
 Pin it
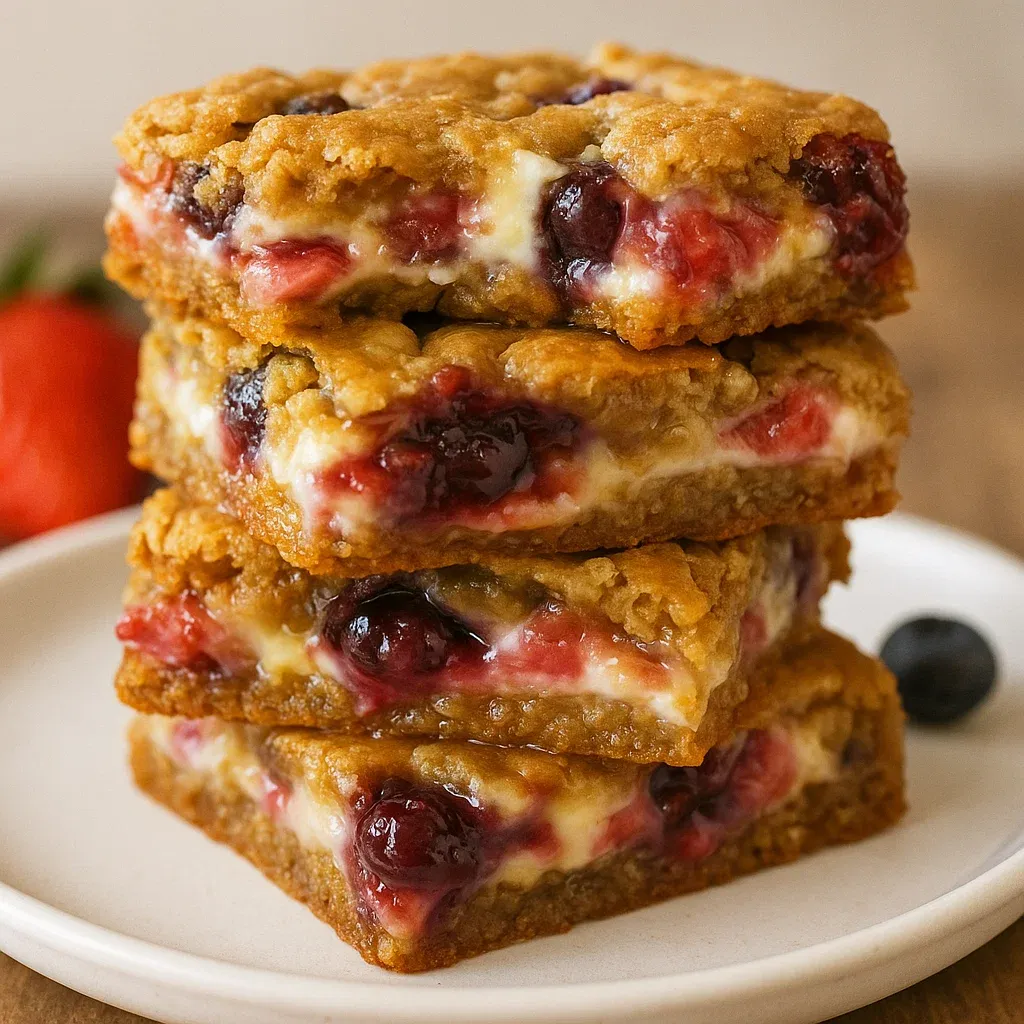
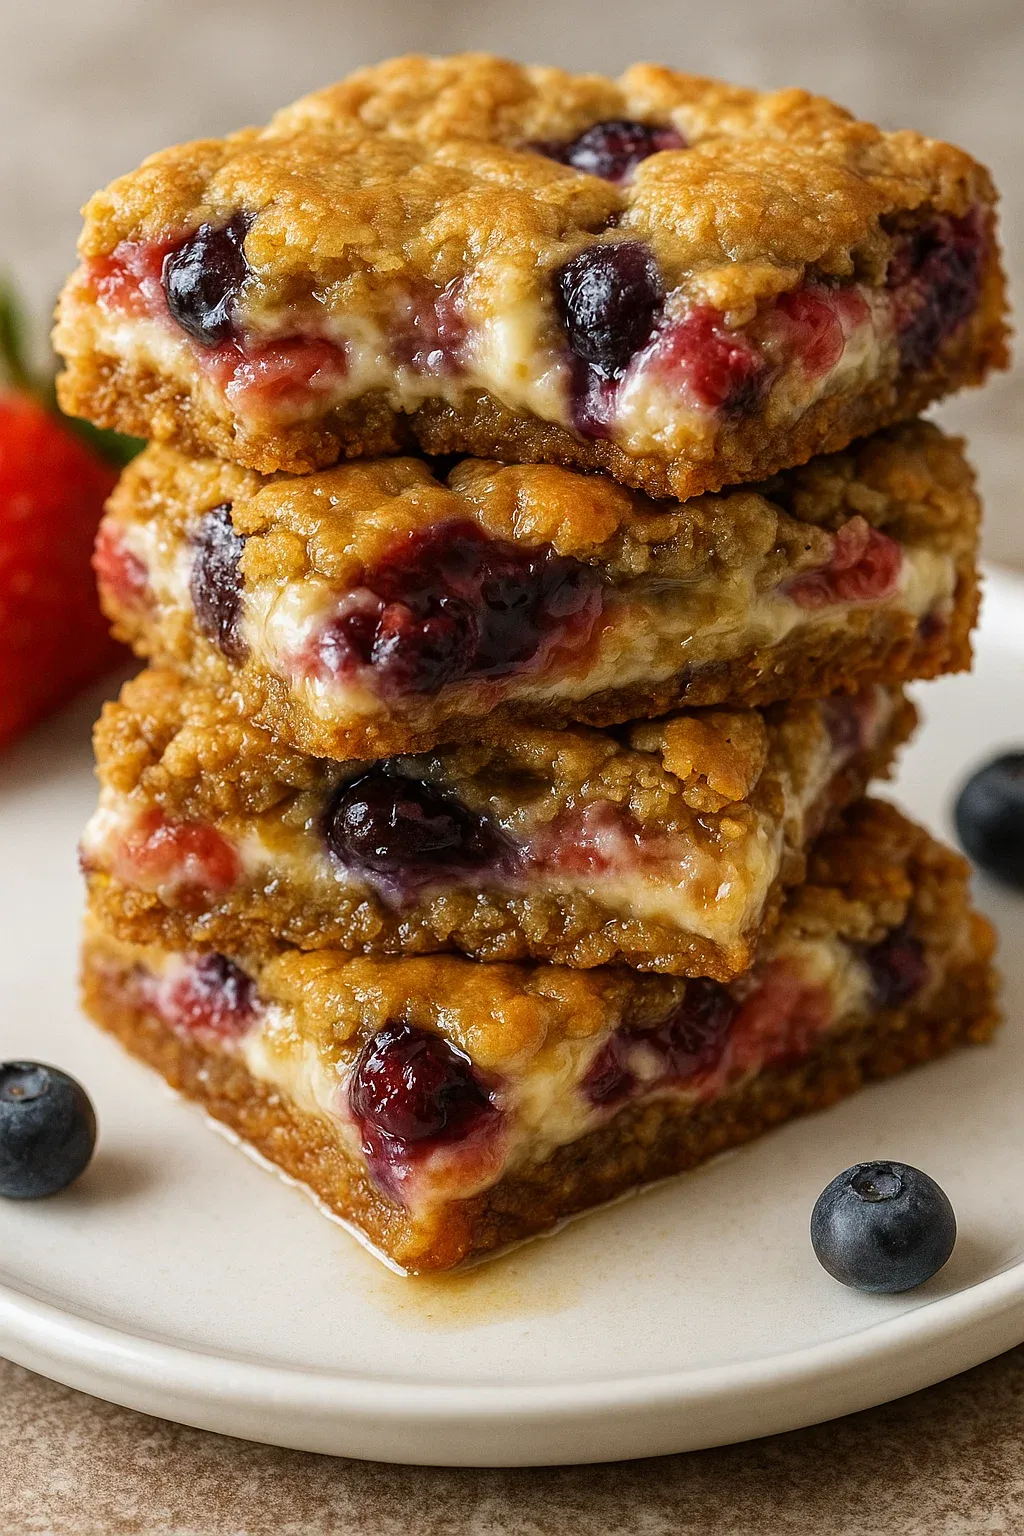
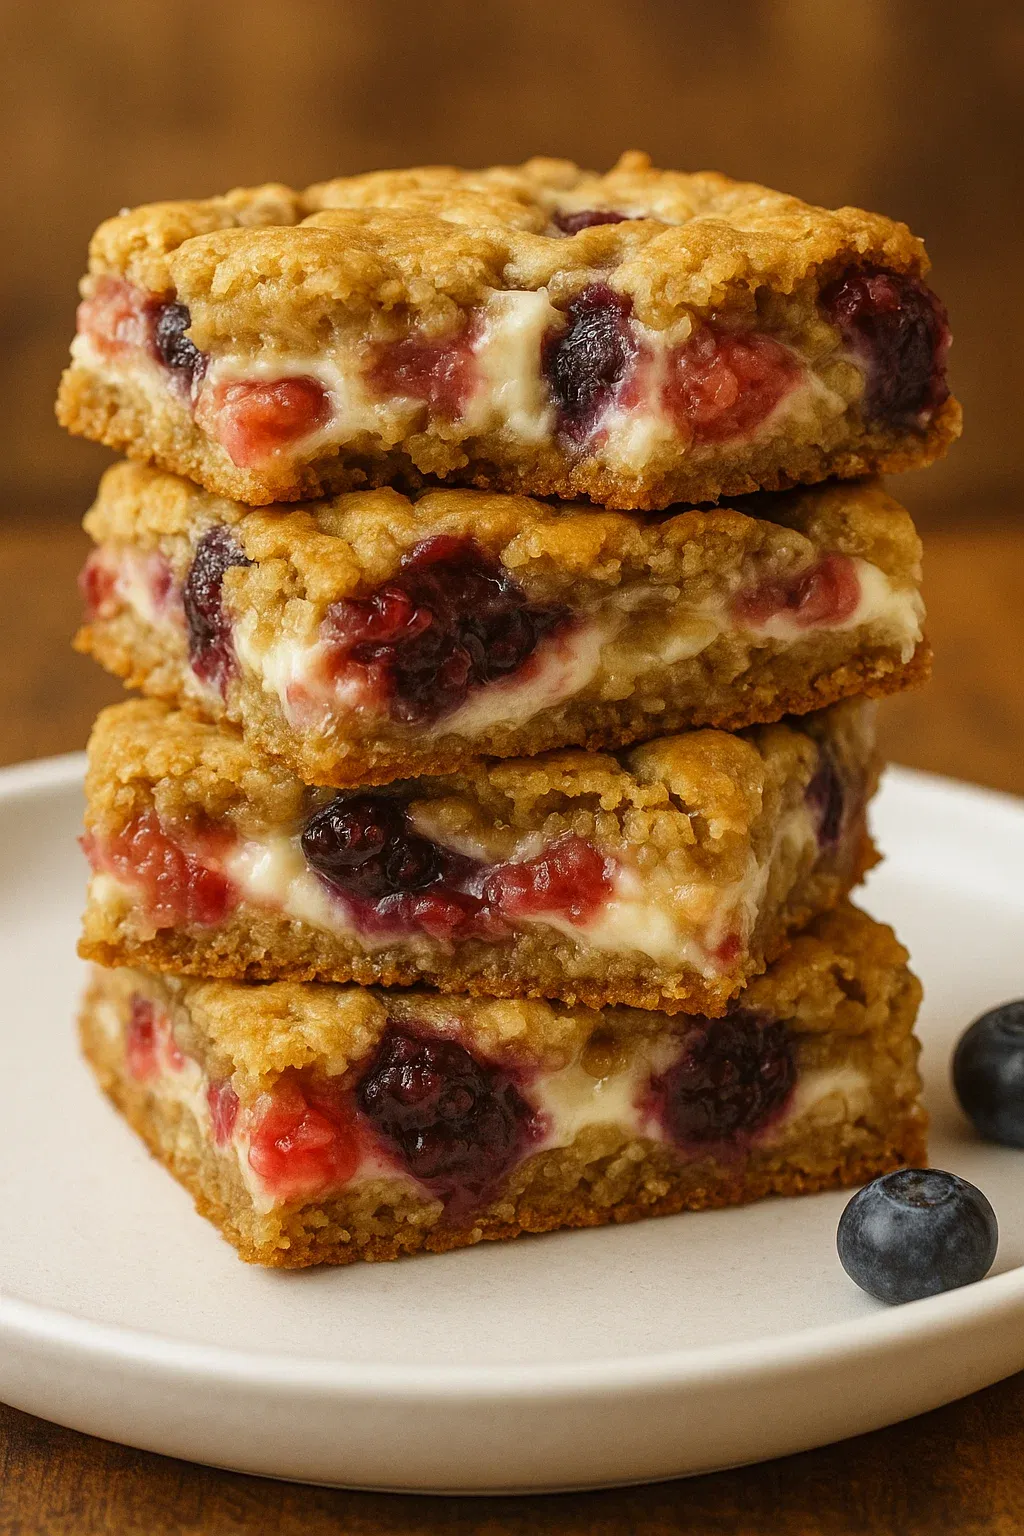
This berry oatmeal cheesecake cookie bar recipe combines the best of three worlds: chewy oatmeal cookies, creamy white chocolate cheesecake, and fresh seasonal berries. The layers work together beautifully, creating a dessert that's perfect for potlucks, family gatherings, or anytime you need a special treat that feels both comforting and elegant.
I first made these bars for a summer backyard gathering, and they disappeared faster than anything else on the dessert table. The combination of tart berries with sweet white chocolate cheesecake and hearty oatmeal cookie creates a flavor profile that appeals to almost everyone.
Ingredients
- All purpose flour: provides structure while keeping the bars tender
- Baking soda: gives just enough lift to keep the cookie base from becoming too dense
- Ground cinnamon: adds warmth and pairs perfectly with the oats
- Unsalted butter: use room temperature for proper creaming
- Light brown sugar: contributes moisture and a caramel undertone
- Granulated sugar: creates the perfect crisp edges
- Eggs: bind everything together and add richness
- Vanilla extract: enhances all the flavors
- Quick cook oats: provide the signature texture look for actual quick oats not instant
- Cream cheese: full fat works best for creamiest results
- Granulated sugar: balances the tang of the cream cheese
- Egg: provides stability to the cheesecake layer
- White chocolate chips: add creaminess and a subtle flavor that complements the berries
- Fresh strawberries and blueberries: choose ripe firm berries for best results
Step-by-Step Instructions
- Prepare Your Workspace:
- Preheat your oven to 350°F and line your 9×13 pan with parchment paper letting it hang over the long sides. This creates handles that will help you remove the bars cleanly after baking. Spray the short sides with baking spray to ensure nothing sticks.
- Mix The Cookie Base:
- Whisk together the dry ingredients flour, baking soda, cinnamon and salt in a separate bowl. In your mixing bowl, cream the butter and both sugars for a full 2-3 minutes until truly light and fluffy. This step is crucial for the texture of your cookie base. Add eggs one at a time, mixing well after each, then stir in vanilla. Gently mix in the dry ingredients just until combined avoid overmixing which can make the cookies tough. Fold in the oats until evenly distributed.
- Create The Base Layer:
- Press half of your cookie dough into the prepared pan. Use slightly damp hands or the bottom of a measuring cup to create an even layer that reaches all corners. Set the remaining dough aside for the topping.
- Prepare The Cheesecake Layer:
- Beat cream cheese and sugar until completely smooth and free of lumps. Add the egg yolk first, mixing until incorporated, then add the white. This technique prevents lumps in your cheesecake mixture. Melt white chocolate chips carefully in short bursts in the microwave, stirring between each heating. Fold the melted chocolate into the cream cheese mixture until smooth and well combined.
- Assemble The Layers:
- Spread the cheesecake mixture evenly over the cookie base, making sure it reaches all edges. Distribute the chopped strawberries and blueberries evenly across the cheesecake layer. Break the remaining cookie dough into crumbles and scatter over the top, creating a rustic streusel-like topping.
- Bake To Perfection:
- Bake for 25-30 minutes until the top is golden brown. The center might still jiggle slightly but should look set. Cool completely on a rack at room temperature before refrigerating until cold and firm. This patience ensures clean cuts and proper texture.
 Pin it
The combination of quick oats with cinnamon creates that classic oatmeal cookie flavor that reminds me of my grandmother's kitchen. She always said the mark of a good oatmeal cookie is that chewy texture, and these bars deliver that perfectly against the creamy cheesecake layer.
Storage Tips
These bars will stay fresh in an airtight container in the refrigerator for 4-5 days. The cookie layers will soften slightly over time but remain delicious. For best results, cut only what you need and keep the remainder as a larger piece to prevent drying out.
If you need to store them longer, you can freeze the cut bars by wrapping individually in plastic wrap and placing in a freezer bag. Thaw in the refrigerator overnight before serving. The texture remains remarkably good even after freezing.
Berry Variations
These versatile bars work with virtually any berry combination. Try raspberries and blackberries for a more tart flavor profile, or go with all strawberries when they're at peak season. Frozen berries can work in a pinch, but they tend to release more moisture, so reduce the amount by about 1/4 cup total and do not thaw them first.
During winter months, dried cranberries soaked in orange juice for 20 minutes provide a delicious alternative to fresh berries. The citrus notes complement the white chocolate beautifully.
Serving Suggestions
These bars are substantial enough to serve as is, but they can be elevated for special occasions. Try warming a slice slightly and topping with a small scoop of vanilla ice cream for a decadent dessert. For brunch gatherings, cut into smaller pieces and serve alongside coffee or tea.
For a dessert buffet, consider cutting these into bite-sized squares to allow guests to sample multiple desserts. The striking layers and bright berries make these bars a standout on any dessert table.
 Pin it
Frequently Asked Questions
- → How do I store Berry Oatmeal Cookie Bars?
Store these bars in an airtight container in the refrigerator. They stay best when chilled and can be enjoyed for up to 4-5 days.
- → Can I use frozen berries instead of fresh?
Yes, you can use frozen berries. Be sure to thaw and drain them well to avoid excess moisture affecting the texture of the bars.
- → Can the white chocolate chips be substituted?
Certainly! You can substitute the white chocolate chips with milk or dark chocolate chips, depending on your taste preference.
- → What size pan should I use for this dessert?
A 9x13-inch pan works best to achieve the perfect thickness and texture for these bars.
- → Is it necessary to separate the egg for the cheesecake layer?
Yes, separating the egg helps prevent lumps and ensures the cheesecake layer is smooth and creamy.
- → Can I freeze these bars for later?
Yes, you can freeze them. Wrap each bar tightly in plastic wrap, place them in an airtight container, and freeze for up to 2 months. Thaw in the refrigerator before serving.