
 Pin it
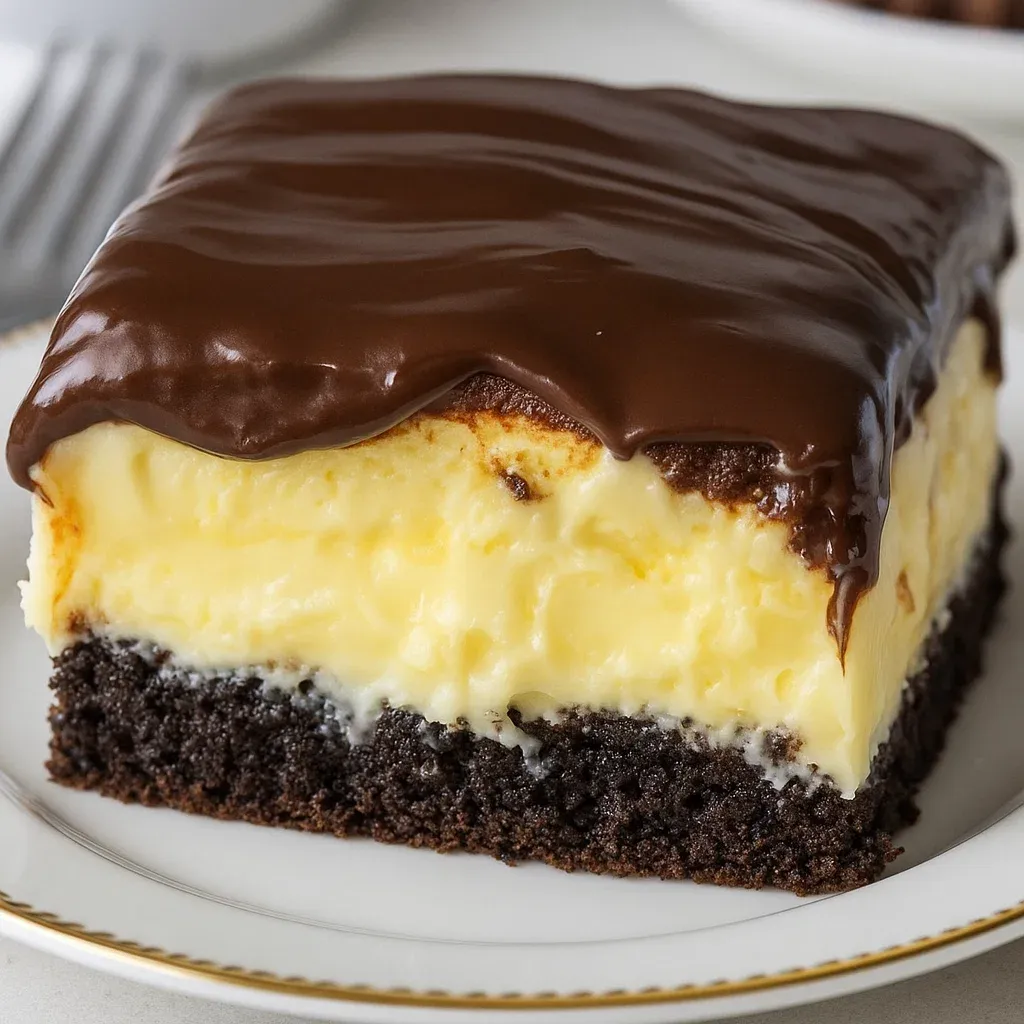
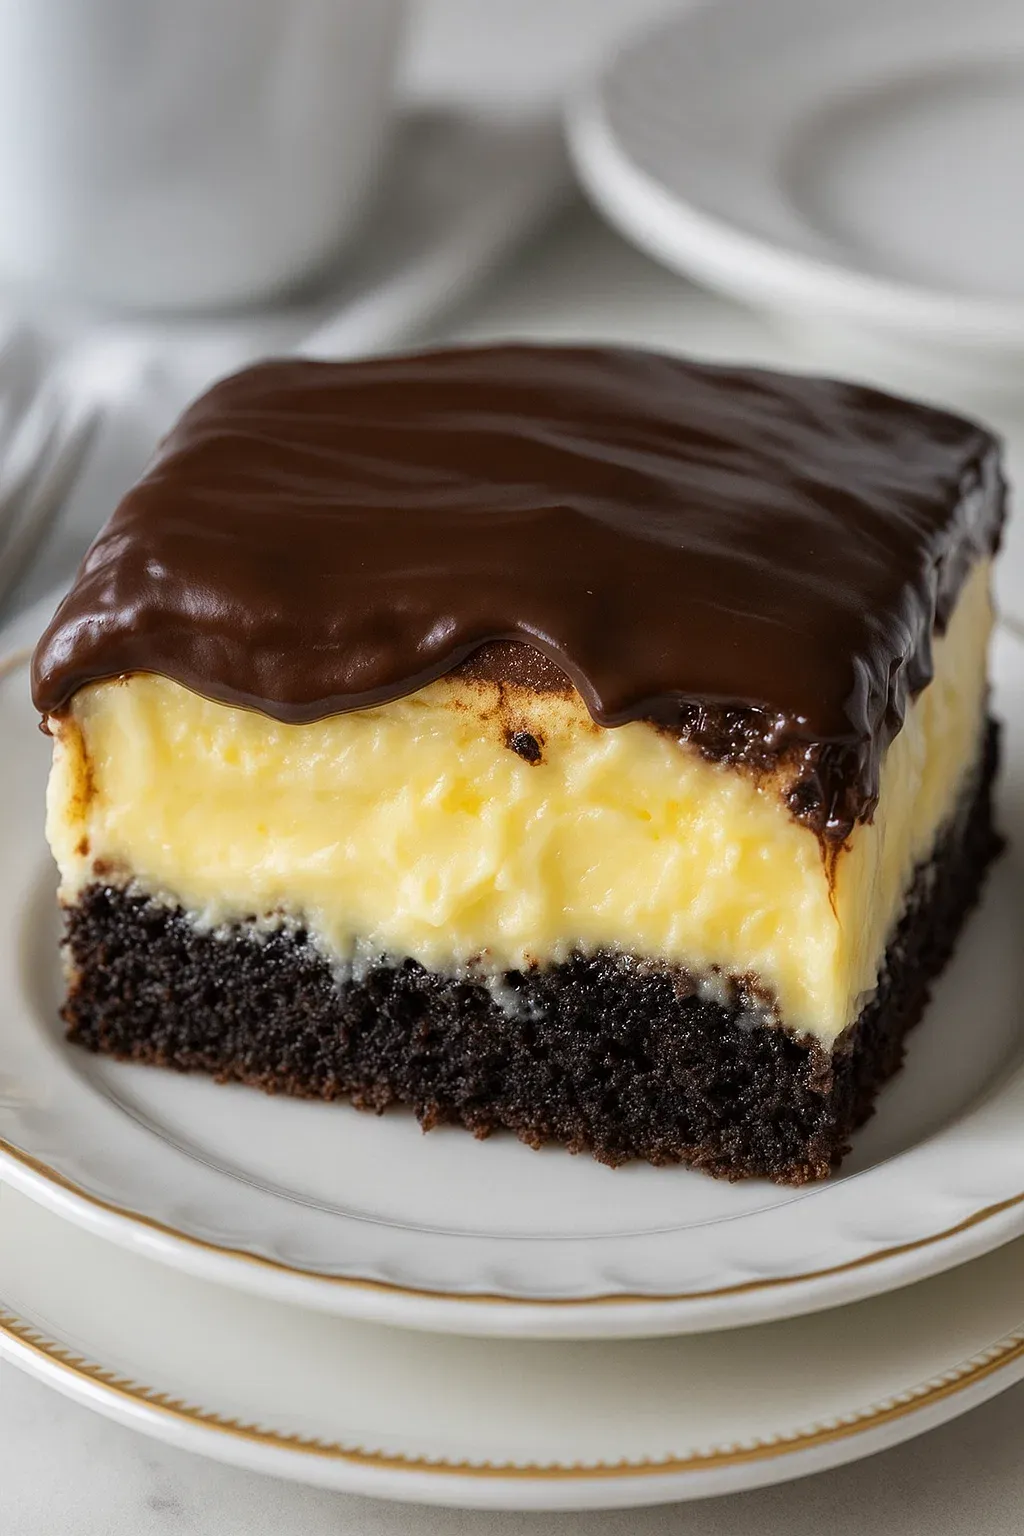
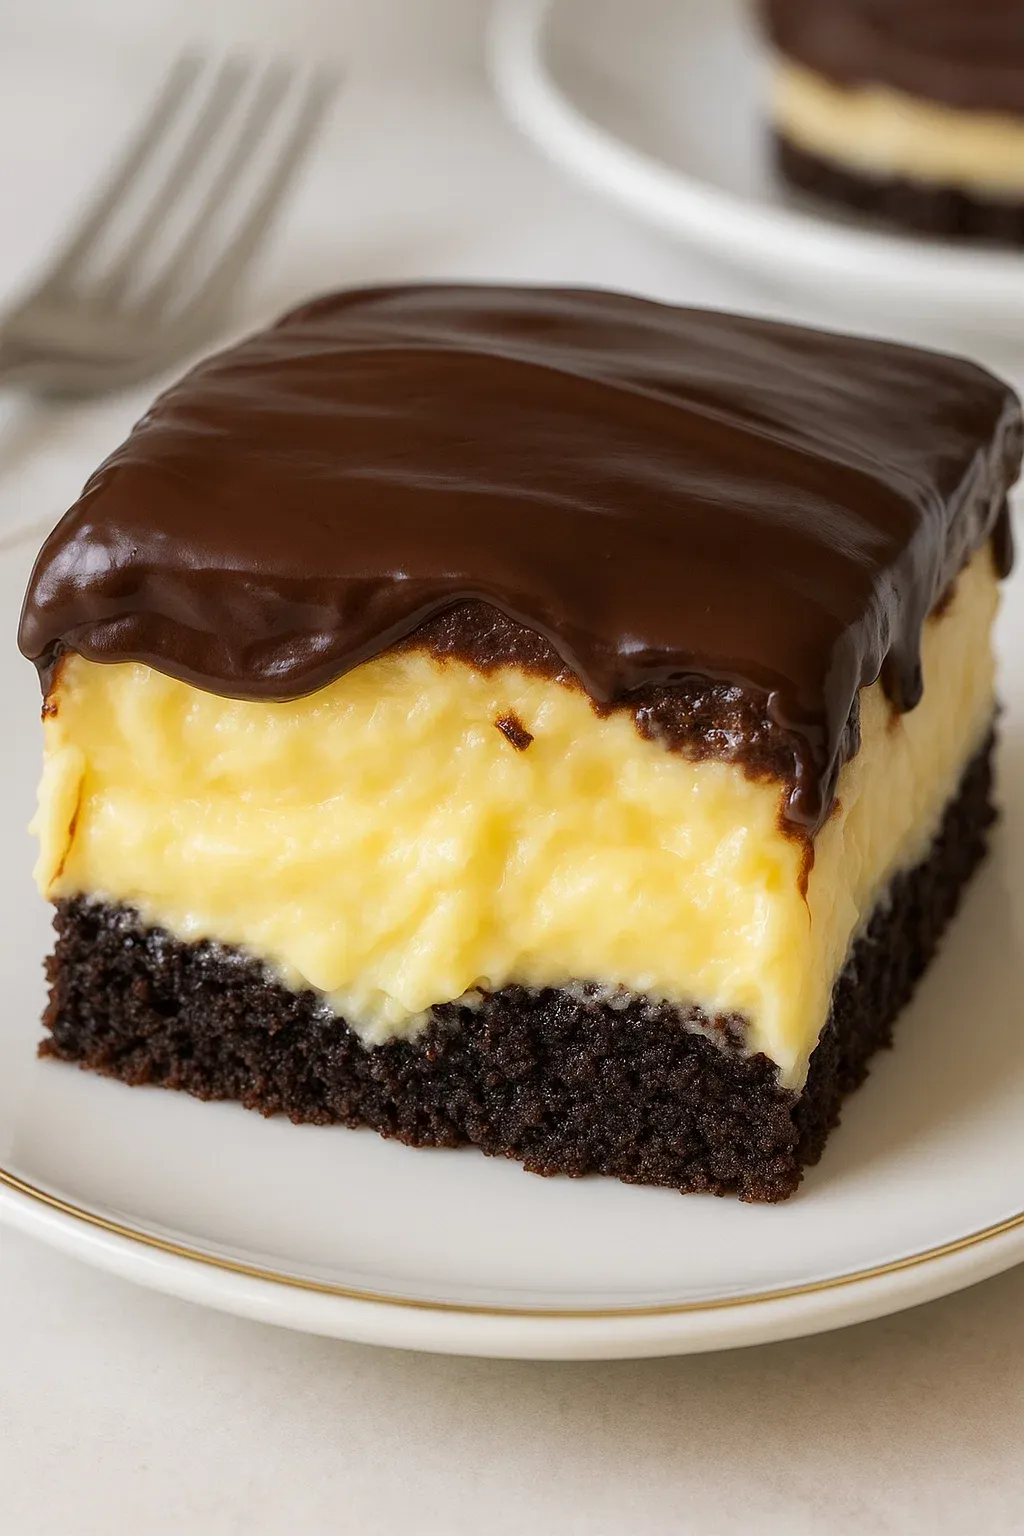
This Boston Cream Poke Cake transforms the beloved pie into an irresistible cake form. The combination of moist yellow cake, creamy vanilla pudding, and rich chocolate frosting creates the classic Boston cream flavor profile but with the fun twist of having pudding throughout the entire cake thanks to the "poke" technique.
I first made this for my nephew's birthday when I was short on time, and it's become his requested dessert every year since. The look on everyone's face when they cut into it and see those gorgeous pudding channels is priceless.
Ingredients
- Yellow cake mix: Plus eggs, oil, and water listed on box. Instructions couldn't be simpler and results are consistently great.
- Two boxes instant vanilla or French vanilla pudding: Using two boxes ensures plenty of creamy filling in every bite.
- Four cups milk: Whole milk creates the richest pudding texture but 2% works well too.
- Chocolate frosting tub: The convenient premade option that melts beautifully for that signature ganache like topping.
Step-by-Step Instructions
- Bake the cake:
- Prepare yellow cake mix according to package directions in a well greased 9×13 inch baking pan. The cake should be golden and spring back when touched lightly.
- Create the poke holes:
- While the cake is still warm, use a wooden spoon handle to poke holes at 1 inch intervals across the entire surface. Press all the way to the bottom of the pan making sure holes are large enough to allow pudding to penetrate deeply.
- Prepare the pudding filling:
- Whisk together both boxes of instant pudding with 4 cups of cold milk for about one minute until most lumps disappear. Work quickly as the pudding will begin setting up fast.
- Fill the holes:
- Carefully pour the prepared pudding over the warm cake, focusing on filling each hole completely. Use the back of a spoon to gently push pudding down into the holes ensuring maximum coverage.
- Chill to set:
- Refrigerate the cake for at least 2 hours to allow the pudding to set properly and for the flavors to meld together completely.
- Prepare the chocolate topping:
- Microwave the tub of chocolate frosting for 10–15 seconds until just pourable but not hot. It should still have some thickness to it.
- Add the finishing touch:
- Pour the softened chocolate frosting over the chilled cake, starting from the center and working outward to the edges for even coverage.
- Final chill:
- Let the frosting set briefly at room temperature before refrigerating for at least 2 more hours or overnight for best results.
 Pin it
The secret to this cake's success is actually in the chilling time. While it's tempting to dive in right away, I've found that letting it rest overnight in the refrigerator allows the pudding to fully infuse the cake, creating that magical Boston cream texture that everyone loves.
Storage Instructions
This cake must be refrigerated due to the dairy in the pudding filling. Cover loosely with plastic wrap or place in an airtight container and store in the refrigerator for up to 5 days. The cake actually improves over the first 24 hours as the pudding has more time to soak into the cake, creating an even more moist and flavorful dessert. I don't recommend freezing this cake as the pudding layer can become watery upon thawing.
Variations To Try
If you're feeling adventurous, there are several delicious variations to explore. For a chocolate lover's dream, use chocolate cake mix instead of yellow. For a twist on the classic, try butterscotch pudding with chocolate cake and top with peanut butter frosting that's been slightly warmed. You can also add a layer of sliced fresh strawberries between the pudding and chocolate topping for a fruity variation that's especially lovely in summer.
Serving Suggestions
While this cake is perfectly delicious on its own, you can elevate it for special occasions. Serve slices with fresh berries on the side or a dollop of lightly sweetened whipped cream. For an extra special touch, dust the plate with a little cocoa powder before adding the cake slice. This dessert pairs wonderfully with coffee or a glass of cold milk, and is substantial enough to serve as the centerpiece dessert at any gathering.
The History Behind Boston Cream
Boston Cream Pie, which inspired this poke cake, was actually created in the 1850s at Boston's Parker House Hotel by French chef Augustine François Anezin. Despite its name, it's technically a cake not a pie, consisting of layers of sponge cake filled with vanilla custard and topped with chocolate glaze. It became so beloved that in 1996, it was named the official dessert of Massachusetts. This poke cake version maintains all the classic flavors but in a format that's easier to transport and serve to a crowd.
 Pin it
Frequently Asked Questions
- → How do I ensure the pudding fills the holes in the cake?
To ensure the pudding fills the holes, make sure they are large enough and spaced evenly. Pour the prepared pudding directly over the cake, focusing on getting it into the holes. Use the back of a spoon to gently guide the pudding down.
- → Can I use homemade cake instead of a boxed mix?
Yes, you can use a homemade yellow cake, but ensure it’s baked in a 9x13-inch pan and cooled slightly before adding the pudding.
- → Do I need to cover the cake while it sets in the refrigerator?
Covering the cake isn’t necessary, but it can help prevent the top from drying out if left in the refrigerator for an extended period.
- → What type of chocolate frosting works best?
A tub of pre-made chocolate frosting works well as it softens quickly in the microwave and spreads evenly. You can also use homemade chocolate ganache for a richer taste.
- → Can I make this cake ahead of time?
Yes, this cake is perfect to prepare ahead of time. Allow it to cool and set fully in the refrigerator for at least 2 hours, or overnight, for best results.