
 Pin it
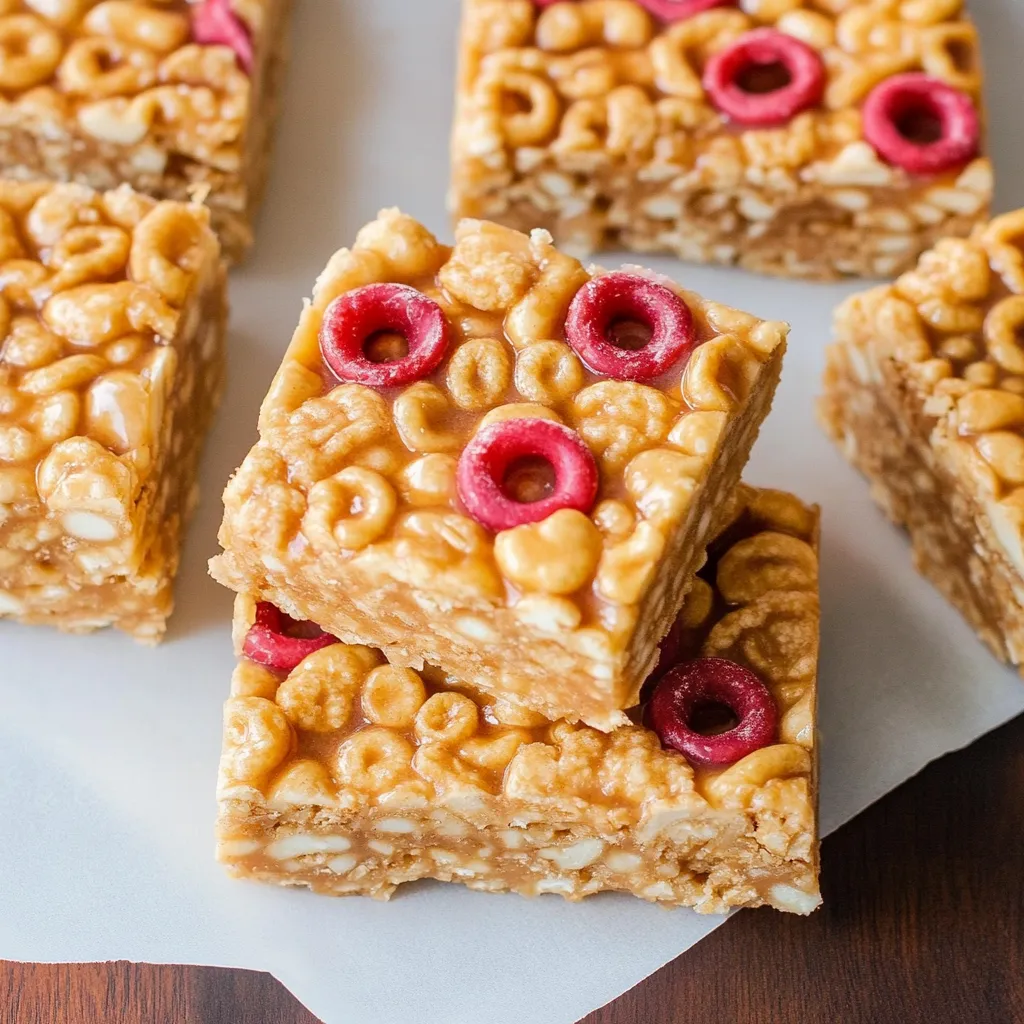
I discovered this cereal bar recipe during a particularly chaotic season when breakfast had become an afterthought and my family was grabbing store-bought granola bars on their way out the door. These homemade cereal bars have completely transformed our morning routine – they take just 5 minutes to throw together, use ingredients I always have on hand, and have become everyone's favorite grab-and-go breakfast or snack. The beauty of this recipe lies in its simplicity and flexibility – any cereal works, from classic Cheerios to crunchy granola or even colorful Fruit Loops for a special treat. We've made countless variations over the years, and they never disappoint.
Last month my 10-year-old nephew stayed with us for a week, and he was skeptical when I mentioned making cereal bars – he's strictly a "cereal with milk in a bowl" kind of kid. But after helping to press the Cinnamon Toast Crunch version into the pan and sampling the results, he declared them "way better than the boxed bars" and has been begging his mom to make them ever since. There's something magical about transforming a familiar breakfast food into a portable, handheld treat.
Simple Ingredients
- Cereal of choice – This is where the fun begins! Virtually any cereal works beautifully here. We've tried everything from healthy multigrain options to sweet, colorful varieties. Crispy rice cereal creates a texture similar to Rice Krispie treats, while heartier cereals like granola or Grape-Nuts create a more substantial bar.
- Peanut butter – Acts as the primary binder that holds everything together. The natural oils and protein help create bars that maintain their shape without becoming too hard. Creamy works best for even distribution, but crunchy adds nice texture if that's your preference. Any nut butter works equally well – almond, cashew, or sunflower butter for allergy-friendly versions.
- Sweetener – This ingredient is optional but adds flavor and helps with binding. Honey creates a classic flavor, agave provides a milder sweetness, and brown rice syrup results in the stickiest, most cohesive bars. You can adjust the amount based on how sweet your chosen cereal already is.
- Protein powder – Another optional ingredient that boosts the nutritional value. Unflavored or vanilla works with most cereal combinations, but chocolate can be delicious with certain cereals too. Even just a few tablespoons significantly increases the staying power of these bars.
- Salt – Don't skip this if your nut butter is unsalted! A little salt enhances all the flavors and balances the sweetness. If your nut butter already contains salt, taste the mixture before adding more.
 Pin it
Creating Bar Magic
- Warming the nut butter:
- This simple step makes a huge difference in how easily everything combines. You don't need to fully melt it – just warm it enough to be easily stirrable. About 20-30 seconds in the microwave usually does the trick, or gentle stovetop warming works too.
- Mixing strategy:
- Add the cereal gradually rather than all at once, especially with delicate cereals that might crush easily. Fold gently with a spatula or wooden spoon until every piece is coated with the nut butter mixture.
- The pressing technique:
- This is the most crucial step for bars that hold together. After transferring the mixture to the pan, place a sheet of parchment on top and use something flat and heavy – the bottom of a measuring cup works perfectly – to press down with significant pressure. I typically press for about 30 seconds, focusing especially on the corners and edges.
- Chilling patience:
- The freezer expedites the setting process, but refrigeration works too if you're not in a hurry. The bars need to be firm enough to cut cleanly, which usually takes about 30 minutes in the freezer or 2 hours in the refrigerator.
- Cutting cleanly:
- Use a sharp knife and clean cuts (rather than sawing) for the neatest results. If the bars are frozen solid, let them thaw for 5 minutes before cutting to prevent crumbling.
My first attempt at these was a learning experience – I didn't press firmly enough, and the bars crumbled when I tried to cut them. I've also experimented with numerous flavor combinations, discovering that heavier cereals like granola may need a bit more nut butter to hold together properly, while lighter cereals like puffed rice might need less. The recipe as written creates a perfect starting point that you can adjust based on your chosen ingredients.
Flavor Inspiration
Transform these simple cereal bars into even more exciting treats with these tested combinations:
- Chocolate Peanut Butter Cup:
- Cocoa Puffs with peanut butter, a tablespoon of cocoa powder, and mini chocolate chips sprinkled on top
- Apple Cinnamon:
- Apple Cinnamon Cheerios with almond butter, honey, and a dash of extra cinnamon
- Tropical Crunch:
- Granola with macadamia nut butter, dried pineapple bits, and shredded coconut
- Berry Blast:
- Mixed berry granola with almond butter, freeze-dried strawberries, and white chocolate drizzle
- Mocha Madness:
- Chocolate cereal with coffee-flavored protein powder and a drizzle of melted dark chocolate
Add-In Ideas
Once you've mastered the basic recipe, try incorporating some of these add-ins for extra flavor, texture, and nutrition:
- For crunch: Toasted coconut flakes, chopped nuts, or cacao nibs
- For chewiness: Dried fruit like cranberries, chopped dates, or golden raisins
- For indulgence: Mini chocolate chips, butterscotch chips, or peanut butter chips
- For nutrition boost: Chia seeds, ground flaxseed, or hemp hearts
- For flavor twist: Spices like cinnamon, cardamom, or pumpkin pie spice
Storage Secrets
These homemade cereal bars maintain their quality for about a week when stored in an airtight container. In warm weather, refrigeration is best to prevent the nut butter from becoming too soft. For grab-and-go convenience, wrap individual bars in parchment paper or reusable food wraps. They travel well in lunchboxes with an ice pack and make perfect after-school or post-workout snacks. For longer storage, place wrapped bars in a freezer container – they thaw in about 20 minutes at room temperature.
 Pin it
I've made these homemade cereal bars countless times over the years, experimenting with different combinations based on what's in my pantry and what flavors we're craving. What started as a practical solution to hectic mornings has become a family tradition – my kids now enjoy creating their own signature combinations, measuring and mixing the ingredients themselves. There's something deeply satisfying about transforming a simple breakfast cereal into something that feels special yet remains wholesome. The fact that they come together in just minutes with minimal mess is just a bonus that keeps this recipe in our regular rotation.
Frequently Asked Questions
- → What types of cereal work best for these bars?
- Almost any cereal will work! Crispy rice cereal creates a classic texture, while heartier cereals like Cheerios, Chex, or granola add more substance. Avoid very sugary cereals as the bars may become too sweet with the added sweetener. For best results, choose cereals with simple shapes that pack together well.
- → Can I make these without nut butter?
- Yes! For a nut-free version, substitute the peanut or nut butter with sunflower seed butter, tahini, or even coconut butter. Each alternative will provide a slightly different flavor profile but will still work to bind the bars together.
- → Why are my cereal bars falling apart?
- The most common reason is not pressing the mixture firmly enough into the pan. Use significant pressure when compacting the mixture. Also, ensure you're using enough binding ingredients (nut butter and sweetener). If they're still crumbly, try adding an extra tablespoon of nut butter or sweetener to help everything stick together better.
- → Do I need to use protein powder?
- No, the protein powder is completely optional. It adds a nutrition boost but isn't necessary for the bars to hold together. If you do use it, unflavored, vanilla, or complementary flavored protein powders work well. You may need to adjust the amount of sweetener depending on whether your protein powder is already sweetened.
- → How long do these cereal bars last?
- When stored in an airtight container, these bars will last about 3-4 days at room temperature (in a cool, dry place), 1-2 weeks in the refrigerator, or up to 3 months in the freezer. For longer storage periods, wrap individual bars in parchment paper or plastic wrap before placing them in a container.
- → Can I add other ingredients to these bars?
- Absolutely! These bars are very customizable. Try adding mini chocolate chips, dried fruit, shredded coconut, chopped nuts, or seeds like chia or flax. Mix-ins should be added when combining the main ingredients, using about ¼ to ½ cup total of additional ingredients to maintain the proper texture.