
 Pin it
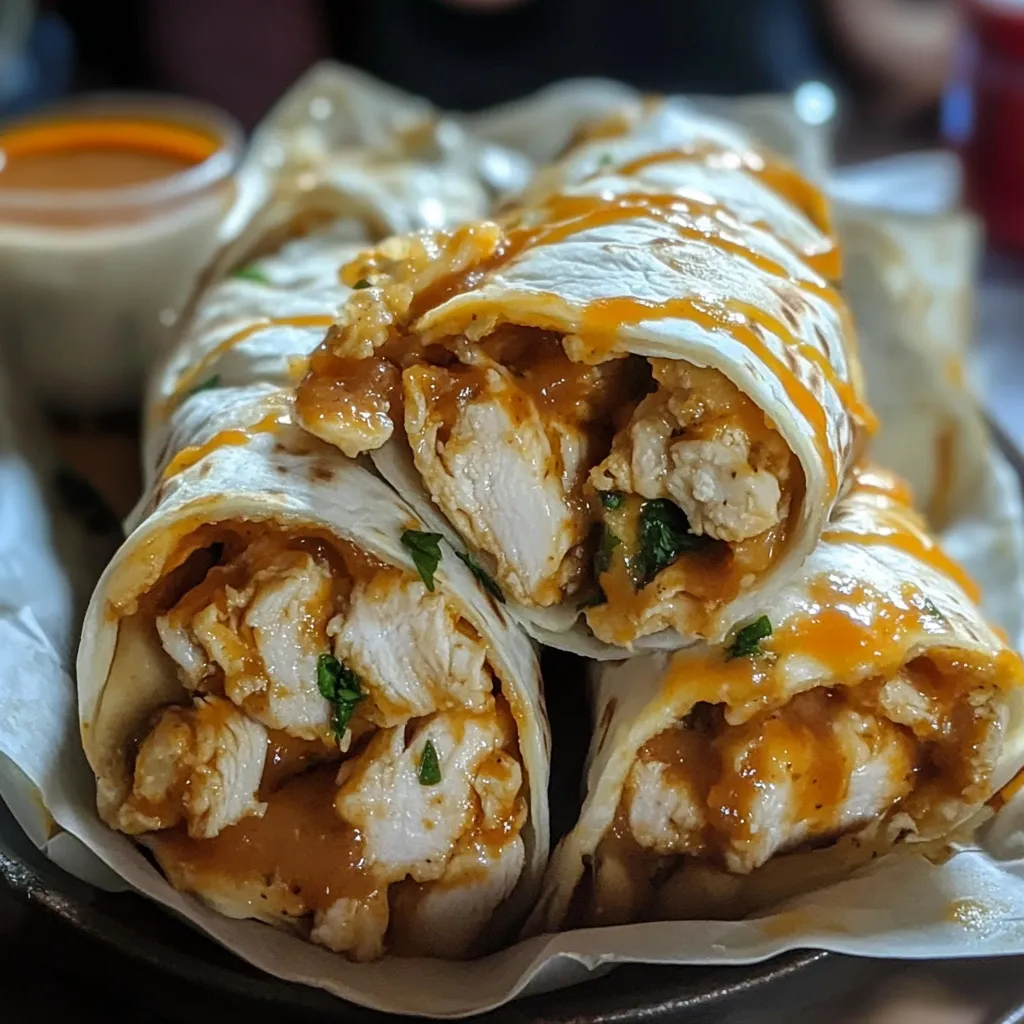
I discovered these cheesy garlic chicken wraps during a particularly busy season when I needed quick, satisfying dinners that would please everyone. The combination of tender chicken with three kinds of cheese and garlic creates this incredible filling that transforms ordinary tortillas into something restaurant-worthy. They've become my go-to when I need something hearty and delicious without spending hours in the kitchen.
My teenage son brought three friends over unexpectedly last week, and I quickly doubled this recipe to feed the hungry crowd. They demolished every last wrap, with one boy actually asking if I could "teach his mom how to make these." Sometimes the simplest recipes earn the highest praise.
Simple Ingredients
- Rotisserie chicken: The ultimate time-saver that provides tender, flavorful meat
- Cream cheese: Creates that creamy, rich base that holds everything together
- Cheese blend: The combination of mozzarella, cheddar, and Parmesan provides perfect flavor and texture
- Fresh garlic: Worth the extra minute to mince rather than using jarred for the best flavor
- Flour tortillas: Look for the large, burrito-size for easier rolling and more filling
 Pin it
Wrap Creation
- Garlic Blooming
- Taking the time to sauté the fresh garlic in olive oil is crucial - this step blooms the flavor and removes the harsh bite of raw garlic. Cook it just until fragrant, about 30 seconds, being careful not to brown it which would make it bitter. I've found that medium-low heat works better than medium to prevent burning, especially if your stove runs hot. This aromatic base infuses the entire filling with that wonderful garlic flavor that makes these wraps special.
- Chicken Preparation
- Using rotisserie chicken saves tremendous time, but any cooked chicken works beautifully. I sometimes use leftover grilled chicken or even poached chicken breasts when planning ahead. The key is shredding it rather than chopping - those uneven pieces create better texture and hold the sauce more effectively. When using rotisserie chicken, I mix both white and dark meat for the best flavor and moisture. The seasonings might seem simple, but they enhance the chicken perfectly without overwhelming the other flavors.
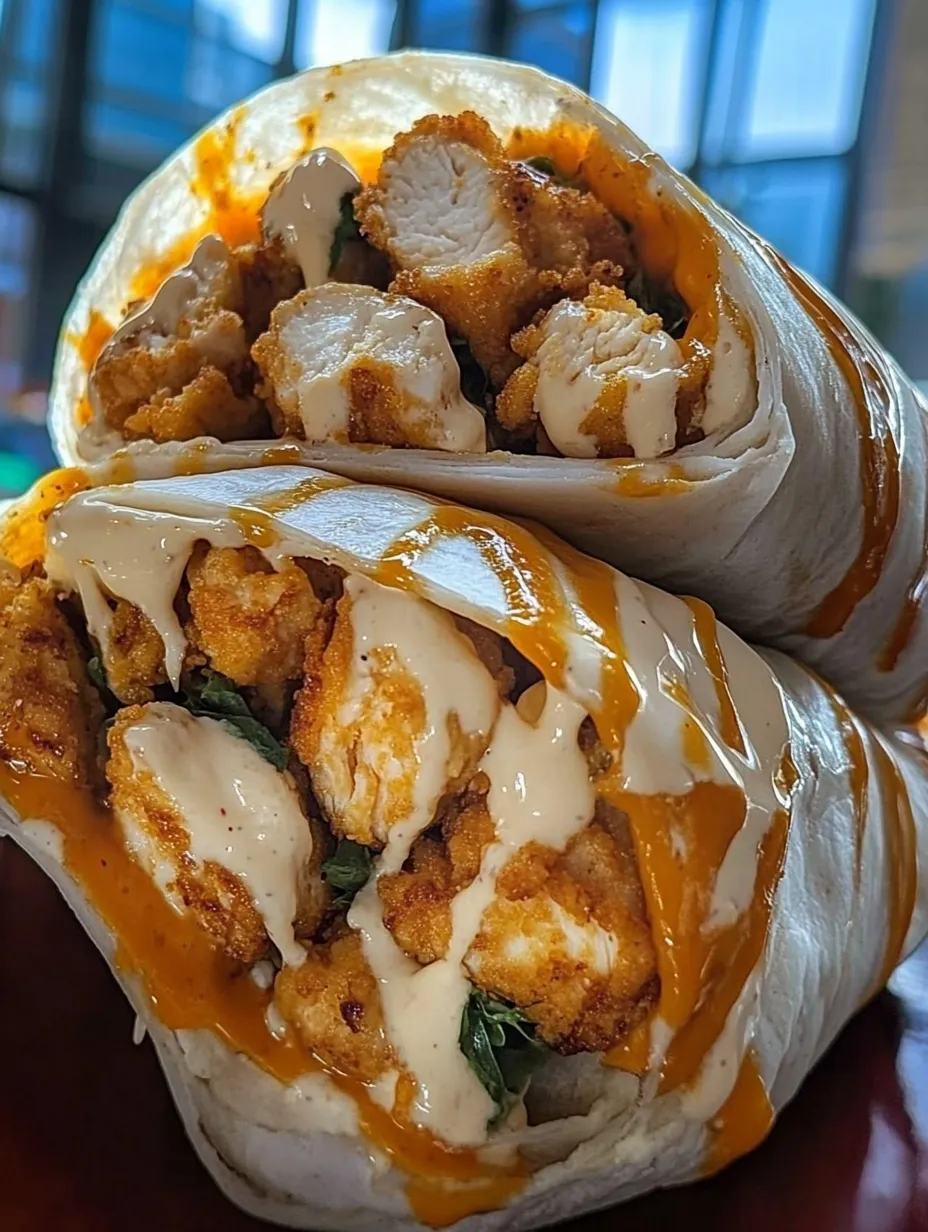
- Cheese Integration
- Adding the cream cheese first creates that silky base that coats every piece of chicken. Make sure it's fully softened before adding, or you'll end up with unwanted lumps. Once it's melted and coating the chicken, add the shredded cheeses gradually, stirring until fully incorporated before adding more. This creates that perfect gooey, stretchy texture without clumping. I've found that grating your own cheese rather than using pre-shredded results in a creamier melt since it doesn't contain the anti-caking agents found in packaged shredded cheese.
- Filling Distribution
- When adding the filling to the tortillas, place it slightly off-center toward the bottom third of the tortilla. This positioning makes rolling much easier and more secure. Use about a half cup of filling per wrap, spreading it in an even rectangle with space around the edges. Too much filling makes them difficult to roll and prone to bursting during cooking, while too little leaves them flat and disappointing. Finding that perfect balance takes a wrap or two, but you'll quickly get the feel for it.
- Rolling Technique
- Fold in the sides first, then the bottom edge up and over the filling, tucking it in tightly as you roll upward. This technique keeps the filling from escaping out the ends. For extra security, especially with generously filled wraps, I sometimes secure them with toothpicks before cooking, removing them just before serving. The first few I made fell apart when flipping because I hadn't tucked the sides in properly - now I make sure to fold them in tightly.
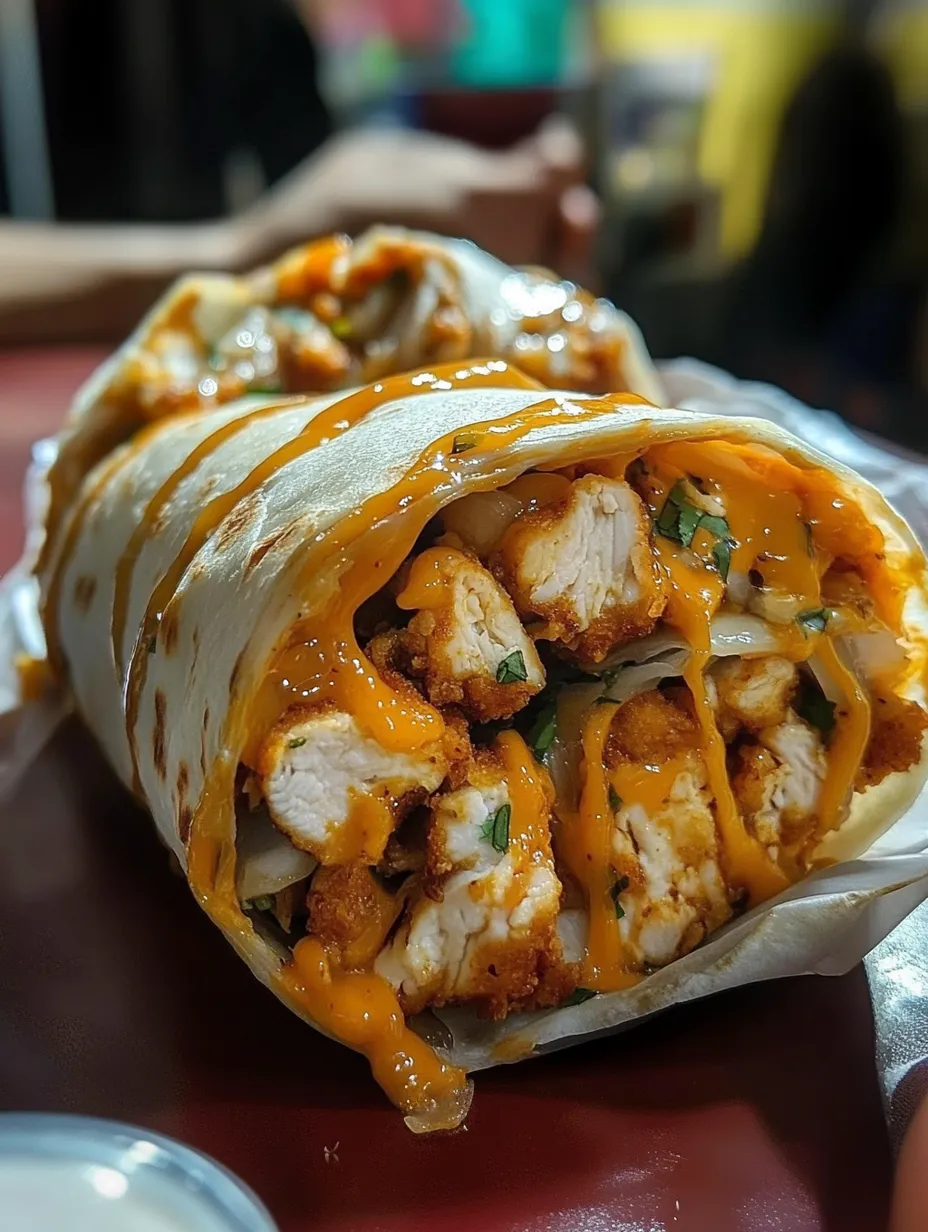
- Toasting Method
- That final toasting step transforms these from good to great - the crispy exterior contrasting with the creamy filling is what makes them irresistible. Brushing with butter and sprinkling with garlic powder and Parmesan before cooking adds another layer of flavor and helps achieve that perfect golden crust. Cook them seam-side down first to seal the wrap closed, then carefully flip to toast the other side. A cast iron skillet works beautifully for this, providing even heat and excellent browning.
My husband, who typically prefers simpler foods, actually requested these two nights in a row during their first week in our dinner rotation. There's something about that combination of crispy tortilla, seasoned chicken, and three cheeses that creates an irresistible meal that appeals to everyone.
Perfect Pairings
Serve these wraps with a simple side salad dressed with vinaigrette for a complete meal. During summer, I pair them with fresh fruit or corn on the cob for an easy dinner. For casual entertaining, I cut them into pinwheels and serve with various dipping sauces for an impressive appetizer. My kids love them with sweet potato fries on the side, while my husband prefers them with a cup of tomato soup for a comfort food combination.
Flavor Variations
Try using different cheese combinations like pepper jack for a spicy kick. Add sautéed onions, peppers, or mushrooms to the filling for more vegetables and flavor. For a southwestern twist, mix in a can of drained, diced green chiles and a teaspoon of cumin. Last week I experimented with adding chopped spinach to the filling, which added nice color and nutrition without changing the delicious flavor profile.
 Pin it
I've made these cheesy garlic chicken wraps for everything from quick family dinners to casual gatherings, and they never disappoint. There's something incredibly satisfying about that combination of crispy exterior, creamy, garlicky chicken, and melty cheese that makes them irresistible. My daughter, who's heading to college next year, has asked me to teach her how to make these as part of her "survival cooking lessons." Sometimes the recipes that become family favorites are the ones that perfectly balance ease of preparation with maximum flavor satisfaction.
Frequently Asked Questions
- → Can I make these chicken wraps ahead of time?
- Yes! You can prepare the chicken filling up to 2 days ahead and store it in the refrigerator. When ready to eat, warm the filling slightly before assembling and toasting the wraps. You can also assemble the wraps completely and refrigerate for up to 24 hours before toasting.
- → What can I use instead of rotisserie chicken?
- Any cooked chicken works well in this recipe. Try leftover grilled chicken, poached chicken breasts, or even canned chicken in a pinch. You could also substitute with cooked ground chicken or turkey for a different texture.
- → How can I make these wraps healthier?
- To lighten up the recipe, use reduced-fat cream cheese and cheeses, opt for whole wheat tortillas, and add extra vegetables like spinach, diced bell peppers, or mushrooms to the filling. You can also use less cheese overall and increase the herbs and spices for flavor.
- → Can I freeze these chicken wraps?
- Yes, these wraps freeze well. Prepare them through the assembly stage but don't toast them. Wrap each one individually in foil, then place in a freezer bag. Freeze for up to 3 months. To serve, thaw in the refrigerator overnight, then toast as directed.
- → What other dipping sauces go well with these wraps?
- Besides ranch, marinara, or garlic aioli, these wraps pair wonderfully with buffalo sauce, honey mustard, avocado crema, salsa, sour cream, or a simple sriracha mayo. The creamy, cheesy filling complements both creamy and spicy dipping options.