
 Pin it
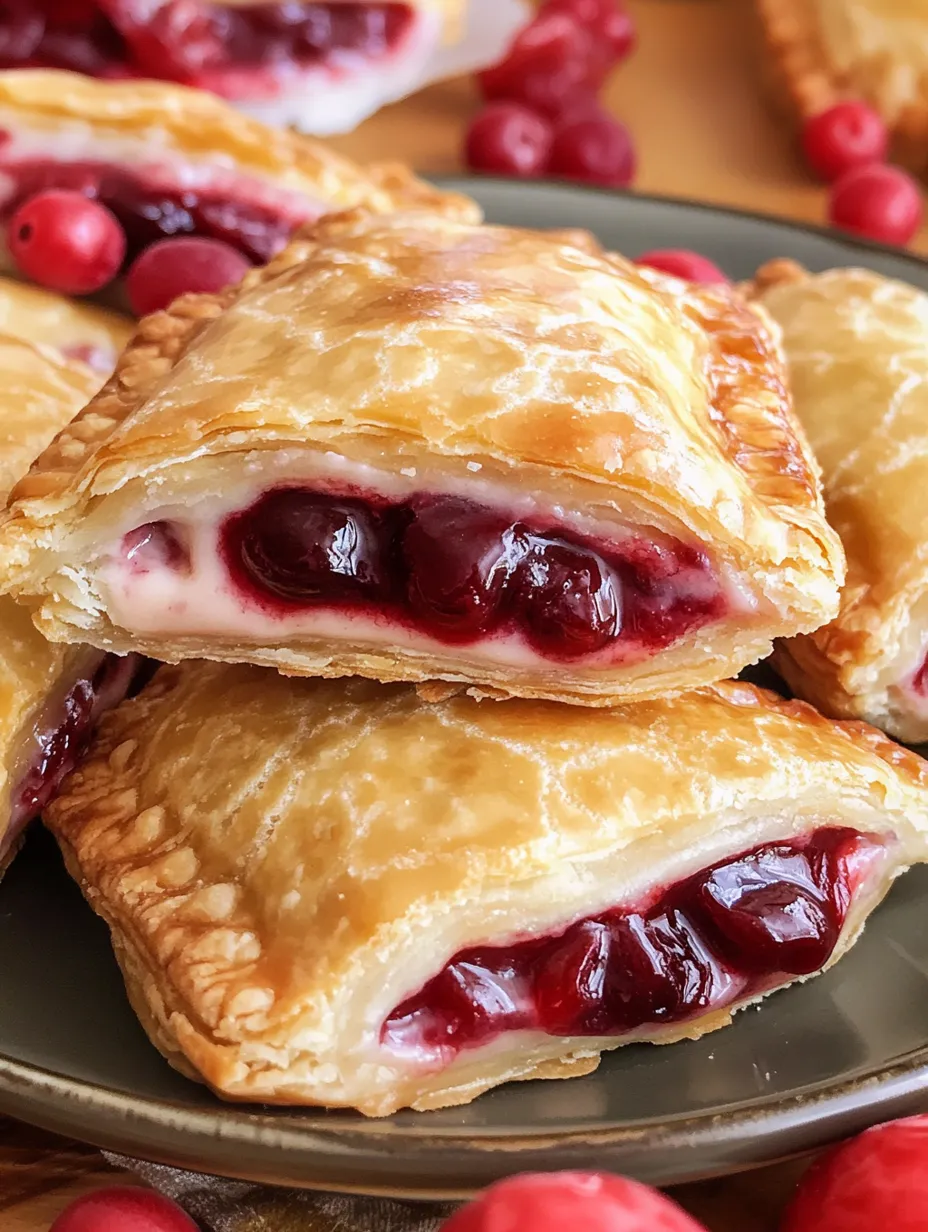
So I stumbled across this recipe about three years ago when I was looking for something to bring to my sister's potluck. I was honestly sick of showing up with the same boring plate of cookies every time. These little hand pies were a total game changer! They combine the tangy cream cheese I'm obsessed with and cherry filling (my absolute weakness) inside a fried pie crust that gets all crispy and amazing. The best part? Everyone thinks you slaved away all day, but they're actually super easy to throw together.
Last Christmas, my uncle Bob (who literally complains about EVERYTHING) took one bite and went completely silent. Then he asked if there were more in the kitchen. Coming from him, that's basically a standing ovation. My cousin later told me he caught Bob sneaking a third one when he thought nobody was looking.
Star Players
- Refrigerated pie crust: Saves me a ton of time and honestly works better than homemade for this recipe. The first time I tried making my own crust, the pies fell apart in the oil.
- Cream cheese: Needs to be really soft or you'll end up with lumps. I've forgotten to take it out early before and tried the microwave shortcut – big mistake. Just plan ahead.
- Cherry pie filling: From the can works perfectly here. Sure, I've made these with homemade filling when cherries were in season, but nobody could really tell the difference.
- Sugar: Balances out the tanginess in the cream cheese. I've tried reducing it once to make them 'healthier' and completely regretted it.
- Corn syrup: In the glaze sounds weird but trust me on this – it gives that shiny bakery look that makes everyone think you're a pro.
I once tried to get fancy and use mascarpone instead of cream cheese. It tasted amazing but was way more expensive and honestly, nobody noticed the difference except my wallet. I've settled on regular cream cheese with just a splash of vanilla mixed in when I'm feeling extra.
 Pin it
Making Magic
- Oil setup
- Find a deep pot for frying – I use my old Dutch oven that's otherwise just collecting dust most of the year. Pour in enough vegetable oil to give your pies plenty of swimming room but not so much that you're risking a fire hazard. Getting the temperature right is honestly the trickiest part of the whole recipe. I learned the hard way after burning the first batch that my ancient stove runs hot, so now I keep the temp slightly lower than the recipe says and use a thermometer to be sure. If you don't have a thermometer, drop a tiny piece of pie crust in – if it sizzles and floats without burning, you're good to go.
- Cream cheese mix
- Dump your soft cream cheese and sugar in a bowl and beat it until smooth. If you forgot to soften the cream cheese (happens to me ALL the time), unwrap it and microwave for like 10 seconds, but keep a close eye on it – there's a fine line between softened and melted mess. I usually mix in a splash of vanilla even though the recipe doesn't call for it. My grandma always added vanilla to her cheesecake, so I just automatically do it too.
- Cutting rounds
- Roll out the pie crust on your counter. I use a cereal bowl to trace circles because who actually owns a circle cutter that big? If your dough isn't stretching to fit 6 circles, just roll it a bit thinner with a wine bottle (or rolling pin if you're fancy). I've definitely pieced together scraps for that last circle when I've cut them too big. Nobody can tell once they're fried anyway.
- Filling strategy
- Spoon some cream cheese filling slightly off-center on each circle. I learned to put it off-center the hard way after making a bunch that were impossible to seal. Add the cherry filling on top – but don't go overboard! The first time I made these, I got greedy with the filling and ended up with an oil-splattered kitchen and empty pies. Now I stick to the recommended amount even when I'm tempted to stuff them fuller.
- Getting them closed
- Run your finger dipped in water around the edge of the dough – this is your pie glue. Fold it over and press down with your fingers first, then grab a fork and crimp the edges. I once skipped the fork part thinking finger-pressing was enough and watched in horror as my filling leaked out into the oil and created a small kitchen fire. Don't be like me – use the fork and press firmly!
- Frying without fear
- Slide one pie into the hot oil and let it do its thing. The first one is always your test pie – mine is usually either undercooked or slightly burnt, but I've learned to adjust the temp after that sacrifice. When they're golden brown, fish them out with a slotted spoon. I've ruined many a good spoon by leaving it in the hot pot too long, so I keep a designated 'frying spoon' in my drawer now. Let them drain on paper towels – I stack several layers because these babies are greasy.
- Glaze phase
- While your pies are still warm but not so hot they'll burn your fingers, brush on the glaze mixture. I use a silicone pastry brush because the glaze completely ruins regular brushes. Make sure to get both sides for that bakery-style finish. Sometimes if I'm feeling lazy, I just dunk one side in the glaze and call it a day. Place them on a cooling rack if you have one, or if you're like me and never remember to buy kitchen basics, just use the least greasy spot on your paper towels.
The worst kitchen disaster I ever had making these was when I got distracted by a phone call and left the oil heating unattended. By the time I got back, my kitchen looked like a scene from a horror movie with smoke everywhere. Now I set a timer on my phone as a backup even when I'm standing right there. Another time I accidentally used powdered sugar instead of regular sugar in the cream cheese (they were in identical containers) – they were actually still pretty good, just less sweet!
Serving Ideas
I usually arrange these on whatever plate is clean at the moment, but if company's coming, I'll put them on my grandma's old cake stand with some fresh cherries scattered around if I'm feeling fancy. They're perfect with coffee after dinner, or if you're like my husband, with coffee for breakfast (don't judge). For kid parties, I sometimes do a half-batch with cherry and half with apple filling since some kids are weird about cherries. I've also drizzled them with chocolate sauce for my chocoholic friend's birthday instead of making a cake.
Recipe Twists
Sometimes I swap in blueberry filling when cherries are out of season or too expensive. My mom loves when I add a tiny sprinkle of cinnamon to the cream cheese mixture. Last 4th of July, I did a mix of cherry and blueberry fillings with a vanilla glaze for a red-white-and-blue theme. My absolute favorite variation was when I added some leftover lemon curd to the cream cheese – the tanginess was incredible with the cherries. I've also tried a savory version with herb cream cheese and mushrooms that was surprisingly good for dinner.
Keeping Fresh
Let's be real – these almost never last beyond the day they're made at my house. But on the rare occasion there are leftovers, I just leave them covered on the counter overnight. They're definitely not as crispy the next day, but still delicious. I've tried refrigerating them but the crust gets soggy and weird. If you need to make them ahead, I've found that prepping everything and refrigerating the assembled but unfried pies works okay – just bring them to room temp before frying. I once tried freezing the assembled pies, but they spattered like crazy in the oil, so I don't recommend that unless you enjoy cleaning oil off your ceiling.
 Pin it
I've probably made these cherry cheesecake hand pies at least 30 times now for everything from casual family movie nights to my best friend's baby shower. There's something stupidly satisfying about watching people's faces when they take that first bite – you know, when the filling is still warm and they get that perfect mix of tangy and sweet. Sure, they're not the healthiest dessert in my arsenal, but some recipes aren't about being healthy – they're about being worth every single calorie. And trust me, these absolutely are.
Frequently Asked Questions
- → Can I bake these hand pies instead of frying them?
- Yes! Bake them at 375°F for 18-22 minutes until golden brown. Brush with an egg wash before baking for shine, and apply the glaze after they've cooled slightly.
- → Can I use a different fruit filling?
- Absolutely! Blueberry, apple, strawberry, or peach pie filling all work wonderfully in these hand pies. You can even use homemade fruit filling if you prefer.
- → How do I store leftover hand pies?
- Store cooled hand pies in an airtight container at room temperature for up to 2 days, or refrigerate for up to 5 days. Reheat them in a 300°F oven for 5-10 minutes to recrisp the crust.
- → Can I make these ahead of time?
- You can prepare the assembled, uncooked pies and refrigerate them for up to 24 hours before frying. Alternatively, freeze the assembled pies on a baking sheet until solid, then transfer to a freezer bag for up to 3 months. Fry from frozen, adding 1-2 minutes to the cooking time.
- → What's the best way to seal the edges of the hand pies?
- After folding the dough over, press the edges firmly with your fingers, then use a fork to crimp the edges. Make sure to moisten the edges with water before sealing to help them stick together and prevent filling from leaking during frying.