


This banana pudding is built from three simple components: a vanilla pudding base, a marshmallow-enriched whipped cream, and neat layers of vanilla wafers and bananas. It is a no-bake dessert, but it still needs two separate chilling periods. The first gives the pudding time to set; the second lets the assembled layers settle without turning the wafers completely soft.
The best result comes from restraint. Barely ripe bananas hold their shape and resist browning, while gentle folding keeps the filling light. Assemble the dessert in an even pattern so every spoonful contains cream, fruit, and a little vanilla-wafer texture.
Ingredients for Banana Pudding
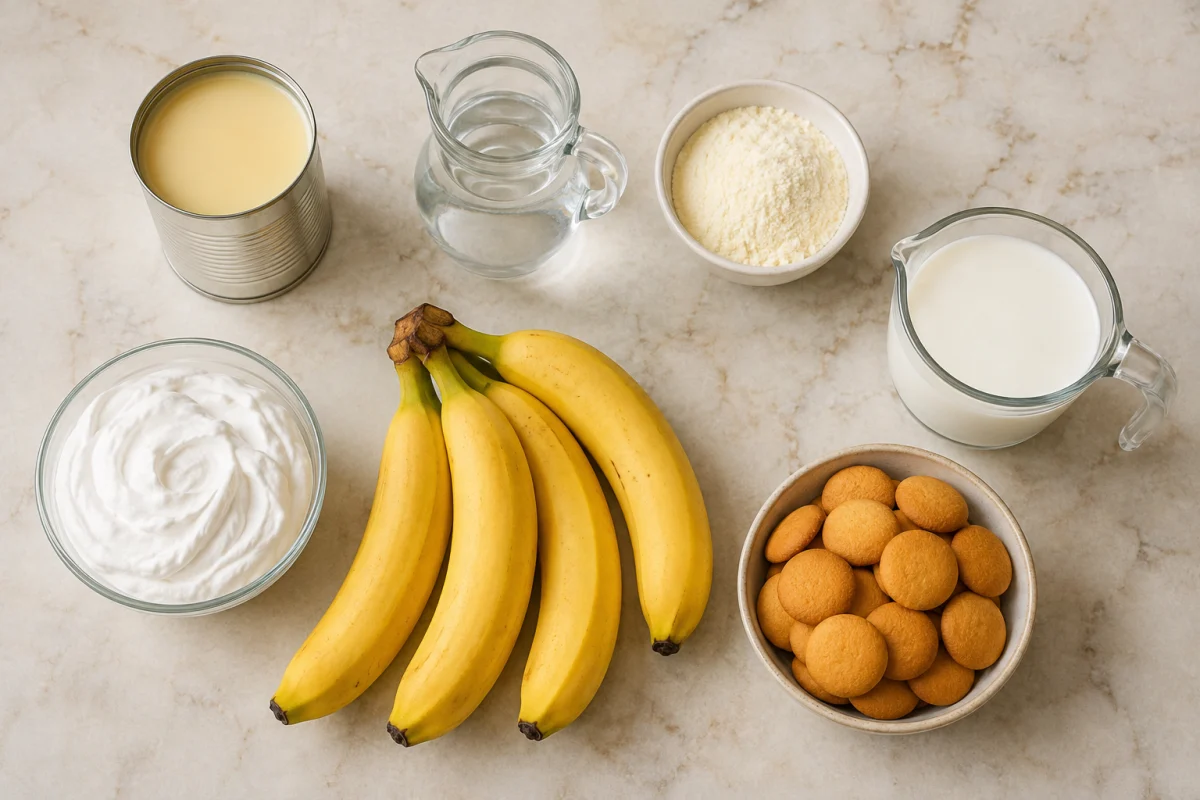
The pudding base uses one 14-ounce can of sweetened condensed milk, 1 1/2 cups ice-cold water, and one 3.5-ounce package of instant vanilla pudding mix. The whipped portion needs 2 1/2 cups heavy cream and 2/3 cup marshmallow fluff. For the layers, plan on five or six large barely ripe bananas and one box of crisp vanilla wafers.
Instant pudding is important because the mixture sets without cooking. Do not substitute a cook-and-serve mix unless you redesign the method. The water should be genuinely cold; warm liquid delays thickening and can leave the base loose when it is time to fold in the cream.
If you enjoy this recipe, you may also like White Chocolate Raspberry Cheesecake Bars.
How to Make Banana Pudding
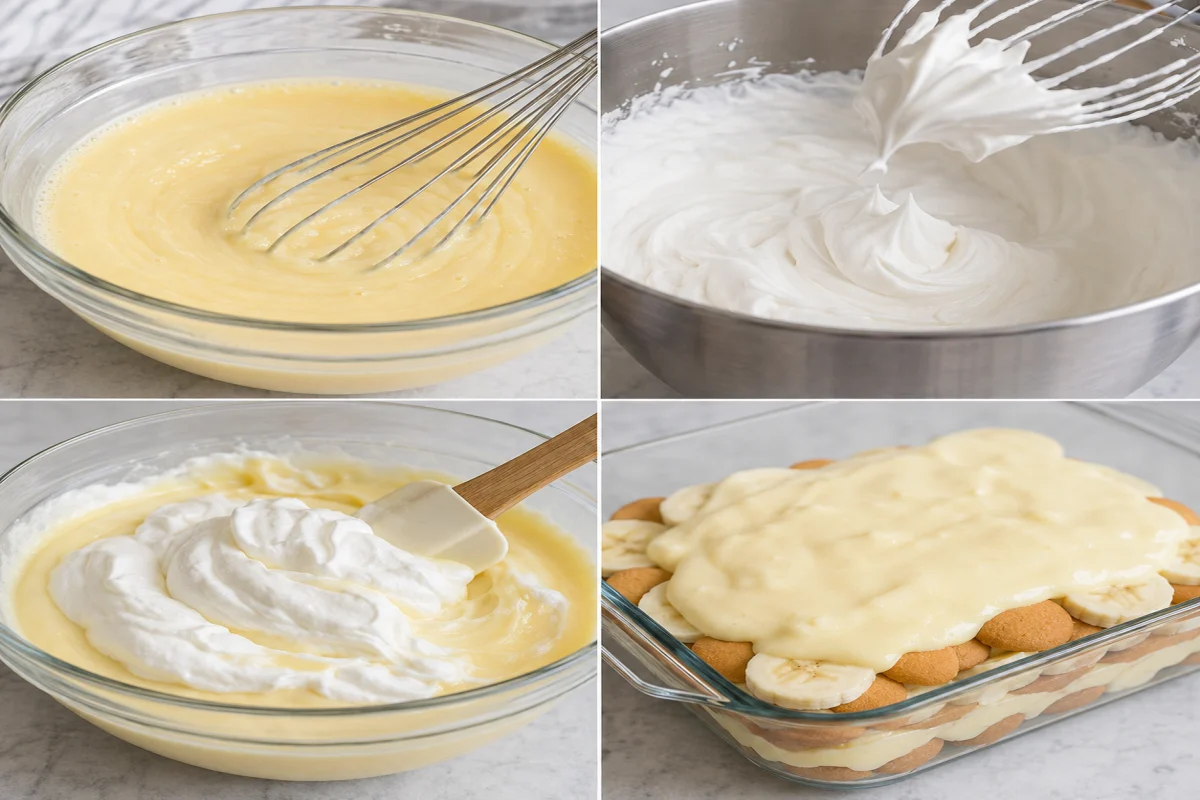
- Mix the base. Whisk the condensed milk and ice-cold water until completely combined. Add the instant vanilla pudding mix and continue whisking until no dry pockets remain.
- Chill the pudding. Cover the bowl and refrigerate for about four hours. This is the setting period that gives the final filling enough structure.
- Whip the cream. Beat the cold heavy cream to soft peaks. Add the marshmallow fluff, then continue beating only until stiff peaks form.
- Fold gently. Add the whipped mixture to the chilled pudding in several portions. Fold with a broad spatula until the color is even and no white streaks remain.
- Build the first layer. Arrange wafers across the bottom of a 9-by-13-inch dish or a deep serving bowl. Add a single layer of freshly sliced bananas, then spread on one-third of the filling.
- Repeat. Make two more layers in the same order, finishing with a smooth layer of pudding.
- Chill again. Cover and refrigerate for at least four hours, or overnight. Add crushed wafers shortly before serving for a crisp finish.
For storage details after serving, the USDA leftovers and food safety guidance.
Why Two Chilling Periods Matter
The first rest belongs to the pudding mixture alone. Instant pudding starch needs time to absorb liquid and create a base that can support whipped cream. If it is folded too early, the filling may look airy in the bowl but relax into a thin sauce after assembly.
The second rest serves a different purpose. It allows the filling to settle around the bananas and partially soften the wafers. Four hours creates a sliceable dessert with some wafer definition; an overnight rest produces a softer, more cake-like texture.
If you enjoy this recipe, you may also like Strawberry Pretzel Salad.
Choose Bananas That Will Hold
Look for yellow bananas with little or no brown spotting and a faint green cast near the stem. They should be sweet enough to taste like banana but firm enough to cut into clean coins. Very ripe fruit releases more moisture, browns quickly, and can become slippery between the layers.
Slice the bananas only when the filling and dish are ready. Keeping the exposed time short is more useful than soaking the slices in citrus juice, which can make the dessert taste sharply lemony and interfere with the mellow vanilla flavor.
Whip the Cream Without Going Too Far
Begin at medium speed so bubbles form evenly, then increase the speed as the cream thickens. Soft peaks bend over when the beaters lift. That is the right moment to add the marshmallow fluff, because it can then disperse before the cream becomes stiff.
Stop when the peaks stand and the mixture looks smooth. Grainy clumps are a warning that the cream is moving toward butter. A properly whipped mixture feels stable yet flexible, making it much easier to fold into the pudding without losing volume.
Fold for a Light, Even Filling
Use a large flexible spatula and work from the bottom of the bowl. Cut through the center, sweep around the side, and turn the mixture over itself. Rotate the bowl and repeat. This motion combines the dense pudding and lighter cream with less deflation than rapid stirring.
Finish only when the filling has one consistent pale color. Large white streaks create pockets with different textures, but excessive mixing makes the whole filling heavy. Several deliberate folds are better than a long series of small, fast movements.
Build Balanced Layers
Arrange wafers close together but do not crush them into a solid crust. Place banana coins in a single layer rather than piling them up, then add enough filling to cover every exposed edge. Repeat the same proportions so the dessert tastes consistent from top to bottom.
A clear trifle bowl shows the layers, while a 9-by-13-inch glass dish allows easy portioning and transport. Spread the filling into the corners to protect the bananas from air and prevent dry wafer pockets along the sides.
Fixing Common Texture Problems
If the filling is loose, the pudding probably needed a longer first chill or the cream was under-whipped. Chill the filling before assembly rather than adding extra dry mix. If it looks dense, the whipped cream may have been overworked or stirred too vigorously into the base.
Watery layers usually come from overripe bananas or a warm dessert left out too long. Wafers that are too soft have simply absorbed more moisture; shorten the final chill to four hours next time and reserve the garnish wafers until serving.

Serving and Garnishing
Serve the pudding well chilled with a wide spoon that reaches through every layer. For clean portions from a rectangular dish, wipe the serving spatula between cuts. A transparent bowl is less formal but shows the wafer and banana layers attractively on a dessert table.
Crush a few wafers into coarse crumbs and scatter them over the top just before serving. Whole wafers can mark portions around the rim. Extra banana slices look appealing but should also be added at the last moment so they do not darken.
Make-Ahead and Storage
The pudding base can be mixed and chilled one day before assembly. The whipped cream is best prepared when you are ready to fold, because freshly whipped cream gives the filling its cleanest texture. Once assembled, cover the dish closely without pressing plastic wrap into the surface.
Refrigerate leftovers promptly and use them within three days. The flavor remains good, but the wafers soften and bananas darken with time. This dessert does not freeze well; thawing damages both the whipped filling and the fruit texture.
Conclusion
For stable banana pudding, chill the condensed-milk pudding base fully, whip cold cream with marshmallow fluff to stiff peaks, and fold the two mixtures gently. Use barely ripe bananas, assemble three even wafer-and-fruit layers, then refrigerate at least four hours before garnishing and serving.
Frequently Asked Questions
- → Can banana pudding be made the night before?
Yes. Overnight chilling gives the layers time to settle and softens the wafers. Add crushed wafers or fresh banana garnish shortly before serving.
- → How do I keep bananas from turning brown?
Use firm barely ripe bananas, slice them immediately before assembly, and cover every slice with filling to reduce exposure to air.
- → Why is my banana pudding filling runny?
The pudding base may not have chilled long enough, or the cream may have been under-whipped. Complete the four-hour first chill and whip to stiff peaks before folding.
- → How long does banana pudding keep?
Keep it covered in the refrigerator and use it within three days. Expect the wafers to soften and the bananas to darken gradually.