
 Pin it
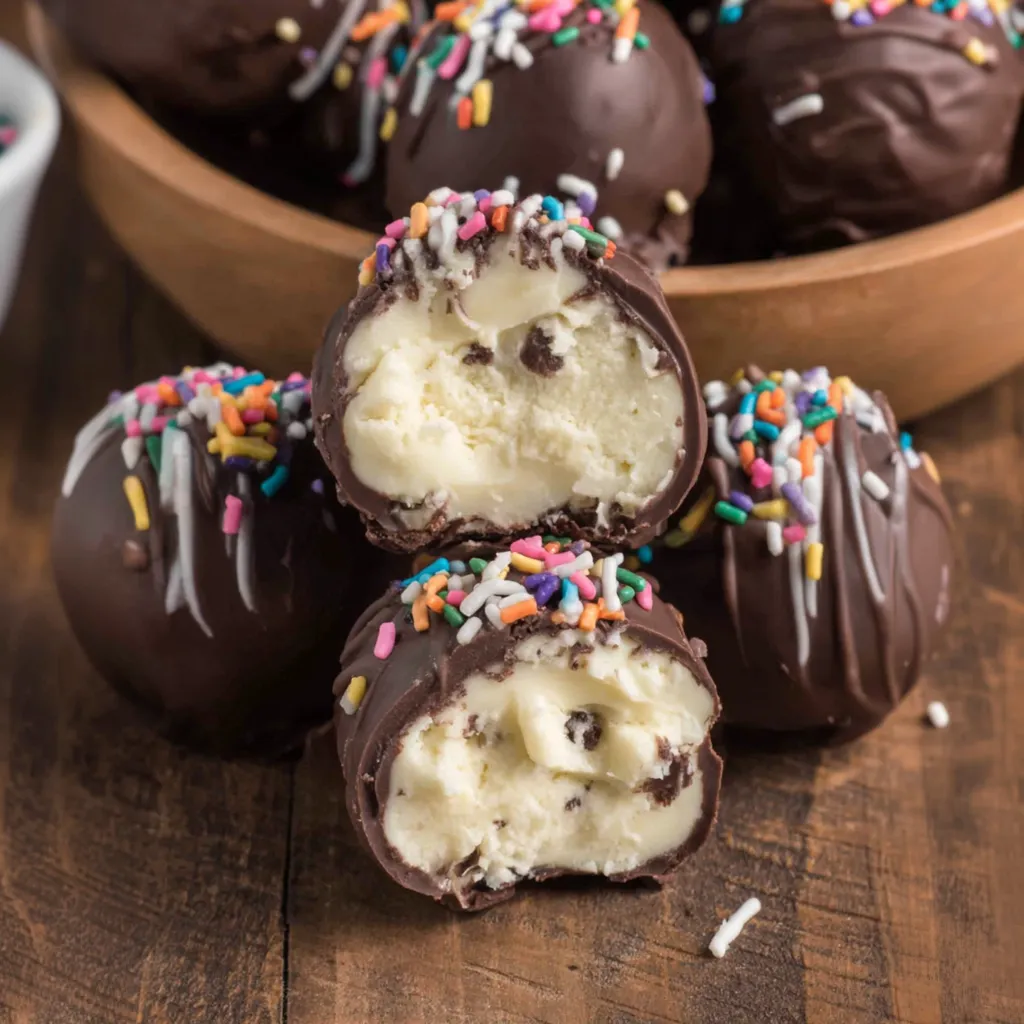
These chocolate dipped buttercream truffles wrap silky vanilla buttercream centers inside a smooth chocolate shell and finish with a shower of colorful sprinkles that make every single piece look like a tiny celebration. The contrast between the rich, melt-on-your-tongue buttercream filling and the thin, snappy chocolate coating creates an eating experience that rivals anything you would find in an expensive candy shop. What makes these buttercream truffles so remarkable is how a handful of simple pantry ingredients transforms into something that looks and tastes incredibly luxurious without requiring any baking, candy thermometers, or professional confectionery skills. With just 15 minutes of active preparation and a bit of patience for chilling, you end up with 20 gorgeous handmade truffles that make people believe you spent hours crafting each one individually.
I started making these buttercream truffles three years ago when I needed a dessert for a baby shower but had run out of oven space with everything else I was preparing. The no-bake nature of this recipe saved me completely, and the finished truffles looked so beautiful on the dessert table that multiple guests assumed I had ordered them from a professional chocolatier. The mother-to-be, who was having intense sugar cravings during her third trimester, ate five truffles and told me they were the best thing she had tasted in months. Now these buttercream truffles appear at every shower, holiday gathering, and special occasion in my circle because nothing else delivers the same combination of impressive presentation and effortless preparation.
Buttercream Filling Ingredients
- Unsalted butter: 3/4 cup, room temperature for a luxurious mouthfeel.
- Powdered sugar: 4 cups, sifted to ensure a smooth, clump-free consistency.
- Vanilla extract: 2 teaspoons to provide warm, aromatic depth.
- Whole milk: 3 tablespoons to achieve a light, fluffy, and scoopable texture.
Chocolate Coating Ingredients
- Chocolate melting wafers: 16 ounces for a glossy, snappy, and professional-looking shell.
- Decorative sprinkles: Chosen to match your occasion for a festive finish.
 Pin it
Truffle Making Method
- Beating The Buttercream
- Place your room temperature butter in a large mixing bowl and add the vanilla extract, then beat with a hand mixer or stand mixer on medium speed for about one minute until the butter becomes smooth, creamy, and slightly lighter in color. Add the first cup of powdered sugar and beat on low speed until the sugar incorporates without creating a cloud of white dust, then increase to medium speed and beat until smooth before adding the next cup. Continue this gradual process with each remaining cup of powdered sugar, scraping down the sides of your bowl between additions to ensure everything mixes evenly without hidden pockets of dry sugar. Pour in the whole milk after all the sugar has been incorporated and beat on medium-high speed for about two minutes until the buttercream becomes noticeably lighter, fluffier, and increased in volume compared to when you started.
- Chilling Until Firm
- Cover your bowl of buttercream tightly with plastic wrap pressed directly against the surface, or use a fitted lid if your bowl has one, to prevent the buttercream from absorbing refrigerator odors or developing a dry crust. Place the covered bowl in the refrigerator and chill for at least one full hour, which allows the butter to firm up enough that the mixture holds its shape when scooped and rolled. Check the buttercream after an hour by pressing it gently with your finger, looking for a consistency firm enough to scoop cleanly but still soft enough to roll between your palms. If the buttercream still feels too soft to handle, return it to the refrigerator for another 30 minutes before attempting to shape.
- Shaping Into Balls
- Line a baking sheet with parchment paper or aluminum foil, creating a non-stick surface where your shaped truffles can rest without rolling around or sticking. Using a cookie scoop or tablespoon measure, portion approximately one and a half tablespoons of chilled buttercream for each truffle, placing each scoop on your prepared baking sheet. Working quickly to prevent the buttercream from warming too much in your hands, roll each portion between your palms using gentle circular motions until it forms a smooth, round ball. If the buttercream becomes too soft and sticky during rolling, rinse your hands under cold water and dry them, or return the remaining scoops to the refrigerator for a few minutes before continuing.
- Freezing For Firmness
- Transfer your baking sheet of rolled buttercream balls to the freezer and let them chill for 30 minutes until they feel very firm when pressed gently with your fingertip. This freezing step solidifies the buttercream enough that the balls maintain their shape when dipped into warm melted chocolate without deforming or melting. The cold temperature also helps the chocolate coating set faster on contact, creating a thinner, more even shell rather than thick, drippy blobs of chocolate. Don't skip this step even if you're in a hurry, as soft, warm buttercream makes the dipping process frustrating and produces messy, unattractive results.
- Melting The Chocolate
- Place your chocolate melting wafers in a microwave-safe bowl and heat in 30-second intervals, stirring thoroughly between each session until the chocolate melts into a completely smooth, fluid consistency. Alternatively, melt the wafers in a heatproof bowl set over a saucepan of barely simmering water, stirring constantly until smooth for more controlled, gentle melting. The chocolate should flow easily from your spoon in a steady ribbon and feel warm but not hot when you touch a small amount to your lip. Overheating chocolate causes it to become thick, grainy, and impossible to work with, so err on the side of less heat and more stirring.
- Dipping Each Truffle
- Insert a toothpick or candy dipping fork into the top of a frozen buttercream ball, pushing about halfway through to create a secure grip without poking all the way through the bottom. Lower the ball into the melted chocolate, submerging it completely while tilting the bowl if needed to ensure full coverage around all sides. Lift the coated truffle slowly and hold it over the bowl for several seconds, letting excess chocolate drip off in a steady stream until only a thin, even coating remains. Gently slide the dipped truffle off the toothpick and back onto the parchment-lined baking sheet, using a second toothpick to help release it cleanly if needed.
- Applying The Sprinkles
- Immediately after placing each dipped truffle on the baking sheet, sprinkle your chosen decorations over the top while the chocolate coating remains wet and receptive. Work quickly because the cold buttercream center causes the chocolate to begin setting within seconds, and sprinkles won't adhere to hardened chocolate. Press any stubborn sprinkles gently into the soft chocolate surface to ensure they stay attached rather than falling off when the truffles are handled later. Continue the dipping and decorating process with each truffle, working in small batches of three or four to ensure you have enough time to garnish before the chocolate sets.
- Setting And Serving
- Allow your decorated buttercream truffles to rest at room temperature for about 15 to 20 minutes until the chocolate coating hardens completely with a smooth, glossy finish. Alternatively, place them in the refrigerator for faster setting if you're short on time or if your kitchen runs warm enough to keep the chocolate from firming properly. Once fully set, the truffles can be transferred to a serving plate, gift box, or storage container without the chocolate smudging or the sprinkles falling off. Serve at room temperature for the softest, most melt-in-your-mouth buttercream experience, or slightly chilled if you prefer a firmer center with more snap to the chocolate shell.
I've always believed that handmade candy makes the most meaningful gift, and these buttercream truffles have become my go-to recipe whenever I want to give someone something truly special from my kitchen. The process of rolling each ball, dipping it in chocolate, and adding those finishing sprinkles feels meditative and satisfying in a way that few other kitchen projects can match. My children started helping me make these truffles when they were small, and the sprinkle-applying step became their favorite task that they still look forward to even now as teenagers. Those afternoons spent around the kitchen counter, hands covered in chocolate and sprinkles scattered everywhere, created some of our family's happiest memories together.
Buttercream Consistency Tips
Getting the right consistency in your buttercream determines how successfully you can shape, chill, and dip your truffles without frustration. The finished buttercream should feel thick and stiff enough to hold peaks when you lift your beater, similar to frosting you would pipe onto cupcakes. If your buttercream feels too soft after adding all the sugar, add powdered sugar one tablespoon at a time until it stiffens to the right consistency. If it feels too thick and dry, add milk half a teaspoon at a time until it loosens just enough to beat into fluffy texture.
Chocolate Melting Mastery
Properly melted chocolate makes the difference between gorgeous, professional-looking truffles and messy, unattractive ones that disappoint visually. The ideal melted chocolate temperature sits around 100 degrees Fahrenheit, warm enough to flow smoothly but cool enough to begin setting relatively quickly on cold buttercream. Overheated chocolate becomes thick and grainy, a condition called seizing that cannot be reversed and requires starting with fresh chocolate. Adding a teaspoon of coconut oil to your melting wafers creates even smoother flow and a slightly more forgiving consistency for first-time truffle makers.
Rolling Technique Secrets
The way you roll your buttercream balls affects both the appearance and the dipping experience of your finished truffles. Clean, dry hands produce the smoothest results, and rinsing them under cold water periodically prevents the buttercream from warming and sticking. Rolling with gentle pressure in quick circular motions creates rounder shapes than pressing hard, which flattens the balls and creates uneven surfaces. Uniform sizing matters for consistent presentation, so using a cookie scoop or measuring spoon ensures every truffle looks similar on your finished tray.
Dipping Without Mess
The chocolate dipping process intimidates many home cooks, but a few simple techniques make it much easier and less stressful than it appears. Keeping the chocolate warm in its bowl by placing it over a barely warm water bath prevents it from thickening as you work through your batch. Tapping the dipping tool gently against the rim of the bowl after lifting each truffle encourages excess chocolate to fall off cleanly rather than pooling at the base. If chocolate pools around the bottom of placed truffles, let them set partially and then use a sharp knife to trim the excess for a neater appearance.
Flavor Variations Explored
Adding half a cup of unsweetened cocoa powder in place of the same amount of powdered sugar creates a rich chocolate buttercream center that doubles down on the chocolate theme. Substituting almond or peppermint extract for the vanilla creates entirely different flavor profiles that suit different seasons and occasions. Folding chopped walnuts or pecans into the buttercream before chilling introduces nutty crunch throughout the creamy centers. Stirring in a tablespoon of instant espresso powder creates a mocha buttercream variation that coffee lovers find absolutely irresistible.
Occasion Styling Ideas
These buttercream truffles adapt to virtually any celebration simply by changing the sprinkle colors and presentation style. Red and pink sprinkles on white chocolate coating create perfect Valentine's Day truffles that make thoughtful handmade gifts for loved ones. Pastel sprinkles transform the same recipe into Easter or baby shower treats that look delicate and sophisticated on any dessert table. Gold and silver sprinkles on dark chocolate make elegant New Year's Eve party treats that feel upscale and celebratory.
Gifting Presentation Tips
Packaging these buttercream truffles attractively transforms them from homemade candy into thoughtful, impressive gifts that people genuinely treasure receiving. Small candy boxes lined with tissue paper or parchment hold four to six truffles perfectly for individual gifts that feel personal and special. Clear cellophane bags tied with ribbon showcase the beautiful sprinkles and glossy chocolate while keeping the truffles fresh during transport. Adding a handwritten tag with the flavor and storage instructions adds a personal touch that makes your gift feel even more thoughtful.
Storing Truffles Properly
Your finished buttercream truffles keep beautifully in the refrigerator for up to two weeks when stored in an airtight container, making them ideal for preparing well ahead of events. Place parchment paper between layers if stacking to prevent the chocolate coatings from sticking together or damaging each other's sprinkle decorations. The buttercream centers actually improve over a few days of refrigeration as the flavors meld and the texture becomes even more smooth and creamy. Bring refrigerated truffles to room temperature for about ten minutes before serving for the softest, most luxurious buttercream experience.
Freezing For Later
These buttercream truffles freeze exceptionally well for up to two months, which means you can prepare them far in advance of holiday gift-giving or large celebrations. Place fully set truffles in a single layer in a freezer-safe container with parchment between layers to prevent sticking and protect the decorations. Thaw frozen truffles in the refrigerator overnight rather than at room temperature, which prevents condensation from forming on the chocolate coating and making it look dull. The texture remains virtually identical to fresh truffles when properly frozen and thawed, making advance preparation a smart strategy.
 Pin it
These chocolate dipped buttercream truffles have become the recipe I turn to whenever I need something that looks spectacular, tastes indulgent, and doesn't require me to turn on my oven or master complicated confectionery techniques. The simplicity of the ingredient list belies the impressive results, and I genuinely enjoy every step of the process from beating the buttercream to applying the final sprinkles on each glossy chocolate shell. I've given these truffles as teacher appreciation gifts, hostess presents, holiday treats, and just-because surprises, and the reaction is always the same mixture of delight and disbelief that something this beautiful was made by hand at home. Creating something that brings this much happiness to the people I care about reminds me that the best gifts from the kitchen don't need to be complicated, they just need to be made with care and shared with love.
Frequently Asked Questions
- → Why do I need to chill and freeze the buttercream?
- Chilling makes the buttercream firm enough to roll into balls, and freezing them solid before dipping prevents the centers from melting when they hit the warm chocolate.
- → Can I use regular chocolate chips instead of melting wafers?
- You can, but melting wafers work better because they're designed to set up smooth and shiny. If you use chocolate chips, add a teaspoon of coconut oil or shortening to help them melt smoothly.
- → How do I make chocolate buttercream truffles?
- Replace 1/2 cup of the powdered sugar with unsweetened cocoa powder. You might need to add an extra tablespoon of milk to get the right consistency.
- → Can I make these ahead of time?
- Yes! These are perfect for making ahead. Store them in an airtight container in the fridge for up to 2 weeks, or freeze them for up to 2 months.
- → Why are my truffles falling off the toothpick when dipping?
- Make sure the buttercream balls are frozen solid before dipping. If they're too soft, they'll fall apart. You can also use a candy dipping tool or fork instead of a toothpick.
- → Can I add other flavors?
- Absolutely! Try peppermint extract, almond extract, or even a tablespoon of instant coffee for a mocha flavor. You can also add chopped nuts to the buttercream for texture.