
 Pin it
These chocolate granola cups with peanut butter filling have become my go-to healthy snack when I need something that satisfies my sweet tooth without derailing my attempts to eat better. I started making these a few years ago when my afternoon energy crashes had me reaching for candy bars every day, and I realized I needed a homemade alternative that delivered chocolate and peanut butter satisfaction while actually providing sustained energy from whole ingredients. The combination of crunchy granola and chopped peanuts bound with melted chocolate creates these sturdy little cups that hold creamy peanut butter filling, and the fact that they require zero baking means I can whip up a batch in less time than it takes to run to the store for packaged snacks.
My coworker Maria, who's always on some new diet and usually brings sad-looking celery sticks for snacks, tried one of these cups when I brought them to share at the office. She immediately asked for the recipe and has been making them every Sunday for her week's snacks ever since. She says they're the only "healthy" snack she's ever actually looked forward to eating, and she loves that they taste like dessert but keep her full until dinner without the sugar spike and crash. Now several people in our office make these regularly, and we've started a little competition to see who can come up with the best flavor variations.
Essential Ingredients Breakdown
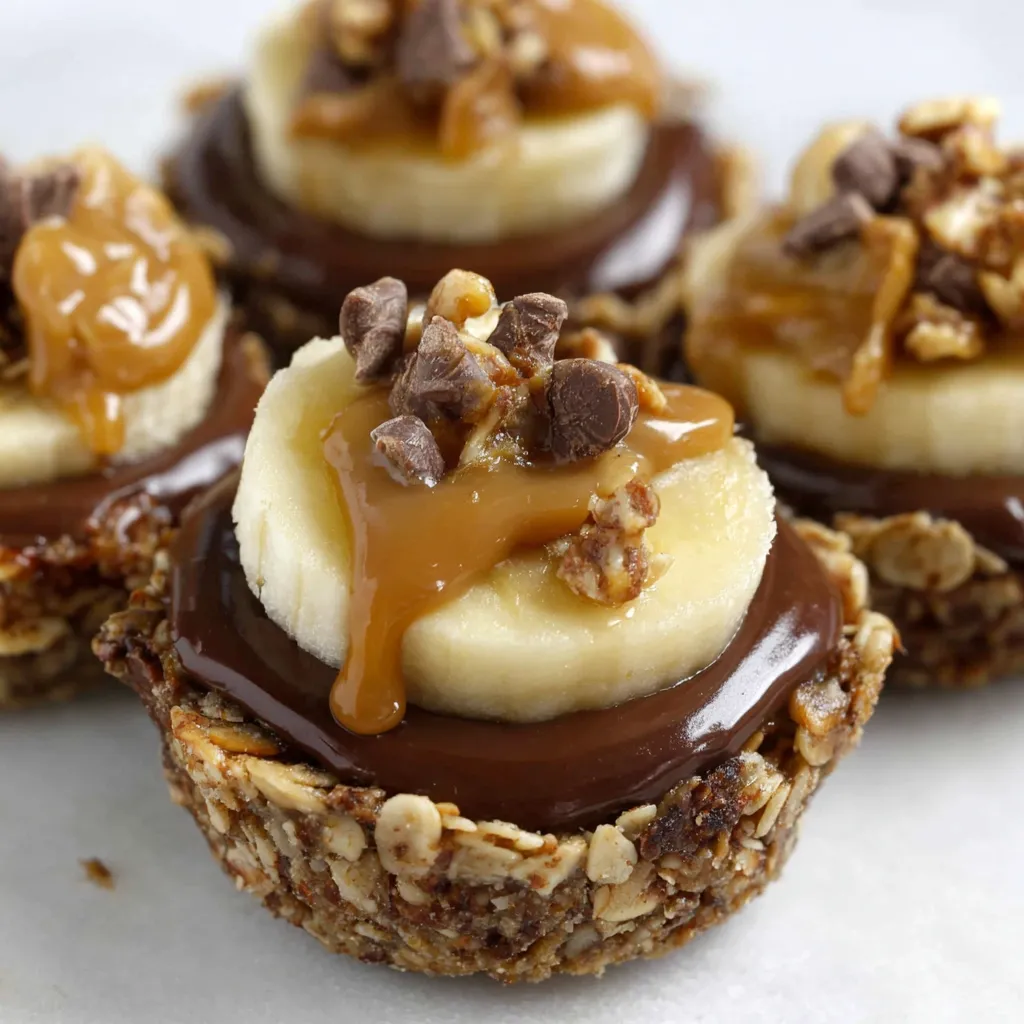
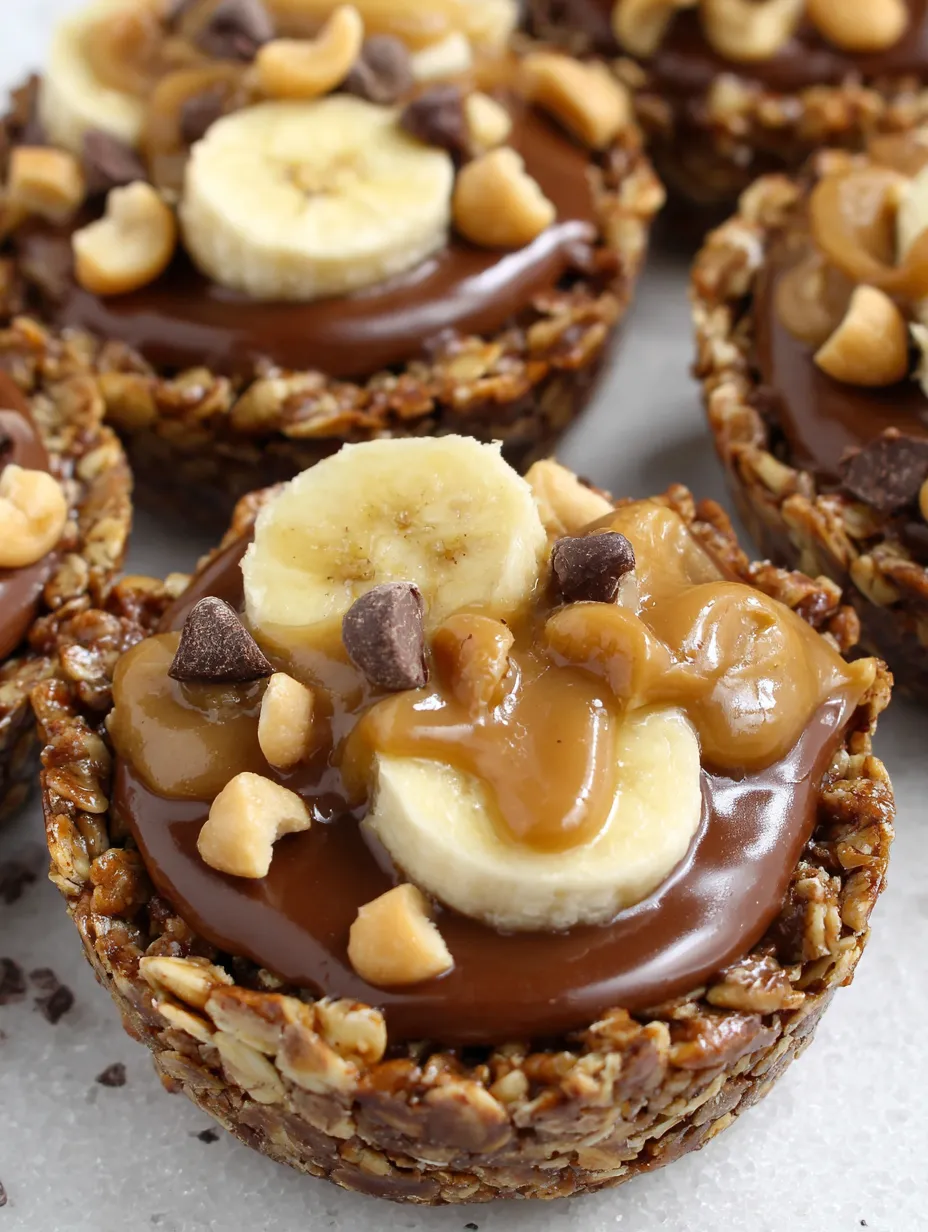
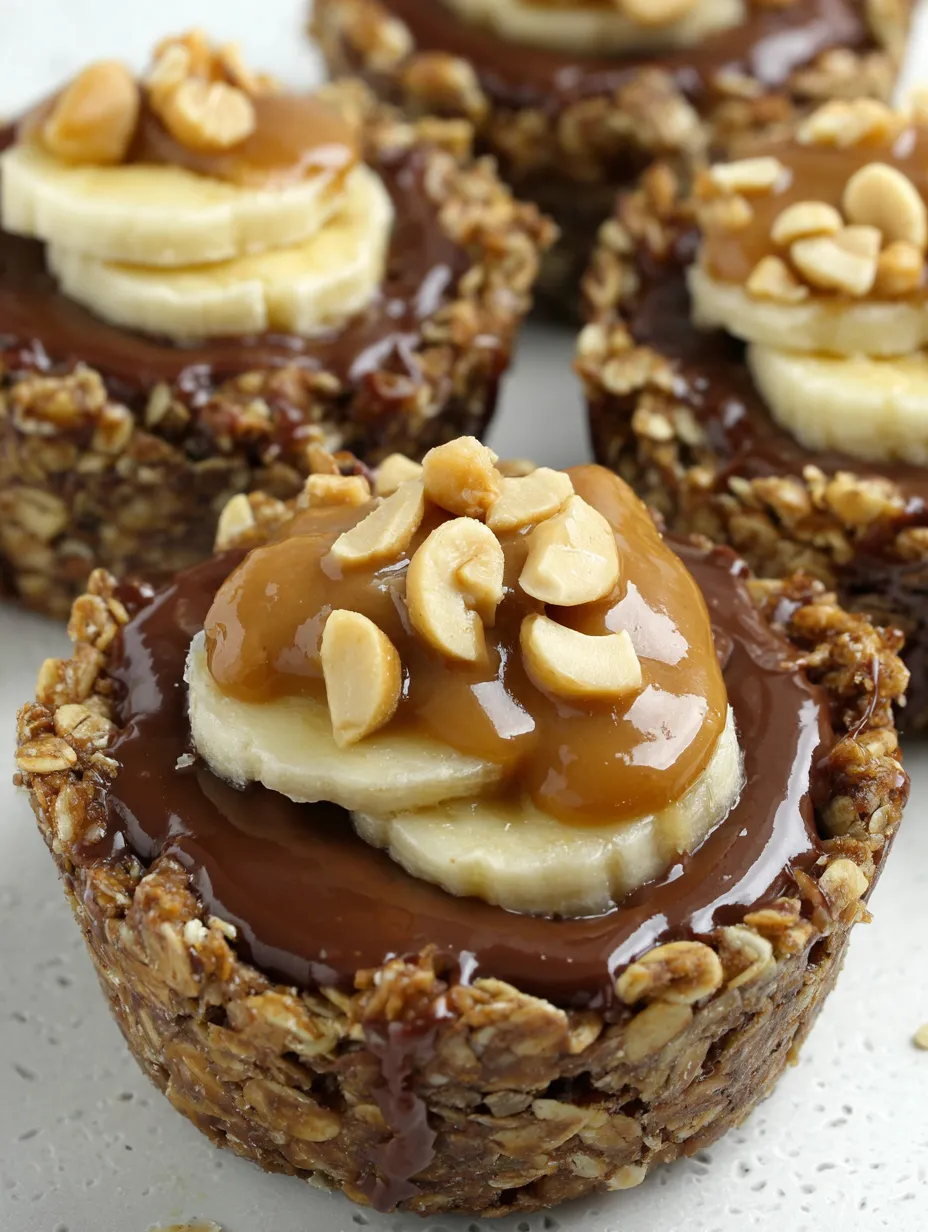
- Honey granola: Forms the crunchy, sturdy base (crush large clusters slightly).
- Chopped peanuts: Adds protein, healthy fats, and crunchy texture.
- Dark chocolate: Provides rich flavor and acts as the binding agent (60–70% cacao recommended).
- Coconut oil: Helps chocolate melt smoothly and ensures firm setting.
- Peanut butter in the mixture: Contributes flavor and binding (use creamy, regular peanut butter).
- Honey: Natural sweetener and essential binder.
- Peanut butter filling: Creates the creamy center (natural peanut butter works well here).
- Banana slices (Optional): Adds fresh sweetness and visual appeal.
 Pin it
Creating Perfect Cups
- Preparing the mixture:
- Crush granola clusters slightly and combine with chopped peanuts in a large bowl. Melt dark chocolate and coconut oil together until smooth. Stir in 2 tablespoons of peanut butter and honey until glossy.
- Combining and adjusting:
- Pour the warm chocolate mixture over the granola/peanuts. Stir until every bit is coated and the mixture is sticky and holds together when squeezed. Adjust consistency with more granola (if too runny) or more honey (if too dry).
- Forming the cups:
- Generously spray a standard 12-cup muffin tin. Divide the mixture evenly among the 12 cups (¼ cup each). Press the mixture **firmly** into the bottom and up the sides of each cup to create a well for the filling.
- Freezing to set:
- Place the muffin tin in the freezer for **5 to 10 minutes** until the cups are firm to the touch.
- Removing from pan:
- Carefully run a thin knife around the edge of each cup to loosen. Gently lift each cup out and place on parchment paper.
- Adding the filling:
- Spoon or pipe (using a snipped zip-top bag) the peanut butter filling into the center of each cup, filling the well generously. Warm thick peanut butter briefly if needed for easier pouring.
- Final touches:
- Place an optional banana slice on top of the filling, pressing gently. Garnish with extra chopped peanuts or a light chocolate drizzle.
- Storing properly:
- Store finished cups in an airtight container in the **refrigerator for up to one week**, layering with parchment paper. Freeze for up to 3 months.
I've learned through making these cups many times that getting the consistency of the chocolate-granola mixture exactly right is the key to success. My first batch was too runny because I didn't let it cool enough before pressing into the muffin tin, and all the cups fell apart when I tried to remove them, leaving me with a delicious but messy pile of chocolate granola. Now I always let the mixture cool for a few minutes until it's just starting to thicken before forming the cups, which creates sturdy cups that pop out of the pan beautifully. I also discovered that really greasing the muffin tin makes removal infinitely easier, and I use cooking spray rather than butter because it coats more evenly and completely.
Peanut Butter Options
- Regular Peanut Butter (with stabilizers): Works better in the chocolate mixture because it's thicker and won't make the mixture too loose.
- Natural Peanut Butter (just peanuts/salt): Works beautifully for the filling due to its thinner, more pourable consistency.
Nut Allergy Adaptations
Substitute **sunflower seed butter** or **tahini** for peanut butter in both the mixture and filling. Use sunflower seeds instead of chopped peanuts for crunch. Choose a nut-free granola.
Consistency Troubleshooting
- **Too dry/crumbly:** Add honey (1 Tbsp at a time).
- **Too wet/loose:** Add granola (1 Tbsp at a time) or let it cool for a few minutes to firm up the chocolate.
Perfect Serving Ideas
- Satisfying **afternoon snack** for sustained energy.
- Great for **lunch boxes** (don't require refrigeration for a few hours).
- Excellent **post-workout fuel** (protein, fat, carbs).
- Convenient for **breakfast on the go**.
 Pin it
Delicious Flavor Variations
- **Almond Butter Cups:** Use almond butter and top with sliced almonds.
- **Chocolate Hazelnut Cups:** Use Nutella as the filling and top with chopped hazelnuts.
- **White Chocolate Cups:** Use white chocolate instead of dark and fill with cashew butter.
- **Protein Boost:** Mix a scoop of chocolate protein powder into the granola mixture.
I've made these chocolate granola cups with peanut butter filling countless times for meal prep, lunch boxes, afternoon snacks, and even gifts for friends, and they've become one of my most-made recipes because they're so simple yet so satisfying. There's something about that combination of crunchy chocolate-covered granola with creamy peanut butter that hits the sweet spot between healthy and indulgent, making you feel like you're eating a treat while actually consuming whole grains, nuts, and natural sweeteners. The fact that these require no baking means I can make them on the hottest summer days or late at night when I realize I need snacks for the next day, and having a container of these in my refrigerator means I never reach for less healthy options when hunger strikes. They've genuinely helped me maintain better eating habits by providing that chocolate-peanut butter satisfaction I crave in a form that actually nourishes rather than just delivering empty calories!
Frequently Asked Questions
- → Can I use a different nut butter?
- Yes, almond butter, cashew butter, or sunflower seed butter all work well as substitutes for peanut butter.
- → Why won't my cups hold together?
- The mixture needs to be sticky. Add more honey if it's too dry, or let the chocolate cool more if it's too runny.
- → Do I have to use banana slices?
- No, the banana is optional. You can skip it or use berries, a drizzle of honey, or mini chocolate chips instead.
- → Can I use milk chocolate instead of dark?
- Yes, but dark chocolate adds a nice balance to the sweetness. Milk chocolate will make them sweeter overall.
- → How do I prevent sticking to the pan?
- Grease the muffin pan really well with coconut oil or cooking spray. You can also use cupcake liners for easier removal.
- → Are these healthy?
- They're made with wholesome ingredients like granola, peanuts, and peanut butter, making them a nutritious breakfast or snack option with protein and fiber.