
 Pin it
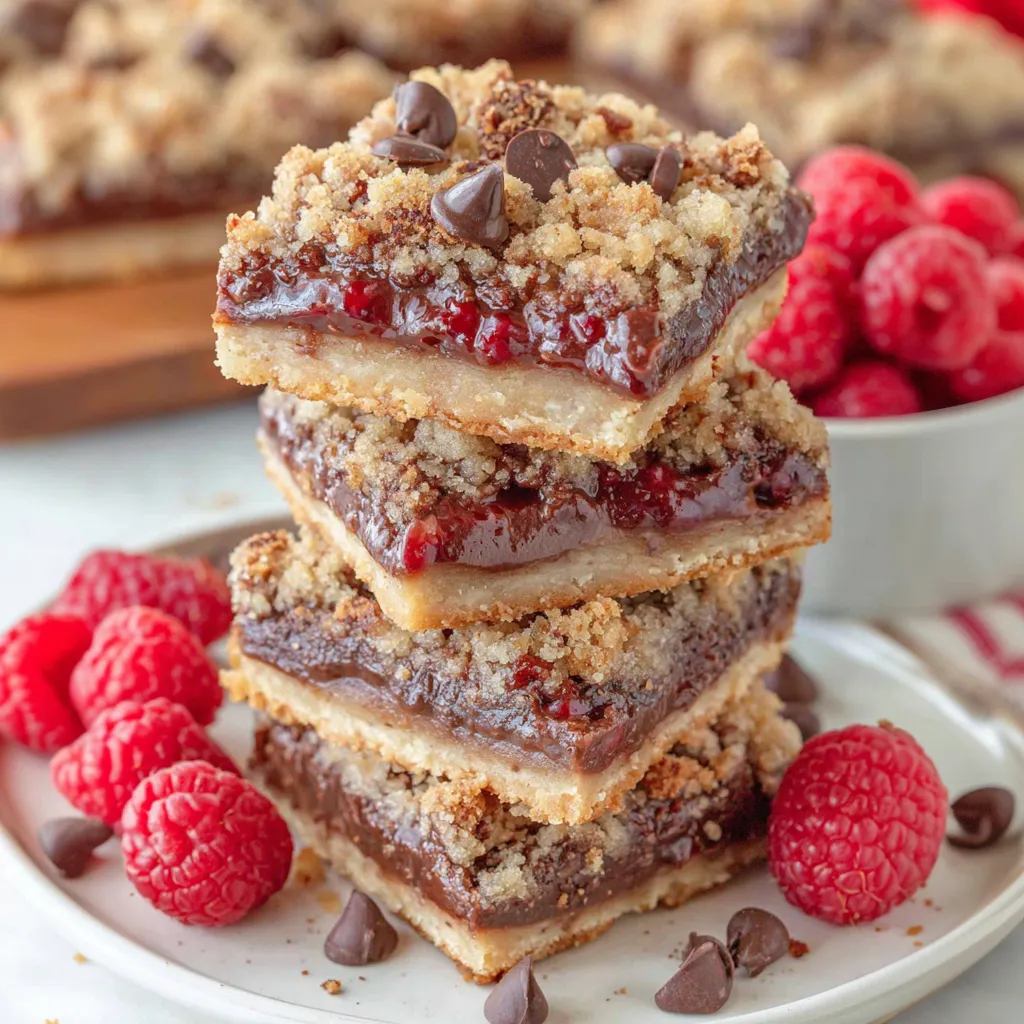
These chocolate raspberry crumb bars deliver a stunning combination of rich chocolate, tangy fruit, and buttery crumble that satisfies every dessert craving in one elegant, layered treat. Starting with a golden shortbread crust and building up through silky chocolate filling made with sweetened condensed milk, dollops of bright raspberry preserves, crunchy pecan-studded crumble, and scattered chocolate chips, each layer contributes something essential to the final experience. What makes these chocolate raspberry crumb bars so irresistible is how the tart raspberry cuts through all that chocolate richness, creating a balance that keeps you reaching for just one more piece long after you intended to stop. The recipe yields 24 generous bars from a single pan, making these perfect for bake sales, holiday cookie trays, potluck dessert tables, or simply keeping in your kitchen for whenever the mood strikes.
I brought these chocolate raspberry crumb bars to a holiday cookie exchange last December, and they caused quite the commotion at the dessert table. A woman I had never met before tracked me down across the room to tell me these were the best bars she had ever tasted and insisted I write down the recipe on a napkin right then and there. My husband, who generally considers himself a chocolate purist who doesn't need fruit interfering with his dessert, admitted after his third bar that the raspberry actually made the chocolate taste even better. Now I make these for every occasion that requires a portable dessert, and I've learned to always make a double batch because one pan never seems to be enough.
Crust And Crumble Ingredients
- Unsalted butter: 1 cup (2 sticks) softened to room temperature for a rich foundation.
- Light brown sugar: 1/2 cup packed for moisture and caramel depth.
- All-purpose flour: 2 cups to provide structure for both crust and topping.
- Chopped pecans or walnuts: 1/2 cup for nutty crunch in the crumble.
Chocolate Layer Ingredients
- Sweetened condensed milk: One 14-ounce can for a silky, fudgy filling.
- Bittersweet chocolate chips: 1 cup to provide deep, intense chocolate flavor.
Topping Layer Ingredients
- Raspberry preserves: 1/2 to 2/3 cup for a bright, tangy contrast.
- Semi-sweet chocolate chips: 1 cup scattered for extra melty pockets.
 Pin it
Baking Method Explained
- Preparing Your Pan
- Preheat your oven to 350 degrees Fahrenheit and position a rack in the center where heat circulates evenly around your baking dish. Lightly grease a 9x13-inch baking dish with butter or nonstick cooking spray, then line it with parchment paper leaving several inches of overhang on the long sides to create handles for easy removal later. Press the parchment firmly into the corners and smooth it against the sides so your bars bake evenly without the paper bunching underneath. The combination of greasing and parchment provides double insurance against sticking, which matters enormously when slicing these layered bars.
- Creaming Butter Mixture
- Place your softened butter and packed light brown sugar in a large mixing bowl or the bowl of a stand mixer fitted with the paddle attachment. Beat on medium speed for two to three minutes until the mixture becomes noticeably lighter in color and fluffy in texture, scraping down the sides at least once during the process. Proper creaming incorporates air that creates tenderness in the finished crust and crumble, so don't rush this step even if the mixture looks combined before the full time passes. The finished mixture should look smooth and creamy with no visible chunks of butter remaining anywhere in the bowl.
- Adding Dry Ingredients
- Add the all-purpose flour and salt to the creamed butter mixture, mixing on low speed just until the dry ingredients incorporate and the mixture resembles coarse, crumbly dough. Stop mixing the moment the flour disappears into the butter since overworking at this stage develops gluten that makes your crust and crumble tough rather than tender. The dough should feel crumbly and sandy when you grab a handful but clump together and hold its shape when you squeeze it firmly in your fist. Check the bottom of the bowl with a spatula to ensure no pockets of unmixed flour hide beneath the crumbled dough.
- Dividing The Dough
- Measure out approximately two-thirds cup of the crumbly dough mixture and set it aside in a separate small bowl for making the crumble topping later. Press the remaining larger portion of dough evenly into the bottom of your prepared baking dish, using your fingertips or the flat bottom of a measuring cup to create a compact, uniform layer. Work the dough into all four corners and along the edges, making sure the thickness remains consistent throughout so the crust bakes evenly. The pressed crust should cover the entire bottom of the pan in a thin, firm layer with no gaps or thin spots visible.
- Pre-Baking The Crust
- Place your pressed crust in the preheated oven and bake for exactly 10 minutes, watching for the edges to just begin turning golden brown while the center remains pale. This pre-baking step sets the crust structure and creates a barrier that prevents the wet chocolate filling from soaking into the raw dough and making it soggy. Remove the pan from the oven but leave the oven on since the fully assembled bars will return shortly for their final baking stage. Let the crust remain in the hot pan where it continues firming up from residual heat while you prepare the remaining components.
- Preparing Nutty Crumble
- Add your chopped pecans or walnuts to the reserved dough mixture, stirring or tossing until the nuts distribute evenly throughout the buttery crumbs. Break apart any large clumps of dough while mixing to create a variety of sizes from fine crumbs to pea-sized pieces that will produce interesting texture variety on top of your bars. The combination of tender butter crumbs and crunchy nut pieces creates a topping that shatters satisfyingly when you bite through it. Set this prepared crumble aside within easy reach since you'll scatter it over the chocolate layer during assembly.
- Melting Chocolate Filling
- Combine the sweetened condensed milk and bittersweet chocolate chips in a microwave-safe bowl large enough to stir comfortably without splashing. Heat on medium power in 30-second intervals, stirring thoroughly between each session with a spatula or whisk until the chocolate melts completely into the condensed milk. Continue heating and stirring until the mixture becomes smooth, glossy, and completely uniform with no visible chips or streaks remaining anywhere. The finished chocolate filling should flow easily when you tilt the bowl and look rich, dark, and shiny like warm fudge sauce.
- Assembling The Bars
- Pour the warm chocolate mixture directly over the hot pre-baked crust, spreading it into an even layer that reaches all edges using an offset spatula or the back of a spoon. Work quickly while the chocolate remains warm and pourable since it begins setting as it contacts the cooler crust surface. Scatter your prepared pecan crumble evenly over the chocolate layer, distributing it so every eventual bar contains some crunchy, nutty topping. Drop teaspoonfuls of raspberry preserves randomly over the crumble, spacing them so every few bars will have a pocket of tangy fruit. Finish by sprinkling the semi-sweet chocolate chips across the entire surface, distributing them as evenly as possible for consistent chocolate presence in every bar.
- Final Baking Stage
- Return your fully assembled baking dish to the preheated oven and bake for 25 minutes until the crumble topping looks golden and set rather than raw and doughy. The raspberry preserves will bubble slightly where they're visible, and the chocolate chips on top will look softened and slightly melted while still holding their general shape. The chocolate filling beneath the crumble should look set around the edges while the center might still appear slightly soft, which is perfectly normal and will firm up as it cools. Remove the pan from the oven and place it on a wire rack or heat-safe surface to begin the cooling process.
- Cooling Before Cutting
- Allow your chocolate raspberry crumb bars to cool completely in the pan before attempting to cut them, which takes at least two hours at room temperature or can be accelerated in the refrigerator. Cutting warm bars results in a messy, smeared appearance because the chocolate filling remains soft and gooey until it reaches room temperature. Once completely cooled, use the parchment paper overhang to lift the entire block out of the pan and onto a cutting board for easier, more precise slicing. Use a sharp knife to cut into 24 even bars, wiping the blade between cuts to maintain clean edges that show off the beautiful layers.
Chocolate and raspberry have been one of my favorite flavor combinations ever since I tried my first raspberry truffle at a fancy chocolate shop years ago. The way tart berries brighten and enhance rich chocolate rather than competing with it demonstrates how opposites truly attract in the culinary world. My grandmother grew raspberry bushes in her garden and would make raspberry jam every summer, and the aroma of warm berries and chocolate together still transports me back to her kitchen. These chocolate raspberry crumb bars honor that memory while delivering a polished, professional-looking dessert that anyone can make regardless of their baking experience level.
Chocolate Melting Guide
Getting a perfectly smooth chocolate filling requires patience and proper technique during the melting process. Medium microwave power prevents the chocolate from overheating and seizing into a grainy, clumpy mess that cannot be rescued. Stirring thoroughly between each 30-second interval distributes the heat evenly and allows the chocolate to melt gradually without any portion burning against the hot bowl surface. The sweetened condensed milk helps protect the chocolate from overheating by providing liquid that moderates the temperature, but it's still important to work slowly and carefully.
Nut Toasting Benefits
Toasting your pecans or walnuts before adding them to the crumble topping transforms their flavor from mild and slightly raw-tasting to deeply nutty and aromatic. Spread the chopped nuts in a single layer on a baking sheet and toast at 350 degrees for about five to seven minutes, watching carefully and stirring once since nuts burn quickly. Toasted nuts also have a crunchier, more satisfying texture that holds up better during baking than raw nuts, which can become slightly soft. The toasting step takes only a few extra minutes but makes a noticeable difference in the finished chocolate raspberry crumb bars.
Preserve Selection Tips
The type and quality of raspberry preserves you use affects both the flavor and appearance of your finished bars significantly. Seedless preserves create smoother, more attractive dollops that look cleaner against the crumble topping, though seeded varieties offer more rustic charm. High-quality preserves with raspberries listed as the first ingredient taste more like real fruit than budget brands heavy with sugar and pectin. The preserves should taste tangy and bright when sampled from the jar, since that tartness is exactly what balances the rich chocolate in the finished bars.
Crust Pressing Technique
Creating an even, compact crust determines how cleanly your chocolate raspberry crumb bars will slice and how professional the finished layers look when cut. Using the flat bottom of a measuring cup or drinking glass to press the dough creates more uniform pressure than fingertips alone can achieve. Start in the center and work outward toward the edges, pressing firmly enough that the dough compacts into a solid layer but not so hard that it becomes dense and tough. Check the corners carefully since dough tends to thin out there, and add small pinches from thicker areas if needed.
Pairing Ideas Presented
These chocolate raspberry crumb bars taste wonderful alongside a cup of strong coffee or espresso, where the bitter notes complement the chocolate and balance the sweetness beautifully. A glass of cold milk remains the timeless pairing that kids and adults alike enjoy with rich, chocolatey baked goods. For special occasions, a scoop of vanilla ice cream alongside a slightly warmed bar creates an elegant plated dessert worthy of any dinner party. Fresh raspberries scattered around the bars on your serving plate add color and reinforce the fruity theme.
Creative Twists Explored
Swapping raspberry preserves for strawberry or blackberry creates a different fruit dimension while maintaining the essential tart-sweet contrast against the chocolate. Adding a thin layer of peanut butter between the crust and chocolate filling transforms these into a chocolate peanut butter raspberry creation that peanut butter lovers will devour. Using white chocolate chips on top instead of semi-sweet creates visual contrast and a sweeter, creamier chocolate element on the surface. Sprinkling flaky sea salt over the finished bars before they cool adds a trendy, sophisticated touch that enhances all the flavors.
Storing Bars Properly
Your finished chocolate raspberry crumb bars keep beautifully at room temperature for up to four days when stored in an airtight container with parchment paper between layers to prevent sticking. The butter-rich crust and chocolate filling maintain their textures well at room temperature, making these ideal for cookie trays and gift boxes that won't be refrigerated. For extended freshness up to one week, store the bars in an airtight container in the refrigerator, though let them come to room temperature for about fifteen minutes before serving for the best texture. The chocolate filling firms up significantly when cold, which some people actually prefer for a more candy-like eating experience.
Freezing Instructions Provided
These chocolate raspberry crumb bars freeze exceptionally well for up to three months, making them perfect candidates for advance preparation before busy holidays or events. Wrap individual bars tightly in plastic wrap to prevent freezer burn and preserve freshness, then place the wrapped bars in a freezer-safe container or bag for extra protection. Thaw frozen bars at room temperature for about thirty minutes before serving, or transfer them to the refrigerator overnight for gradual, even thawing. The layers maintain their distinct textures beautifully through the freezing process when properly wrapped and stored.
 Pin it
These chocolate raspberry crumb bars have earned a permanent place in my dessert rotation because they satisfy that craving for something deeply chocolatey while the raspberry keeps things interesting and prevents dessert fatigue from setting in. The recipe feels effortless compared to the stunning, multi-layered result it produces, which makes it perfect for occasions when you want impressive results without spending your entire afternoon in the kitchen. I've given these bars as gifts, served them at dinner parties, tucked them into lunchboxes, and kept them on my counter for afternoon snacking, and they perform beautifully in every situation. The combination of chocolate and raspberry is timeless for good reason, and wrapping those flavors in a buttery, crumbly, nutty package creates something that reminds people why homemade treats will always be worth the small effort they require.
Frequently Asked Questions
- → Can I use strawberry or other preserves instead of raspberry?
- Yes! Any seedless fruit preserves work great. Strawberry, apricot, or cherry would all be delicious. Just make sure to use seedless so the texture stays smooth.
- → Do I have to use nuts in the crumble?
- No, you can skip the nuts if you have allergies or just don't like them. The crumble will still be tasty without them, just not quite as crunchy.
- → Can I use milk chocolate instead of bittersweet?
- You can, but the bars will be sweeter. Bittersweet chocolate balances the sweetness of the condensed milk and raspberry preserves nicely.
- → Why do I need to line the pan with parchment paper?
- The parchment paper makes it really easy to lift the whole batch out of the pan for clean cutting. You can skip it, but the bars might be harder to remove neatly.
- → How do I know when the bars are done baking?
- The crumb topping should be set and golden brown, and the chocolate layer should look set rather than jiggly. The total bake time is about 35 minutes (10 for the crust, 25 for the assembled bars).
- → Can I make these in a different sized pan?
- A 9x13 inch pan is best for the right thickness. If you use a smaller pan, the bars will be thicker and need longer baking time. A larger pan will make thinner bars.