
 Pin it
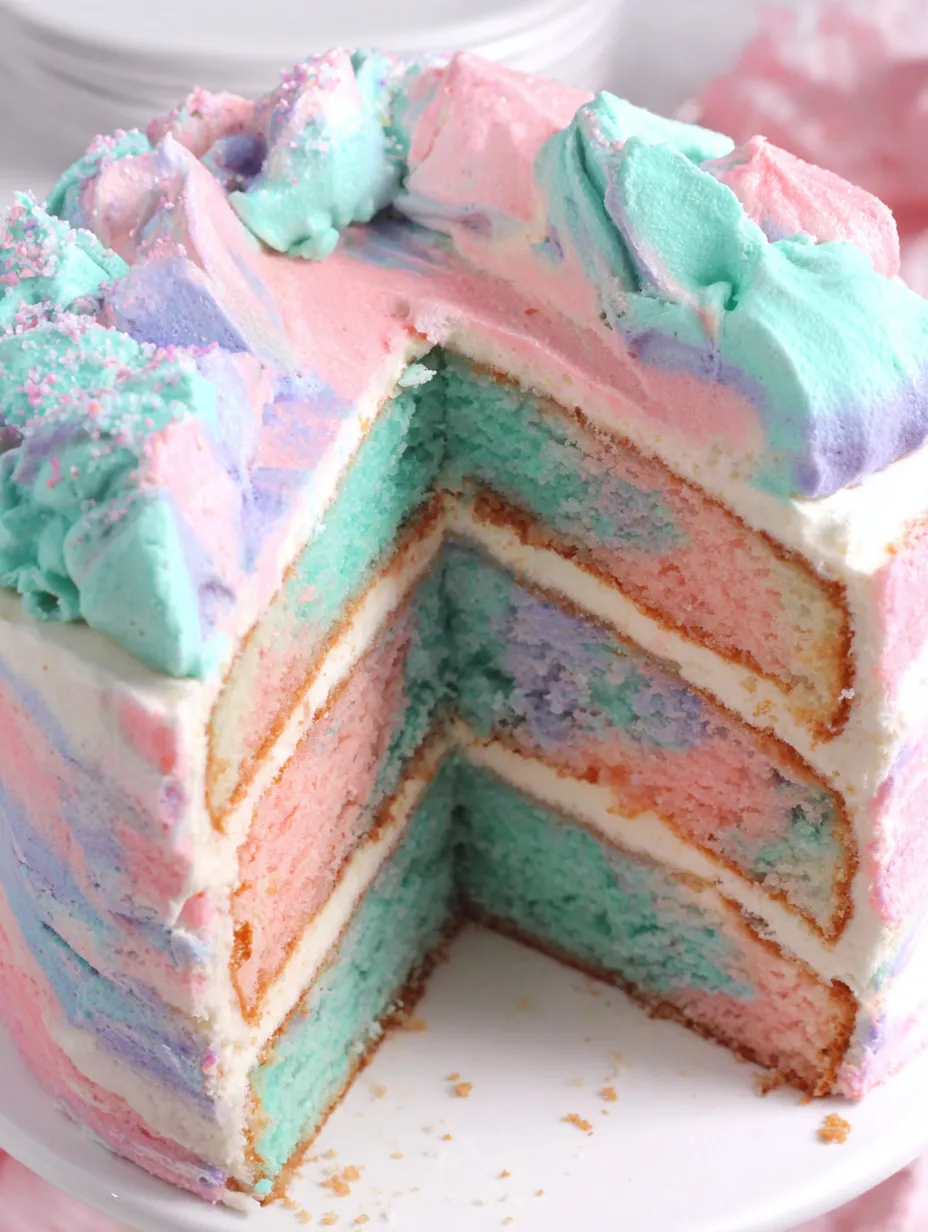
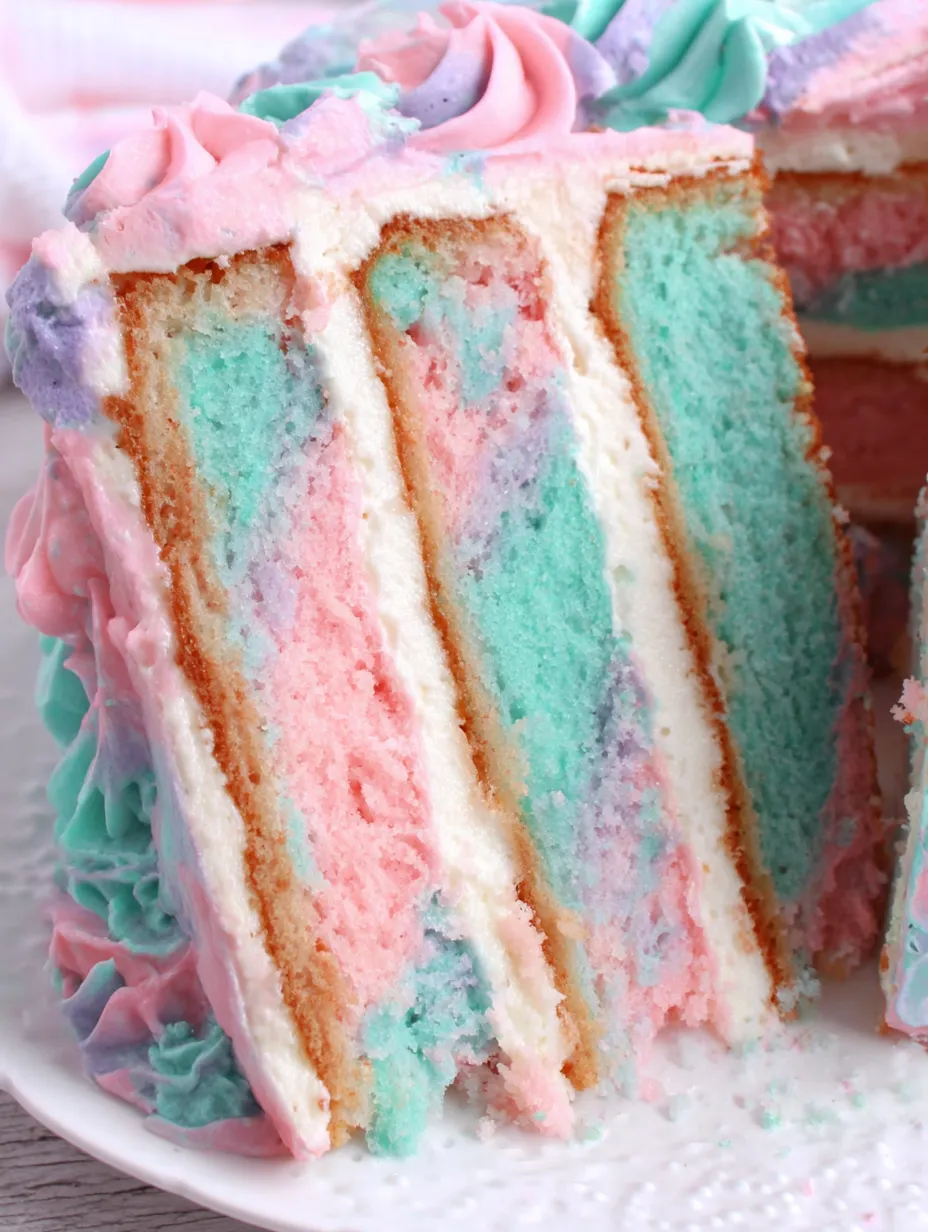
Making a cake that tastes like actual cotton candy seemed impossible until I found this recipe. You use cotton candy flavoring in both the cake layers and the buttercream frosting, creating this nostalgic carnival flavor that takes you straight back to being a kid at the county fair. The cake itself is incredibly light and fluffy, tinted in soft pastels that swirl together when you bake them, and the frosting has this dreamy watercolor effect that looks way more complicated than it actually is. I made this for my niece's eighth birthday party after she specifically requested "something that tastes like the pink cotton candy from the fair," and when we cut into it and she saw those swirled colors inside, she literally gasped and said it was the prettiest cake she'd ever seen. Every single kid at that party ate their entire slice and most came back asking for seconds, which never happens with children and cake.
My best friend's daughter is one of those picky eaters who claims she doesn't like cake and usually just picks at the frosting. When I brought this to her fifth birthday party, she ate an entire slice including all the cake part and then asked her mom if they could have cotton candy cake for every birthday from now on. Her mom texted me later saying it was the first time her daughter had voluntarily eaten cake in like two years. Now I make this for their family celebrations constantly, and the daughter gets genuinely excited every time she sees it appear.
What Goes Into It
- Cake flour: Sifted cake flour creates that incredibly tender, fluffy texture.
- Baking powder and baking soda: Both leaveners working together help the cake rise properly and stay light.
- Granulated sugar: Sweetens the cake while helping create that tender crumb texture.
- Unsalted butter at room temperature: Needs to be soft for creaming properly with the sugar.
- Egg whites: Keep the cake lighter in both texture and color.
- Vegetable oil: Helps keep the cake moist for days after baking.
- Cotton candy flavoring: This special flavoring is what makes the cake actually taste like cotton candy (Amoretti brand recommended).
- Full-fat buttermilk: The acidity tenderizes the cake and reacts with the baking soda for rising.
- Food coloring: Gel colors work better than liquid because they won't thin out your batter.
- Unsalted butter for frosting: Two full cups create that rich, creamy buttercream base.
- Powdered sugar: Seven cups gives you enough frosting to fill and cover the layers properly.
- Whole milk: Room temperature milk thins the buttercream slightly for easier spreading.
- Real cotton candy: The fluffy spun sugar you pile on top right before serving adds visual drama.
 Pin it
Creating This Cake
- Getting your oven ready:
- Turn your oven to 350 degrees. Spray the sides of three 6-inch cake pans (or two 8-inch pans) with baking spray and line the bottoms with parchment paper circles.
- Mixing dry ingredients:
- In a medium bowl, whisk together sifted cake flour, baking powder, baking soda, and salt. Set aside.
- Creaming butter and sugar:
- Beat room-temperature butter alone for 2 minutes. Add all the granulated sugar and beat for another 2 minutes until light and fluffy. Scrape down the bowl. Add egg whites one at a time on low speed. Pour in vegetable oil and cotton candy flavoring, then beat on high for 1 full minute.
- Combining everything together:
- Turn mixer off, dump in all the flour mixture. Mix on low speed just until you can't see dry flour anymore (do not overmix). Slowly pour in buttermilk while mixing on low for about 30 seconds until batter is uniform and smooth.
- Creating swirled colors:
- Divide batter equally into two separate bowls. Add one drop of pink gel food coloring to the first bowl. Add one small drop of blue gel food coloring to the second bowl. Whisk each color until uniform.
- Filling the pans:
- Alternate random scoops of pink and blue batter into each pan. Do not try to swirl or mix the colors—they will marble as they bake. Continue until all batter is divided among your pans.
- Baking the layers:
- Bake for 28 to 32 minutes (check at 28 mins). Cakes are done when they spring back to the touch and a toothpick comes out clean. Cool in pans for 5 minutes, then turn out onto a wire rack, peel off parchment, and cool completely (at least an hour).
- Making cotton candy buttercream:
- Beat room-temperature butter on medium-high speed for about 7 minutes until almost white and very creamy. Gradually add powdered sugar on low speed, then pour in milk, cotton candy flavoring, and salt. Mix until smooth. Scoop out about 1 cup of plain pink buttercream for the watercolor base.
- Assembling the layers:
- Level the cooled layers if needed. Stack the layers, filling each with a layer of cotton candy buttercream. Cover the entire cake with a thin layer of buttercream (crumb coat). Chill for at least 30 minutes.
- Creating watercolor effect:
- Divide the reserved white buttercream into two small bowls, coloring one purple and one blue. Scoop random patches of the pink, blue, and purple buttercreams onto the chilled cake. Use an offset spatula to spread them together in sweeping motions, blending the edges for a watercolor look. Chill for another 20 minutes.
- Final decorating touches:
- Pipe decorative swirls or rosettes around the top edge using the remaining buttercream. Pile a generous amount of real cotton candy on top immediately before serving.
The first time I made this, I didn't understand why the recipe insisted on adding pink coloring when the batter already looked pink. I skipped it thinking I was being smart and saving a step. When the cakes came out of the oven, the pink color had completely disappeared and only the blue portions stayed colored. My cakes looked lopsided and weird with blue swirls on white instead of the pretty pink and blue marble effect I wanted. Now I always add that pink coloring even though it seems redundant, and the cakes come out with beautiful pastel colors intact.
Presenting This Dessert
Slice this cake with a sharp knife that you've dipped in hot water and wiped dry between cuts to get clean slices that show off those pretty swirled layers inside. Serve pieces on dessert plates at birthday parties, baby showers, or any celebration where you want something whimsical and fun. The flavor appeals to both kids and adults. It works beautifully as the centerpiece dessert at carnival-themed parties or events with pastel color schemes. Pair slices with cold milk or hot tea.
Creative Variations
- Make this in different colors using other food colorings (yellow/green for spring, purple/teal for mermaid, etc.).
- Use vanilla extract instead of cotton candy flavoring for the same texture but a traditional cake flavor.
- Add sprinkles to the batter for a funfetti-style cake with cotton candy flavor.
- Make cupcakes instead of a layer cake.
- Add a teaspoon of cinnamon to the batter for a warmer flavor.
- Top with other carnival-themed decorations like popcorn or mini donuts instead of cotton candy.
Storage and Freshness
- Store this cake covered at room temperature for up to 3 days; it stays moist thanks to the oil.
- You can refrigerate it if your kitchen is hot, but bring it back to room temperature before serving for the best texture.
- Cake layers can be made ahead, wrapped tightly, and stored at room temperature for up to 2 days, or frozen for up to 2 months.
- Buttercream can be made up to 2 weeks ahead, refrigerated, and re-whipped before use.
- Never add the cotton candy topping until right before serving.
 Pin it
I've made this cotton candy cake dozens of times now for various celebrations, and it never fails to get an enthusiastic reaction when people see it and taste it. There's something about the combination of nostalgic carnival flavor, pretty pastel colors, and that dramatic cotton candy topping that just makes people happy. The flavor is spot-on cotton candy without tasting artificial or chemical, which is the hardest thing to achieve with novelty flavored cakes. The texture is incredibly light and moist, staying fresh for days without drying out or getting stale. And despite looking really impressive and complicated, it's actually not that hard to make if you just follow the steps and don't overthink the decorating. This has become one of my signature celebration cakes, the one people request specifically when they're planning parties.
Frequently Asked Questions
- → Where can I find cotton candy flavoring?
- You can find cotton candy flavoring at baking supply stores, craft stores like Michael's, or online. The recipe calls for a specific brand, but any cotton candy extract or flavoring should work.
- → Can I make this without the cotton candy flavoring?
- The flavoring is what makes this taste like cotton candy, so it's pretty important. But if you can't find it, you could use vanilla extract and just enjoy it as a pretty marbled cake.
- → Why does the pink color bake off?
- Some food colorings, especially natural ones, fade during baking. That's why you need to add pink coloring to both the batter and one bowl, even though the batter already looks pink.
- → How do I get the watercolor effect?
- Use three colors of buttercream (pink, blue, and purple) and spread them on in a random, blended pattern. Don't over-smooth - you want to see the different color streaks.
- → Can I make this cake ahead of time?
- Yes! Bake the layers ahead and freeze them, or make the whole frosted cake a day early. Just don't add the cotton candy topping until right before serving.
- → What size should I make - 6-inch or 8-inch?
- Three 6-inch layers make a tall, dramatic cake. Two 8-inch layers are easier and more traditional. Both work great - just depends on the look you want.