
 Pin it
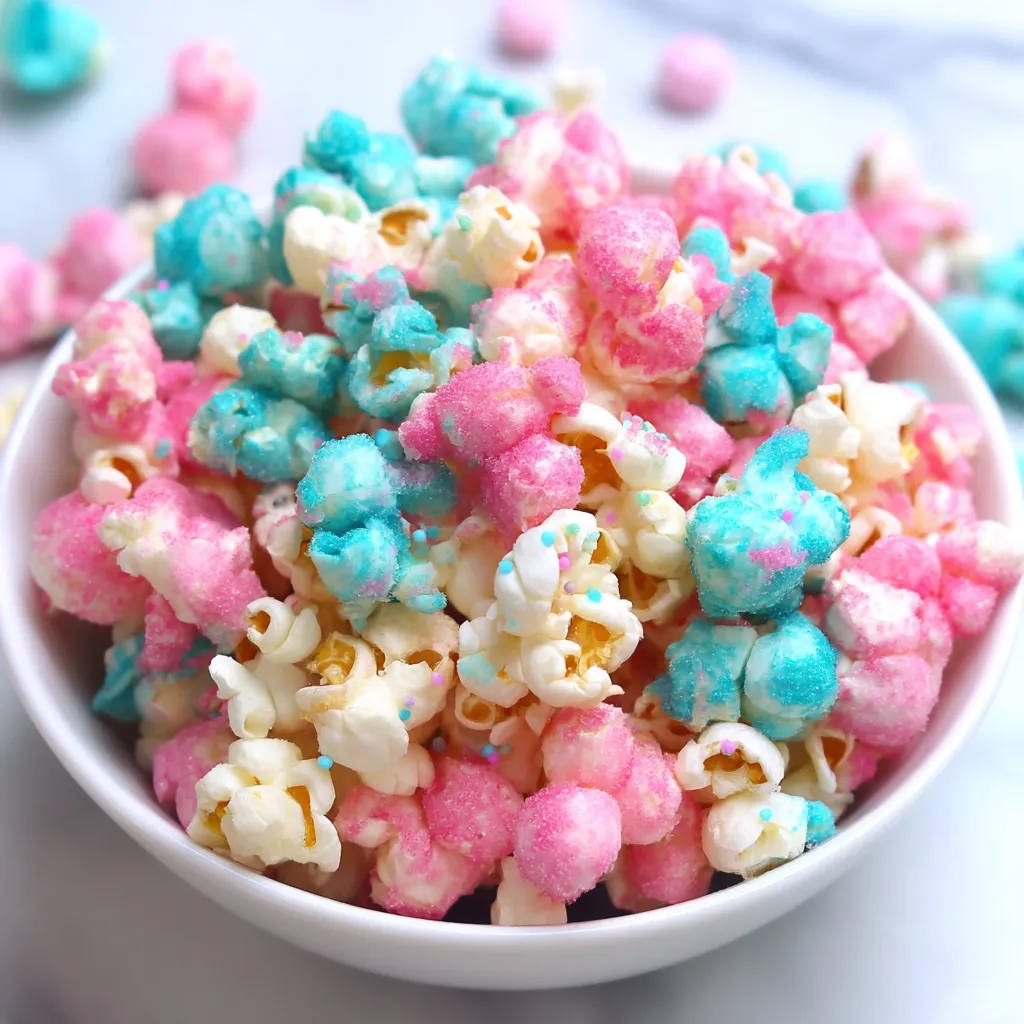
This is my go to treat when I need something that makes people say "wow" without having to slave over a complicated recipe. I came up with it for my niece's birthday party last year when she requested a carnival theme, and it ended up being the hit of the party. Kids were grabbing handfuls while adults tried to sneak some without being caught. The combination of sweet candy coating, real cotton candy pieces, and the satisfying crunch of popcorn creates a snack that's both nostalgic and totally addictive.
Last summer I made this for a neighborhood block party and put it in little paper cones to mimic fair food. Three different moms texted me the next day asking for the recipe. When something disappears that fast at a potluck with dozens of options, you know you've hit on something special!
Fun Ingredients
- Candy Melts: Creates that sweet coating that hardens perfectly—white or vanilla works best as the base color
- Real Cotton Candy: The secret ingredient that makes this unique—those fluffy pieces add authentic flavor and fun texture
- Colorful Sprinkles: Brings festive pops of color throughout—jimmies or nonpareils both work great
- Colored Candy Melts: Those pink and blue drizzles add carnival vibes—the contrast against the white base is what makes it look so professional
- Plain Popcorn: The crunchy foundation that balances the sweetness—air popped or unflavored microwave both work well
I discovered through trial and error that adding the cotton candy pieces after coating the popcorn is crucial. My first attempt involved mixing cotton candy directly with the melted candy coating, which made it dissolve completely. This way, you get those distinct pieces of cotton candy throughout the mix, creating little pockets of melt in your mouth sweetness.
 Pin it
Step-by-Step Instructions
- Base Preparation
- Starting with properly popped corn ensures no unpopped kernels ruin the experience later. Dividing the popcorn into portions helps manage the different coatings without creating a sticky mess. Working with fresh popcorn prevents it from becoming stale or chewy in the final mix.
- White Coating Magic
- Melting the candy coating according to package directions prevents scorching or seizing. That quick, thorough stirring ensures even coverage without breaking too many popcorn pieces. The large bowl gives you room to fold and toss without creating a sugary explosion all over your kitchen.
- Cotton Candy Integration
- Adding those torn cotton candy pieces gently preserves their fluffy texture. Distributing them throughout creates bursts of flavor in random bites. The candy coating helps the cotton candy adhere to the popcorn without immediately dissolving, though some melting is inevitable and adds to the flavor.
- Cooling Configuration
- Spreading the mixture on a lined baking sheet allows proper setting without clumping. Adding sprinkles while the coating is still soft ensures they stick properly. That brief cooling time creates the perfect texture—firm enough to handle but not too hard to eat.
- Color Creation
- Melting the pink and blue candy melts separately maintains their vibrant colors. Coating separate batches of popcorn creates those distinct colored pieces that make the final mix so visually appealing. The smaller portions ensure complete coverage with the colored coating.
- Final Mixing
- Combining all three colors creates that carnival inspired look. The gentle tossing prevents breaking the coated popcorn while ensuring even distribution of colors. This final mix should be done after everything has cooled enough to handle but before it becomes too brittle.
My first attempt at this was way too sweet because I used caramel popcorn as the base instead of plain. The combination of caramel plus candy coating was sugar overload. Using plain popcorn creates the perfect balance of sweetness and satisfying crunch. Sometimes simplifying ingredients actually improves the final result!
Serving Suggestions
This festive treat adapts to multiple presentation styles. For birthday parties, serve in colorful paper cones or clear cellophane bags tied with ribbon. Create a carnival snack bar by pairing with other fair favorites like chocolate dipped pretzel rods and caramel apples. For movie nights, fill individual popcorn boxes for an elevated cinema experience. This popcorn also makes wonderful gifts—pack in mason jars with colorful lids and handwritten tags for teachers, neighbors, or party favors.
Creative Variations
Transform this basic recipe with simple twists that create entirely new experiences. Try crushed freeze dried strawberries or blueberries mixed in for natural fruit flavor and color. Add a teaspoon of vanilla to the white candy coating for a richer flavor profile. For a unicorn version, use rainbow sprinkles and pastel colored candy melts. During holidays, adapt the colors to match the season—orange and black for Halloween, red and green for Christmas, or team colors for game day celebrations.
Storage Smarts
This popcorn keeps beautifully when stored properly. Place in airtight containers or ziplock bags with as much air removed as possible. It stays fresh at room temperature for up to a week, though the cotton candy pieces will gradually become less distinct. For gifting, portion into cellophane bags and seal tightly—the candy coating creates a barrier that helps maintain freshness longer than regular popcorn. Avoid refrigeration, as it can make the coating sticky or soggy.
 Pin it
I've been making versions of this carnival popcorn for about three years now, gradually perfecting the proportions and technique. What started as a birthday party experiment has become one of my most requested treats for gatherings and gifts. There's something magical about watching people's faces light up when they see those colorful swirls and realize there's actual cotton candy mixed in—it instantly transports them back to childhood memories of fairs and carnivals, which is exactly what good party food should do!
Frequently Asked Questions
- → Where can I find cotton candy for this recipe?
- You can purchase pre-packaged cotton candy at most grocery stores, candy shops, or party supply stores. Many big box stores also carry it in their party or candy sections. If you can't find any, you can substitute with cotton candy flavoring oil and extra sprinkles.
- → Can I use microwave popcorn for this recipe?
- Yes, but choose plain or lightly salted microwave popcorn (not buttered varieties). Make sure to remove any unpopped kernels before adding the candy coating. Air-popped or stovetop popcorn works best for a cleaner flavor that won't compete with the sweet coating.
- → Why did my popcorn become soggy?
- Cotton candy is very sensitive to moisture and humidity. If your popcorn became soggy, it might be due to high humidity in your kitchen or the cotton candy absorbing moisture. Make sure to store in an airtight container immediately and work in a cool, dry environment.
- → How far in advance can I make this for a party?
- You can make this popcorn 1-2 days ahead of time. Store it in an airtight container away from heat and humidity. For the freshest taste and to preserve the cotton candy pieces, making it the day before your event is ideal.
- → What can I use instead of candy melts?
- White chocolate chips or almond bark can substitute for the vanilla candy melts. For the colored portions, you can use white chocolate with a few drops of oil-based food coloring (water-based coloring will cause chocolate to seize).
- → Can I make this recipe without the cotton candy pieces?
- Yes! If you want the cotton candy flavor without actual cotton candy, use cotton candy flavoring oil (about 1/4 teaspoon) in the white candy coating, and increase the colorful sprinkles to 1/3 cup for extra visual appeal.