
 Pin it
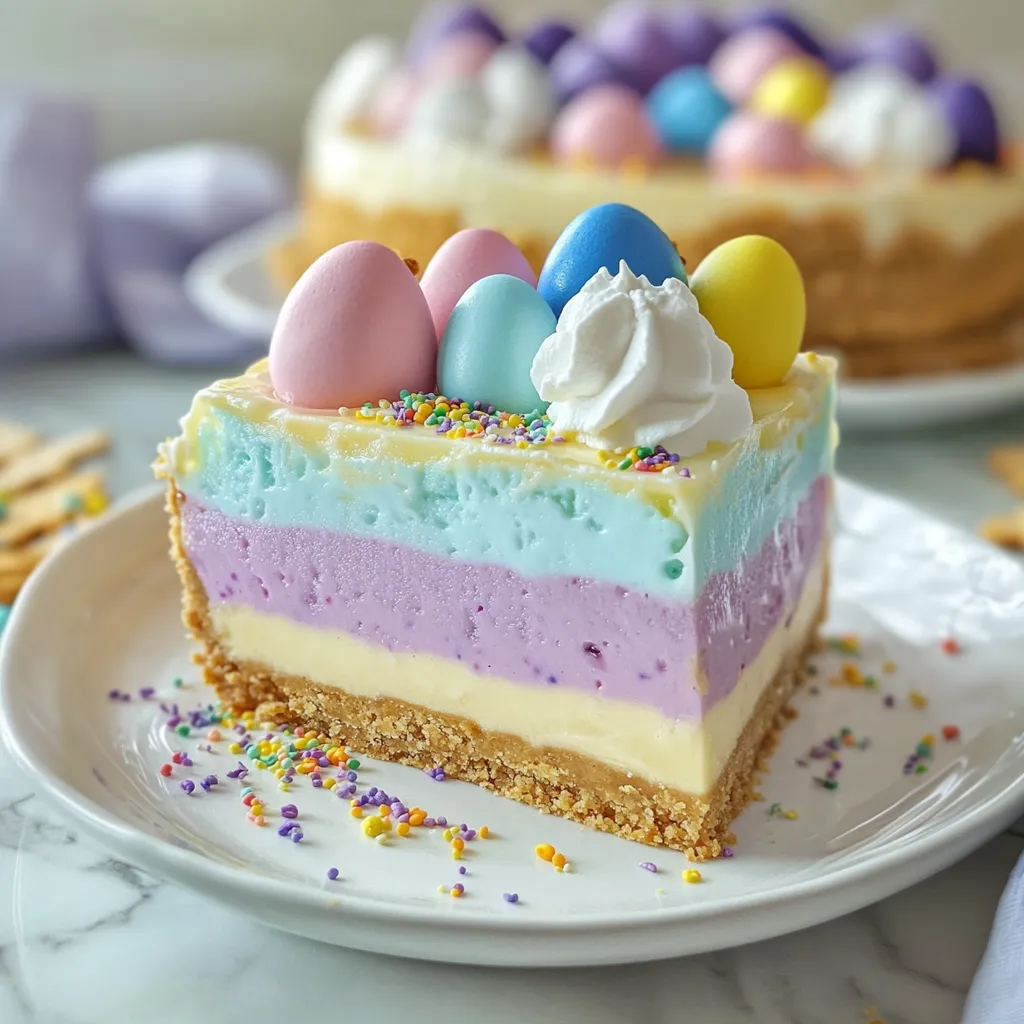
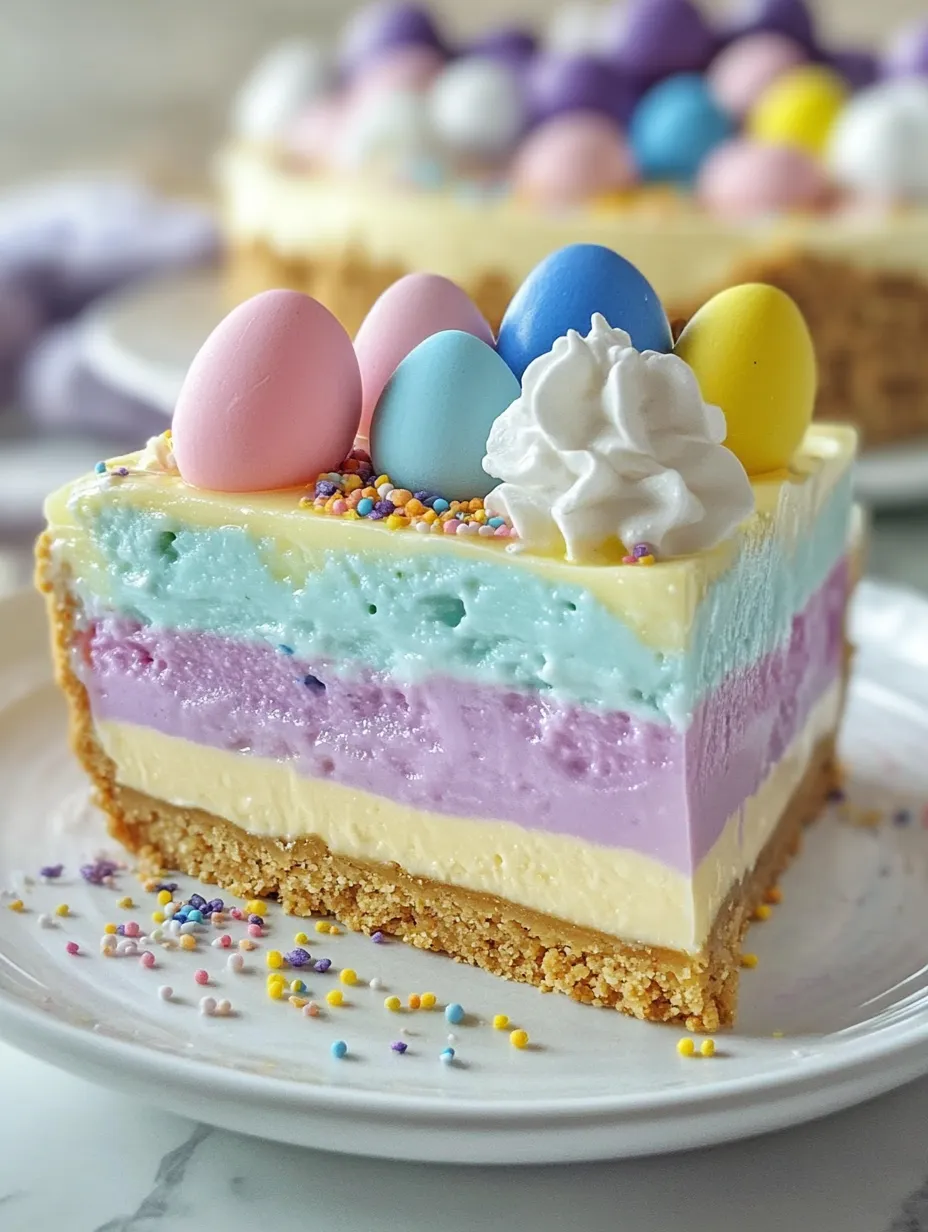
I stumbled onto this Easter Jell-O pie recipe last spring when I needed something fun and colorful for a family gathering. The combination of creamy, pastel-colored layers creates this showstopping dessert that looks like you spent hours making it, though it's actually quite simple. It's become my go-to for Easter celebrations and spring parties when I want something that feels festive and nostalgic.
My niece took one look at this pie last Easter and her eyes went wide with excitement. "It's like magic!" she declared before asking for the biggest slice. There's something about those vibrant, jewel-toned layers that appeals to kids and adults alike.
Simple Ingredients
- Flavored Jell-O: The three colors create that beautiful layered effect
- Cream cheese: Adds richness and transforms the texture from jiggly to creamy
- Whipped topping: Lightens the mixture for a mousse-like consistency
- Graham cracker crust: Provides the perfect crunchy contrast to the soft filling
- Festive decorations: The sprinkles and candy eggs make it unmistakably Easter-themed
 Pin it
Pie Creation
- Layer Planning
- Starting with the lightest color (lemon) on the bottom ensures the most dramatic visual effect when sliced. This order - yellow, blue, then purple - creates that beautiful pastel rainbow effect that screams spring. I've tried different color combinations, but this particular progression seems to work best both visually and flavor-wise. The lemon provides a bright, tangy base that complements the sweeter berry flavors on top.
- Patience Between Layers
- Those 30-minute chilling times between layers are non-negotiable - they prevent the colors from bleeding together. I've learned the hard way that trying to rush this process leads to muddled layers rather than distinct ones. I set a timer on my phone to make sure I don't forget the next layer. The first time I made this, I got distracted and left one layer chilling for over an hour, which made the next layer harder to spread evenly. Now I try to time it just right - solid enough to support the next layer but not completely set.
- Cream Cheese Integration
- Make sure your cream cheese is truly softened for smooth incorporation - cold cream cheese will create lumps in your layers. I set mine out at least an hour before starting. When mixing with the Jell-O, I use a whisk and work quickly to prevent the mixture from starting to set before it's smooth. The cream cheese not only adds richness but also stabilizes the layers, making them easier to slice neatly. That precise 1/3 portion for each layer ensures consistency throughout the pie.
- Gentle Pouring Technique
- When adding a new layer over a set one, pour very slowly and gently, preferably over the back of a spoon. This breaks the fall of the liquid and prevents it from drilling a hole through your beautiful previous layer. I usually place my spoon just above the surface and pour the mixture slowly onto the spoon, letting it gently flow off the edges. Patience here makes all the difference between distinct, clean layers and a muddled mess.
- Decoration Timing
- Add the whipped cream topping and decorations right before serving for the freshest appearance. If you need to prepare ahead, the pie itself can be made a day in advance, but save the final decorative touches until just before presentation. I've found that candy eggs sometimes can bleed their colors if placed on whipped cream too far in advance. The sprinkles hold up better but still look freshest when added last minute.
- Slicing Strategy
- For the cleanest slices, dip your knife in hot water and wipe dry between cuts. This prevents the layers from dragging and keeps each slice looking picture-perfect. I also find that a thin-bladed knife works better than a thick one for preserving those beautiful layers. When serving, a pie server with a thin edge will slide under the graham cracker crust without crumbling it.
My grandmother, who normally prefers traditional desserts, took one bite of this pie and declared it "just like the one my mother used to make for Easter!" Sometimes the simplest recipes connect us with memories and traditions in the most unexpected ways.
Perfect Pairings
Serve this colorful pie after a spring brunch for a festive finale. For children's parties, it makes a showstopping centerpiece that kids love. During Easter dinner, it's a lighter alternative to heavier traditional desserts. My family enjoys it alongside a cup of coffee, with the bitter notes balancing the sweet, fruity flavors of the pie.
Creative Variations
Try different Jell-O flavors to create new color combinations - lime, orange, and strawberry make a bright citrus version. Use a chocolate graham cracker crust for a different flavor foundation. For a more sophisticated presentation, make individual servings in clear glasses or mason jars to showcase the layers. Last Easter, I experimented with adding finely grated lemon zest to the yellow layer and a few fresh blueberries to the blue layer, which added wonderful bursts of natural flavor.
 Pin it
I've made this Easter Jell-O pie for family gatherings, church potlucks, and children's parties, and it never fails to delight everyone who sees it. There's something magical about those colorful, creamy layers that brings a sense of joy and celebration to any spring table. My daughter has already asked if we can make this "rainbow pie" again for her birthday, even though it's nowhere near Easter. Sometimes the most memorable recipes are the ones that combine simple ingredients with a touch of whimsy to create something that looks far more complex than it actually is.
Frequently Asked Questions
- → Can I use Cool Whip instead of whipped cream?
- Yes! Cool Whip works perfectly in this recipe and is actually what many people use. You'll need about two 8-ounce containers to have enough for all layers.
- → Can I use a pre-made graham cracker crust?
- You can use a pre-made crust, but you'll need a deep-dish version since this recipe makes a taller pie with multiple layers. You might also need to reduce the filling amounts slightly.
- → How can I make this pie more vibrant for Easter?
- Add a few drops of food coloring to enhance the yellow and pink layers, which tend to be lighter. You could also decorate the top with Easter candies like jelly beans or mini chocolate eggs.
- → Can I use different Jello flavors?
- Absolutely! Choose any flavors that complement each other. Popular options include strawberry, lime, lemon, and berry blue for spring colors. Match the food coloring to your chosen flavors.
- → Why does my pie need to be chilled between layers?
- Chilling between layers helps set each color before adding the next. This creates distinct, clean layers rather than colors that blend together and prevents the layers from mixing.