
 Pin it
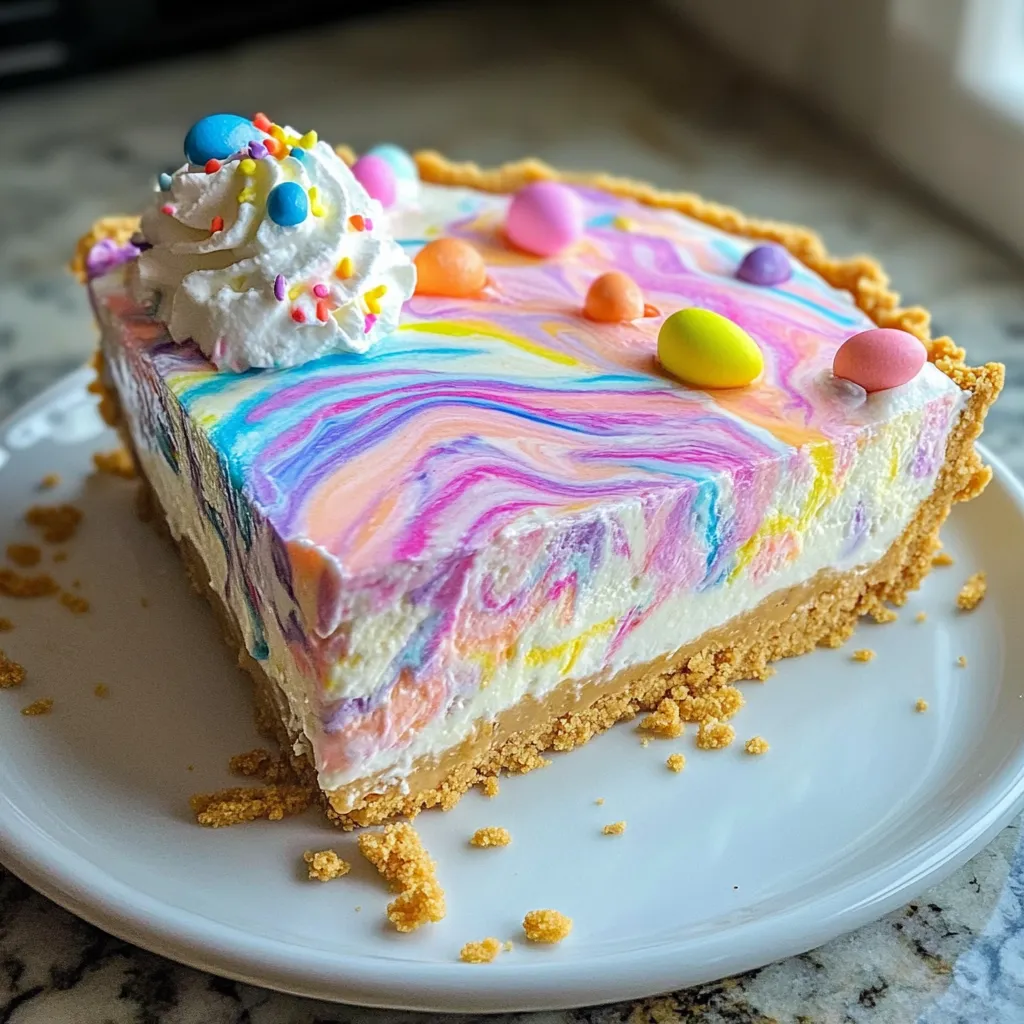
This Easter swirl pie combines creamy, sweet flavors with a stunning rainbow effect that steals the spotlight at any spring gathering. The buttery graham cracker crust supports a silky cream cheese filling swirled with pastel colors. I love how the beautiful marbled pattern makes it look like I spent hours in the kitchen, when it's actually quite simple to create. Plus, being completely no-bake means more time for Easter celebrations and less time watching the oven.
Last Easter, I brought this to my family gathering and my dessert-snob aunt asked for the recipe before finishing her slice. My niece was mesmerized by the colors and declared it looked "like an Easter egg you can eat!" That's when I knew this one was a keeper.
Perfect Parts
- Graham cracker crumbs: create a sweet, buttery base with just the right crunch
- Softened cream cheese: provides tangy richness that balances the sweetness
- Heavy whipping cream: gives the filling its cloud-like texture
- Powdered sugar: dissolves completely, avoiding any graininess
- Sweetened condensed milk: adds silky smoothness and distinctive flavor
I've found that a slightly thicker crust works best with this light filling. The real secret is properly softened cream cheese—I leave mine out for at least an hour before starting. Cold cream cheese always leaves those annoying lumps that no amount of mixing seems to fix.
 Pin it
Creation Method
- Crust foundation:
- Mix graham cracker crumbs, sugar, and melted butter until it resembles wet sand and holds together when pressed. Pour into your pie dish and, using a measuring cup, press firmly across the bottom and up the sides. The flat bottom creates an even layer and helps compact the crust so it won't crumble when sliced. Refrigerate while making the filling.
- Creamy blend:
- Beat the softened cream cheese until completely smooth, then add powdered sugar, vanilla extract, and sweetened condensed milk. Mix until well combined, scraping down the sides a few times to catch any cream cheese hiding in the corners. The mixture will be quite thick at this point, but we'll lighten it up next.
- Airy incorporation:
- In a separate bowl, whip the heavy cream until stiff peaks form. Using a rubber spatula, gently fold it into the cream cheese mixture. "Folding" means cutting through the center, scraping along the bottom, and bringing the mixture up and over. Rotate the bowl and repeat until combined but still fluffy. Take your time—aggressive mixing will deflate the air in the whipped cream.
- Color creation:
- Divide your filling among four small bowls. Add a few drops of gel food coloring to each, creating your favorite pastel shades. I usually go with pink, blue, yellow, and purple for that classic Easter look. Gel coloring works better than liquid because it doesn't thin out your filling. Start with just a drop or two—you can always add more!
- Artistic swirling:
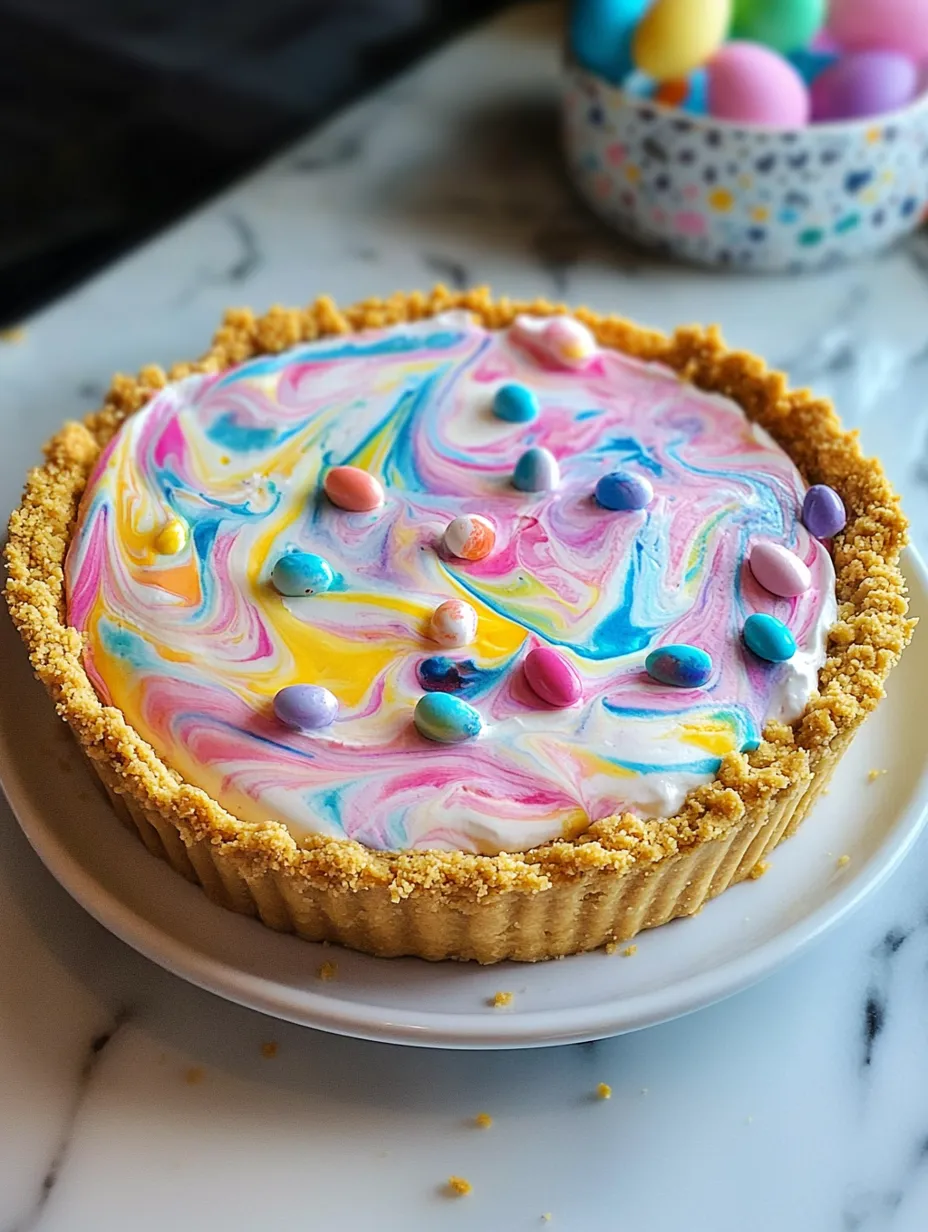
- Using a tablespoon, drop dollops of each colored filling randomly into the chilled crust, alternating colors as you go. Once you've used all the filling, take a wooden skewer or toothpick and lightly drag it through the dollops to create a marbled effect. The key word is "lightly"—just a few passes is enough. Overdoing it will blend the colors too much.
- Patience period:
- Cover loosely with plastic wrap, being careful not to let it touch the filling. Refrigerate for at least 4 hours, though overnight is better. This resting time allows the filling to firm up properly and the flavors to meld. The waiting is truly the hardest part, but it's necessary for the right texture.
- Festive finish:
- Just before serving, add whipped cream around the edge, then sprinkle with colorful Easter sprinkles. Arrange mini chocolate eggs or pastel candies on top. These decorations not only make the pie look festive but also hint at the colorful surprise waiting inside. For clean slices, dip your knife in hot water and wipe dry between cuts.
My first attempt was a disaster because I rushed the chilling time and tried to serve it after just an hour in the fridge. It looked beautiful but collapsed into a puddle when I cut into it! Now I always make it the day before. I've also learned that a light hand with the swirling creates the most striking patterns—my early versions looked muddy because I got carried away with the toothpick.
Serving Tips
Present this colorful pie on a white cake stand to make the pastel colors pop. Cut small slices—this pie is rich and a little goes a long way. I like to serve it well-chilled with fresh berries on the side to cut through the richness. Keep any leftovers in the refrigerator, covered loosely with plastic wrap.
Flavor Twists
Try adding lemon zest to the filling for a fresh citrusy note. For a cookies-and-cream version, fold crushed Oreos into the plain filling before adding colors. Add a hint of almond extract for a more complex flavor. My favorite variation includes a thin layer of lemon curd spread over the crust before adding the colored filling—the bright tartness works beautifully with the creamy sweetness.
 Pin it
Easy Solutions
If your crust crumbles when slicing, try freezing the pie for about 30 minutes before serving. For a make-ahead option, prepare the entire pie up to 2 days in advance, but add the decorations just before serving. If you don't have multiple mixing bowls, color your filling one batch at a time, transferring each colored portion to a separate container before making the next color.
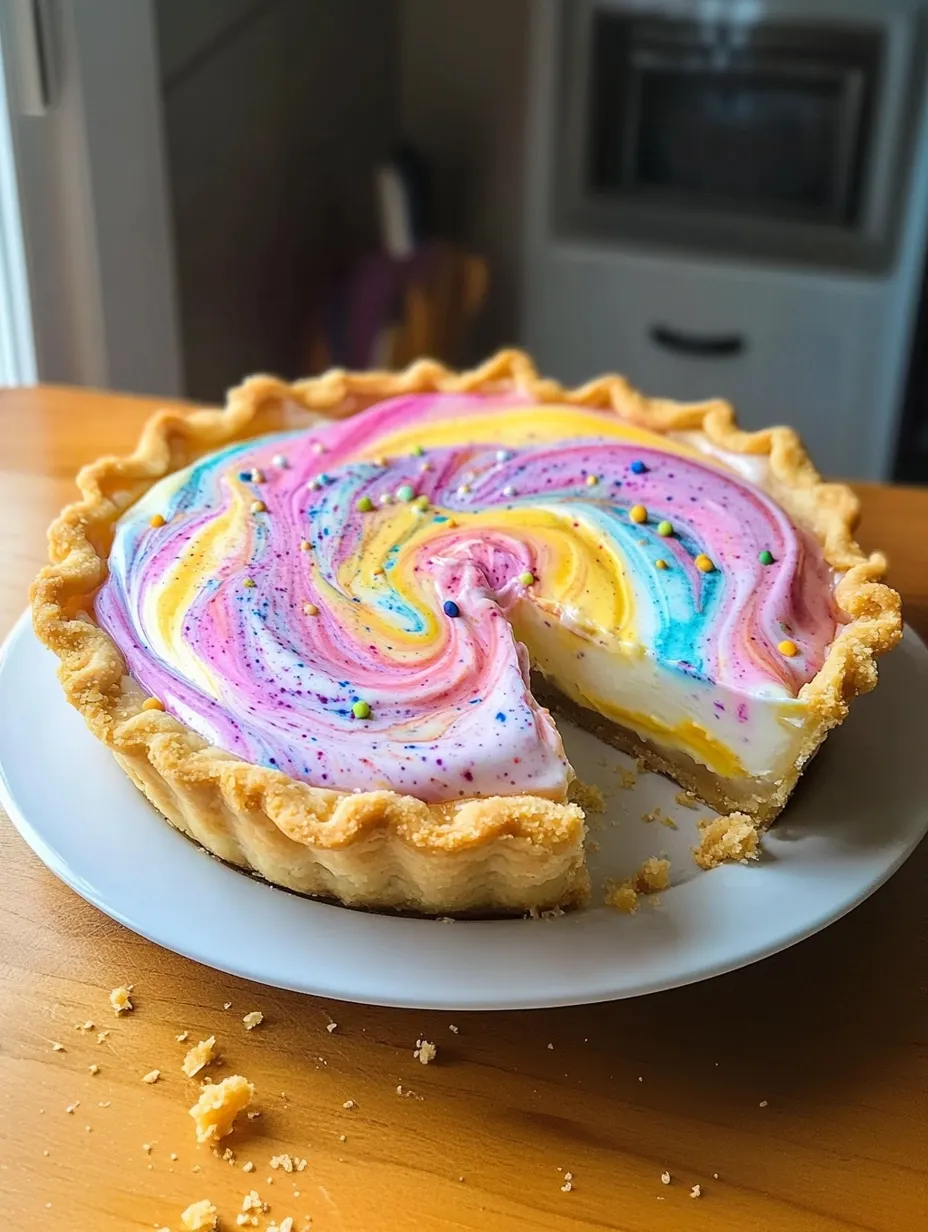
I've brought this Easter swirl pie to countless spring gatherings, and it always generates those "oohs" and "aahs" when I set it on the table. There's something magical about cutting into what looks like a simple cream pie and revealing that beautiful pastel swirl inside. Even though the recipe is straightforward, it never fails to impress guests who think you've performed some kind of pastry wizardry. The fact that it tastes as good as it looks—creamy, not too sweet, with that buttery crust—makes it my go-to dessert for Easter and all spring celebrations.
Frequently Asked Questions
- → Can I make this Easter Swirl Pie ahead of time?
- Yes! This pie is perfect for making ahead. You can prepare it 1-2 days before serving and keep it refrigerated. Add the whipped cream and decorative toppings just before serving for the freshest appearance.
- → What can I use instead of gel food coloring?
- Regular liquid food coloring will work, though you may need to use more drops to achieve pastel colors. Natural food coloring options like beet powder (pink), matcha (green), or freeze-dried fruit powders can also create lovely pastels.
- → Can I freeze this pie?
- Yes, this pie freezes well for up to 1 month. Freeze without the whipped cream topping and garnishes. Wrap tightly in plastic wrap and foil. Thaw overnight in the refrigerator before decorating and serving.
- → What substitutions can I make for dietary restrictions?
- For a gluten-free version, use gluten-free graham crackers or cookies for the crust. For a lighter option, you can use reduced-fat cream cheese and light whipped topping instead of heavy cream. Note that texture may vary slightly with substitutions.
- → How do I get the best swirl effect?
- For the best swirl, don't overmix the colors. Use a light hand with the skewer or toothpick, making just a few passes through the filling. Too much swirling will blend the colors too much and create a muddied effect rather than distinct swirls.