
 Pin it
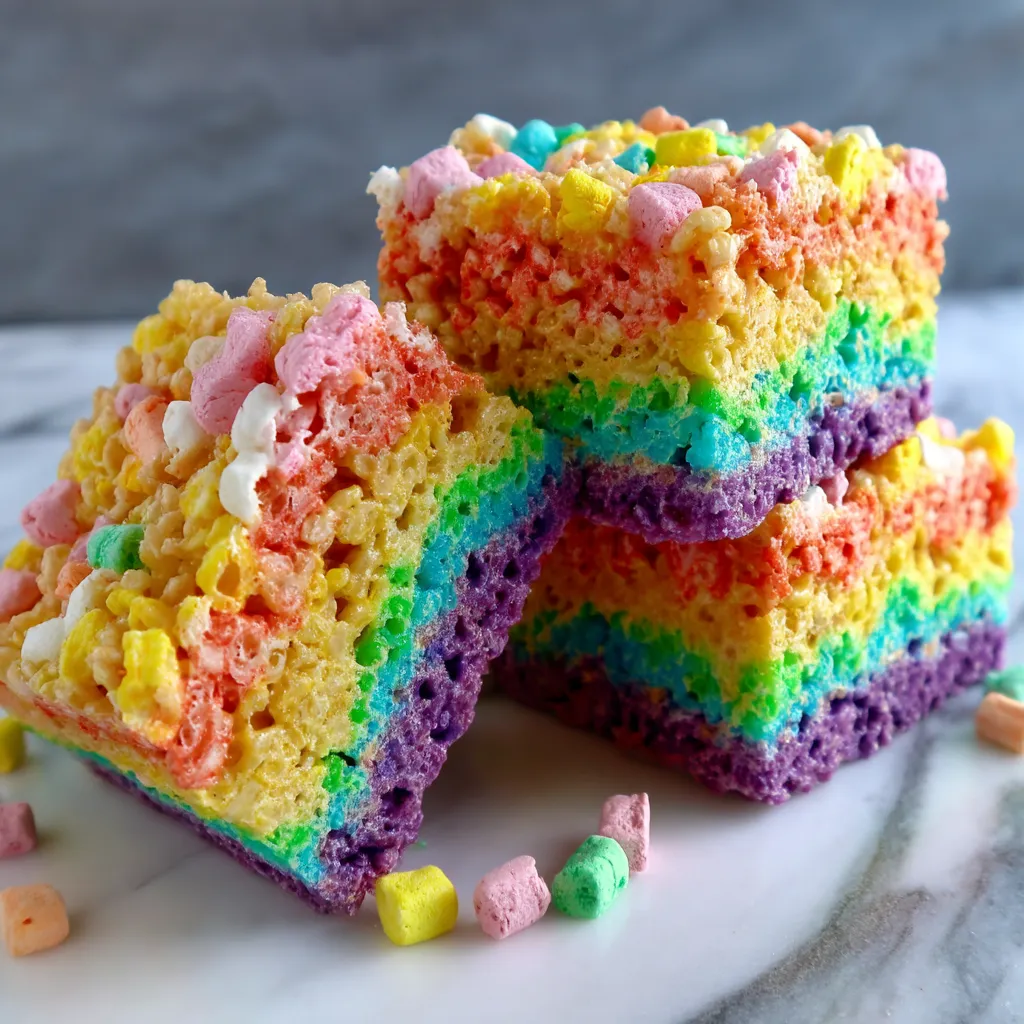
Nothing brings a smile to faces faster than these vibrant rainbow rice krispie treats. The familiar sweet, marshmallowy goodness gets a colorful upgrade that transforms a classic treat into something magical. Perfect for brightening up any occasion, these treats combine simple ingredients with a bit of patience to create something that looks impressively complex but remains wonderfully approachable.
My niece requested these for her birthday party last year, and watching the kids' faces light up when they saw the colorful layers was worth every minute spent carefully stacking them. Even the adults couldn't resist grabbing one, proving some treats truly are ageless in their appeal.
Ingredients
- Mini Marshmallows: Smaller varieties melt more evenly than regular sized—fresh bags work much better than stale ones hiding in your pantry
- Butter: Creates that rich, smooth texture that makes homemade treats superior to store bought—unsalted lets the sweet marshmallow flavor shine
- Rice Krispies Cereal: The classic choice that provides that signature light crunch—store brand versions work just as well as name brand
- Gel Food Coloring: Delivers vibrant color without adding excess liquid—liquid food coloring works in a pinch but may require more drops
- Wax Paper: The unsung hero that prevents sticking and makes removal from the pan effortless—parchment paper works as an alternative
I discovered the secret to truly vibrant layers was using gel food colors rather than the standard liquid drops. The concentrated color creates those eye catching hues without adding excess moisture that might make the treats soggy.
 Pin it
Step-by-Step Instructions
- Perfect Preparation
- Line your baking pan with wax paper extending up and over the sides to create handles for easy removal later. That extra spritz of cooking spray on top prevents any sticking. Using a square pan creates those perfect geometric slices that showcase all the colors when cut.
- Marshmallow Magic
- Melting the marshmallows and butter gradually in short microwave bursts prevents scorching and ensures smooth texture. Stirring between heating intervals distributes the heat evenly and helps you monitor the consistency. The mixture should be completely smooth with no visible marshmallow pieces remaining.
- Color Division
- Dividing the marshmallow mixture evenly between six bowls creates consistent layer thickness. Adding gel food coloring while the mixture is still warm allows it to incorporate more easily. Start with small amounts and add more as needed—it's easier to deepen color than to lighten it.
- Perfect Proportions
- The specified amount of cereal creates that ideal balance between marshmallow gooeyness and crispy texture. Folding in the cereal gently rather than stirring aggressively helps maintain the light, airy quality without compressing the cereal into dense layers.
- Layer Building
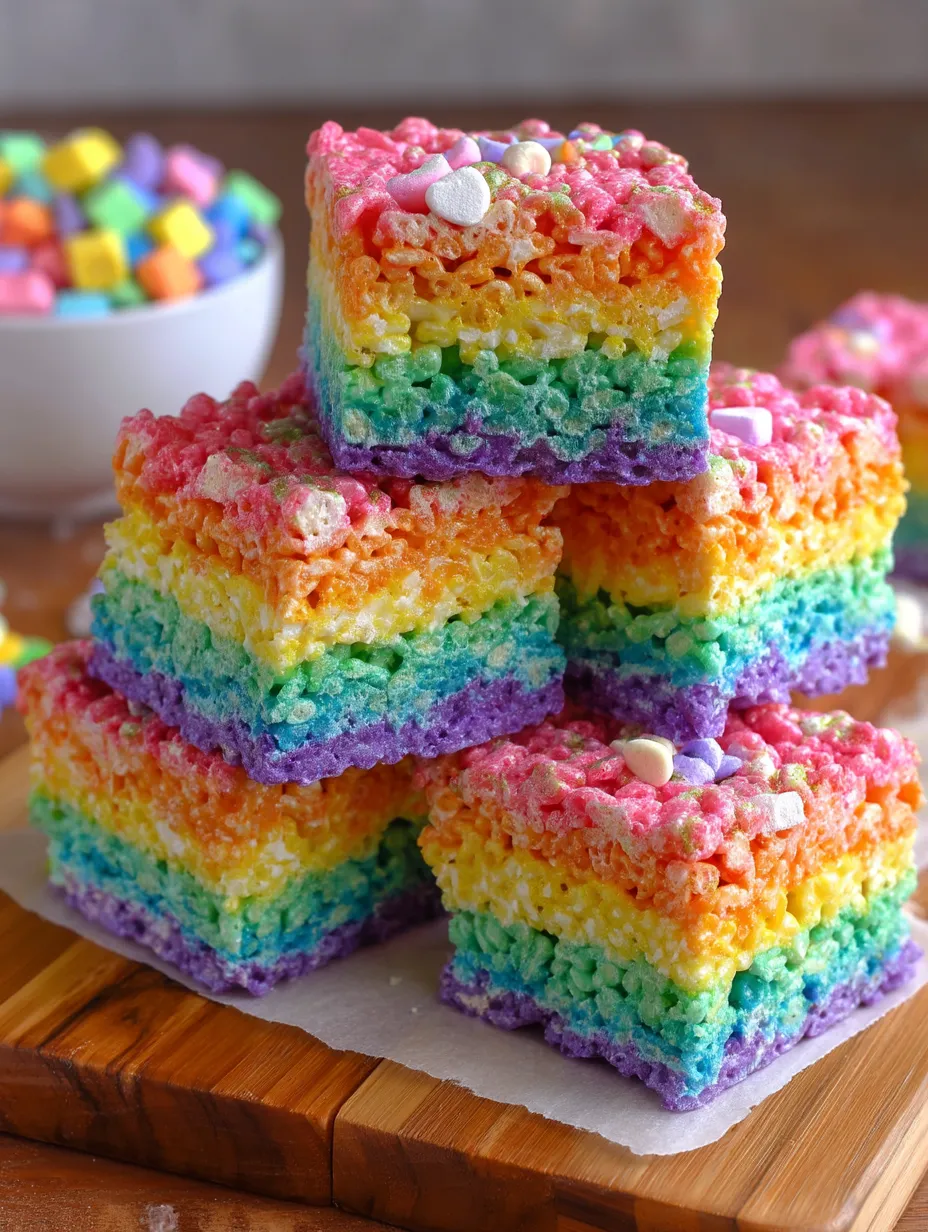
- Pressing each colored layer firmly but gently ensures good adhesion without compacting too much. Using a buttered spatula prevents sticking as you work. Starting with red at the bottom and working through the rainbow ROYGBV creates that classic rainbow effect when sliced.
- Cooling Period
- Allowing the treats to cool completely before cutting ensures clean slices that showcase the distinct layers. Rushing this step can result in messy cutting and layers that pull apart rather than staying neatly together. Patience here makes all the difference in the final presentation.
- Perfect Slicing
- Using the wax paper handles to remove the entire block keeps your rainbow intact. Trimming the edges creates that perfect rectangular presentation with clean color lines. A large sharp knife works best, cleaned between cuts for the neatest slices.
My first attempt at these turned into a rainbow blob because I tried rushing the process. Now I know that taking the time to carefully layer and allowing proper cooling creates those picture perfect treats that bring the "wow" factor. Sometimes kitchen patience really does pay off.
Serving Suggestions
These colorful treats need no accompaniment but can be elevated for special occasions. For birthday parties, stand them upright on a white platter for maximum color impact. At holiday gatherings, arrange in a curved rainbow pattern with small pots of chocolate coins at each end for a St. Patrick's Day theme. For unicorn parties, add a light white chocolate drizzle and sprinkle with edible glitter before it sets for magical sparkle.
Creative Variations
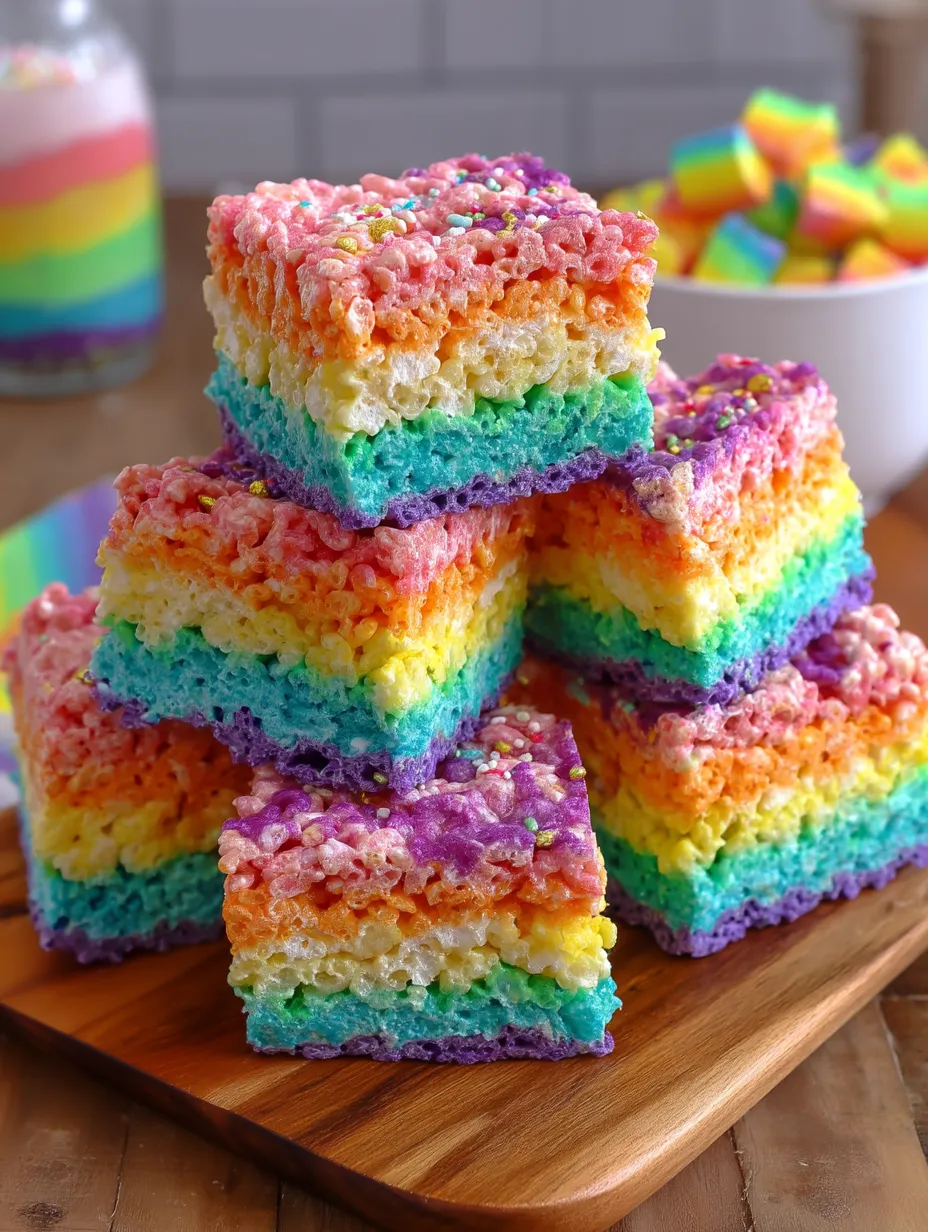
Transform this basic concept using different color schemes for various occasions. Red and green layers for Christmas, school colors for graduation parties, or pastels for baby showers create customized treats for any event. Add 1/2 teaspoon of extract to each color for flavored layers—vanilla, lemon, orange, lime, berry and grape extracts matching each color create a flavor rainbow experience. For an extra special touch, press mini white chocolate chips into the top purple layer while still warm for "clouds" at the top of your rainbow.
Storage Success
Keep these treats in an airtight container at room temperature for up to three days. Separating layers with wax paper prevents sticking and color transfer. These don't freeze well as the texture changes upon thawing, becoming harder rather than maintaining that perfect chew. For gifting, wrap individual pieces in clear cellophane tied with ribbon for a colorful treat package.
 Pin it
I've made these rainbow treats for countless parties, school functions, and family gatherings over the years. What began as a novelty has become one of my most requested contributions. There's something undeniably joy inducing about biting into what looks like a little piece of rainbow—no matter how old you are. The small extra effort to create those vibrant layers pays off tremendously in the delight they bring to any occasion.
Frequently Asked Questions
- → Can I use liquid food coloring instead of gel?
- While you can use liquid food coloring, gel colors are strongly recommended for this recipe. Liquid colors may require much more product to achieve vibrant rainbow colors, which can affect the flavor and add too much moisture to the mixture. Gel colors provide intense, true colors without altering the texture of your treats.
- → How far in advance can I make these rainbow treats?
- Rainbow Rice Krispie Treats can be made 1-2 days in advance. Store them in an airtight container at room temperature, with wax paper between layers if you need to stack them. For longer storage, you can freeze them for up to 6 weeks - just wrap individually in plastic wrap, then place in a freezer bag.
- → Why are my Rice Krispie treats hard instead of soft and chewy?
- Hard Rice Krispie treats usually result from one of two issues: either the marshmallow mixture was overheated (which breaks down the gelatin) or the cereal was pressed too firmly into the pan. Heat the marshmallows just until melted, and when layering, press gently but firmly enough to make the layers stick together.
- → Can I use different cereals for some or all of the layers?
- Absolutely! While traditional Rice Krispies work best because of their neutral color and light texture, you could experiment with Fruity Pebbles for additional color, Cocoa Krispies for a chocolate layer, or even Frosted Krispies for extra sweetness. Just keep the measurements the same.
- → Do I need to use all six rainbow colors?
- Not at all! You can customize the colors to match any theme or occasion. Use team colors for sports events, school colors for graduations, holiday-specific color schemes, or even ombré effects with varying shades of the same color. Just divide the marshmallow mixture accordingly based on how many colors you're using.