
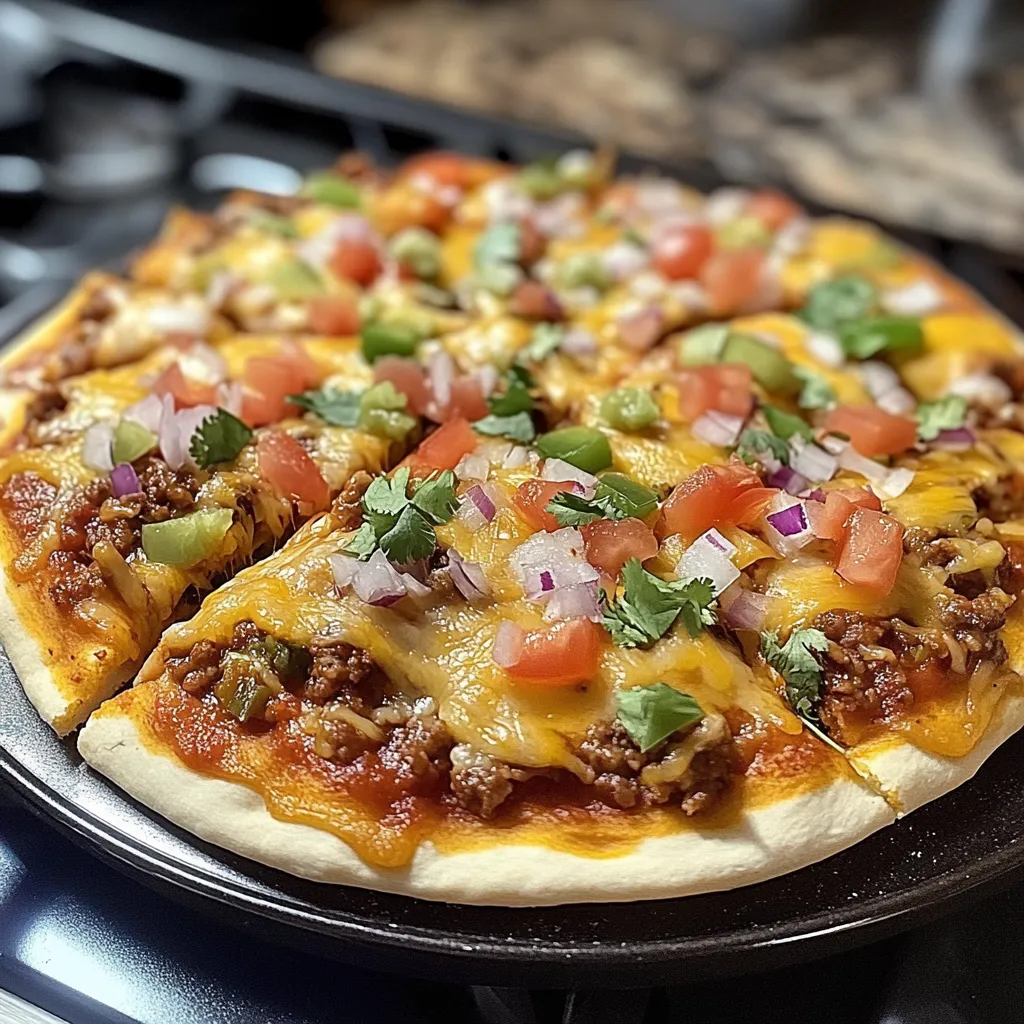
Homemade Mexican Pizza is built from the recorded ingredient list and ordered method below. Read each quantity as a working part of the recipe: keeping the listed ingredients measured, using the stated equipment, and following the sequence gives the clearest path to the intended texture and finish. This editorial guide preserves the original recipe facts while explaining the practical cues that help a home cook work carefully and confidently.
Homemade Mexican Pizza Ingredients
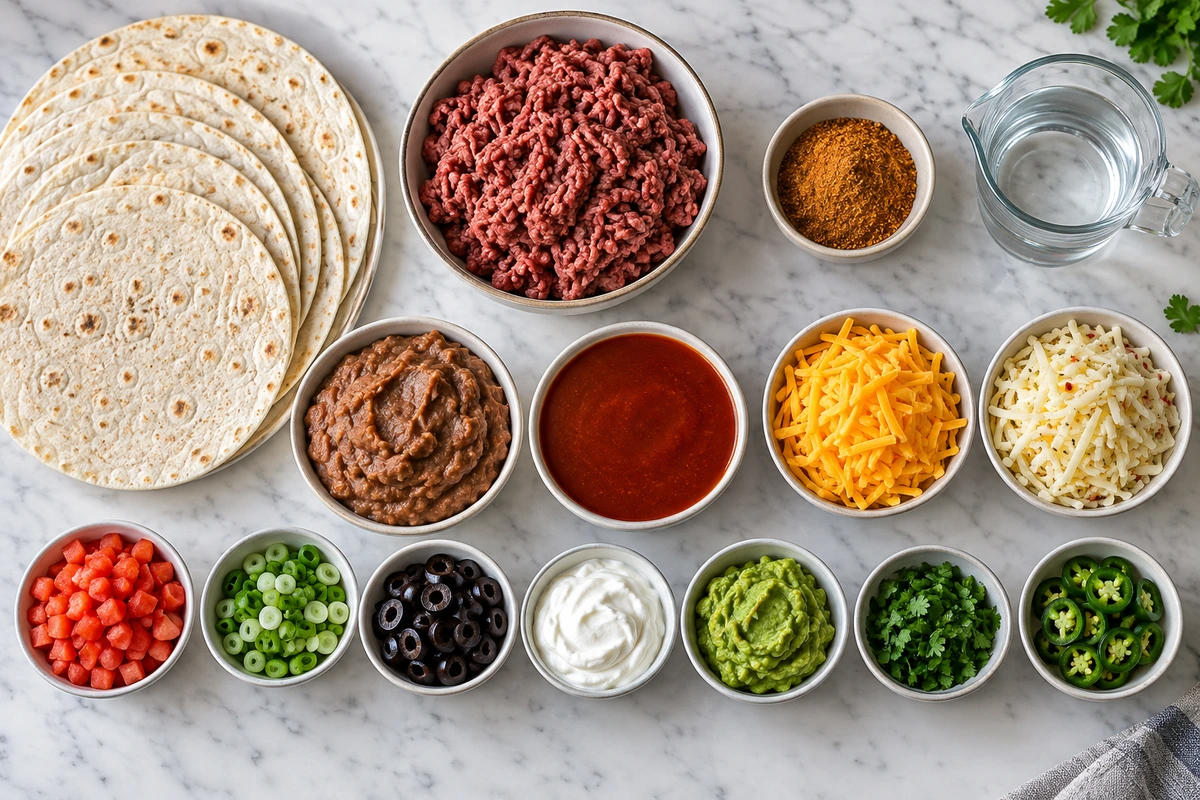
Base and Protein: 6 medium flour tortillas; 1 pound lean ground beef; 1 packet (1 ounce) taco seasoning; ½ cup water.
Sauces and Cheese: 1 can (16 ounces) refried beans; 1 can (10 ounces) red enchilada sauce; 1 cup shredded cheddar cheese; 1 cup shredded pepper-jack cheese.
Toppings: 1 Roma tomato, diced; 1 green onion, sliced; 1 small can sliced black olives.
Optional Additional Toppings: Sour cream; Guacamole; Fresh cilantro, chopped; Jalapeños, sliced.
If you enjoy this recipe, you may also like Slow Cooker Ranch Pork Chops.
How to Make Homemade Mexican Pizza
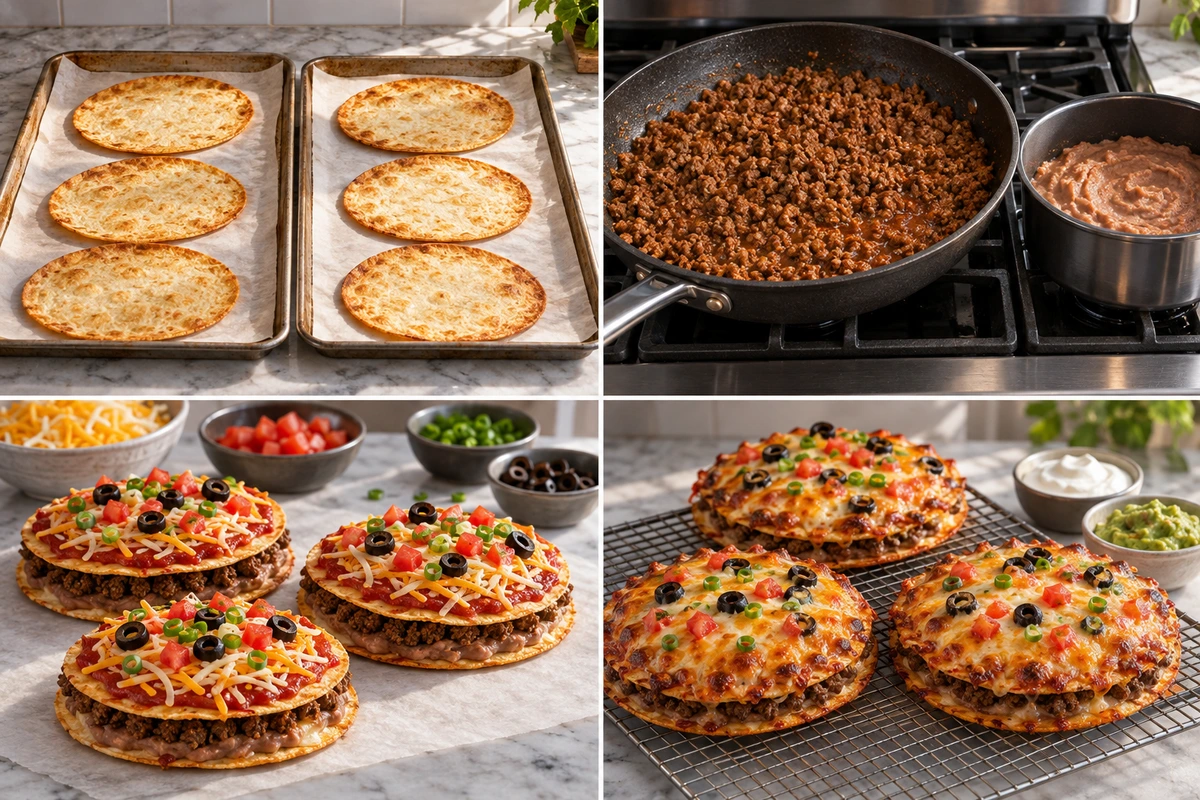
- Preheat Oven and Prepare Tortillas: Preheat the oven to 375°F (190°C). Spray two baking sheets with non-stick cooking spray. Place 3 tortillas on each baking sheet in a single layer.
- Crisp the Tortillas: Bake the tortillas for 3-5 minutes, then flip and bake for another 2-5 minutes until they become golden and crispy around the edges. Remove from the oven and set aside. Keep the oven on.
- Cook the Ground Beef: In a large skillet over medium-high heat, cook the ground beef, breaking it up with a wooden spoon or spatula until it's fully browned and crumbled. Drain off any excess grease.
- Season the Beef: Add the taco seasoning and water to the skillet with the beef. Bring to a boil, then reduce heat to medium-low and simmer for 10 minutes, stirring occasionally, until most of the liquid has been absorbed. Remove from heat and set aside.
- Warm the Refried Beans: Place the refried beans in a microwave-safe bowl and heat for 1-2 minutes until warmed through and easier to spread. Stir well.
- Begin Assembling Pizzas: Place three of the crisped tortillas on a clean baking sheet. Spread about ⅓ cup of warmed refried beans on each tortilla, creating a thin, even layer.
- Add Meat Layer: Distribute the seasoned ground beef evenly over the refried beans on each tortilla, using about ⅓ of the meat mixture per pizza.
- Add Second Tortilla: Place another crisped tortilla on top of each meat layer, creating a sandwich.
- Top with Sauce and Cheese: Spread approximately 3 tablespoons of enchilada sauce on top of each upper tortilla. Sprinkle each pizza with a combination of the shredded cheddar and pepper-jack cheeses, dividing them equally among the three pizzas.
- Add Fresh Toppings: Distribute the diced tomatoes, sliced green onions, and black olive slices evenly over the cheese layer on each pizza.
- Bake the Pizzas: Place the assembled Mexican pizzas back in the oven and bake for approximately 5 minutes, or until the cheese is completely melted and bubbly.
- Serve: Remove from the oven and let the pizzas cool slightly for 2-3 minutes. Cut each pizza into quarters (like a regular pizza) and serve warm with optional toppings like sour cream, guacamole, fresh cilantro, or jalapeños if desired.
For storage details after serving, the USDA leftovers and food safety guidance.
Why the Order Matters
The order is useful because it separates preparation, mixing, shaping, cooking, and finishing into deliberate stages. Set out every measured ingredient before starting, use the stated temperature and timing from the source, and pause to check texture at each transition. Combine only as much as the instruction asks; aggressive mixing, early cutting, or changing the listed pan or vessel can alter the result. Use the visual cue in the recorded step alongside its time range, then let the finished dish rest, chill, cool, or set whenever the method specifies.
If you enjoy this recipe, you may also like The Ultimate School Pizza.
Critical Visual and Timing Cues
Work with clean bowls and measured portions so the recipe remains repeatable. Keep wet and dry components separate until the stated joining point. If the source calls for folding, use a broad gentle motion rather than beating; if it calls for chilling, baking, or cooling, allow the full recorded interval. Check colour, firmness, and texture at the point named in each instruction instead of adding unlisted ingredients. These small decisions preserve the intended balance without changing the verified formula.
Serving and Storage
Serve the finished recipe in the form and temperature directed by the source. Cool or chill it fully before storage when the method calls for that step, and keep leftovers covered in an appropriate container. The exact ingredients and quantities remain the reference point; substitutions should only be made where the original recipe explicitly permits them. Use sensible food-safety handling for dairy, eggs, or other perishable ingredients. Present each portion neatly and enjoy it promptly for the best texture.
Practical Kitchen Notes
The ingredient list is not a suggestion: every listed amount, including optional ingredients and garnish directions, belongs to the verified record. Measure before beginning, preserve the named pan or preparation surface, and avoid adding familiar extras that are not present in the source. The recorded preparation, cooking, and total times communicate the recipe's intended schedule, while individual resting and cooling steps still need their full attention.
Details Worth Preserving
The new ingredient photograph and chronological 2×2 process photograph support the written method without replacing it. The current hero image remains unchanged. The earlier repeated body image is excluded, and a separate original image from the source record is retained as the third body image. Before serving, review the finished texture against the final cue in the original instruction rather than relying on an arbitrary clock alone. Keep surfaces clean, portion tools ready, and perishable ingredients appropriately chilled. If you make the recipe ahead, complete every stated cooling or setting stage before covering it. Wash measuring tools promptly and return ingredients to proper storage after use. When portions are shaped or served, work steadily and keep the serving surface dry and clean. A careful final check of colour, aroma, firmness, and temperature helps preserve the recipe's intended result without adding a new ingredient or changing its method. Direct responsive WebP copies preserve orientation and aspect ratio without crop, upscaling, transformations, or a Worker deployment.
A Steady Workflow
Read the complete method, measure every recorded amount, and arrange the named equipment before starting. Keep the written recipe beside you. The source method controls the sequence, temperature, timing, and any cooling, chilling, setting, or resting interval. Keep perishables appropriately chilled and leftovers covered. This steady approach preserves the verified formula without adding changes.
Recorded Recipe Tips
- For extra crispy tortillas, you can lightly brush them with oil before the initial baking.
- This recipe makes 3 complete Mexican pizzas, which can serve 3-6 people depending on appetite and sides.
- Leftover components can be stored separately in the refrigerator and assembled fresh for the best texture.
- For a spicier version, add diced jalapeños or use hot enchilada sauce instead of mild.

Conclusion
Homemade Mexican Pizza makes 3 pizzas in 45 recorded minutes. Preserve every listed quantity, temperature, timing cue, and ordered instruction for the intended result.
Frequently Asked Questions
- → How many servings does Homemade Mexican Pizza make?
It makes 3 pizzas and serves 6.
- → How long does Homemade Mexican Pizza take?
The recipe records 15 minutes of preparation, 30 minutes of cooking, and 45 minutes total.
- → What is the best way to keep Homemade Mexican Pizza consistent?
Measure every listed ingredient, follow the ordered instructions, and use the stated temperature and timing cues rather than adding unrecorded changes.
- → Why should the recorded cooling or resting directions be followed?
Those directions are part of the method and help the finished recipe reach the texture and structure intended by the source.