
 Pin it
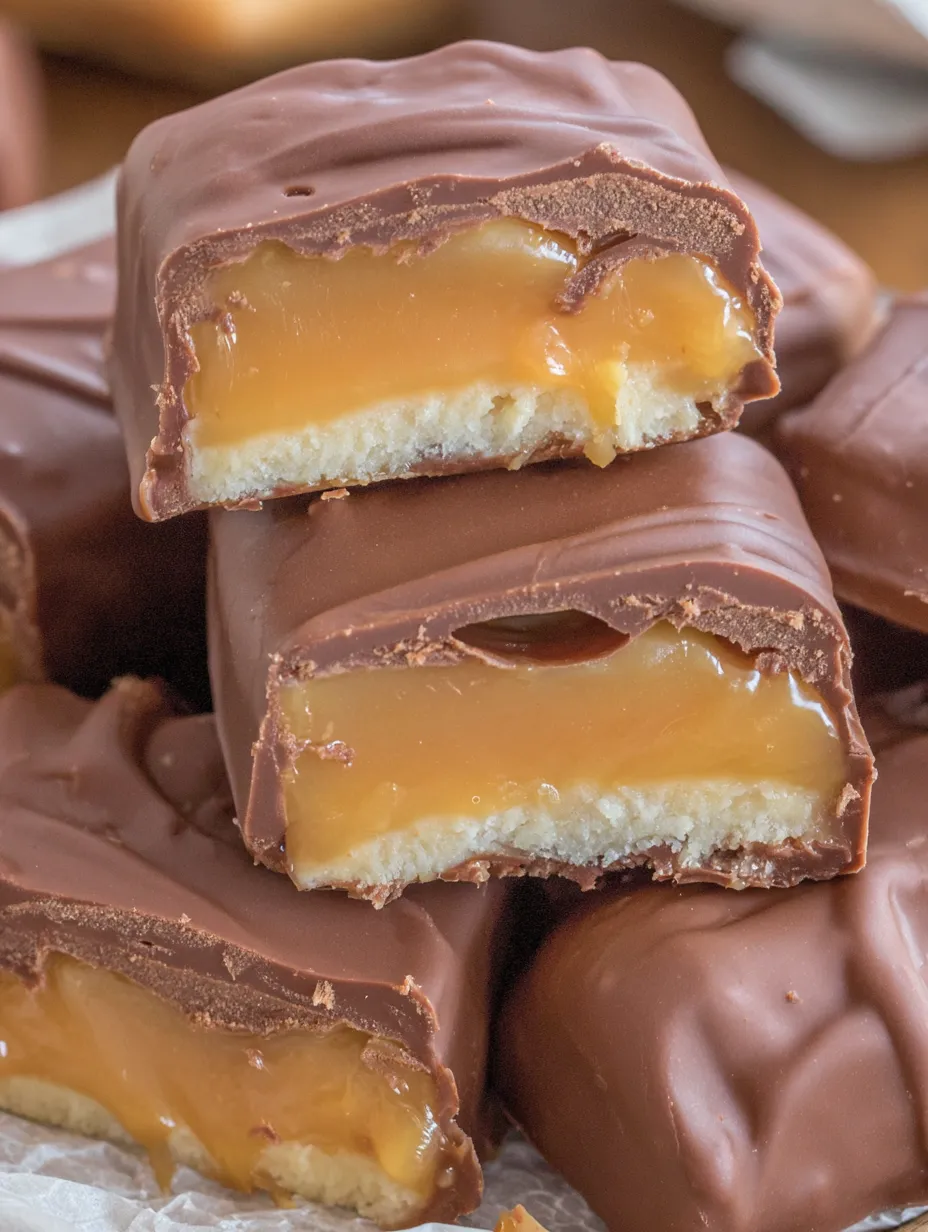
Making your own Milky Way bars at home sounds like something only pastry chefs would attempt, but it's actually way easier than you'd think. You make a chocolate nougat layer by melting chocolate chips with marshmallow fluff, pour a smooth caramel layer on top, chill the whole thing, cut it into bars, and dip everything in melted chocolate. The result tastes cleaner and richer than the commercial version, without all the weird preservatives and that slightly waxy texture store-bought candy bars sometimes have. I made these on a whim last year when I was craving Milky Ways but didn't want to go to the store, and my teenage son literally stopped playing video games to come into the kitchen and ask what smelled so good. He ate three bars before dinner and then asked if I could make them for his birthday party instead of cake. That's when I knew I'd stumbled onto something worth keeping around.
My best friend Sarah is one of those people who claims she can't cook or bake anything successfully. She burns water and calls me crying when recipes don't work out. But after trying these at my house, she decided to make them for her husband's office party because she wanted to look impressive. She texted me updates the whole time, panicking about every step, but they turned out perfect. Her husband's coworkers apparently went crazy over them and couldn't believe she made them herself. Now she acts like she's this accomplished candy maker and makes these constantly. I haven't told her yet that this is literally the only recipe she's ever successfully completed without calling me for help.
Ingredient Breakdown
- Semi-sweet chocolate chips: An 11-ounce bag for the nougat base.
- Evaporated milk: Used for both the nougat and caramel layers for creaminess and to help setting.
- Marshmallow fluff: The 7-ounce jar creates the classic nougat texture without fussy candy-making.
- Soft chewy caramels: Individually wrapped caramels, unwrapped before cooking.
- Ghirardelli melting wafers: For a smooth, shiny coating that sets up perfectly.
- Vegetable oil: Thins the melted coating chocolate for a smoother dip.
 Pin it
Creating Candy Bars
- Preparing your pan:
- Line an 8x8 inch square baking pan with parchment paper, ensuring the paper overhangs the sides to create handles. Spray lightly with cooking spray.
- Making chocolate nougat layer:
- In a large saucepan, combine semi-sweet chocolate chips and half the evaporated milk (about 1/3 cup). Stir constantly over low/medium heat until completely smooth and glossy (4-5 minutes). Remove from heat, add the entire container of marshmallow fluff, and stir thoroughly until uniform. Pour into the prepared pan, spread evenly, and refrigerate to firm up.
- Preparing caramel layer:
- In a second clean saucepan, combine unwrapped caramels and the remaining half of evaporated milk (about 1/3 cup). Stir constantly over low/medium heat until the caramels are completely melted and you have a smooth, lump-free caramel sauce. Pour this hot caramel over the firm chocolate nougat layer. Return the pan to the refrigerator and chill for at least 4 hours, or preferably overnight, until completely firm and cold.
- Cutting into bars:
- Use the parchment paper handles to lift the chilled slab onto a cutting board. Use a sharp knife (wipe clean or warm between cuts) to cut the slab into 16 even bars (e.g., cut in half vertically, then 7 cuts across each half).
- Melting coating chocolate:
- Line a 9x13 baking sheet with parchment paper. Put melting wafers in a microwave-safe bowl. Microwave on **50% power** for 1 minute, stir, add vegetable oil, and stir. Continue heating in 30-second bursts at 50% power, stirring after each, until the chocolate is completely smooth and flowing.
- Dipping the bars:
- Drop one candy bar into the melted chocolate. Use two forks or dipping tools to flip it until fully coated. Lift, letting excess chocolate drip off, then carefully transfer to the prepared parchment-lined baking sheet. Repeat with all bars. Refrigerate the entire sheet for 30 minutes to let the coating firm up completely.
Critical Candy Knowledge
- Evaporated Milk Split: Using half the evaporated milk in each layer is essential for achieving the correct, firm consistency in both the nougat and caramel layers.
- Melting Technique: Melting the chocolate wafers at **50% power** prevents scorching or seizing, ensuring a smooth coating.
- Chilling Time: Chilling the candy layers for a full 4 hours or overnight is absolutely necessary for clean, professional-looking cuts.
The first time I made these, I got impatient and tried cutting them after only 2 hours in the fridge. The layers were still too soft and the whole thing turned into a gooey disaster when I tried slicing through it. The knife just smooshed everything together into this messy blob that I ended up eating with a spoon straight from the pan. After that experience, I learned to be patient and wait the full overnight chill time. The bars cut cleanly and look professional when they're completely firm and cold.
I also learned about the 50% power thing the hard way when I tried melting the coating chocolate on full power to save time. About 30 seconds too long and the chocolate went from smooth to this weird, grainy, separated mess that looked like it had curdled. Chocolate is surprisingly temperamental when you heat it too aggressively. Now I always use lower power and stir frequently, and I haven't had that problem since.
Serving These Treats
Cut the bars into smaller pieces for a platter at parties. They are great for holiday gift-giving when packed in decorative tins. Serve them at room temperature or straight from the fridge depending on your preference. They are rich enough that one bar usually satisfies most sweet cravings. Keep a stash in your fridge for a quick dessert.
Different Flavor Ideas
- Add a layer of **peanut butter** between the nougat and caramel for a Snickers-style bar.
- Use **dark chocolate melting wafers** for a less sweet coating.
- Mix **sea salt** into the caramel layer or sprinkle flaky salt on the coating for a salted caramel version.
- Add a teaspoon of **vanilla extract** to the nougat layer.
- Try **white chocolate melting wafers** for the coating.
- Sprinkle **chopped nuts** on top of the wet chocolate coating for crunch.
- Add a thin layer of **raspberry or strawberry jam** between the nougat and caramel.
Storage and Freshness
- Store in the **refrigerator** for up to 3 weeks in an airtight container with parchment paper between layers.
- Freeze for up to 3 months wrapped individually in plastic wrap and then placed in a freezer bag. Thaw overnight in the refrigerator.
- Do not leave out at room temperature for extended periods.
- The bars actually taste better after they've been stored for a day or two as the flavors meld together.
 Pin it
Frequently Asked Questions
- → Can I use a different size pan?
- An 8x8 pan works best for the right thickness. If you use a bigger pan, the bars will be thinner and you'll get more pieces.
- → Do I have to unwrap all those caramels?
- Yes, unless you can find pre-unwrapped caramels. It's tedious but worth it! Get the kids to help if you can.
- → Can I skip the vegetable oil in the chocolate coating?
- The oil helps thin out the chocolate so it coats smoothly. You can skip it, but the coating might be thicker and harder to work with.
- → How long do these keep?
- They'll stay fresh in the fridge for up to 2 weeks in an airtight container. Just let them sit at room temperature for a few minutes before eating.
- → Can I use milk chocolate instead of semi-sweet?
- Yes! Milk chocolate will make them sweeter, more like the original Milky Way. Dark chocolate works too if you like less sweet treats.
- → Why is my caramel layer too hard?
- Make sure you're stirring constantly and not overcooking it. The caramel should be smooth and pourable when you add it to the pan.