
 Pin it
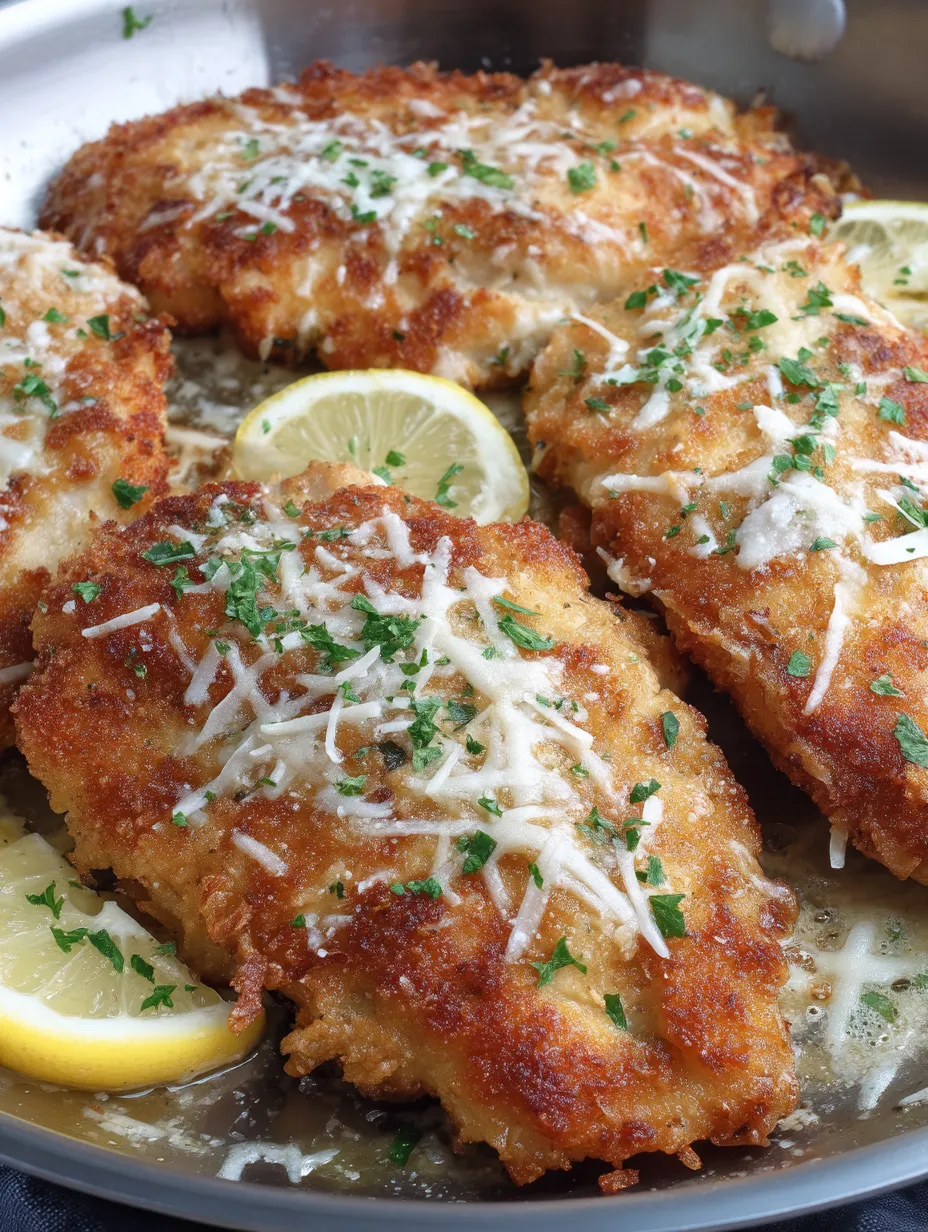
This lemon chicken Romano has been my weeknight dinner savior countless times with its irresistible golden crust and perfect balance of flavors. The combination of crispy breadcrumbs, tangy lemon, and rich Romano cheese transforms ordinary chicken into a restaurant-worthy meal that comes together in just 30 minutes.
I first made this chicken when I needed to impress my in-laws without spending hours in the kitchen. The compliments flowed so freely that it's now requested whenever family gathers at our home.
Ingredients
- Eggs: Create the perfect moisture barrier that helps breadcrumbs adhere while keeping chicken juicy
- Oregano: Provides classic Italian flavor that complements the cheeses beautifully
- Lemon zest: Adds bright citrus notes that cut through the richness look for organic lemons for best flavor
- Salt and pepper: Basic but essential for properly seasoned chicken
- Breadcrumbs: Forms the crispy golden exterior use panko for extra crunch
- Pecorino Romano cheese: Brings sharp salty depth that regular parmesan cannot match
- Flour: Helps create a dry surface for better egg adhesion
- Oil for frying: Choose a neutral oil with high smoke point like canola or vegetable
- Chicken breasts: Look for evenly sized pieces for consistent cooking
- Mozzarella: The melty finishing touch that turns good chicken into great chicken
Step-by-Step Instructions
- Prepare the egg mixture:
- Whisk together eggs, oregano, lemon zest, salt and pepper in a wide shallow bowl until completely combined. This mixture not only adds flavor but creates the perfect surface for breadcrumbs to adhere to.
- Create the breading:
- Combine breadcrumbs and Romano cheese in another wide bowl, mixing thoroughly to distribute the cheese evenly. The Romano adds incredible savory notes that elevate ordinary breadcrumbs into something special.
- Heat the cooking oil:
- Pour enough oil into a large skillet to reach about 1/4 inch depth and heat over medium heat until shimmering but not smoking. The right temperature ensures crispy chicken without burning.
- Prepare the chicken:
- Lightly dust each chicken piece with flour on all sides, gently shaking off excess. This creates a dry surface that allows the egg mixture to adhere properly rather than sliding off.
- Dip in egg mixture:
- Immerse each floured chicken piece into the egg mixture, ensuring complete coverage while allowing excess to drip back into the bowl. An even coating here leads to evenly crispy chicken.
- Coat with breadcrumbs:
- Press chicken firmly into the breadcrumb mixture, turning and pressing to coat all surfaces thoroughly. Use your fingers to gently press breadcrumbs onto any bare spots for complete coverage.
- Fry to golden perfection:
- Cook chicken in the hot oil for approximately 3-4 minutes per side until deep golden brown and crispy. Work in batches if needed to avoid overcrowding which leads to steaming instead of crisping.
- Finish with cheese:
- Transfer the fried chicken pieces to a baking sheet, sprinkle generously with mozzarella, and bake at 350°F until cheese melts completely and turns slightly golden, about 5-10 minutes.
 Pin it
My favorite part of this recipe is the contrast between the crunchy exterior and the tender chicken inside. My daughter once declared it "the best chicken in the universe" and now stands on a stool beside me whenever I make it, eager to help with the breading process.
Perfect Chicken Thickness Matters
Achieving the ideal chicken thickness completely transforms this dish. Too thick and your chicken will take too long to cook, potentially burning the breadcrumbs before the center is done. Too thin and it might dry out quickly. Aim for chicken pieces about 1/2-3/4 inch thick through pounding or butterflying. When pounding, place the chicken between plastic wrap to prevent splattering and use the flat side of a meat mallet with gentle, even pressure working from the center outward.
Make-Ahead Options
This chicken Romano shines as a make-ahead meal. You can bread the chicken completely up to 8 hours before cooking and store it in the refrigerator on a parchment-lined tray. This actually allows the coating to adhere better and results in less shedding during cooking. For fully cooked leftovers, reheat in a 350°F oven for about 10 minutes to restore the crispy exterior rather than using a microwave which would make it soggy.
 Pin it
Serving Suggestions
Turn this crispy chicken into a complete meal with thoughtful sides. For a light dinner, serve alongside a bright arugula salad dressed with lemon vinaigrette that echoes the citrus notes in the chicken. For heartier appetites, place the chicken atop a bed of angel hair pasta tossed with butter, herbs and a squeeze of lemon. A side of roasted asparagus or broccoli rabe provides a perfect vegetable complement that stands up to the rich flavors of the dish.
Frequently Asked Questions
- → How can I ensure the chicken cooks evenly?
Pound the chicken breasts to 1/2 or 3/4 inches thick to ensure even cooking and quick frying.
- → Can I make this dish gluten-free?
Yes, use gluten-free breadcrumbs and flour to adapt this dish for a gluten-free diet.
- → What oil should I use for frying?
Use a neutral oil with a high smoke point, such as vegetable or canola oil, for frying the chicken.
- → Can I bake instead of frying the chicken?
Yes, bake the chicken in a 350°F oven until cooked through and golden brown before adding mozzarella cheese.
- → What sides pair well with this dish?
This dish pairs well with a fresh salad, roasted vegetables, or a serving of pasta with marinara sauce.
- → Can I substitute romano cheese?
Yes, parmesan cheese is a good substitute if romano cheese is unavailable.