
 Pin it
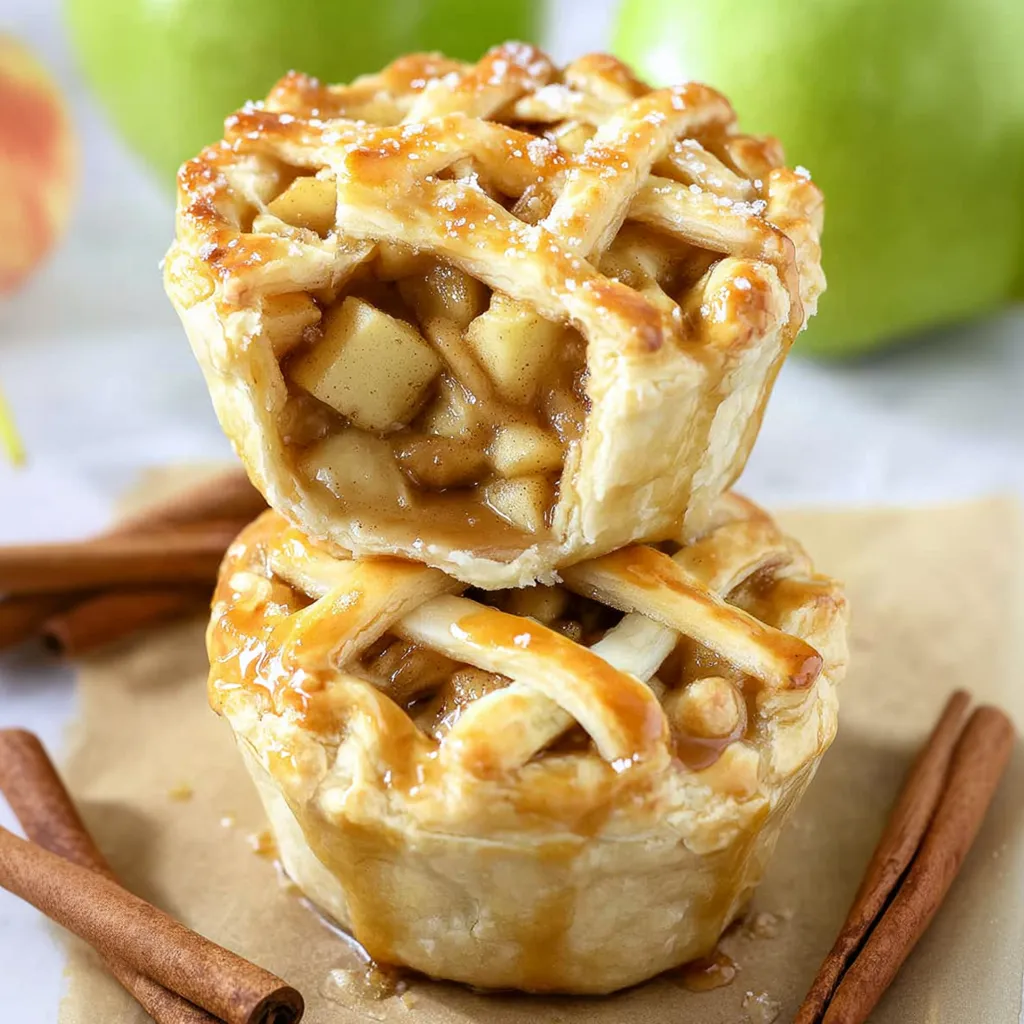
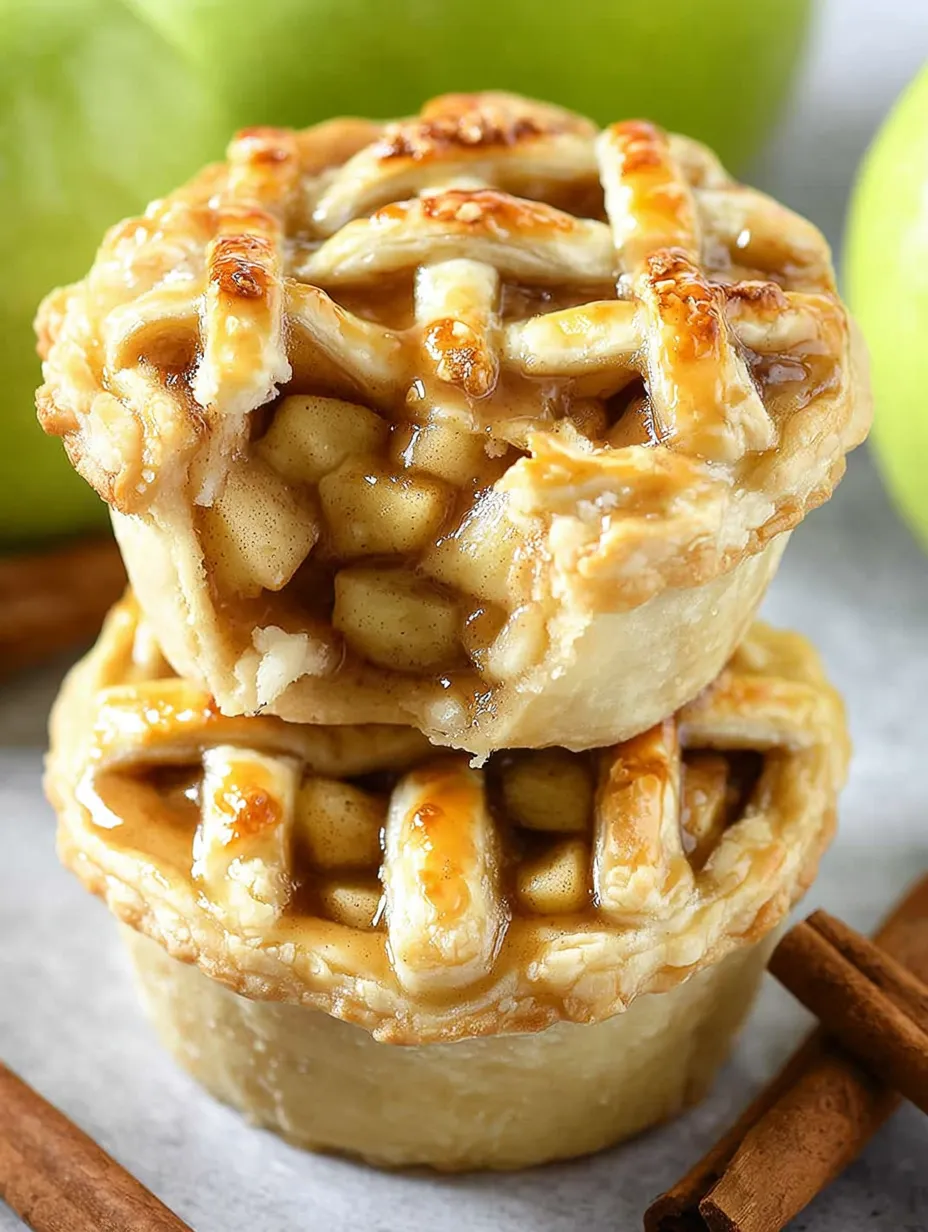
These mini apple pies have become my favorite fall baking project when I want all the satisfaction of homemade apple pie without the stress of rolling out perfect pastry or worrying about soggy bottoms and collapsed lattice tops. I started making these a few years ago when my kids requested apple pie but I didn't have time for a full-sized pie that takes hours from start to finish, and these individual portions solved that problem while also being absolutely adorable and perfect for serving at gatherings. The combination of tender cinnamon-spiced apples wrapped in flaky pie crust with those charming little lattice tops creates miniature works of art that taste exactly like traditional apple pie but are easier to make and even more fun to eat.
My neighbor brought a plate of cookies to our last block party, and I brought these mini apple pies thinking they'd be one dessert option among many. Within twenty minutes, every single pie was gone while other desserts sat mostly untouched, and three different people asked for the recipe before the party even ended. One woman actually took a photo of the empty plate and texted it to me with laughing emojis, saying she'd been in the bathroom and came back to find them completely gone. Now whenever there's a neighborhood gathering, people specifically ask if I'm bringing "those little apple pies," and I've noticed nobody else brings apple desserts anymore because they know mine will be there.
Essential Ingredients Breakdown
- Refrigerated pie crusts: Provide flaky foundation (let warm for 15 minutes before unrolling). Two crusts make 12 pies + lattice.
- Granny Smith apples: Essential for tart flavor and firm texture that holds up during baking. Dice into small quarter-inch cubes.
- White and brown sugar combination: Creates clean sweetness with caramel notes and moisture.
- Cinnamon and nutmeg: Bring classic warm spices that define apple pie.
- All-purpose flour: Thickens apple juices to prevent a watery filling.
- Vanilla extract: Enhances all other flavors and adds aromatic depth.
- Egg wash: Creates a gorgeous golden-brown shine and helps the sanding sugar adhere.
 Pin it
Creating Perfect Pies
- Preparing your pan:
- Preheat oven to **425°F** (220°C). Generously spray a standard 12-cup muffin tin with nonstick cooking spray.
- Making egg wash and filling:
- Beat 1 egg with 1 tablespoon of water for the wash. Peel, core, and dice apples into ¼-inch cubes. Toss diced apples with vanilla extract, flour, both sugars, cinnamon, and nutmeg until fully coated.
- Cutting and shaping crusts:
- Unroll pie crusts. Use a 4-inch round cookie cutter to cut 12 circles (re-roll scraps). Gently press each circle into a muffin cup, molding it to the bottom and sides.
- Assembling the pies:
- Brush the bottom of each crust with **egg wash** (to prevent soggy bottoms). Spoon the apple filling evenly into each cup, filling close to the top.
- Creating lattice tops:
- Roll out scraps thinly. Cut into strips slightly less than ¼ inch wide. Lay 3 strips parallel across one pie, then **weave** the remaining 3 strips perpendicular to create the lattice pattern. Trim excess and press strip ends onto the bottom crust edge to seal.
- Final touches and baking:
- Brush the lattice tops generously with remaining egg wash. Sprinkle with sanding sugar (optional). Bake for **20 to 25 minutes** until the crust is lightly golden brown and the filling is actively bubbling through the lattice gaps.
- Cooling and removing:
- Let the muffin tin cool for 5–10 minutes to allow pies to firm up. Carefully run a thin knife around the edge of each pie, then gently lift and transfer to a wire cooling rack. Cool until warm or room temperature before serving so the filling sets.
I've learned through making these mini apple pies many times that taking the time to create proper lattice tops really does elevate them from simple to stunning. My first batch involved just pressing circles of dough over the top with a few fork holes for venting, and while they tasted fine, they looked quite plain and ordinary. The lattice tops add maybe 15 extra minutes to the process but make such a dramatic difference in presentation that I always do them now even when I'm tempted to take the shortcut. I also discovered that using very cold dough for the lattice makes weaving nearly impossible because it cracks and breaks, so I let the re-rolled scraps sit at room temperature for a few minutes before cutting strips.
Apple Selection Matters
Granny Smiths are the gold standard for their firm texture and tartness. Honeycrisp or Braeburn are good substitutes. Avoid soft apples like Red Delicious or McIntosh, which turn to applesauce when baked.
Preventing Soggy Bottoms
Key steps: **brushing the bottom crust with egg wash** (creating a barrier), using a high baking temperature (425°F), and using flour to thicken the filling for stability.
Perfect Serving Ideas
- Serve warm or at room temperature with a scoop of **vanilla ice cream** or a dollop of fresh whipped cream.
- Drizzle with warm caramel sauce for extra indulgence.
- Perfect for holiday dessert buffets or any gathering requiring individual servings.
Delicious Flavor Variations
- Mixed Berry: Use a combination of blueberries, raspberries, and blackberries instead of apples.
- Cranberry Apple: Mix in chopped cranberries (increase sugar slightly).
- Caramel Apple: Add 1 teaspoon of caramel sauce to each pie before topping.
- Cheddar Apple: Add small cubes of sharp cheddar cheese to the apple filling.
Keeping Them Fresh
- Keep at room temperature for **one day** in an airtight container.
- Refrigerate for up to 4 days (crust will soften slightly).
- Freeze for up to 2 months when wrapped individually.
 Pin it
I've made these mini apple pies for countless fall gatherings, holiday celebrations, and random weeknight desserts when I wanted something special, and they never fail to delight everyone who tries them. There's something magical about individual pies that makes people smile before they even take a bite, and the combination of flaky crust, tender spiced apples, and those charming lattice tops creates the perfect handheld version of classic apple pie. The fact that these come together in about an hour using store-bought crust means I can have homemade pies without dedicating my entire afternoon to baking, which makes them feasible for busy weeknights rather than just special occasions. They've become one of my most-requested recipes, the dessert that friends and family specifically ask me to bring to gatherings because they know how good these little pies are and how quickly they disappear!
Frequently Asked Questions
- → Can I use a different type of apple?
- Granny Smith works best because they're tart and hold their shape. Honeycrisp or Braeburn also work well if you prefer sweeter apples.
- → Do I have to make the lattice top?
- Not at all. You can use solid circles with a small vent cut in the center, or cut out shapes like leaves or apples instead.
- → Can I use homemade pie crust?
- Yes, homemade crust works great. You'll need enough dough for two standard 9-inch pie crusts.
- → How do I prevent soggy bottoms?
- Brushing the bottom crust with egg wash before adding the filling creates a barrier that helps keep it crisp.
- → Can I freeze these?
- Yes, freeze them after baking and cooling completely. Wrap individually and freeze for up to 2 months. Reheat in the oven.
- → Why are my pies sticking to the pan?
- Make sure to spray the pan well before adding the dough. Also, let them cool a bit before removing so they firm up.