
 Pin it
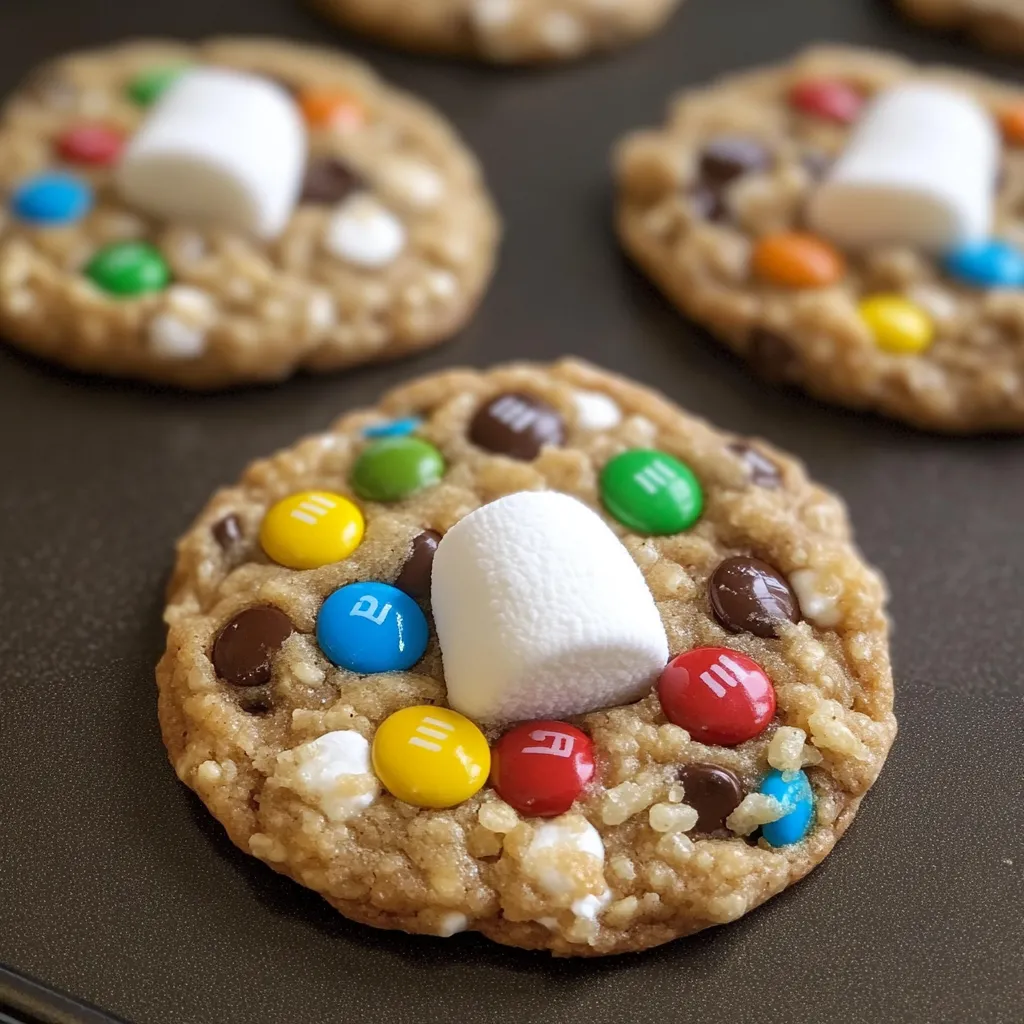
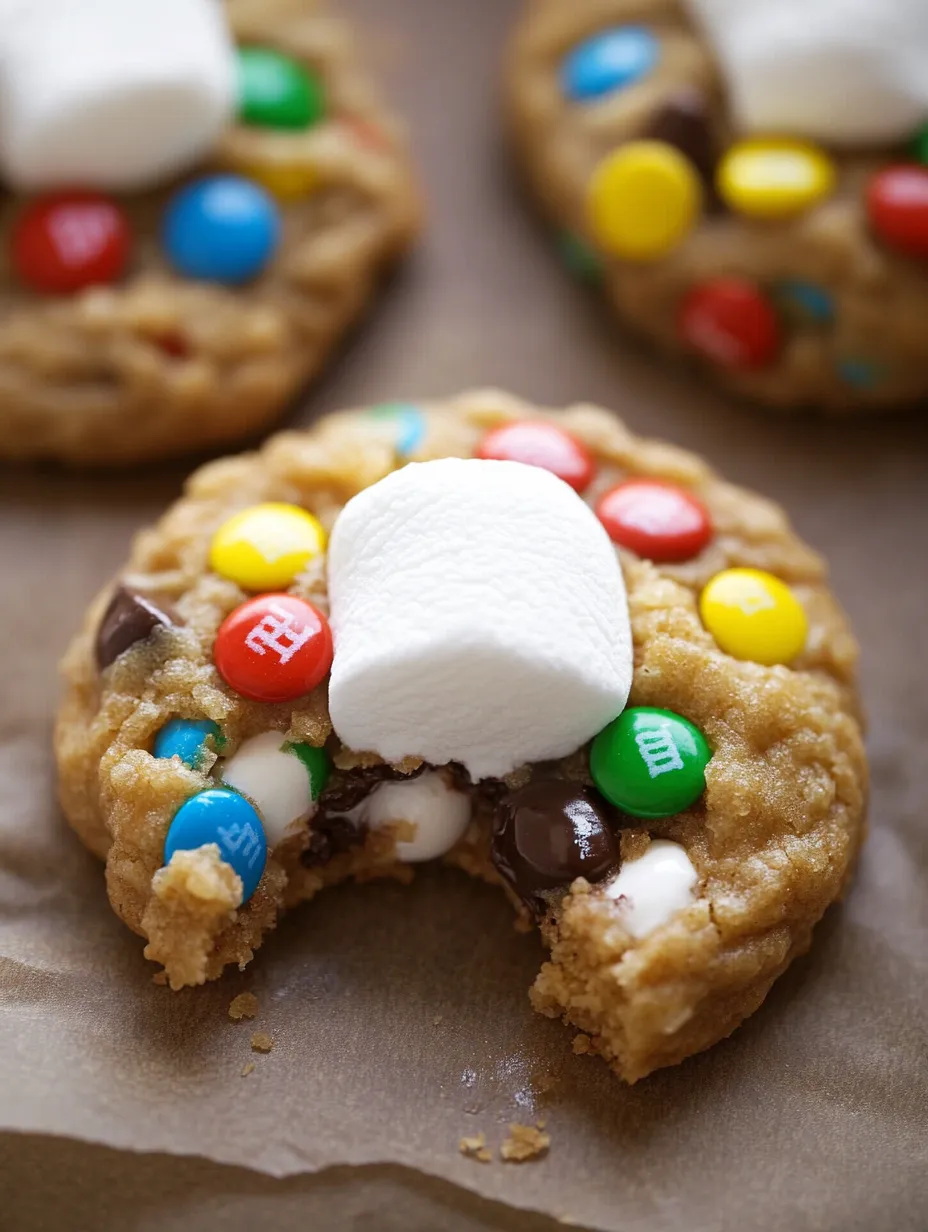
Crispy, chewy cookies packed with chocolate and a gooey marshmallow center make these treats totally irresistible. I stumbled onto this recipe last winter when I had leftover marshmallows and cereal from making Rice Krispie treats with my kids. That first experimental batch disappeared so quickly I barely got one myself! There's something magical about breaking a warm cookie in half and watching that perfect marshmallow stretch between the pieces.
My neighbor Tom stopped by to drop off my mail while these were cooling. He tried politely declining when I offered him one since he was "watching his sugar," but the smell broke his willpower. After one bite, he took a second cookie for the road, muttering something about diets starting tomorrow. These cookies just have that effect on people.
Ingredients
- Brown butter - Taking the extra few minutes to brown the butter makes ALL the difference here. That nutty, almost caramel-like flavor can't be matched any other way. Just watch it carefully - the line between perfectly browned and burnt happens fast.
- Brown sugar - Gives these cookies their chewy texture and deeper flavor. Make sure to really pack it into your measuring cup - loose brown sugar will throw off the recipe. I've tried with both light and dark brown sugar, and both work great.
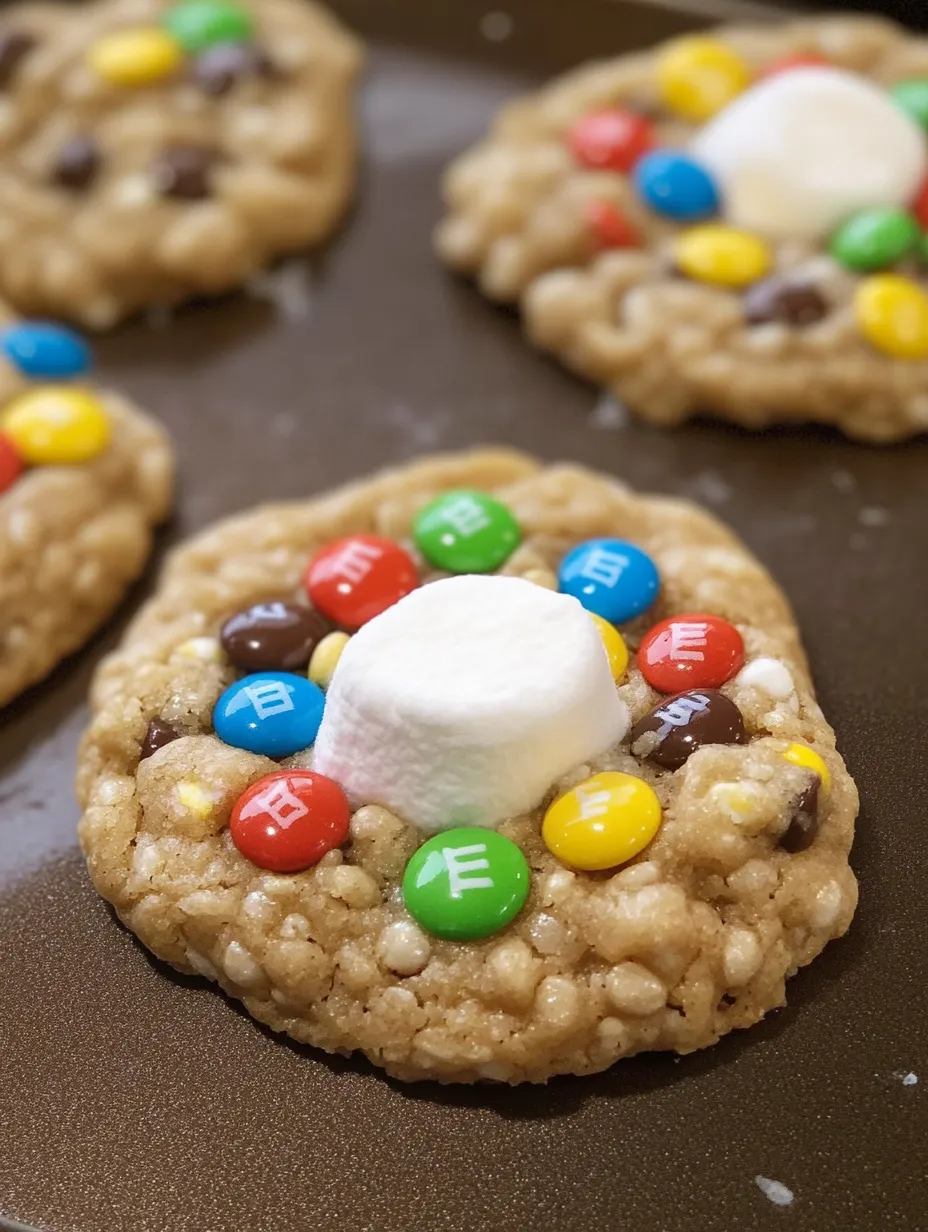
- Rice Krispies - The secret ingredient that adds that unexpected crunch throughout. Some go into the dough while others get pressed on top, giving you texture in every bite. They stay surprisingly crisp even after baking.
- Mini M&Ms - Regular sized ones work too, but the minis distribute better throughout the dough. I've found the candy coating holds up well during baking, keeping those bright colors intact. Save some extras for pressing into the tops after baking.
- Marshmallows - Regular size, not mini! Each cookie gets one whole marshmallow, creating that perfect gooey center. Leaving the top exposed during baking gives you that slight toasting on the marshmallow that adds another layer of flavor.
 Pin it
Step-by-Step Instructions
- Butter Browning:
- Don't rush this step! Medium heat is perfect - any higher and you risk burning it. I stir constantly once it starts foaming, and when it smells nutty and turns amber, it's done. I pour it into a heatproof bowl right away to stop the cooking process.
- Dough Handling:
- Mix everything just until combined. I've found overworking the dough makes the cookies tough. Folding in the mix-ins by hand rather than with a mixer gives you more control and keeps the cereal from getting crushed.
- Marshmallow Trick:
- Flatten each dough ball, place the marshmallow in the center, then wrap the dough around it leaving just the top exposed. This creates a little "nest" that keeps most of the marshmallow contained while baking but still allows for that perfect toasted top.
- Cookie Shaping:
- These spread quite a bit during baking, so give them plenty of space. The trick with the measuring cup to reshape them while still warm works amazingly well - it turns slightly misshapen cookies into perfect circles. Just be gentle so you don't deflate them.
- Timing Matters:
- Ten minutes seems short, but these cookies are best when slightly underdone in the center. They'll continue cooking on the hot pan after you take them out. If you wait until they look fully done in the oven, they'll end up too crisp once cooled.
My first batch was a disaster because I completely enclosed the marshmallow. It created steam pockets that made weird bubbles in the cookies. Now I make sure to leave that top exposed and get perfect results every time. My daughter loves helping press the cereal into the tops before baking, though she "accidentally" eats almost as many M&Ms as make it into the dough.
Serving Style
These cookies are substantial enough to stand alone as a dessert, but they're even better slightly warm with a cold glass of milk. For birthdays or special occasions, I'll sometimes serve them with a scoop of vanilla ice cream on the side. The warm cookie with cool ice cream and that stretchy marshmallow pull makes for a pretty spectacular dessert experience.
Easy Swaps
While the recipe is pretty perfect as written, I've played around with some variations that work well. Using Cocoa Krispies instead of regular adds another chocolate dimension. Seasonal M&Ms make these perfect for holidays - we do red and green at Christmas and pastels for Easter. I've even tried adding a tablespoon of malted milk powder to the dough which gives a subtle but delicious flavor boost.
Storage Tricks
These cookies are definitely best the day they're made, but they'll keep reasonably well in an airtight container for 2-3 days. The cereal will soften slightly but the flavor is still great. If you want to refresh them, 10 seconds in the microwave brings back some of that gooey marshmallow magic. Just don't microwave too long or the marshmallow will expand dramatically!
 Pin it
I've made these cookies for everything from school bake sales to dinner parties. There's something about that combination of familiar flavors in an unexpected format that gets people excited. My picky brother-in-law, who claims most homemade cookies are "too something" (too soft, too crunchy, too sweet), ate three of these in one sitting last Christmas. When a cookie can convert the skeptics, you know you've found a keeper!
Frequently Asked Questions
- → Why is it important to use room temperature eggs?
- Room temperature eggs mix more evenly into the batter, creating a uniform texture. When cold eggs hit warm brown butter, they can cause the butter to solidify unevenly, resulting in a lumpy dough that's harder to work with.
- → Can I make these cookies smaller?
- Yes, but you'll need to adjust the marshmallow size accordingly. For smaller cookies, cut regular marshmallows in half or use mini marshmallows. The baking time will also need to be reduced by 1-2 minutes, so watch them carefully.
- → Why can't I store this dough for later?
- The specific ratio of brown butter to sugar in this recipe creates a dough that firms up significantly when chilled. Once refrigerated, it becomes difficult to work with and doesn't spread properly when baked. For best results, bake immediately after mixing.
- → What does 'spoon and leveled' flour mean?
- This is a measuring technique where you lightly spoon flour into your measuring cup (rather than scooping directly from the bag), then level it off with a straight edge. This prevents packing too much flour into the cup, which can make cookies dry and dense.
- → Can I use regular M&Ms instead of minis?
- Regular M&Ms will work, but minis distribute better throughout the dough and provide more consistent color and chocolate flavor in each bite. If using regular-sized M&Ms, roughly chop them or use about 1/2 cup instead of 2/3 cup.