


Oreo Cake Balls is built from the recorded ingredient list and ordered method below. Read each quantity as a working part of the recipe: keeping the listed ingredients measured, using the stated equipment, and following the sequence gives the clearest path to the intended texture and finish. This editorial guide preserves the original recipe facts while explaining the practical cues that help a home cook work carefully and confidently.
Oreo Cake Balls Ingredients
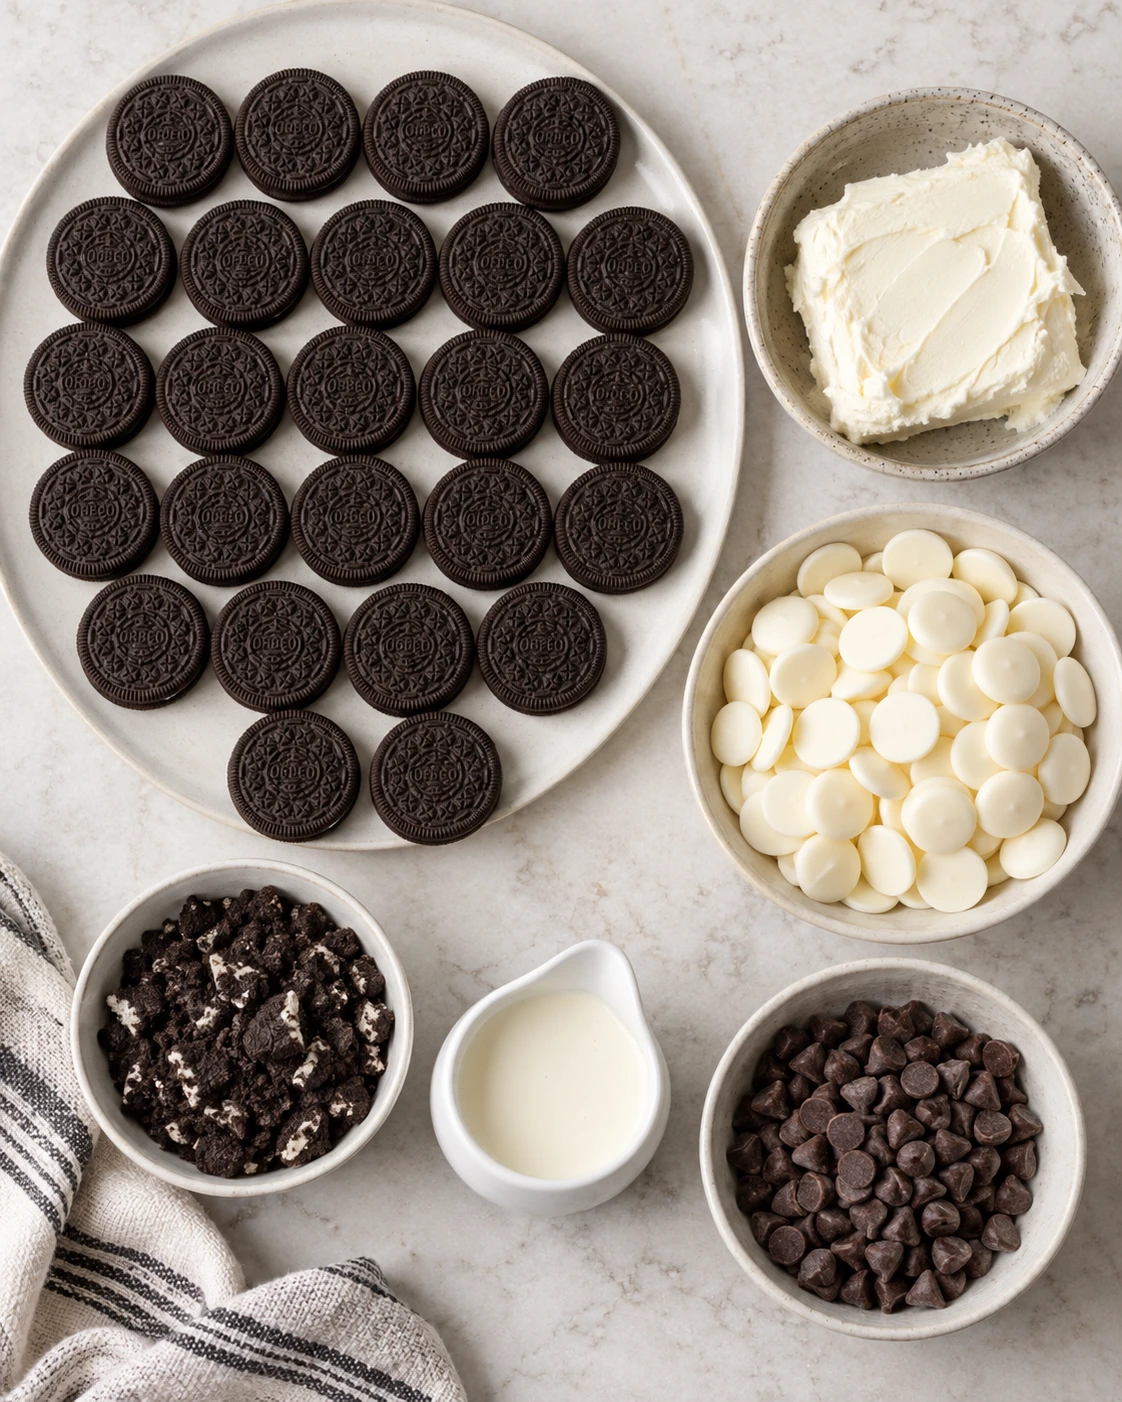
Cake Ball Base: 24 Oreo cookies (regular size, about one standard package); 4 oz cream cheese, softened.
Chocolate Coating: 10 oz white candy melts (Ghirardelli brand recommended); 2 tablespoons heavy cream (optional, only if needed to thin candy coating).
Optional Decorations: Crushed Oreo cookies for sprinkling; Semi-sweet chocolate chips for drizzling.
If you enjoy this recipe, you may also like Peach Cobbler Cookie Cups.
How to Make Oreo Cake Balls
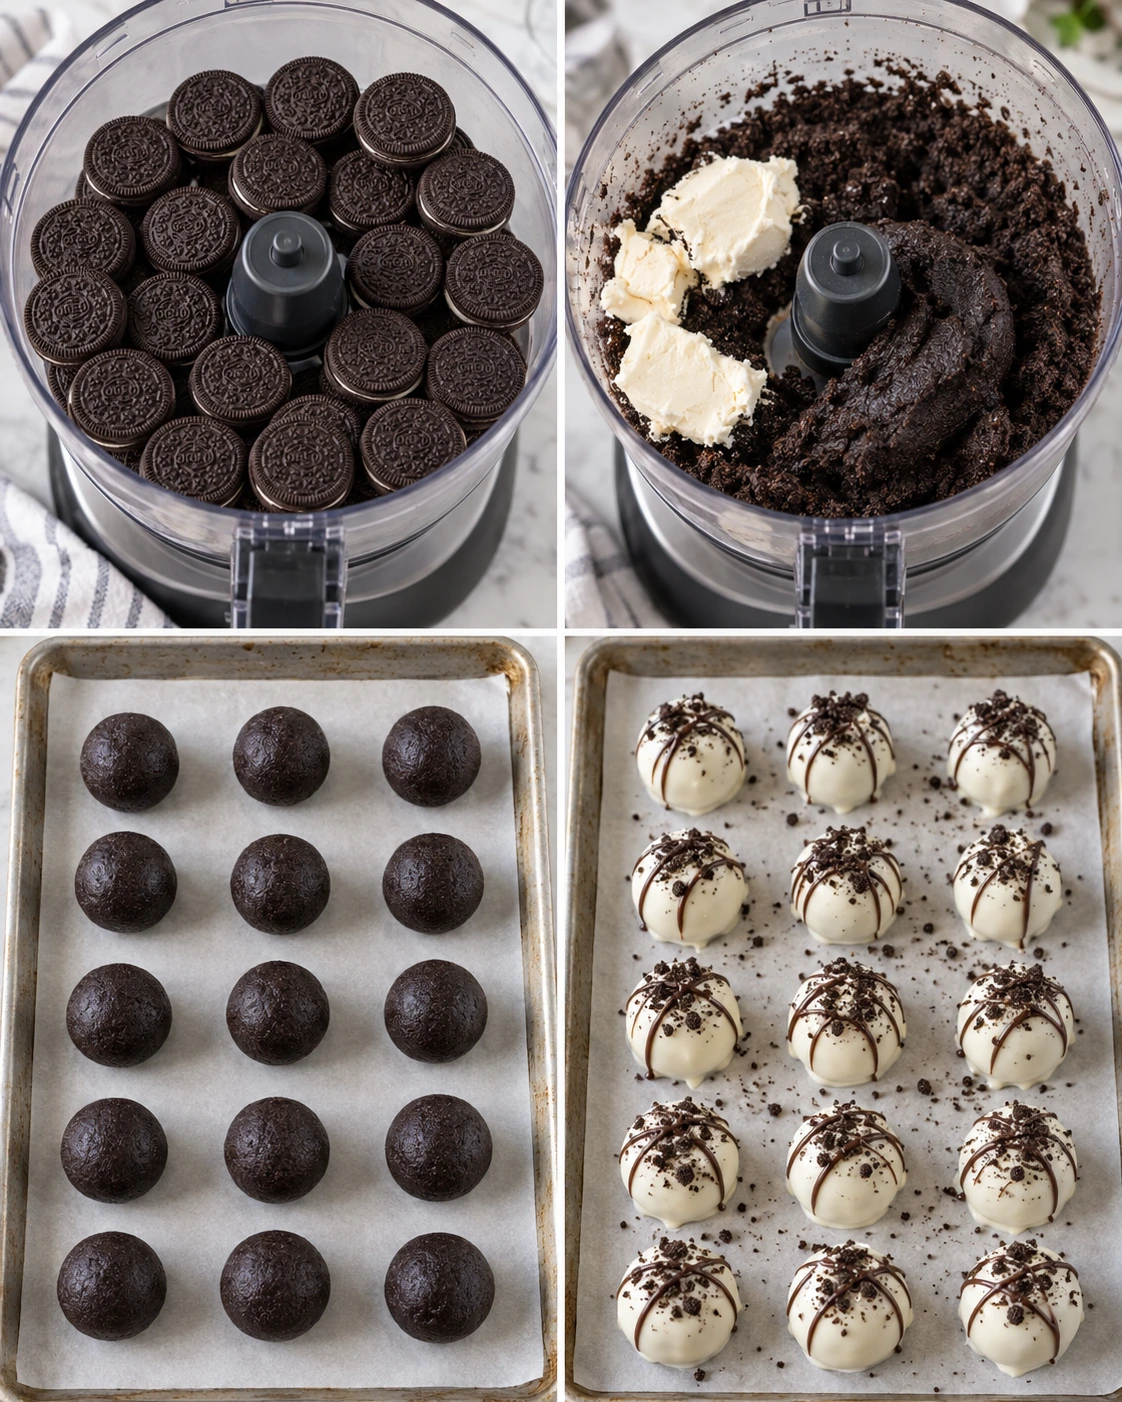
- Prepare the Oreo Mixture: Place 24 whole Oreo cookies (including the cream filling) in a food processor. Pulse on high speed until the cookies are crushed into a fine, coarse powder with no large chunks remaining.
- Add Cream Cheese: Add the softened cream cheese to the crushed Oreos in the food processor. Pulse again until the mixture becomes smooth and uniform, stopping to scrape down the sides as needed. The mixture should be thick and moldable, similar to a soft dough.
- Shape the Cake Balls: Remove the blades from the food processor, being careful to scrape any remaining mixture back into the bowl. Using a medium cookie scoop (about 1.5 tablespoons), scoop out portions of the Oreo mixture. Roll each portion between your palms to form smooth, round balls.
- Chill the Cake Balls: Place the shaped cake balls on a baking sheet lined with parchment paper, making sure they don't touch each other. Freeze for 15 minutes or refrigerate for 1 hour until firm. This step helps them maintain their shape during dipping.
- Melt the Candy Coating: Place the white candy melts in a microwave-safe bowl. Heat in the microwave in 20-second intervals, stirring well between each interval, until completely melted and smooth. Be careful not to overheat. If using Ghirardelli brand, the melted consistency should be perfect for dipping without thinning.
- Prepare for Dipping: If the melted candy coating seems too thick for dipping, stir in hot heavy cream, 1 tablespoon at a time, until you reach the desired consistency. Alternatively, you can use specialized dipping aid chips designed for candy melts.
- Dip the Cake Balls: Working with a few cake balls at a time (keeping the rest in the refrigerator), use a fork to dip each ball into the melted candy coating. Ensure it's completely coated, then lift out with the fork, gently tapping the fork on the edge of the bowl to remove excess coating.
- Set and Decorate: Carefully transfer the coated cake balls back to the parchment-lined baking sheet. If adding crushed Oreo topping, sprinkle it immediately while the coating is still wet. Repeat with remaining cake balls.
- Optional Chocolate Drizzle: If desired, melt semi-sweet chocolate chips and drizzle over the set cake balls for decoration. You can use a piping bag with a small tip or a plastic bag with a tiny corner snipped off.
- Let Set and Serve: Allow the coated cake balls to set completely at room temperature or place in the refrigerator for faster setting. Once set, they're ready to serve or can be stored in an airtight container in the refrigerator.
For storage details after serving, the USDA leftovers and food safety guidance.
Why the Order Matters
The order is useful because it separates preparation, mixing, shaping, cooking, and finishing into deliberate stages. Set out every measured ingredient before starting, use the stated temperature and timing from the source, and pause to check texture at each transition. Combine only as much as the instruction asks; aggressive mixing, early cutting, or changing the listed pan or vessel can alter the result. Use the visual cue in the recorded step alongside its time range, then let the finished dish rest, chill, cool, or set whenever the method specifies.
If you enjoy this recipe, you may also like Air Fryer Nutella Bombs.
Critical Visual and Timing Cues
Work with clean bowls and measured portions so the recipe remains repeatable. Keep wet and dry components separate until the stated joining point. If the source calls for folding, use a broad gentle motion rather than beating; if it calls for chilling, baking, or cooling, allow the full recorded interval. Check colour, firmness, and texture at the point named in each instruction instead of adding unlisted ingredients. These small decisions preserve the intended balance without changing the verified formula.
Serving and Storage
Serve the finished recipe in the form and temperature directed by the source. Cool or chill it fully before storage when the method calls for that step, and keep leftovers covered in an appropriate container. The exact ingredients and quantities remain the reference point; substitutions should only be made where the original recipe explicitly permits them. Use sensible food-safety handling for dairy, eggs, or other perishable ingredients. Present each portion neatly and enjoy it promptly for the best texture.
Practical Kitchen Notes
The ingredient list is not a suggestion: every listed amount, including optional ingredients and garnish directions, belongs to the verified record. Measure before beginning, preserve the named pan or preparation surface, and avoid adding familiar extras that are not present in the source. The recorded preparation, cooking, and total times communicate the recipe's intended schedule, while individual resting and cooling steps still need their full attention.
Details Worth Preserving
The new ingredient photograph and chronological 2×2 process photograph support the written method without replacing it. The current hero image remains unchanged. The earlier repeated body image is excluded, and a separate original image from the source record is retained as the third body image. Before serving, review the finished texture against the final cue in the original instruction rather than relying on an arbitrary clock alone. Keep surfaces clean, portion tools ready, and perishable ingredients appropriately chilled. If you make the recipe ahead, complete every stated cooling or setting stage before covering it. Wash measuring tools promptly and return ingredients to proper storage after use. When portions are shaped or served, work steadily and keep the serving surface dry and clean. A careful final check of colour, aroma, firmness, and temperature helps preserve the recipe's intended result without adding a new ingredient or changing its method. Direct responsive WebP copies preserve orientation and aspect ratio without crop, upscaling, transformations, or a Worker deployment.
A Steady Workflow
Read the complete method, measure every recorded amount, and arrange the named equipment before starting. Keep the written recipe beside you. The source method controls the sequence, temperature, timing, and any cooling, chilling, setting, or resting interval. Keep perishables appropriately chilled and leftovers covered. This steady approach preserves the verified formula without adding changes.
Recorded Recipe Tips
- If you don't have a food processor, place the Oreos in a ziplock bag and crush them with a rolling pin until finely crushed, then mix with softened cream cheese in a bowl.
- For best flavor, let the cake balls sit at room temperature for 10-15 minutes before serving.
- These cake balls freeze well. Simply place them in an airtight container with wax paper between layers and freeze for up to 3 months.

Conclusion
Oreo Cake Balls makes 15 cake balls in 30 recorded minutes. Preserve every listed quantity, temperature, timing cue, and ordered instruction for the intended result.
Frequently Asked Questions
- → How many servings does Oreo Cake Balls make?
It makes 15 cake balls and serves 15.
- → How long does Oreo Cake Balls take?
The recipe records 30 minutes of preparation, 0 minutes of cooking, and 30 minutes total.
- → What is the best way to keep Oreo Cake Balls consistent?
Measure every listed ingredient, follow the ordered instructions, and use the stated temperature and timing cues rather than adding unrecorded changes.
- → Why should the recorded cooling or resting directions be followed?
Those directions are part of the method and help the finished recipe reach the texture and structure intended by the source.