


Peanut butter snowballs are no-bake candies with a soft peanut-butter center and a smooth white coating. They use three core ingredients for the filling and can be finished with optional sprinkles for a simple holiday tray or edible gift.
Chilling twice is the key to clean shaping and dipping. Conventional creamy peanut butter creates a stable dough, powdered sugar firms it, and cold one-inch balls stay round when they meet the warm melted coating.
Ingredients for Peanut Butter Snowballs
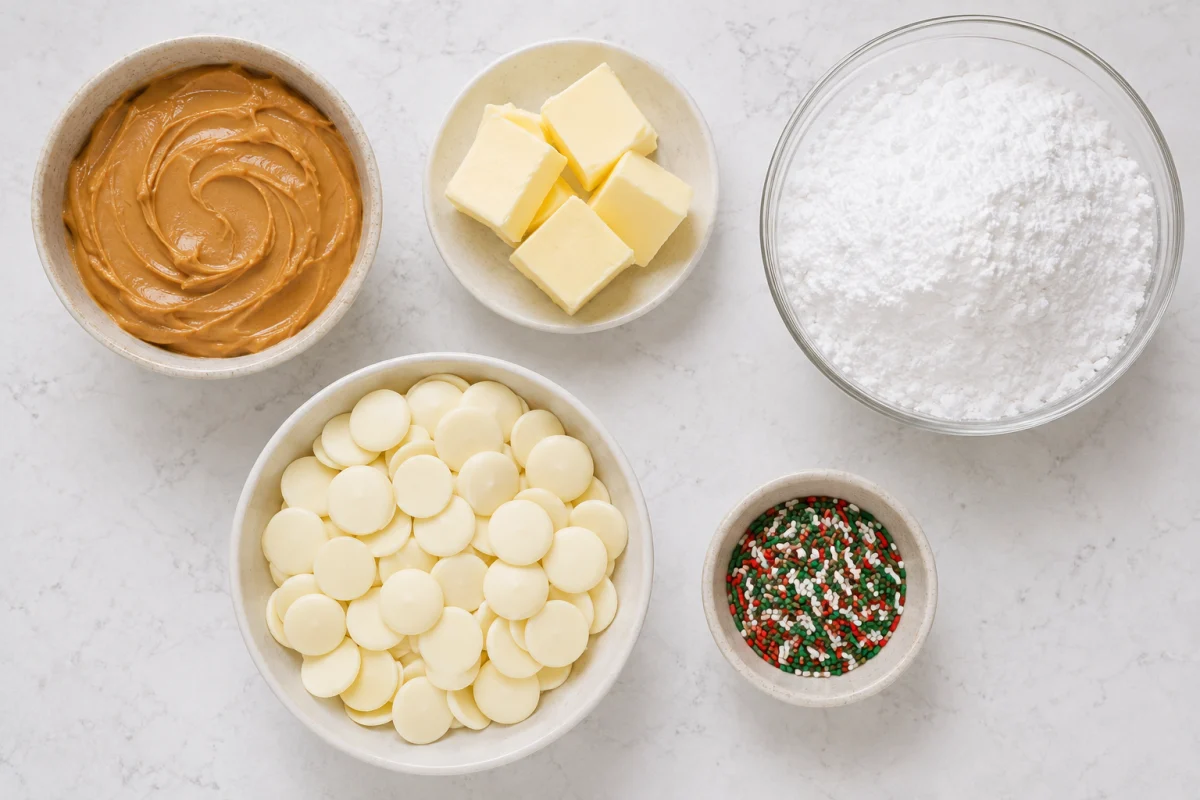
The centers use 1 cup conventional creamy peanut butter, 6 tablespoons softened unsalted butter, and 2 cups powdered sugar. For coating, prepare 16 ounces almond bark or white melting candy coating. Sprinkles are optional.
Avoid natural peanut butter that separates into an oil layer. Its variable texture can make the mixture greasy, crumbly, or too soft to hold a round shape.
If you enjoy this recipe, you may also like Strawberry Pretzel Salad.
How to Make Peanut Butter Snowballs
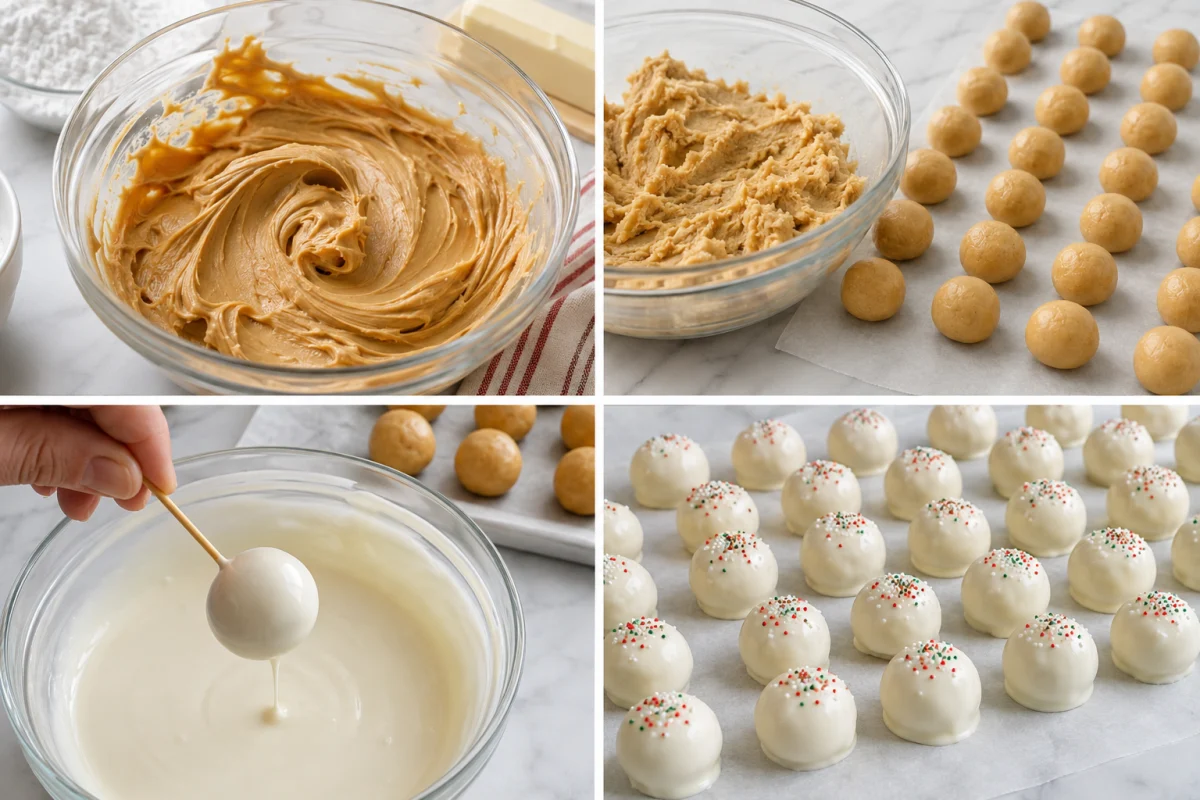
- Mix fats. Stir creamy peanut butter and softened butter until smooth.
- Add sugar. Incorporate powdered sugar gradually until the crumbly mixture forms a cohesive dough.
- Chill. Cover and refrigerate for one hour.
- Shape. Portion and roll into one-inch balls, placing them on a lined cookie sheet.
- Freeze briefly. Keep the sheet in the freezer while the coating melts.
- Melt. Heat white coating in a dry microwave-safe bowl for 15-second intervals, stirring each time.
- Dip. Use a toothpick or dipping tool, tap off excess coating, and return each ball to wax paper.
- Decorate. Add sprinkles immediately and let the coating harden completely.
For storage details after serving, the USDA leftovers and food safety guidance.
Choose Conventional Creamy Peanut Butter
Stabilized creamy peanut butter gives consistent fat and solids in every cup. Stir the jar before measuring, but it should not have a separate layer of oil.
Crunchy peanut butter changes the smooth snowball texture and can create bumps beneath the coating. If using it intentionally, expect a more rustic surface.
If you enjoy this recipe, you may also like 3 Ingredient Blueberry Cobbler.
Soften, Do Not Melt, the Butter
Butter should yield easily to a spoon while still holding its shape. Melted butter makes the center oily and may require extra sugar, upsetting the recipe balance.
Mix the peanut butter and softened butter until the color is uniform and no pale streaks remain. Scrape the bottom of the bowl before adding sugar.
Add Powdered Sugar Gradually
Sift visibly lumpy powdered sugar, then add it in several portions. Mix slowly to prevent a cloud and scrape the bowl after each addition.
The final dough should hold when squeezed without leaving oil on your hand. If the kitchen is warm, chill before deciding it is too soft.
Chill Before Rolling
Cover the bowl and refrigerate for one hour. The butter firms and the sugar hydrates, making the dough less sticky and easier to portion.
Line a cookie sheet with wax paper or parchment during this time. A small scoop helps produce consistent one-inch centers and a yield close to 36.

Roll Equal One-Inch Balls
Portion all the dough before rolling so sizes can be compared. Roll briefly between clean palms and place each center on the lined sheet.
Warm hands can soften the dough. If the surface begins to shine or stick, return the tray and remaining mixture to the refrigerator for ten minutes.
Freeze While the Coating Melts
Place the shaped balls in the freezer only while preparing the coating. This short chill helps them resist softening during dipping without freezing them solid.
Very frozen centers can contract and later crack a set shell. The goal is firm and cold, not rock hard.
Melt the White Coating Gently
Use a completely dry microwave-safe glass bowl. Heat the coating for 15 seconds, stir thoroughly, and repeat. Residual heat melts remaining pieces as you stir.
Overheated coating becomes thick or scorched, and even a drop of water can make some coatings seize. Stop heating while a few small pieces remain and stir them smooth.
Dip and Remove Excess
Insert a toothpick into one cold center, lower it into the coating, and lift it straight up. Tap the wrist holding the toothpick with the opposite hand so excess falls back without shaking the ball loose.
Slide the coated ball onto wax paper with a fork or second toothpick. Cover the small toothpick mark with a drop of coating if desired.
Decorate Before the Shell Sets
Add sprinkles immediately after dipping each ball. White candy coating firms quickly on a cold center, and decorations will not stick once the surface loses its shine.
Leave the finished candies undisturbed until hard. Trim any thin coating feet with a small knife after they set.
Storage and Gifting
Refrigerate snowballs in an airtight container for up to one week, separating layers with wax paper. Let them stand briefly before serving for a softer center.
For gifting, use candy cups and a rigid container so the shells do not rub together. Keep the package cool and disclose that the candy contains peanuts and dairy.
Allergen and Cross-Contact Notes
Peanuts are a major allergen, and almond bark is a product name that does not always describe its exact ingredients. Read the coating label for milk, soy, or tree-nut warnings, especially when sharing the candy outside your household.
Use clean bowls, utensils, and storage containers if other treats are being prepared at the same time. Do not present these snowballs as safe for someone with a peanut allergy, even if the white coating itself contains no peanuts.
Troubleshooting
- Dough is oily: Use conventional peanut butter and softened, not melted, butter.
- Centers crumble: Keep mixing after adding sugar and press a portion to test cohesion.
- Coating is thick: It may be overheated; use shorter intervals and stir longer.
- Balls fall off the toothpick: Chill them briefly and lift gently.
- Sprinkles do not stick: Add them immediately after each dip.
Conclusion
Mix conventional creamy peanut butter with softened butter, gradually add powdered sugar, and chill for one hour. Roll into one-inch balls and freeze briefly. Melt white candy coating in short intervals, dip each center, tap off excess, add optional sprinkles immediately, and let the shells harden.
Frequently Asked Questions
- → Can I use natural peanut butter?
It is not recommended because separated oil makes the filling inconsistent. Conventional creamy peanut butter holds its shape more reliably.
- → Why is my white coating thick?
It may have been overheated or exposed to water. Melt it in a dry bowl using short intervals and stir thoroughly.
- → Do peanut butter snowballs need refrigeration?
Yes. Store them airtight in the refrigerator for up to one week for the best texture and food safety.
- → Can peanut butter snowballs be frozen?
Yes. Freeze in a rigid airtight container with parchment between layers, then thaw in the refrigerator to reduce condensation.