

Peppermint Oreo Crunch Cookies is built from the recorded ingredient list and ordered method below. Read every quantity as a working part of the recipe: measuring the listed ingredients, using the stated equipment, and keeping the recorded sequence gives the clearest path to the intended texture and finish. This editorial guide preserves the source facts while explaining the practical cues that help a home cook work carefully and confidently. Before beginning, read the complete instruction list once, prepare the work surface, and place the measured components in the order they will be used.
Peppermint Oreo Crunch Cookies Ingredients
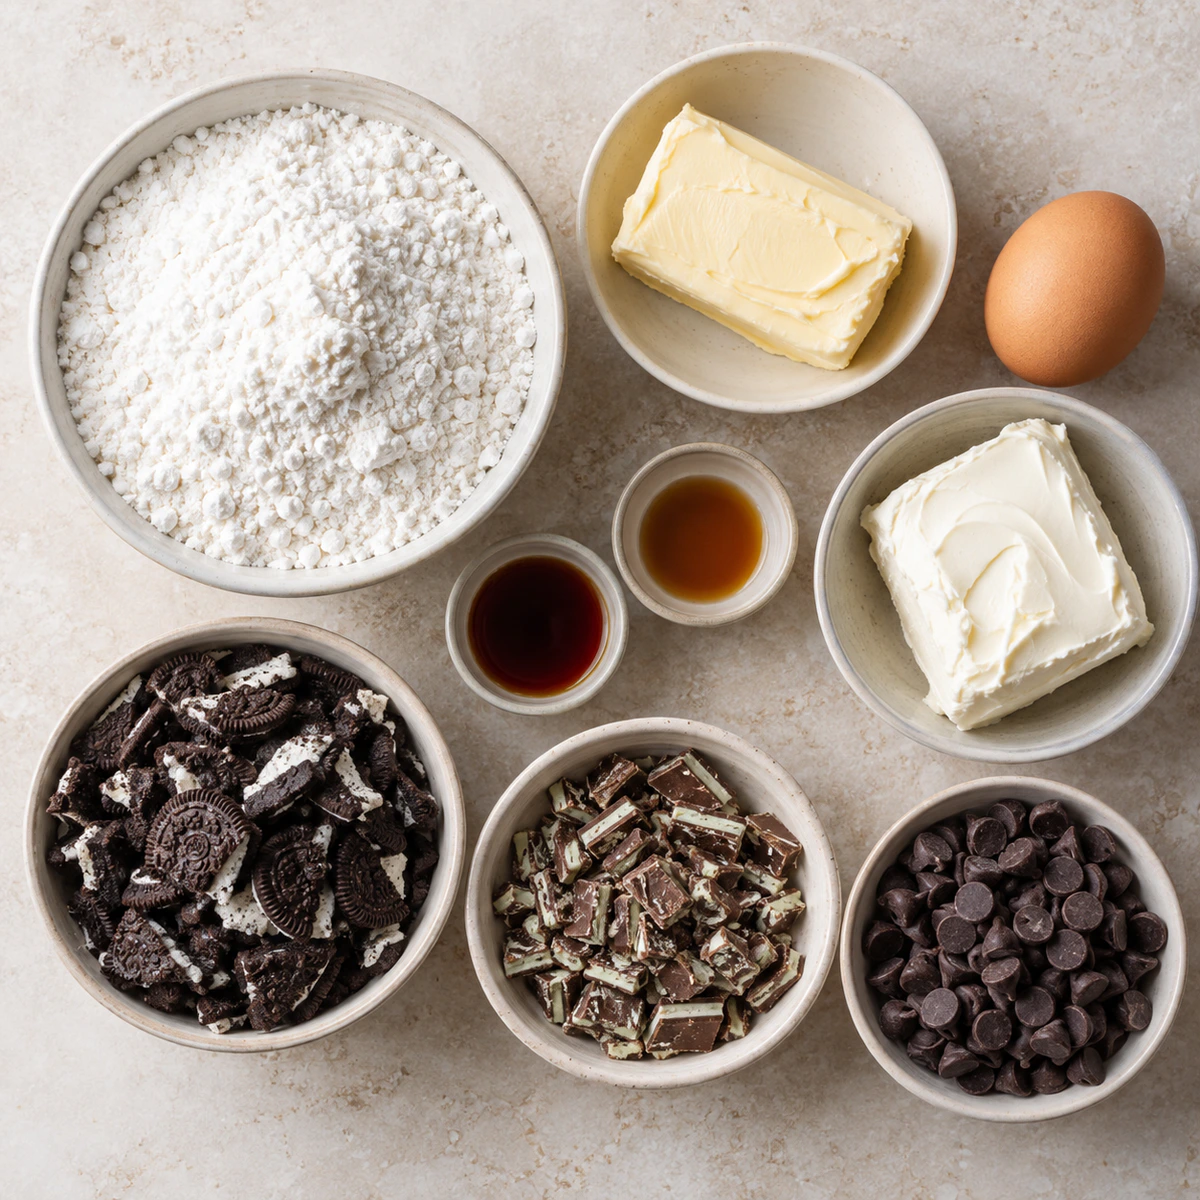
Ingredients: 1 box white cake mix.; 8 tbsp unsalted butter, softened.; 1 large egg.; ½ tsp peppermint extract.; ½ tsp vanilla extract.; 4 oz cream cheese, softened.; 1 cup Oreo cookie chunks.; 1 cup Andes Peppermint Crunch pieces (plus extra for topping).; ½ cup dark chocolate chips (plus extra for topping)..
If you enjoy this recipe, you may also like Creamsicle Truffles.
How to Make Peppermint Oreo Crunch Cookies
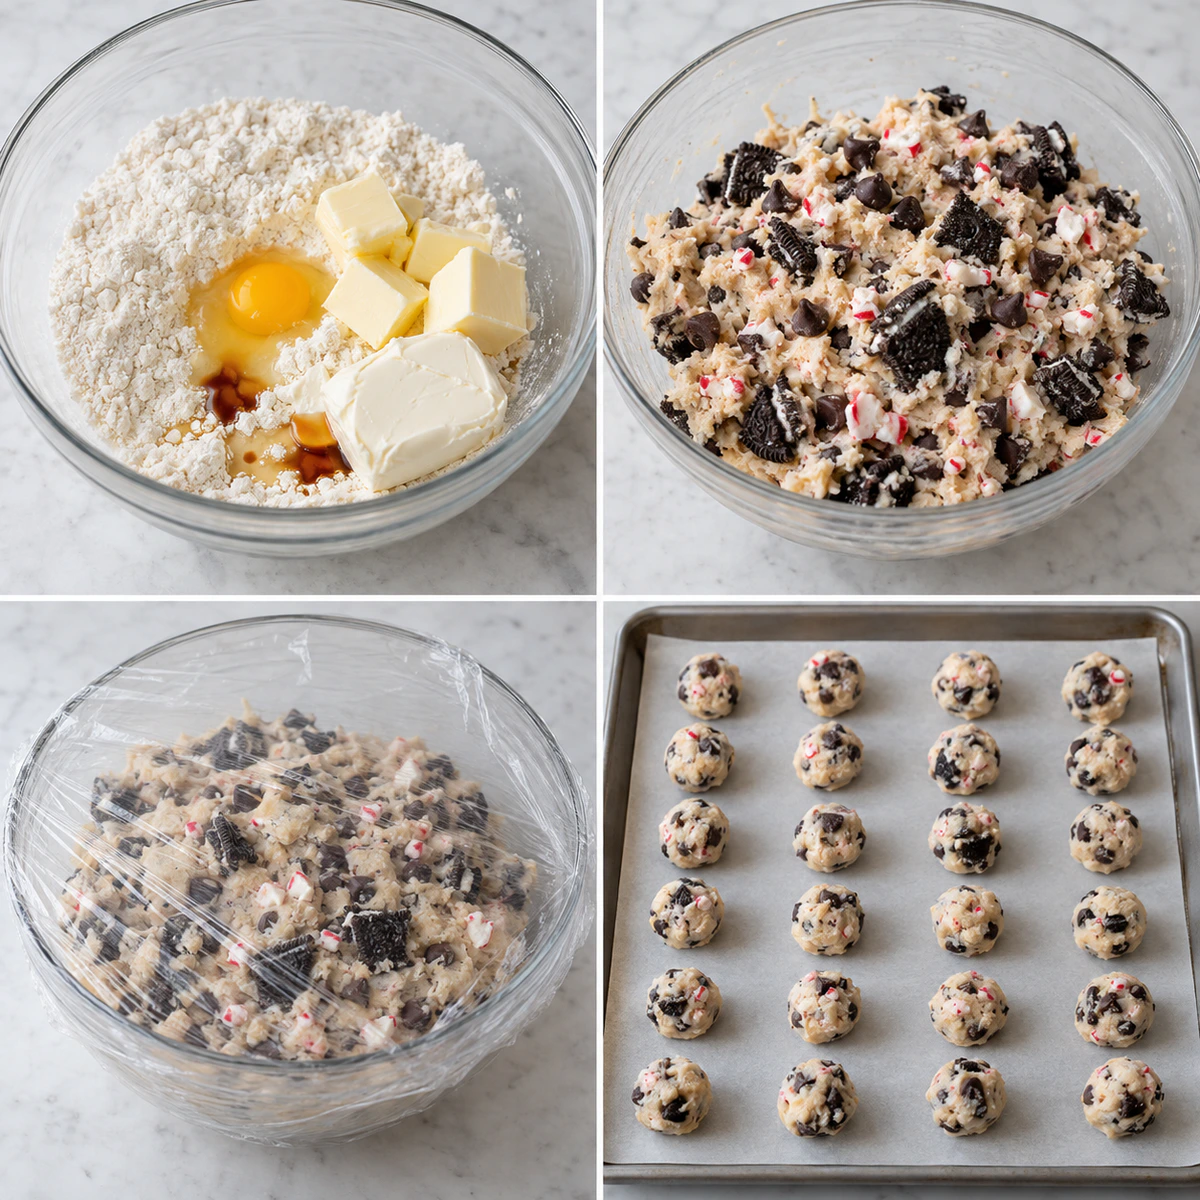
- Prepare Dough: In a mixing bowl, combine the cake mix, softened butter, egg, peppermint extract, vanilla extract, and cream cheese until a soft dough forms.
- Mix-in Ingredients: Gently stir in the Oreo cookie chunks, peppermint crunch pieces, and dark chocolate chips.
- Chill Dough: Refrigerate the dough for at least 60 minutes to firm up.
- Form Dough Balls: Preheat the oven to 350°F (177°C). Scoop and roll the dough into 24 balls.
- Bake: Place 12 dough balls on a baking sheet and bake for 10-11 minutes. Keep the other 12 dough balls refrigerated. Do not overbake; the cookies should appear soft.
- Cool: Allow the cookies to cool on the baking sheet for a few minutes before transferring them to a cooling rack.
For storage details after serving, the USDA leftovers and food safety guidance.
Recipe-Specific Method Notes
For Peppermint Oreo Crunch Cookies, combine the white cake mix, 8 tablespoons softened butter, egg, both extracts, and 4 ounces softened cream cheese into soft dough. Fold in the Oreo chunks, peppermint crunch pieces, and dark chocolate chips, then refrigerate at least 60 minutes. Roll 24 balls, keep half refrigerated while the first 12 bake at 350°F for 10–11 minutes, and do not overbake: the cookies should still look soft before they cool on the sheet.
If you enjoy this recipe, you may also like Fruity Pebbles Bread.
A Calm, Accurate Kitchen Workflow
Before beginning, read the ingredient list and method once. Use clean, dry equipment and check each recipe cue: a mixture may need to look smooth, a dough may need to feel firm, or a cooked component may need to be golden, tender, or set. Those cues work alongside the stated minutes. Avoid adding extra ingredients, changing heat, or rushing a rest. Keep raw ingredients separate from foods ready to serve, and refrigerate leftovers promptly in a covered container.
Why the Order Matters
The order matters because it separates preparation, cooking, sauce-building, pasta handling, and finishing into deliberate stages. Set out every measured ingredient before starting and use the visual cue named in each instruction alongside its stated time. Keep components separate until the method tells you to join them. Avoid adding familiar extras or changing the order merely for convenience: a sauce can thicken differently, chicken can overcook, and cheese can become grainy when the sequence is altered. The source recipe remains the controlling reference for every temperature, timing cue, and cooking step.
Critical Visual and Timing Cues
Work with clean bowls, measured portions, and the named pan or pot so the method is repeatable. Keep perishables appropriately chilled until they are needed. Brown meat only as directed, let liquids reach the stated boil or simmer stage, and lower heat before gradual dairy additions. Check texture and colour at the point named by the source instead of relying on an arbitrary clock. When pasta is folded into sauce, stir steadily and gently so it remains intact and coated. These small decisions preserve the intended balance without introducing unrecorded ingredients or substitutions.
Serving and Storage
Serve the finished recipe in the form and temperature directed by the source. Keep leftovers covered in a suitable container and refrigerate promptly after cooling. The verified ingredient list and quantities remain the reference point; substitutions should be limited to options the original recipe explicitly permits. Use sensible food-safety handling for chicken, beef, dairy, and cooked pasta. Present each portion neatly and enjoy it promptly for the best texture, because creamy sauces and cooked pasta are at their most appealing just after the final combine stage.
Finishing Check
Before serving, make one calm final check: the pasta should be coated rather than dry, the sauce should match the thickness described by the method, and any meat should be fully cooked through as directed. Use a broad spoon or spatula to combine rather than crushing pasta shapes. Keep the cooking surface clear, scrape browned flavour only when the written method calls for it, and serve promptly after the final stage. This careful finish respects the recipe record and gives every portion the same balanced sauce, seasoning, and texture.
Stage-by-Stage Checkpoint
Before moving on from each stage, pause for a short practical check. Confirm that the ingredient just used was measured from the listed amount, the pan is at the stated heat, and the visual cue in the instruction has actually appeared. If a mixture needs to be smooth, stir only until it is smooth; if a sauce needs to bubble, let it reach that cue before starting the next timer. This is not an invitation to alter the recipe. It is a way to follow it more accurately, particularly when several components are prepared close together. Keep the work area tidy, use a clean spoon for tasting where appropriate, and return chilled ingredients to refrigeration until their written step. The most reliable result comes from completing one recorded action fully before beginning the next.
Make the Most of the Ingredients You Have
The ingredient list is intentionally the full working reference for this recipe. Set out every item before beginning and use the listed form where it is specified: a softened ingredient behaves differently from a cold one, and a measured garnish or topping belongs at its recorded point in the sequence. A steady, unhurried setup also helps prevent overmixing, crowding a pan, or reaching the final stage before the serving dish is ready. If an ingredient needs washing, slicing, thawing, or bringing to room temperature, complete that preparation before the method begins, while keeping the quantity unchanged. This small bit of organisation is not an extra recipe step; it simply makes the original directions easier to execute accurately from start to finish.
Image and Recipe Integrity
The new ingredient photograph and chronological 2×2 process photograph support the written method without replacing it. The site’s original hero remains unchanged. The earlier repeated body image is excluded, while a separate original final-serving image is retained as the third body image. Direct responsive WebP copies preserve aspect ratio and orientation without crop, upscaling, image transformations, or a Worker deployment.
Recorded Recipe Tips
- This recipe creates a festive, chewy cookie perfect for the holidays with a mix of Oreo chunks, peppermint crunch, and dark chocolate chips.
- Ensure not to overbake for a soft and chewy texture.
- Refrigerating the dough helps maintain cookie shape during baking.

Conclusion
Peppermint Oreo Crunch Cookies makes 24 cookies in 86 recorded minutes. Preserve listed quantities, temperatures, timing cues, and ordered instructions.
Frequently Asked Questions
- → How many servings does Peppermint Oreo Crunch Cookies make?
It makes 24 cookies and serves 24.
- → How long does Peppermint Oreo Crunch Cookies take?
The recipe records 75 minutes of preparation, 11 minutes of cooking, and 86 minutes total.
- → How do I keep Peppermint Oreo Crunch Cookies consistent?
Measure every listed ingredient, follow the ordered instructions, and use the stated visual, temperature, and timing cues rather than adding unrecorded changes.
- → Why should I preserve the written method?
The sequence is part of the verified recipe: it guides texture, food safety, and the intended finish without changing the original formula.