
 Pin it
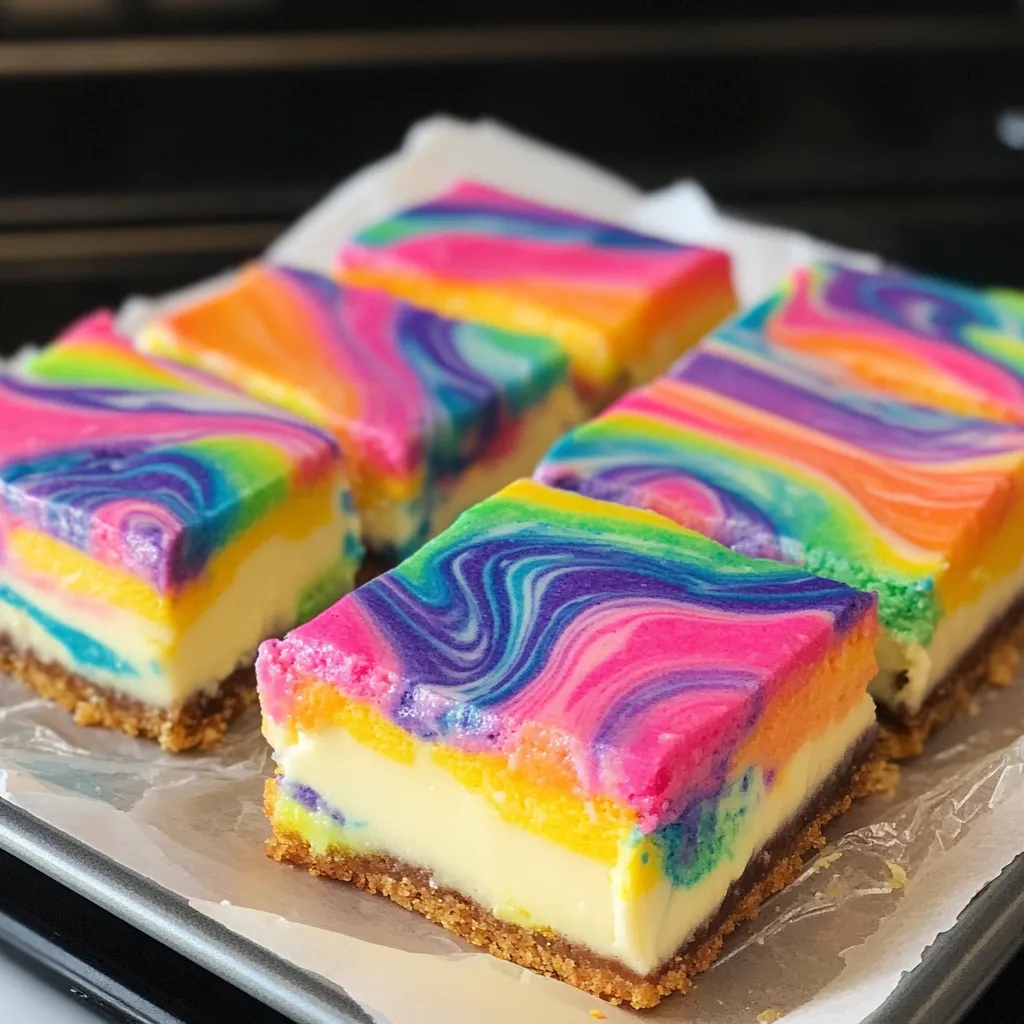
Vibrant swirls of rainbow colors dancing through creamy cheesecake on a tender cake base - these bars bring pure joy to any dessert table. I stumbled upon this recipe while searching for something spectacular for my daughter's rainbow-themed birthday party last spring. Since then, these colorful treats have become my most-requested dessert for potlucks, bake sales, and family gatherings. The magic happens when you pull them from the oven and see those beautiful swirls that make each bar a unique piece of edible art.
I brought these to my neighborhood block party last summer, and they disappeared faster than I could set down the plate. My usually stoic neighbor Tom actually followed me back to the dessert table asking if there were more "rainbow things" hidden somewhere. His seven-year-old daughter stood beside him nodding enthusiastically, rainbow crumbs adorning her cheeks. That's when I knew this recipe was a keeper.
Colorful Components
- White cake mix: The perfect blank canvas for our rainbow colors. Don't substitute yellow cake mix or you'll muddy those beautiful hues we're aiming for.
- Butter: Use real butter, not margarine. I tried the margarine shortcut once, and the texture just wasn't the same. The bars lacked that rich, melt-in-your-mouth quality that makes them so addictive.
- Gel food colors: These concentrated colors create vibrant swirls without thinning the batter. Liquid food coloring just doesn't provide the same intensity and can make your batter too runny. I've found the neon colors create especially striking bars.
- Cream cheese: Make sure it's properly softened or you'll end up with lumps in your cheesecake layer. I've forgotten this step more times than I care to admit and ended up frantically microwaving cream cheese in 10-second bursts.
- Vanilla extract: Splurge on the real stuff if you can. That tiny hint of flavor complexity makes a difference in the cheesecake layer. I've used clear vanilla when I wanted the whitest possible cheesecake background for the swirls.
 Pin it
Rainbow Magic
- Preparing your canvas:
- Line that pan properly - this makes removing and cutting the bars so much easier. I prefer the non-stick foil method for the cleanest cuts. The preheat temperature matters too - 325°F rather than the usual 350°F gives us more control over baking without browning our pretty colors.
- Creating your rainbow base:
- When dividing the batter between bowls, I actually use a kitchen scale for precision. Each portion should be around 2/3 cup of batter. Start with just a tiny bit of gel color - a little goes a long way, and you can always add more but can't take it away! That tablespoon you reserve from each color is crucial for those beautiful top swirls.
- Building the perfect base:
- When spooning the colored batters into the pan, work quickly but thoughtfully. I find a checkerboard pattern works well, but honestly, any arrangement creates a beautiful effect. The key is pressing it down with slightly damp fingers to create an even base without mixing the colors too much.
- Perfecting the cheesecake layer:
- Room temperature cream cheese is non-negotiable for a smooth filling. I've found a few pulses in the food processor creates the silkiest texture, but a hand mixer works fine too. Pour it gently over the base to avoid disturbing those colorful patterns underneath.
- Creating swirl perfection:
- Thinning those reserved colored batters with milk is the secret to beautiful swirls that don't sink into the cheesecake. Drizzle them randomly across the top, then use a toothpick or skewer for the actual swirling. Less is more with swirling - too much and you'll just blend everything into a muddy mess.
- The foil trick:
- That step of covering with foil halfway through baking is absolutely critical. The first time I made these, I skipped it and ended up with brown-tinged swirls that lost their vibrant appeal. The foil keeps those colors bright and beautiful.
My first attempt at these bars was a learning experience, to put it kindly. I didn't reserve enough batter for the top swirls and tried to compensate by using food coloring directly on the cheesecake layer. The result was a tie-dyed mess that tasted great but looked nothing like the gorgeous swirls I was hoping for. I've since perfected the ratio of base to topping and discovered that patience during the cooling process makes all the difference in both appearance and texture.
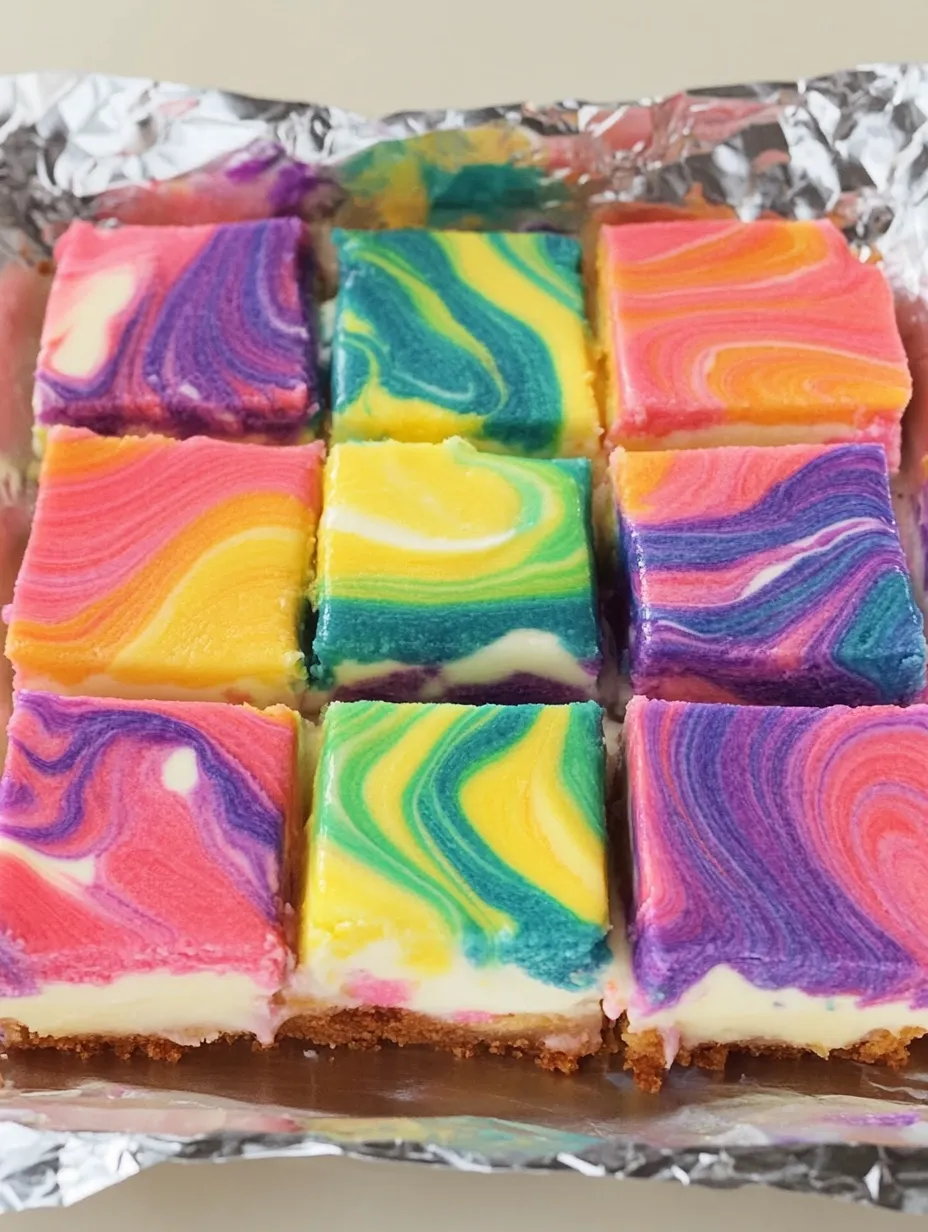
Perfect Presentation
Transform these Rainbow Cheesecake Swirl Bars into an even more impressive dessert by arranging them on a black serving platter that makes the colors pop dramatically. For birthday parties, I've cut them into smaller pieces and arranged them in a rainbow arc shape on the dessert table. They pair beautifully with fresh berries on the side for a more sophisticated presentation. For bake sales, wrap individual bars in clear cellophane with colorful ribbon ties.
Creative Variations
Once you've mastered the basic technique, try seasonal color themes for different occasions. Red, white, and blue make patriotic bars perfect for summer holidays. Green and red create festive Christmas treats. School colors work great for graduation parties or sports celebrations. You can also experiment with flavoring the cheesecake layer - a touch of lemon zest brightens the flavor profile beautifully. For chocolate lovers, try marbling in a few tablespoons of chocolate hazelnut spread along with the colored batter.
Storage Smarts
These colorful bars maintain their fresh flavor and texture for up to five days when stored in an airtight container in the refrigerator. The flavor actually improves after the first 24 hours as the cake layer moistens slightly from the cheesecake. For the cleanest cuts, dip your knife in hot water and wipe dry between slices. If you're making them well ahead, you can freeze the bars in a single layer until solid, then stack them between layers of parchment in a freezer container. Thaw overnight in the refrigerator before serving.
 Pin it
I've brought these Rainbow Cheesecake Swirl Bars to countless gatherings over the past few years, and they never fail to elicit wide eyes and delighted smiles before anyone even takes a bite. There's something about those vibrant swirls that speaks to the kid in all of us while the creamy cheesecake satisfies more grown-up taste buds. My neighbor's daughter now requests these for her birthday instead of cake, which is perhaps the highest compliment a baker can receive. While they might look like they require pastry chef skills, the simplicity of the process makes them accessible to bakers of all levels – just don't tell your admirers how easy they actually were to make!
Frequently Asked Questions
- → Can I use liquid food coloring instead of gel?
- Gel food coloring is recommended as it provides more vibrant colors without thinning the batter. If using liquid colors, you may need more drops and the colors might not be as bright.
- → Can I make these ahead of time?
- Absolutely! These bars actually taste better after chilling overnight, making them perfect for preparing a day before your event.
- → How do I get the perfect swirl pattern?
- Use a toothpick or skewer to create swirls, and don't overdo it. Just a few gentle motions will create beautiful patterns without muddying the colors.
- → Can I freeze these cheesecake bars?
- Yes, they freeze well for up to 2 months. Wrap them individually and thaw in the refrigerator overnight before serving.
- → What if I don't have all six food colors?
- You can use fewer colors and still get a beautiful result. Even 3-4 colors will create a lovely rainbow effect. You can also mix primary colors to create others.