Rainbow Drip Cake Magic

Featured in Irresistible Sweet Treats.

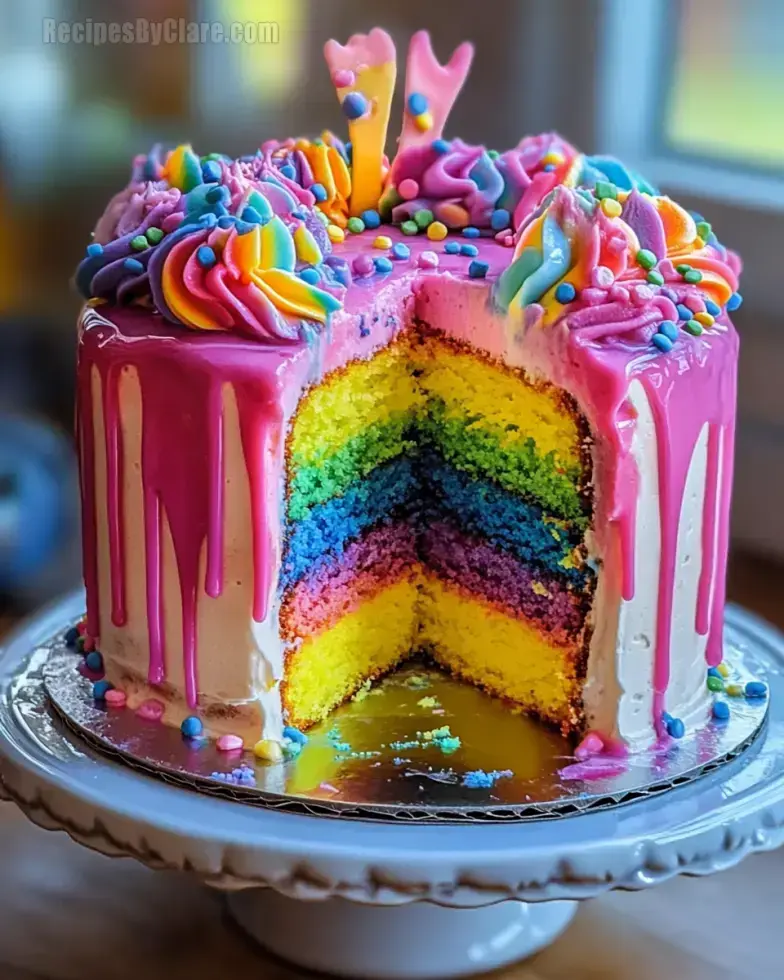
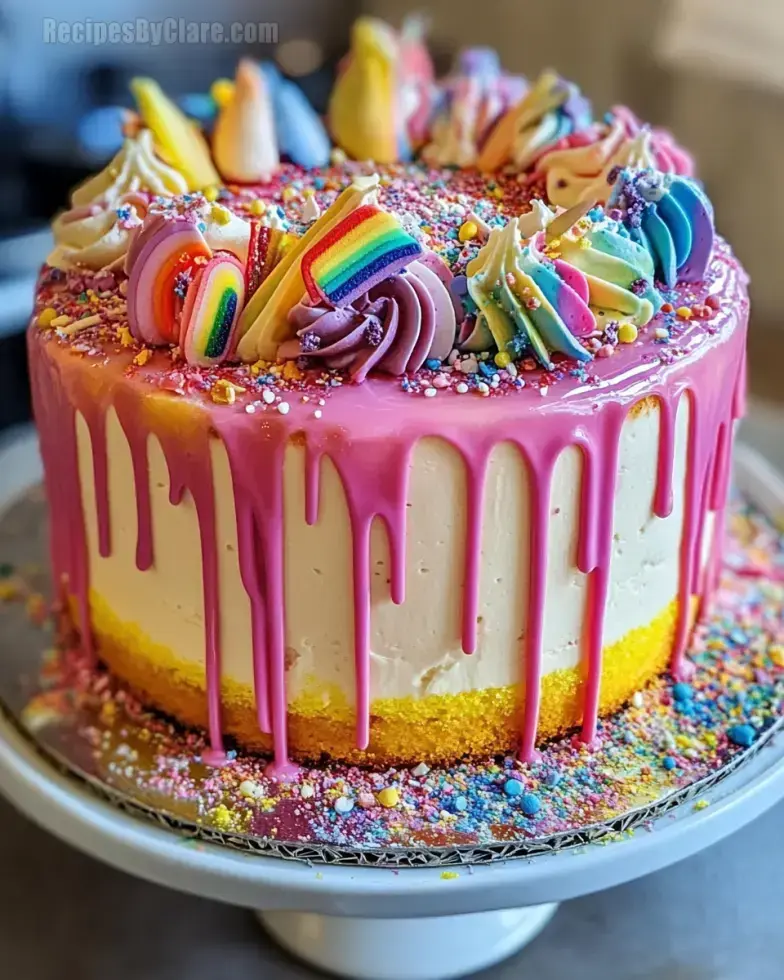
This stunning Rainbow Drip Cake brings the magic of color and flavor to your party table! With its layers of pink, blue, and yellow sponge cake, held together by creamy buttercream frosting, this cake is as fun to make as it is to eat. The real show-stopper is the white chocolate drip, tinted with gel food coloring to match the rainbow theme. Buttercream swirls and colorful sprinkles make it an irresistible centerpiece for any celebration. Easy to bake and decorate, this cake is perfect for birthdays, holidays, or any festive occasion.

Clare Greco
Updated on Mon, 20 Jan 2025 15:56:59 GMT
Rainbow Drip Cake Magic Pin it
Rainbow Drip Cake Magic | recipesbyclare.com

Rainbow Drip Cake Magic

This Rainbow Drip Cake is a show-stopping dessert that’s perfect for any celebration! With layers of vibrant sponge cake in shades of pink, blue, and yellow, this cake adds a burst of color and joy to your party table. The fluffy sponge is paired with a rich buttercream frosting and topped with a beautiful white chocolate drip for a professional finish. Buttercream swirls and colorful sprinkles complete this cake, making it a must-bake for birthdays or any festive occasion.

INGREDIENTS
  • All-purpose flour: 3 cups, sifted
  • Baking powder: 2 1/2 tsp, to help the cake rise
  • Unsalted butter: 1 cup, softened for easy creaming
  • Sugar: 2 cups, for sweetness
  • Eggs: 4 large, to bind the cake batter
  • Whole milk: 1 cup, for moisture and richness
  • Vanilla extract: 1 tsp, for added flavor
  • Gel food coloring: Pink, blue, and yellow for the colorful layers
  • Buttercream frosting: To fill and coat the cake
  • Sprinkles: For decoration
  • White chocolate drip: Tinted with gel food coloring to match the cake
INSTRUCTIONS
Step 1:
Preheat the oven to 350°F (180°C) and grease three 8-inch round cake pans.
Step 2:
Cream the butter and sugar together until light and fluffy. Add eggs one at a time, beating well after each addition.
Step 3:
In a separate bowl, mix flour and baking powder. Gradually add to the butter mixture, alternating with milk. Stir in the vanilla.
Step 4:
Divide the batter into three bowls and add gel food coloring (pink, blue, yellow) to each.
Step 5:
Pour the colored batters into the prepared pans and bake for 25-30 minutes, until a toothpick inserted comes out clean. Let the cakes cool.
Step 6:
Stack the cooled cakes with buttercream frosting in between. Apply a crumb coat and chill for 30 minutes.
Step 7:
Decorate the cake with another layer of buttercream. Add the white chocolate drip to the top edges, letting it drip down the sides.
Step 8:
Top with buttercream swirls and sprinkles for decoration.
Serving and Storage Tips
  • For best results, serve the cake at room temperature to enjoy the full flavor of the buttercream and sponge.
  • Store the cake in the refrigerator for up to 3 days, but allow it to come to room temperature before serving.
Helpful Notes
  • Gel food coloring works best for bright, vibrant colors without altering the cake's consistency.
  • If the white chocolate drip seizes when adding food coloring, add a teaspoon of vegetable oil to smooth it out.

Tips from Well-Known Chefs

  • Chef Marcus suggests adding a pinch of salt to the buttercream to enhance the sweetness of the cake layers.
FAQs

Can I use different food coloring?

Yes, you can customize the colors to your liking or match a specific theme!

How can I make the cake gluten-free?

Substitute the all-purpose flour with a 1:1 gluten-free flour blend.

Can I use a different frosting?

Yes, cream cheese frosting or Swiss meringue buttercream would also work well with this cake.

Can I skip the drip decoration?

Absolutely! The cake will still look beautiful with just the buttercream swirls and sprinkles.
Rainbow Drip Cake Magic Pin it
Rainbow Drip Cake Magic | recipesbyclare.com

Conclusion

Rainbow Drip Cake Magic is a vibrant cake designed to bring joy to any celebration. Made from fluffy layers of colorful sponge in pink, blue, and yellow, the cake is stacked with creamy buttercream frosting between each layer. After a crumb coat and chill, the cake is decorated with a second smooth layer of buttercream and a stunning white chocolate drip, which cascades elegantly over the sides of the cake. Tinted with gel food coloring, the white chocolate drip adds a beautiful finishing touch. Buttercream swirls and sprinkles top off the cake, making it an irresistible dessert perfect for birthday parties, festive gatherings, or simply to impress your loved ones. Whether you're a seasoned baker or a beginner, this recipe is straightforward and offers an excellent way to practice your cake decorating skills. The result is a cake that's both delicious and visually stunning, leaving everyone in awe of your baking skills.

Rainbow Drip Cake

A colorful rainbow drip cake topped with buttercream swirls and sprinkles. Perfect for celebrations!

Prep Time
30 Minutes
Cook Time
30 Minutes
Total Time
60 Minutes

Category: Sweet Treats

Difficulty: Intermediate

Cuisine: American

Yield: 12 Servings (1 cake)

Dietary: Vegetarian

Ingredients

01 3 cups all-purpose flour.
02 2 1/2 tsp baking powder.
03 1 cup unsalted butter, softened.
04 2 cups sugar.
05 4 large eggs.
06 1 cup whole milk.
07 1 tsp vanilla extract.
08 Gel food coloring (pink, blue, yellow).
09 Buttercream frosting (for filling and decoration).
10 Sprinkles for decoration.
11 White chocolate drip, tinted with gel food coloring.

Instructions

Step 01

Preheat the oven to 350°F (180°C). Grease and line three 8-inch round cake pans.

Step 02

In a large bowl, cream the butter and sugar together until light and fluffy.

Step 03

Add the eggs one at a time, beating well after each addition.

Step 04

In a separate bowl, whisk together the flour and baking powder.

Step 05

Add the dry ingredients to the butter mixture in three parts, alternating with the milk, beginning and ending with the dry ingredients. Stir in the vanilla extract.

Step 06

Divide the batter equally into three bowls and add different gel food coloring to each bowl (pink, blue, yellow).

Step 07

Pour each colored batter into the prepared pans. Bake for 25-30 minutes or until a toothpick inserted into the center comes out clean. Let the cakes cool completely before assembling.

Step 08

To assemble the cake, stack the cooled cake layers with buttercream frosting between each layer.

Step 09

Apply a thin crumb coat of buttercream frosting to the outside of the cake and refrigerate for 30 minutes to set.

Step 10

Once chilled, apply another smooth layer of buttercream frosting to the cake.

Step 11

Pour the tinted white chocolate drip over the top edges of the cake, letting it drip down the sides.

Step 12

Decorate the top of the cake with buttercream swirls and finish with colorful sprinkles.

Notes

  1. Use gel food coloring for the most vibrant colors without altering the cake's texture.
  2. For best results, chill the cake after applying the crumb coat to ensure a smooth finish.
  3. White chocolate should be melted carefully to avoid seizing when adding gel food coloring.

Nutrition Facts (Per Serving)

It is important to consider this information as approximate and not to use it as definitive health advice.
  • Calories: ~
  • Total Fat: ~
  • Total Carbohydrate: ~
  • Protein: ~