
 Pin it
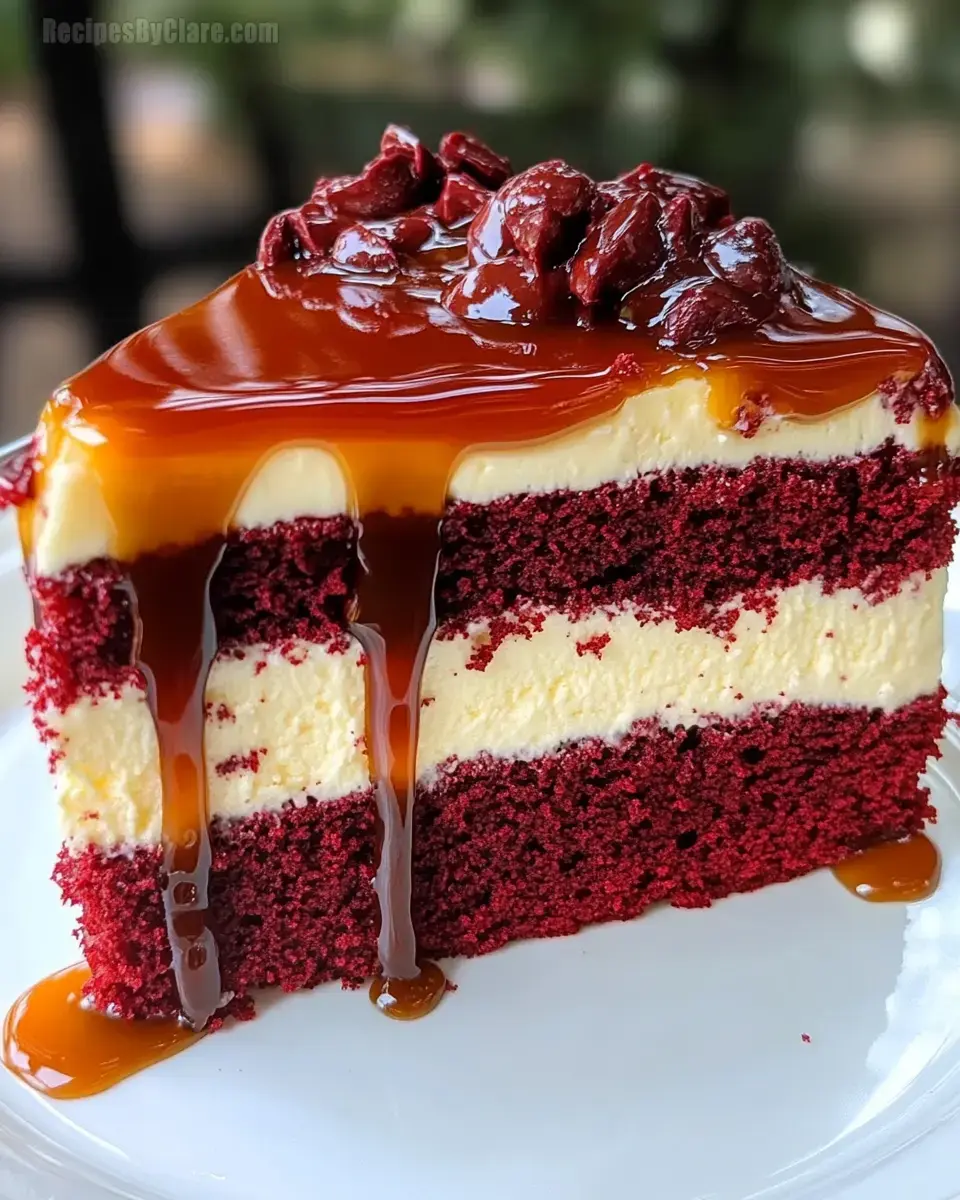
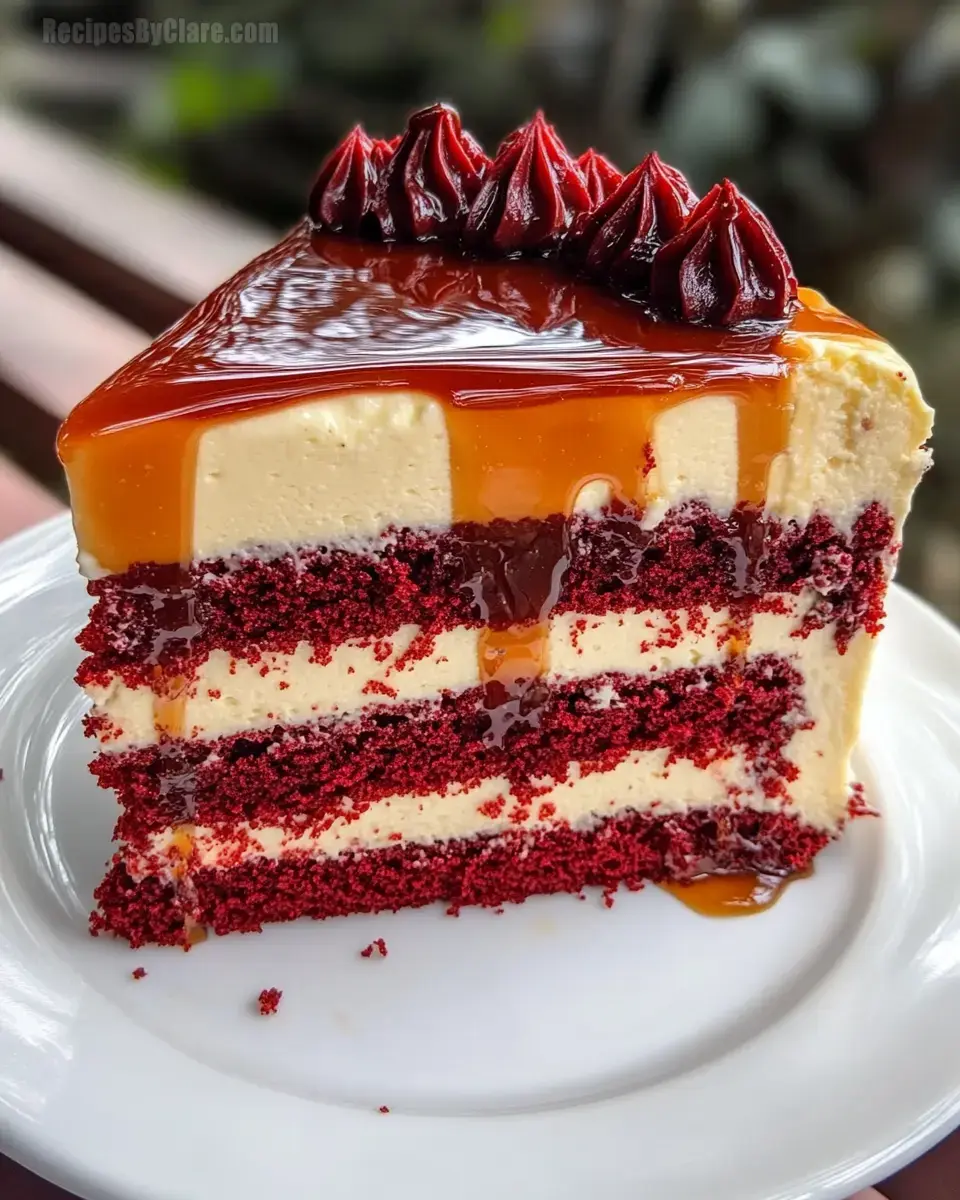
Red Velvet Cheesecake Cake With Caramel Drizzle is a show-stopping dessert that combines the best of both worlds: the soft, rich flavor of red velvet cake and the creamy, smooth texture of cheesecake. Topped with a luxurious caramel drizzle, this cake is perfect for any special occasion or celebration. It’s an indulgent, layered delight that will impress guests and satisfy any sweet tooth.
INGREDIENTS- 2 ½ cups all-purpose flour
- 1 ½ cups granulated sugar
- 1 teaspoon baking soda
- 1 teaspoon salt
- 1 teaspoon cocoa powder
- 1 ½ cups vegetable oil
- 1 cup buttermilk, room temperature
- 2 large eggs, room temperature
- 2 tablespoons red food coloring
- 1 teaspoon vanilla extract
- 1 teaspoon white vinegar
- 16 oz cream cheese, softened
- ½ cup granulated sugar
- 2 large eggs
- 1 teaspoon vanilla extract
- 1 cup granulated sugar
- 6 tablespoons unsalted butter, room temperature, cut into pieces
- ½ cup heavy cream
- 1 teaspoon vanilla extract
- Step 1:
- Cheesecake Preparation: Heat the oven to 325°F (163°C). Prepare a 9-inch springform pan with lining and greasing.
- Step 2:
- Mix the cream cheese until it's silky. Fold in the sugar thoroughly.
- Step 3:
- Incorporate the eggs one after another, blending gently. Add the vanilla essence.
- Step 4:
- Transfer the mixture into the prepared pan and let it bake for 45-50 minutes, ensuring it's firm. Allow to cool before chilling.
- Step 5:
- Crafting the Red Velvet Cake: Set the oven at 350°F (175°C). Ready two 9-inch round pans with grease and flour.
- Step 6:
- Sift together all-purpose flour, sugar, baking soda, salt, and cocoa.
- Step 7:
- Oil, buttermilk, eggs, red coloring, vanilla, and vinegar should be whisked together in another receptacle.
- Step 8:
- Slowly blend the wet components with the dry to create a smooth batter.
- Step 9:
- Divide and pour the batter into the pans, baking for 30-35 minutes until an inserted pick emerges clean.
- Step 10:
- Cake Arrangement: Position a red velvet tier on a platter.
- Step 11:
- Gently place the chilled cheesecake layer atop the first layer.
- Step 12:
- Finish with the second layer of red velvet.
- Step 13:
- Caramel Garnish Creation: Gently liquify the sugar in a pot on medium heat, stirring to reach an amber tint.
- Step 14:
- Introduce the butter, stirring until fully melted.
- Step 15:
- Gradually add in the cream and vanilla, mixing until silky. Leave to cool slightly.
- Step 16:
- Adorn the cake with the caramel, letting it flow down the edges.
- Step 17:
- Indulge: Portion the cake and relish the rich combination of red velvet, creamy cheesecake, and the caramel extravagance!
- Store the cake in an airtight container in the refrigerator for up to 5 days. Let it come to room temperature before serving for the best flavor.
- For a more polished finish, gently warm the caramel sauce before drizzling it over the cake.
- Ensure the cream cheese is softened to room temperature for a smooth cheesecake filling without lumps.
- Use high-quality red food coloring for a vibrant, classic red velvet hue.
Tips from Well-Known Chefs
- For added depth, add a splash of bourbon to the caramel sauce before letting it cool. It pairs beautifully with the red velvet flavor.
Red Velvet Cheesecake Cake With Caramel Drizzle is an indulgent and stunning dessert that’s perfect for birthdays, holidays, and other special occasions. With its layers of soft red velvet and creamy cheesecake, topped off with a sweet caramel finish, it’s a showstopper that’s sure to impress.
FAQsCan I use store-bought caramel sauce?
Yes, you can use store-bought caramel sauce for convenience. Just be sure to warm it slightly before drizzling it over the cake.
What type of frosting pairs well with this cake?
Cream cheese frosting works best for this cake, but a light whipped frosting can also be used for a less rich option.
Can I freeze the cheesecake layer?
Yes, you can prepare the cheesecake layer in advance and freeze it. Wrap it tightly in plastic wrap and store it in the freezer for up to 1 month.
How do I prevent the red velvet layers from crumbling?
Make sure to let the cake layers cool completely before assembling. Chilling the layers slightly can also make them easier to handle.
 Pin it