
 Pin it
I stumbled onto this recipe three years ago when I was drowning in leftover rotisserie chicken and had a houseful of hungry teenagers to feed. What started as desperation cooking has become our most requested family meal. There's something magical about the way the crispy chicken pieces keep their crunch even while nestled in all that cheese and sauce. My brother in law, who considers himself something of an Italian food snob after spending a semester in Florence twenty years ago, actually asked for the recipe after claiming it was "almost as good as his mother's" - which is basically the Italian American equivalent of a Michelin star.
Last month when my daughter's soccer team came over after practice, I pulled this out of the oven and watched twelve hungry teenagers fall completely silent for about ten minutes. My normally chatty daughter later told me her friend Sophia asked if I'd adopt her just for the food. Apparently, her family eats mostly quinoa bowls and she'd never had proper chicken parm before. Poor kid.
What You'll Need
Rigatoni has those ridges that grab onto sauce and cheese like nothing else. I've tried penne and ziti in a pinch, but something about the heft of rigatoni stands up better to the chicken.
Marinara sauce can make or break this dish. I'm not above using jarred - Rao's is worth the extra few bucks when I don't have homemade on hand. Just don't use the super sweet kinds or anything with weird added flavors.
Mozzarella needs to be full fat and freshly shredded if possible. Those pre shredded bags have anti caking stuff that keeps it from melting properly. Trust me on this one - I learned the hard way after serving a casserole with patches of weirdly separated cheese.
Chicken breasts work perfectly when sliced into strips rather than trying to cook whole cutlets. The increased surface area means more crispy coating in each bite, which is really what we're all after.
Breadcrumbs should definitely be Italian style. I've made my own by pulsing stale bread with dried herbs, but who has time for that on a Tuesday? The canister kind works just fine.
 Pin it
Step-by-Step Instructions
- Starting pasta properly
- means salting your water like you mean it. Pasta cooked in under salted water never tastes right, no matter how much seasoning you add later.
- Stopping cooking just shy of al dente
- felt wrong the first time I did it - the pasta seemed too firm when I drained it. But those extra minutes in the oven with hot sauce finish the job perfectly.
- Cutting chicken strips against the grain
- makes a huge difference in tenderness. I aim for pieces about the width of my pinky finger, which cook quickly and stay juicy.
- Setting up breading stations before you start
- saves so much hassle. There's nothing worse than having gunky hands and realizing you forgot to prepare the next step.
- Dredging thoroughly
- means using one hand for dry ingredients and one for wet to avoid creating those clumpy fingers that make the whole process ten times messier.
- Adding butter to the oil
- was a trick I learned from my grandmother. She swore it helped with browning, and whatever the science, it does seem to create a more golden crust.
- Testing oil temperature with a breadcrumb
- lets you know it's ready - it should sizzle immediately but not burn. Too cool and you get greasy chicken; too hot and you get burnt coating with raw centers.
- Draining properly on paper towels
- pulls away excess oil that would otherwise make your carefully fried chicken soggy once in the casserole.
My first version of this recipe was a complete mess. I crowded too much pasta in too small a dish, overcooked the chicken, and used pre shredded "Italian blend" cheese that melted into an odd, grainy texture. The biggest game changer was figuring out that layering some of the cheese in the middle instead of putting it all on top creates pockets of melty goodness throughout instead of just a cheese cap.
Serving Ideas
Garlic bread makes the perfect partner for soaking up extra sauce. I keep it simple - split a baguette, spread with butter mixed with garlic powder and dried parsley, then wrap in foil and warm in the oven while the casserole rests.
Simple green salad dressed with nothing more than good olive oil, lemon juice, and salt cuts through the richness perfectly. Nothing fancy - just clean, bright flavors.
Red wine obviously works here - nothing fancy needed. That $12 Chianti is actually perfect with this kind of hearty food.
Different Spins
Monday shortcut version uses rotisserie chicken torn into chunks and tossed with a little olive oil and breadcrumbs, then briefly crisped under the broiler before adding to the casserole.
Veggie loaded adaptation incorporates sautéed bell peppers, onions and mushrooms between the layers for people who need to feel virtuous about their comfort food.
Spicy twist happens when I add crushed red pepper flakes to both the sauce and the breadcrumb mixture - perfect for when my son's college friends visit and want to prove their heat tolerance.
Keeping It Good
Storing leftovers works best in shallow containers that allow quick cooling in the refrigerator, preventing that weird condensation that makes the top soggy.
Reheating in the oven takes longer but maintains the textural contrast between pasta and chicken much better than microwaving, which turns everything soft.
Freezing individual portions has saved my sanity on busy weeknights - they reheat directly from frozen in about 45 minutes at 350°F with a piece of foil on top to prevent over browning.
 Pin it
This chicken parmesan casserole has gotten me through countless sports team dinners, family gatherings, and "the boss is coming over" moments. It strikes that perfect balance between impressive and accessible that makes people think you're a better cook than you might actually be. My mom still asks for it on her birthday instead of going out to a restaurant, which might be the highest compliment a dish can receive. Not bad for something that started as a way to use up leftovers and feed hungry kids without making multiple meals.
Frequently Asked Questions
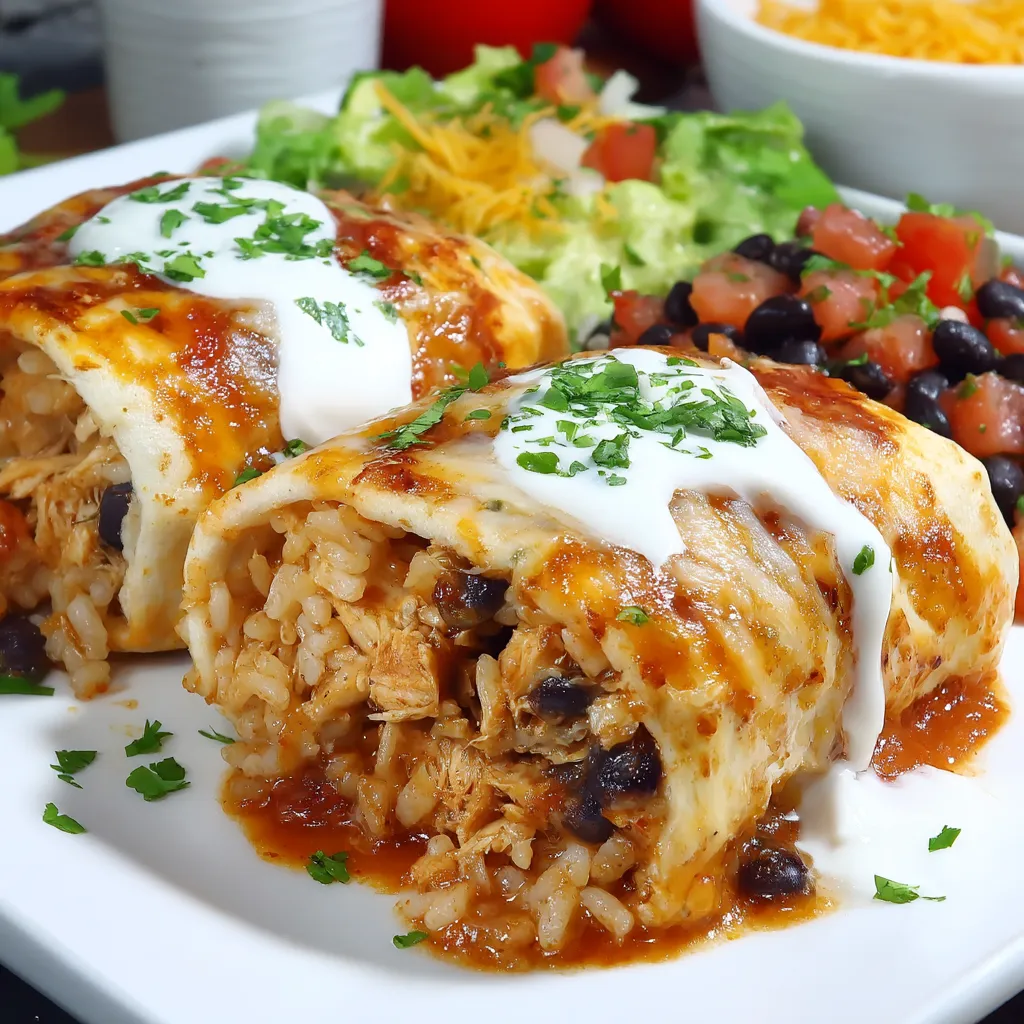
- → Can I prepare these burritos ahead of time?
- Yes! You can assemble the burritos without the sauce up to 24 hours ahead and refrigerate them covered. When ready to bake, prepare the sauce, pour it over the burritos, add cheese, and bake as directed, adding about 5 extra minutes to the covered baking time since they'll be starting cold.
- → How do I store and reheat leftovers?
- Store leftover burritos in an airtight container in the refrigerator for up to 3 days. Reheat individual portions in the microwave for 1-2 minutes until heated through. For a crispier texture, reheat in a 350°F oven for about 15 minutes. The sauce may separate slightly when reheated, but will still taste delicious.
- → Can I freeze these burritos?
- Yes, these freeze well in two ways: 1) Freeze the assembled, unbaked burritos without sauce, individually wrapped in foil, then sealed in a freezer bag for up to 3 months. Thaw overnight, then add sauce and cheese before baking. 2) Freeze fully cooked leftovers in individual portions for quick meals. Thaw and reheat in the microwave or oven.
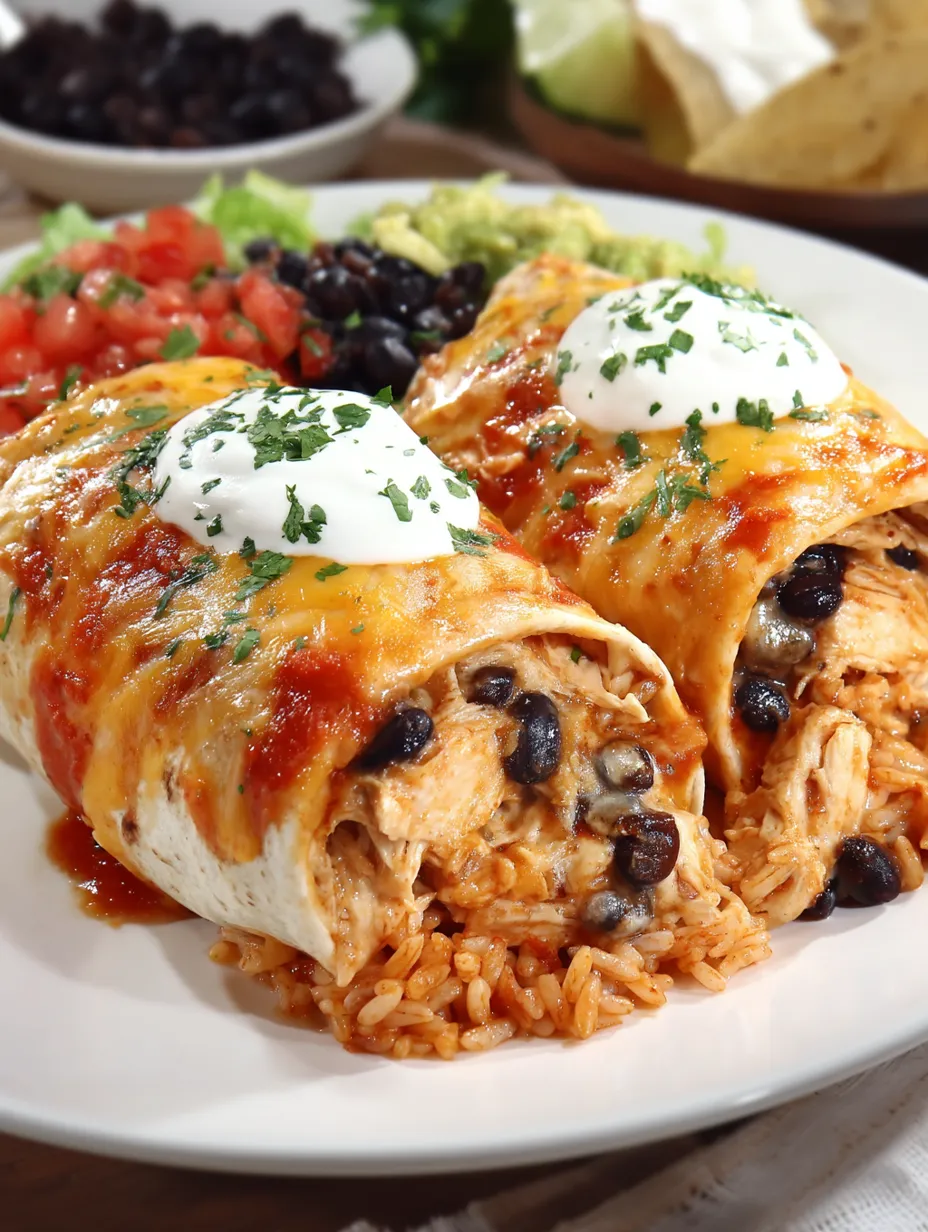
- → What can I substitute for chicken to make this vegetarian?
- For a vegetarian version, replace the chicken with an extra cup of black beans or pinto beans, 2 cups of roasted vegetables (bell peppers, zucchini, corn, and mushrooms work well), or 1 cup of cooked quinoa for protein. The rest of the recipe remains the same.
- → Can I use corn tortillas instead of flour tortillas?
- While traditional burritos use flour tortillas because they're more pliable, you can use corn tortillas for a gluten-free option. They're smaller and more prone to cracking, so warm them first to increase flexibility, use less filling in each, and arrange them more like enchiladas rather than fully wrapped burritos.
- → What sides go well with these burritos?
- These hearty burritos are a complete meal on their own, but they pair wonderfully with Mexican rice, a simple green salad with cilantro-lime dressing, or a side of Mexican street corn (elote). For appetizers, serve with guacamole, fresh salsa, and tortilla chips.