
 Pin it
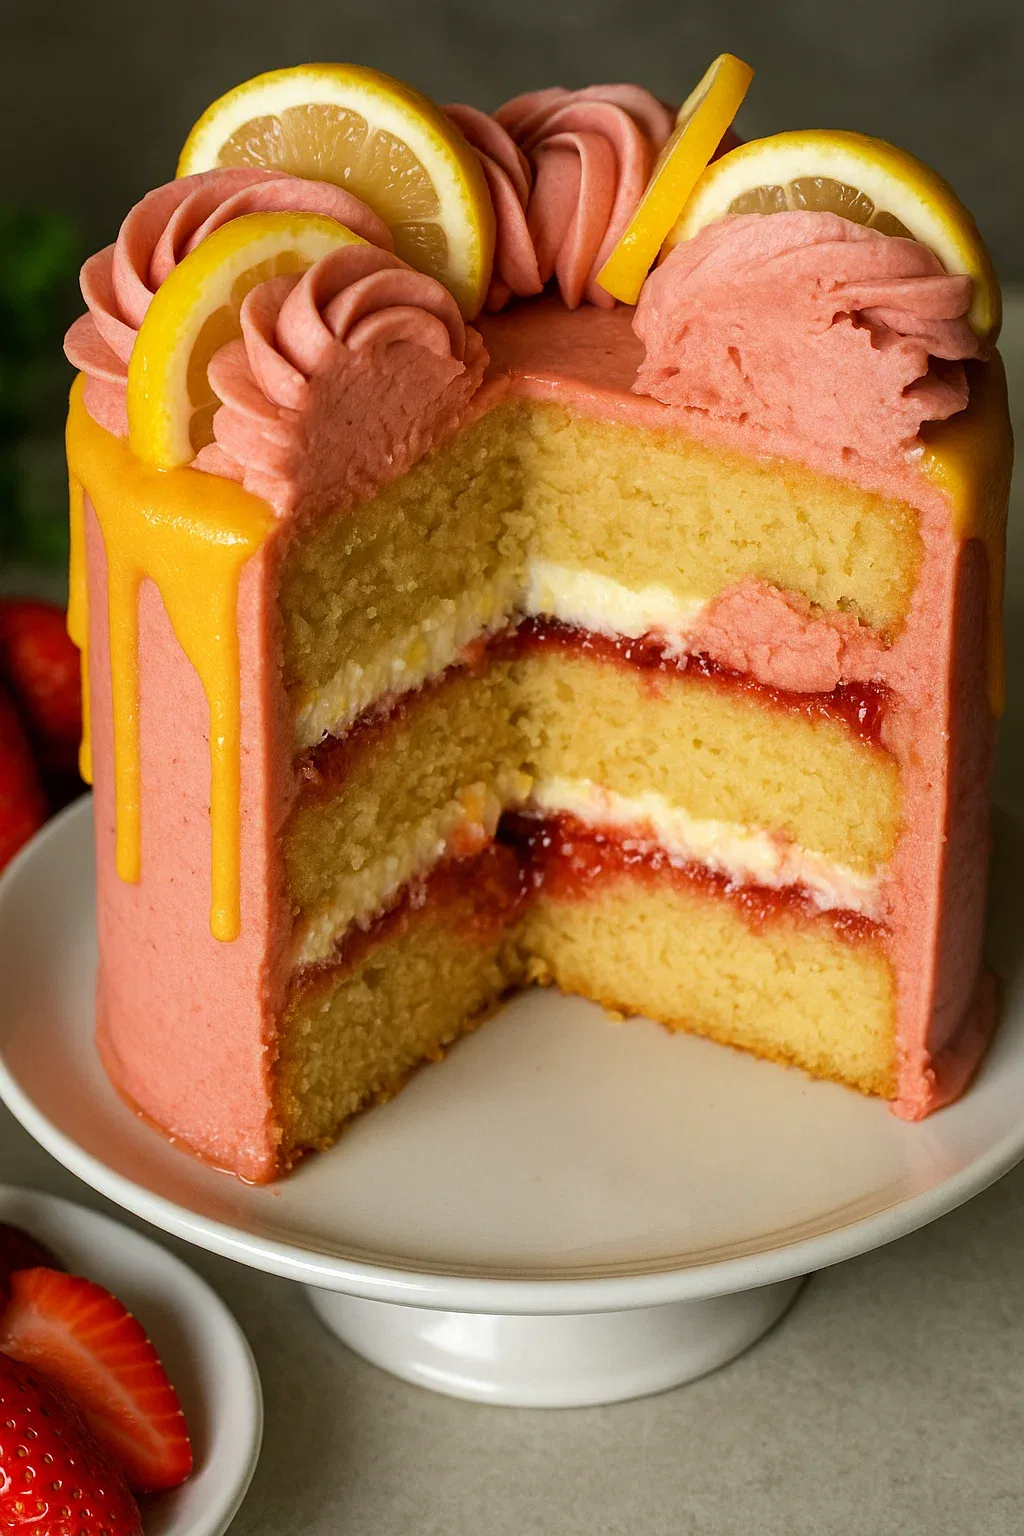
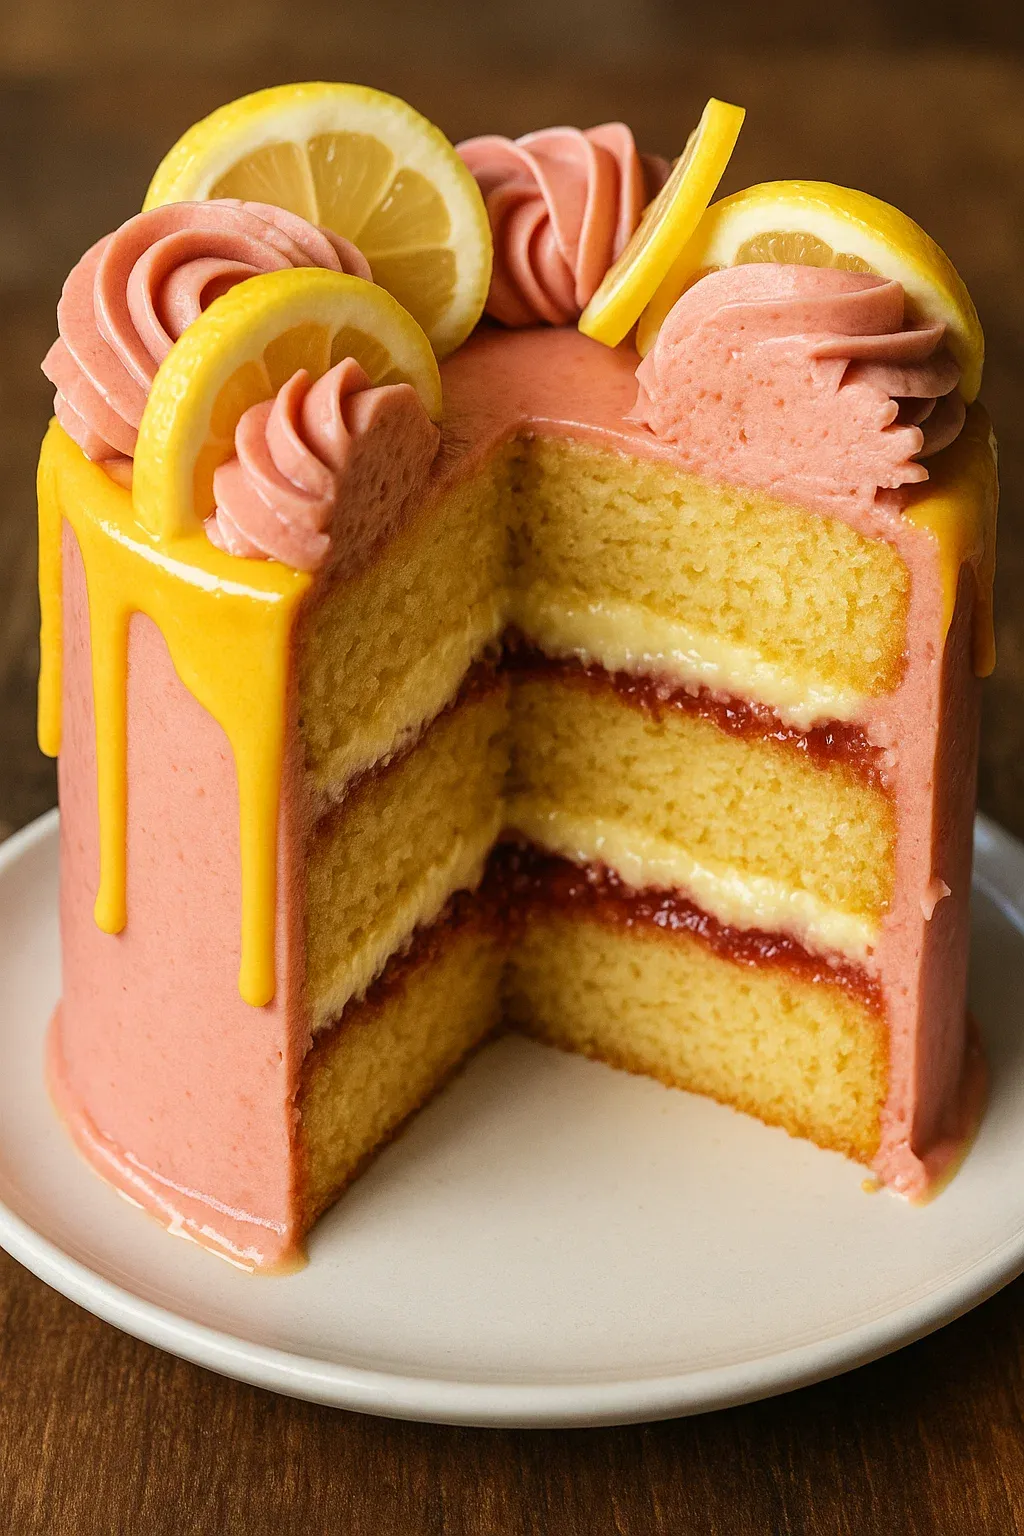
This strawberry lemonade cake brings together the bright flavors of lemon and fresh strawberries in a stunning layered dessert that's perfect for special occasions. The combination of tangy lemon cake, sweet strawberry filling, and creamy frostings creates a spectacular flavor profile that will impress everyone at your table.
I first created this cake for my daughter's spring birthday party, and it quickly became our most requested celebration dessert. The beautiful pink and yellow colors always brighten the table, and guests are always amazed that something so beautiful can be homemade.
Ingredients
For the Lemon Cake
- Unsalted butter: Provides richness and helps create a tender crumb
- Powdered sugar: Gives the cake a finer texture than granulated sugar would
- Room temperature eggs: Ensure proper emulsion for a light cake
- Vanilla extract: Enhances all the flavors without overpowering
- All purpose flour: Creates the perfect structure
- Cornstarch: Helps tenderize the crumb for a velvety texture
- Leavening agents: Baking powder and soda work together for the perfect rise
- Buttermilk: Adds moisture and tanginess that complements the lemon perfectly
- Fresh lemon juice and zest: Provide bright citrus flavor throughout the cake
For the Fillings and Frostings
- Homemade strawberry compote: Gives concentrated berry flavor without excess moisture
- Strawberry Swiss buttercream: Creates a stable, silky exterior with natural fruit flavor
- Lemon mascarpone chantilly: Adds a luxurious creamy layer between the cake tiers
- White chocolate lemon drip: Provides a stunning decorative element and extra citrus punch
Step-by-Step Instructions
Prepare the Lemon Cake
- Step 1:
- Begin by preheating your oven to 165°C (325°F) and preparing three 15 cm (6 inch) cake pans with parchment paper circles. Properly prepared pans ensure your cakes will release cleanly after baking. Take time to sift together the dry ingredients in a separate bowl this creates a lighter texture and ensures even distribution of leavening agents.
Create the Butter Base
- Step 2:
- In your mixing bowl, cream the softened butter with powdered sugar and fresh lemon zest for a full 2-3 minutes. This extended mixing incorporates air and creates the foundation for a tender cake. The lemon zest releases fragrant oils when rubbed into the sugar, intensifying the citrus flavor throughout the batter.
Add Eggs and Vanilla
- Step 3:
- Incorporate room temperature eggs and vanilla extract, beating for 3-5 minutes until the mixture becomes noticeably lighter in both color and texture. This extended mixing creates a stable emulsion that will hold air bubbles for a lighter cake. Room temperature eggs blend more easily and create a smoother batter.
Combine Wet and Dry Ingredients
- Step 4:
- Mix the buttermilk with fresh lemon juice in a measuring cup, then alternate adding this mixture and the dry ingredients to your butter mixture. Use gentle folding motions with a spatula rather than an electric mixer at this stage to preserve the air you've incorporated and prevent gluten development which could make your cake tough.
Bake to Perfection
- Step 5:
- Divide the batter evenly between your prepared pans and bake until the tops are golden and a toothpick inserted in the center comes out clean, approximately 30 minutes. Allow the cakes to cool in the pans for about 10 minutes before turning them out onto cooling racks to cool completely.
Prepare the Fillings
- Step 6:
- While the cakes cool, make the strawberry compote, strawberry Swiss buttercream, and lemon mascarpone chantilly according to the linked recipes. Cooling all components completely before assembly is essential for a structurally sound cake.
Assemble the Cake
- Step 7:
- Level your cooled cake layers using a serrated knife or cake leveler for perfectly flat surfaces. Place the first layer on a cake board and pipe a ring of strawberry buttercream around the edge to create a dam. Fill the center with strawberry compote, then spread a layer of lemon mascarpone chantilly inside the dam. Repeat with the second layer, then top with the third cake layer.
Frost and Finish
- Step 8:
- Apply a thin crumb coat of strawberry buttercream over the entire cake and chill for about 15 minutes to set. Then apply a final thicker layer of buttercream, smoothing with an offset spatula and icing smoother for a professional finish. Chill the cake thoroughly before applying the white chocolate lemon drip for the best results.
 Pin it
The lemon mascarpone chantilly is my absolute favorite element in this cake. I discovered this combination when experimenting with different fillings, and the light, creamy texture paired with bright lemon flavor creates the perfect counterpoint to the sweet strawberry components. My family always fights over any leftover filling I might have after assembly!
Mastering the Lemon Drip
The white chocolate lemon drip creates that wow factor that takes this cake from homemade to professional looking. The key is temperature control. If your white chocolate mixture is too warm, you'll end up with drips that run all the way to the cake board. Too cool, and the drips will be short and stubby. The ideal temperature is around 30°C (86°F), where the mixture flows smoothly but sets up quickly on the cold cake. Practice making drips on the inside of a chilled glass before applying to your cake if you're nervous.
Make Ahead Options
This cake becomes more flavorful after the components have had time to meld together, making it an excellent make ahead dessert. You can bake the cake layers up to two days in advance, wrapped tightly in plastic wrap once cooled. The strawberry compote can be made up to a week ahead and stored in the refrigerator. Even the assembled cake improves with an overnight rest in the refrigerator, allowing the flavors to deepen and the textures to harmonize perfectly.
Scaling the Recipe
While this recipe is designed for a 6 inch (15 cm) cake serving 8-10 people, you can easily adapt it for different sized pans. For an 8 inch (20 cm) cake, multiply all ingredients by 1.5 and increase the baking time by about 5-7 minutes. For a 9 inch (23 cm) cake, double the recipe. The cake layers will be slightly thinner if you maintain three layers, so check for doneness a few minutes earlier than the original recipe suggests.
 Pin it
Frequently Asked Questions
- → How do I ensure the sponge cakes remain moist?
Ensure that you don’t overmix the batter and bake only until a toothpick inserted in the center comes out clean. Avoid overbaking as it can dry out the cakes.
- → Can I substitute buttermilk in the cake?
Yes, replace buttermilk with semi-skimmed milk mixed with a splash of vinegar or lemon juice, or use a combination of milk and plain yogurt.
- → How do I prevent the strawberry compote from seeping out?
Pipe a secure border of buttercream around the cake layers to encase the compote and prevent it from leaking during assembly.
- → Can I make this cake ahead of time?
Absolutely, the cake can be wrapped and refrigerated for up to 4 days or frozen for up to 3 months. Add the glaze and decorations shortly before serving.
- → What’s the best way to achieve a smooth buttercream finish?
Spread a crumb coat, chill the cake, and then apply a thicker buttercream layer. Smooth it using an offset spatula and icing smoother, leveraging the acrylic plate method for precision.
- → How long should the cake sit before serving?
Let the assembled cake sit at room temperature for 20-30 minutes to soften the buttercream for easier cutting and serving.