

Very Strawberry Crunch Cheesecake Slice is presented with the exact source ingredient list and ordered method, plus a practical editorial guide for using those facts accurately. Measure every stated quantity, keep the original order, and follow the named temperature, time, and finish cues rather than adding an unrecorded shortcut.
Very Strawberry Crunch Cheesecake Slice Ingredients
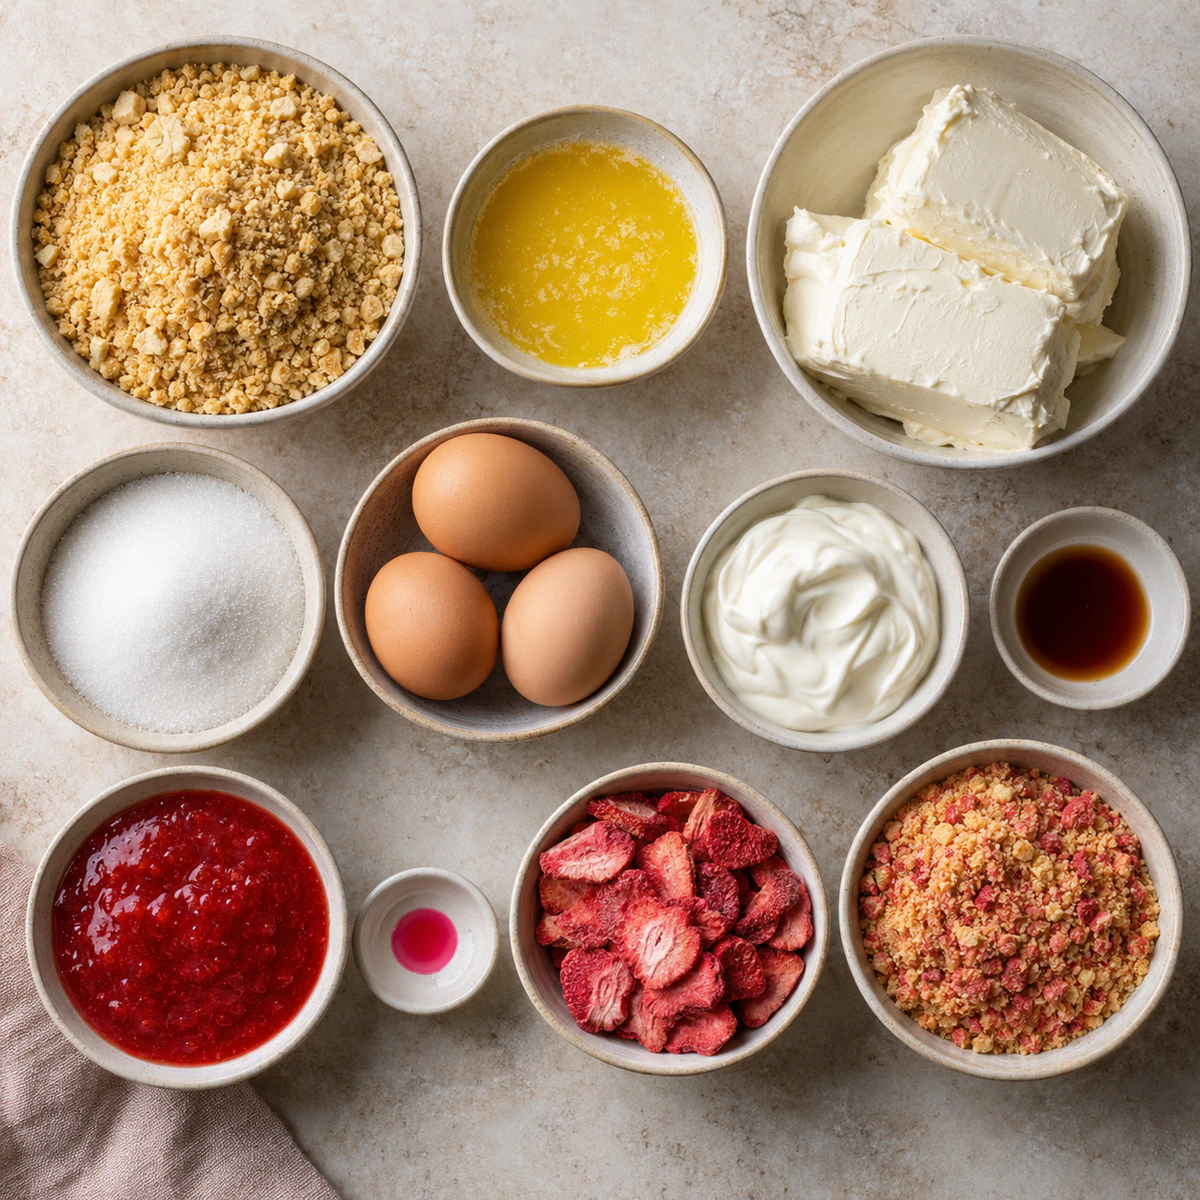
Ingredients: 2 cups crushed golden Oreos or vanilla wafer cookies (for crust).; ¼ cup unsalted butter, melted (for crust).; 16 oz cream cheese, softened.; ¾ cup granulated sugar.; 2 large eggs.; ½ cup sour cream.; 1 tsp vanilla extract.; ½ cup strawberry puree or strawberry jam.; 2-3 drops pink food coloring (optional).; 1 cup crushed golden Oreos or vanilla wafer cookies (for topping).; ½ cup freeze-dried strawberries, crushed.; 3 tbsp melted butter (for topping).; 2-3 drops pink food coloring (optional for topping)..
If you enjoy this recipe, you may also like Banana Foster Cheesecake Cups.
How to Make Very Strawberry Crunch Cheesecake Slice
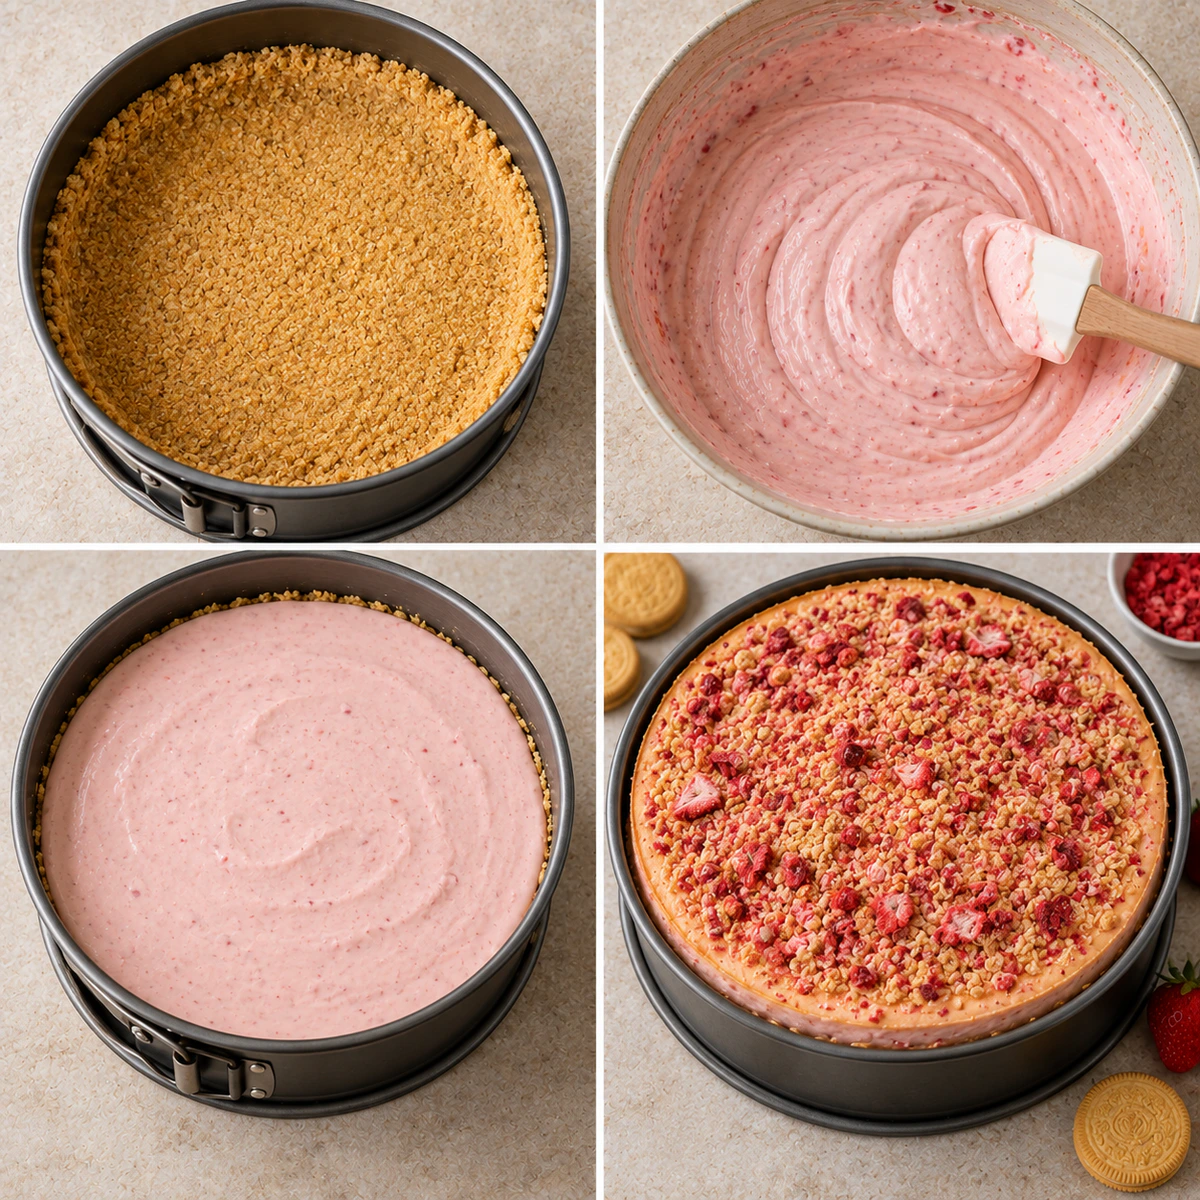
- Preheat: Preheat oven to 325°F (163°C). Grease and line a 9-inch springform pan with parchment paper.
- Prepare Crust: In a medium bowl, mix crushed golden Oreos and melted butter. Press the mixture firmly into the bottom of the prepared pan. Bake for 8-10 minutes, then set aside to cool.
- Prepare Filling: In a large bowl, beat softened cream cheese and sugar until smooth and creamy. Add eggs one at a time, mixing well after each addition. Stir in sour cream, vanilla extract, strawberry puree, and pink food coloring (if using).
- Bake Filling: Pour the filling over the cooled crust and bake for 50-60 minutes, until the center is set but slightly jiggly. Turn off the oven and leave the cheesecake in the oven with the door slightly open for 1 hour. Refrigerate for at least 4 hours or overnight.
- Prepare Topping: In a bowl, mix crushed golden Oreos, crushed freeze-dried strawberries, melted butter, and pink food coloring (if using) until it resembles coarse crumbs.
- Apply Topping: Once fully chilled, sprinkle the strawberry crunch topping evenly over the cheesecake, pressing gently to adhere.
- Serve: Slice and enjoy this sweet, crunchy, and colorful cheesecake!.
For storage details after serving, the USDA leftovers and food safety guidance.
Recipe-Specific Method Notes
Bake the golden-cookie crumb crust in the 9-inch springform at 325°F for 8–10 minutes. Beat the filling smoothly in the written order, including the strawberry puree or jam, then bake 50–60 minutes until set with a gentle jiggle. Cool in the switched-off oven with the door ajar for 1 hour, chill at least 4 hours or overnight, and add the strawberry crunch only before cutting.
If you enjoy this recipe, you may also like Churro Stuffed Cheesecake Bites.
Prepare With the Source in View
Read the complete ingredient list and method before heating anything. Set out the exact measured portions in the order they are used, and keep the original recipe visible while working. This preparation is not a new recipe step; it is a practical way to follow the verified source without guessing at amounts, temperatures, or timing.
Why the Order Matters
Use the written sequence as the controlling workflow. A creamed mixture, a melted coating, a pressed crust, or a baked filling develops differently when ingredients are joined in another order. Complete each named action and watch the stated visual cue before moving on. Avoid unrecorded substitutions, additions, or changes in heat simply because they are familiar.
Temperature, Timing, and Food Safety
Timing and temperature work together. Preheat equipment where the source calls for it, use the recorded minutes as a guide, and check the listed cue such as set, golden, smooth, tender, or cooled. Keep dairy and other perishable ingredients properly chilled until needed, use clean tools, and refrigerate leftovers promptly in a covered container.
Image and Recipe Integrity
The ingredient photograph and chronological four-panel process photograph are editorial aids, not replacements for the method. They show the measured components and the general order visually. The unchanged original hero stays at its existing path, the repeated earlier body image is omitted, and the distinct original final-serving image remains as the third body image.
A Reliable Finish
For a calm finish, clear the work surface before the last stage and have the correct pan, parchment, rack, or serving plate ready. Let cooling, setting, or resting happen for the stated period instead of rushing it. These pauses are especially important for cookies, bars, fudge, and cheesecake because structure continues to settle after heat is removed.
Serving and Storage
Serve the recipe in the form directed by its original method. Store leftovers safely and use the exact source as the reference if you return to the recipe later. Direct WebP responsive copies preserve the image aspect ratio and orientation without cropping, upscaling, Cloudflare image transformations, or any Worker/theme deployment.
Measured Ingredients, Used as Written
Work deliberately from one completed stage to the next. Before mixing, confirm that every ingredient is in the form specified by the source: softened butter behaves differently from melted butter, drained fruit contributes less moisture than fruit with syrup, and a measured topping should stay separate until the written finishing stage. Use a dry measuring cup for dry ingredients and level it without packing unless the source identifies an ingredient as packed. When the method directs folding, use a broad spatula and gentle strokes; when it directs beating or whisking, stop as soon as the stated smooth or combined result appears. This attention keeps the documented proportions meaningful without modifying them.
Equipment and Pan Preparation
Choose equipment that gives the recipe room to behave as written. A properly sized baking pan creates the intended thickness, while parchment or wax paper should be used at the moment the source calls for it. Keep an oven thermometer available if the oven is known to run hot or cool, but do not change the listed temperature merely on assumption. Rotate nothing unless the source says to do so. For recipes that set after cooling, transfer the pan only when it is safe to handle, keep it level, and protect it from steam or condensation. A little organisation prevents small avoidable changes from affecting texture.
Use Cues Without Rewriting the Recipe
Taste and appearance are useful checks only where the written recipe allows them. Watch for the source cues—edges turning lightly golden, a topping becoming smooth, a center holding a gentle jiggle, or a coating beginning to set—and pair those cues with the recorded minutes. Do not use an image as a reason to make a dish darker, thicker, sweeter, or more decorated than the source specifies. The photographs document the recipe presentation, while the ingredient list and numbered instructions remain the factual authority. If a listed optional ingredient is not used, simply omit it rather than replacing it with an unlisted alternative.
Protect the Finished Result
After the final step, preserve the work you have done by cooling and storing carefully. Place hot bakeware on a heat-safe surface, keep food covered only after it is no longer likely to collect condensation, and use clean utensils for serving. For foods that include dairy, eggs, or a cream-based component, return leftovers to refrigeration promptly after the serving period. Label a container if it will be kept for later so no one mistakes its contents or date. These ordinary kitchen practices support the written recipe without changing any ingredient, yield, timing, or intended serving style.
Recorded Recipe Tips
- This vibrant Strawberry Crunch Cheesecake Slice features a sweet strawberry flavor and a colorful, crunchy topping, making it perfect for any strawberry lover.

Conclusion
Very Strawberry Crunch Cheesecake Slice makes 8 slices in 80 recorded minutes. Preserve the listed quantities, temperatures, timings, and method.
Frequently Asked Questions
- → How many servings does Very Strawberry Crunch Cheesecake Slice make?
It makes 8 slices and serves 8.
- → How long does Very Strawberry Crunch Cheesecake Slice take?
The recipe records 20 minutes of preparation, 60 minutes of cooking, and 80 minutes total.
- → How do I keep Very Strawberry Crunch Cheesecake Slice consistent?
Measure every listed ingredient and follow the original sequence, visual cues, temperature, and timing without adding unrecorded changes.
- → Why should I preserve the written method?
The verified sequence guides texture, safe handling, and the intended finish while keeping the original formula intact.