
 Pin it
Imagine biting into warm, crusty bread filled with savory beef, melted cheese, and perfectly sautéed veggies. This stromboli takes everything wonderful about Philly cheesesteaks and wraps it into an easy weeknight dinner my family requests constantly. I stumbled upon this recipe years ago when looking for something different to serve on movie nights, and it's been in regular rotation ever since.
My husband Mark actually requested this three weekends in a row last football season. He claimed it was "for the guests," but I noticed he always managed to grab the first slice before anyone else arrived. Now whenever I mention having friends over to watch a game, he gives me that look that says "stromboli night?"
Important Ingredients
Frozen bread dough - The foundation that makes this recipe so accessible for busy evenings. I've tried making dough from scratch, but honestly, the convenience factor wins every time.
Deli roast beef - Thin slices fold beautifully into the roll and heat quickly during baking. The deli counter at my local grocery slices it perfectly thin when I ask.
Fresh vegetables - The pepper, onion, and mushroom trio brings essential flavor and moisture to balance the richness of meat and cheese.
Provolone cheese - Creates those wonderful cheese pulls that make stromboli so satisfying. The slight tang cuts through the richness perfectly.
Seasoned mayonnaise - My secret weapon that prevents dryness and infuses garlic flavor throughout every bite.
The first time I made this recipe, I skipped the seasoned mayo layer thinking it wasn't necessary. Big mistake! That simple mixture is what keeps everything moist and adds an incredible flavor base. My sister-in-law watched me make it at our last family gathering and said that particular step was "absolute genius."
 Pin it
Step-by-Step Instructions
- Proper thawing
- Give your bread dough sufficient time to thaw and rise according to package directions for the best texture result.
- Vegetable preparation
- Dice everything into small, uniform pieces before sautéing for even cooking and easier rolling later.
- Even distribution
- Spread each layer carefully across the dough surface, paying special attention to reaching the edges while maintaining your border.
- Gentle rolling
- Use firm but careful pressure when creating your log shape to avoid tearing the dough while ensuring tight filling.
- Seam placement
- Position the finished roll with the seam side down on your baking sheet to prevent opening during baking.
- Butter finishing
- Brush the entire surface with melted butter before adding seasonings for that beautiful golden color.
- Resting period
- Allow your finished stromboli to cool slightly before slicing to keep fillings intact and prevent burning your mouth!
My mother-in-law watched me make this recipe last Christmas and was convinced I'd been hiding culinary school training from the family. The truth is much simpler - I've just made this stromboli enough times to learn what works. Initially, I had issues with fillings leaking out during baking until I discovered the importance of that half-inch border and proper seam sealing underneath.
Perfect Companions
Serve this golden beauty with small bowls of warm **marinara sauce** for dipping, transforming the experience into something between a stromboli and calzone. For casual family dinners, I pair it with a simple **Caesar salad** to add freshness that balances the richness. When entertaining, I slice it thinner and arrange pieces on a wooden board surrounded by **pickled vegetables** and extra **provolone cubes** for an Italian-inspired grazing board that disappears quickly.
Different Approaches
Switch up the experience by using different **cheese combinations** - my teenagers love when I use half provolone and half mozzarella for extra cheese-pull drama. For something with a kick, add sliced **pepperoncini peppers** to your vegetable mixture and substitute **pepper jack** for traditional provolone. Create a **breakfast version** using scrambled eggs and breakfast sausage inside - perfect for weekend mornings when we have overnight guests. For vegetarian friends, I load it with extra **mushrooms, roasted red peppers, and sometimes even spinach** with amazing results.
Keeping It Fresh
Store completely cooled leftovers wrapped in foil in the refrigerator where they'll keep beautifully for about three days. For the best texture when reheating, avoid the microwave which makes the bread tough. Instead, wrap loosely in foil and warm in a 325°F oven for about 10 minutes until heated through. Individual portions can be frozen between parchment sheets for quick lunches - my husband takes these to work regularly and his colleagues are constantly asking for the recipe.
 Pin it
Every time I make this stromboli, I'm reminded why simple food done well brings people together so effectively. The recipe has followed me through three moves, countless gatherings, and even became the first meal I cooked in our new kitchen last year. There's something about the aroma of this baking that signals comfort and care to everyone in the house. While I appreciate fancy culinary adventures sometimes, it's these accessible, reliable recipes that form the backbone of real family cooking traditions.
Frequently Asked Questions
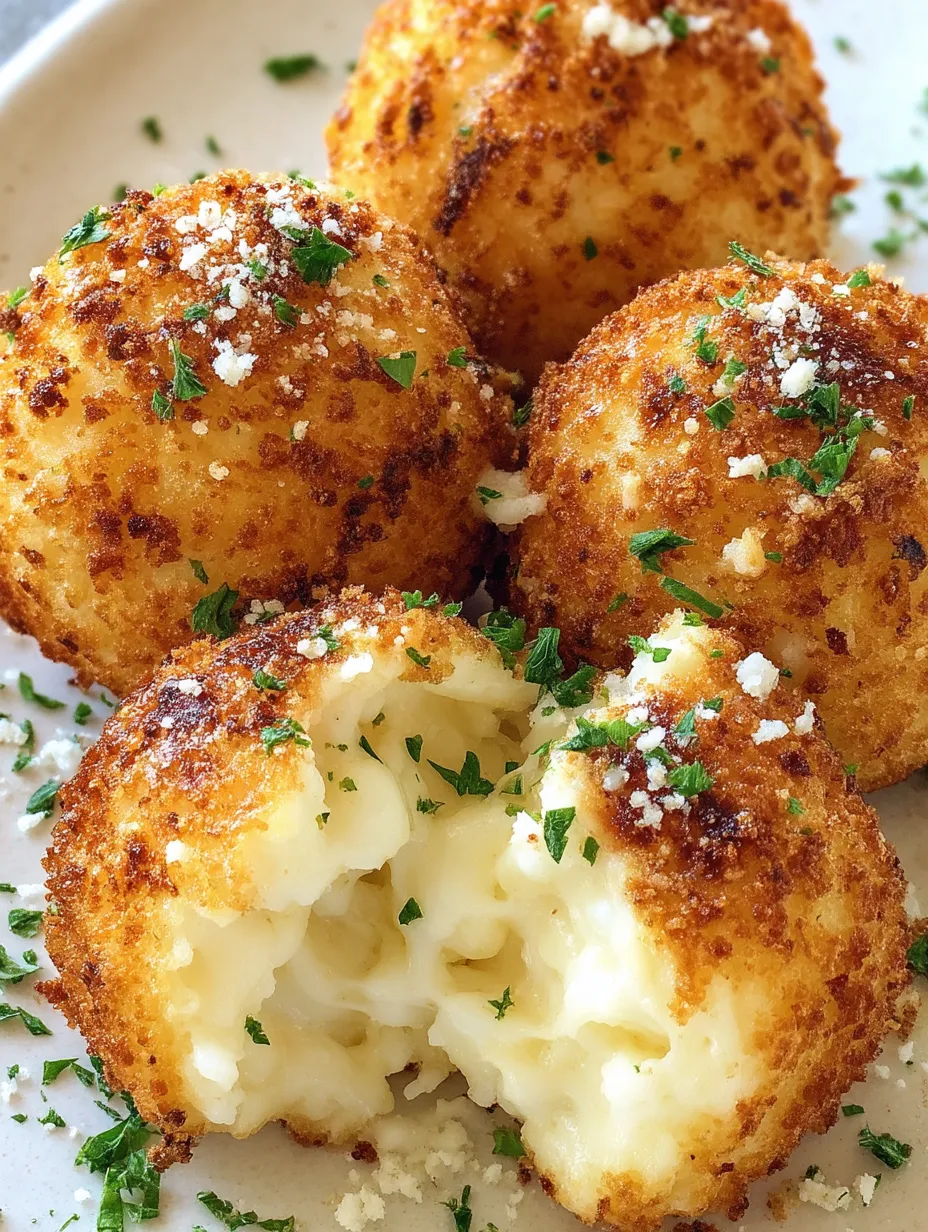
- → Can I make these potato balls ahead of time?
- Yes! You can prepare the potato balls up to the breading stage and refrigerate them for up to 24 hours before cooking. Store them in a single layer on a parchment-lined tray and cover with plastic wrap. When ready to cook, you may need to add 1-2 minutes to the cooking time since they'll be cold from the refrigerator.
- → Can I freeze these cheesy potato balls?
- Absolutely! These freeze beautifully both before or after cooking. To freeze uncooked balls, place them on a baking sheet in a single layer until frozen solid, then transfer to a freezer bag. To cook from frozen, add about 3-4 minutes to the cooking time. For cooked balls, reheat in the air fryer at 350°F for 3-5 minutes.
- → What if I don't have an air fryer?
- No problem! You can bake these in a conventional oven at 425°F for 20-25 minutes, turning halfway through, until golden brown. For even more crispiness, place them under the broiler for the last minute. Alternatively, you can deep fry them in oil at 350°F for 2-3 minutes until golden brown.
- → What kinds of dipping sauces work best with these potato balls?
- These versatile bites pair well with many sauces! Try classic options like sour cream, ranch dressing, marinara sauce, or garlic aioli. For more adventurous flavors, consider sriracha mayo, honey mustard, blue cheese dressing, or even a warm cheese sauce for extra indulgence.
- → Can I add other ingredients to the potato mixture?
- Definitely! These are very customizable. Try adding cooked and crumbled bacon, chopped chives or green onions, finely diced jalapeños for heat, or even substitute some of the potato with cauliflower for a lighter version. Just make sure any add-ins are finely chopped and not too wet to maintain the proper texture.