
 Pin it
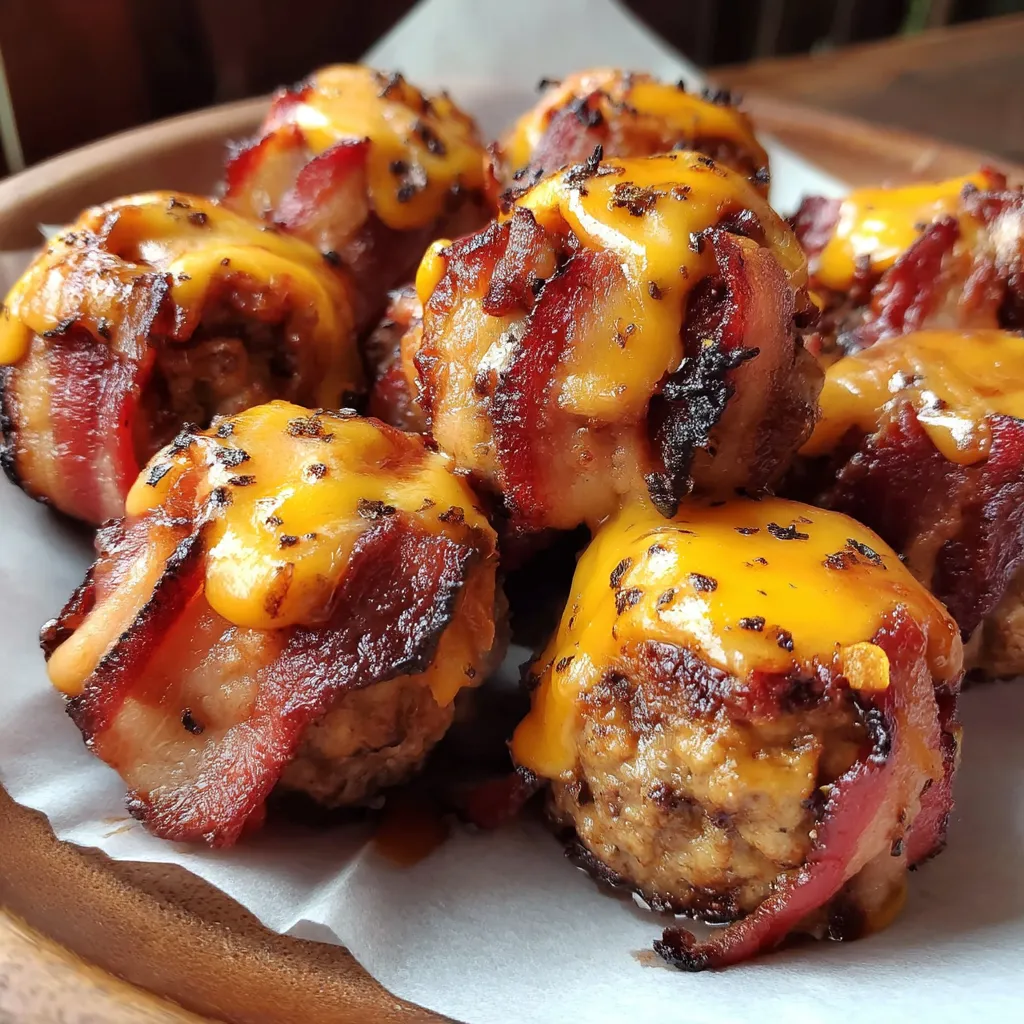
Man, these little meat missiles are dangerous. I made them for a tailgate last fall and nearly caused a riot when they ran out. Think juicy meatballs packed with melty cheese, wrapped in crispy bacon, and kissed with smoky BBQ flavor. They're basically everything good about a backyard cookout concentrated into two bite explosions of flavor.
My buddy Dave, who claims he's "watching what he eats," somehow put away seven of these while pretending not to count. His wife just rolled her eyes and said, "At least there's protein." Sometimes you just gotta live a little.
Ingredients
- Ground Beef: Don't go super lean or they'll dry out—80/20 gives you that perfect juicy texture
- Thick Cut Bacon: The regular stuff is too thin and will burn before the meat cooks—splurge on the good thick cut stuff
- Sharp Cheddar: The sharper the better to stand up against the other big flavors—pre shredded works fine but freshly grated melts better
- BBQ Sauce: Use your favorite—sweet, spicy, smoky, whatever—it's going to infuse the meat and create that sticky glaze
- Simple Seasonings: Don't overthink it—garlic and onion powders are workhorses that never let you down
I learned the hard way that fancy cheese doesn't work better here. Tried making these with some expensive aged gouda once, and it just disappeared into the meat. Good ol' sharp cheddar actually holds its own better.
 Pin it
Step-by-Step Instructions
- The Meat Mix
- Don't beat the meat mixture to death—just combine everything until it's mixed. Overworking makes tough meatballs. I use my hands because it's faster and you can feel when it's right. The mixture should hold together but still feel loose and juicy.
- Size Matters
- Making them all the same size is key for even cooking. I grab a kitchen scale and aim for about 2 ounces each. No scale? Just divide the meat into 12 equal portions. They should be about the size of a golf ball—any bigger and the outside will burn before the inside cooks.
- Bacon Strategy
- Stretch that bacon a bit before wrapping—it shrinks during cooking and can pop off if it's wrapped too tightly. I start by wrapping around the middle, then work my way up and down. That toothpick isn't just for looks—it's structural engineering to keep everything together.
- Fire Control
- Whether you're grilling or baking, the key is medium heat. Too hot and the bacon burns while the inside stays raw; too cool and you never get that crispy exterior. If grilling, keep them away from direct flames—the fat dripping from the bacon will cause flare ups that'll torch your bombs.
- The Flip
- Turning these babies during cooking is essential for even bacon cooking, but do it gently. Those toothpicks can loosen if you get too aggressive with the tongs. I find it easiest to use two spatulas for the first flip, then tongs once they've firmed up a bit.
- The Rest
- Those few minutes of rest after cooking aren't optional—the cheese inside is basically molten lava. Plus, the meat needs time to reabsorb juices. Trust me, burnt tongues don't enjoy the rest of the cookout.
First time I made these, I didn't secure the bacon well enough and ended up with what looked like meat grenades that had already exploded. Still tasted good, but the presentation was a disaster. Some cooking lessons you only need to learn once.
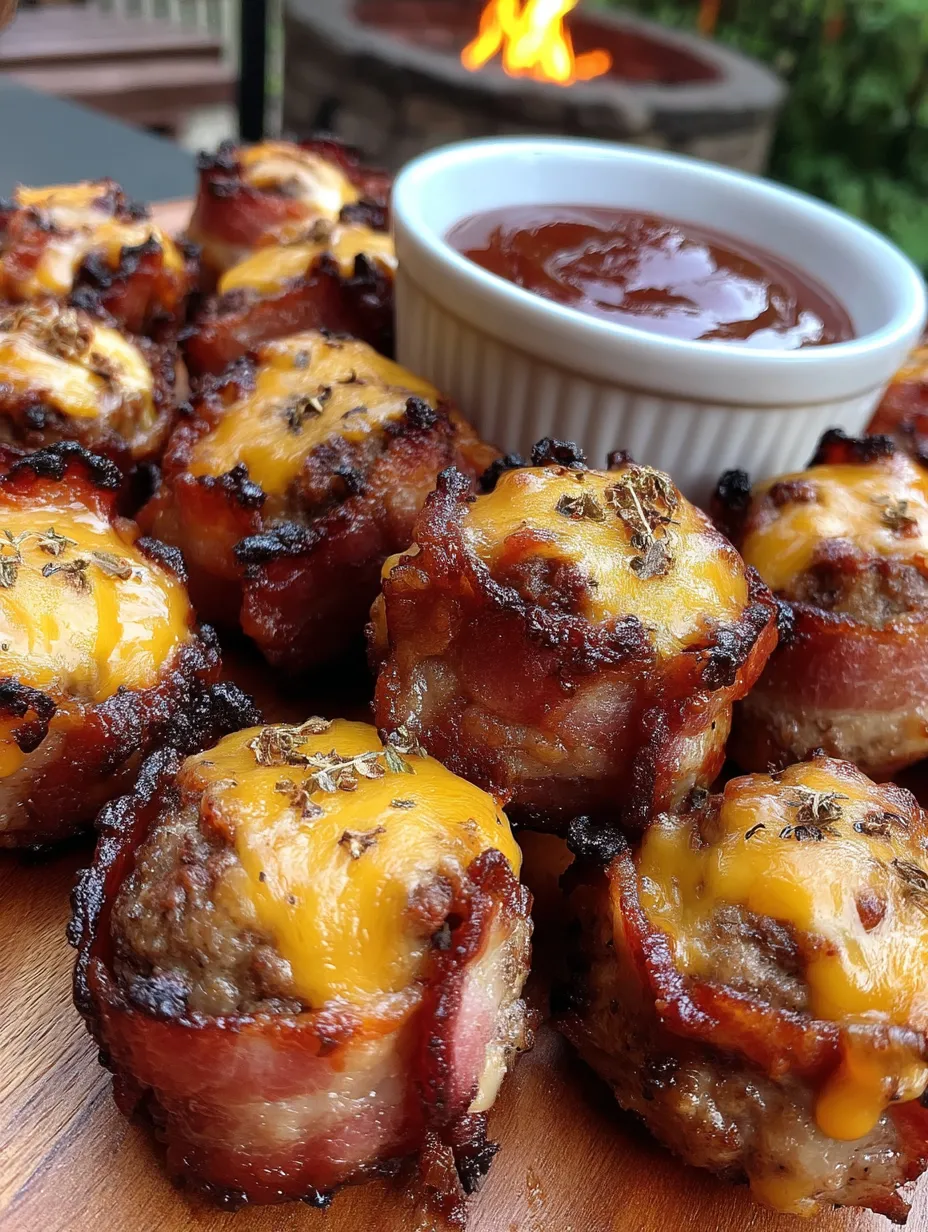
What to Serve With 'Em
These bombs are perfect appetizers but can easily become a meal. For game day, I serve them with toothpicks and extra BBQ sauce for dipping. For dinner, throw them on a bun with some slaw for an amazing meatball sub situation. They're also killer alongside some mac and cheese or potato salad for a full on comfort food assault.
Switch It Up
Once you've mastered the basic version, get creative. Swap the cheddar for pepper jack if you want some heat. Replace the BBQ sauce with buffalo sauce and blue cheese for a wing inspired bomb. Add some chopped jalapeños to the meat mixture for a spicy kick. For a breakfast version, use breakfast sausage instead of beef and stuff with scrambled eggs and cheese.
Make Ahead Magic
You can prep these the night before—just form the balls, wrap in bacon, secure with toothpicks, and refrigerate covered. The flavors actually get better as they hang out together. I wouldn't go more than 24 hours though, as the meat starts to discolor. For parties, you can partially cook them ahead of time, then finish on the grill just before serving.
 Pin it
I've probably made these bombs twenty times now, tweaking something small each time. What started as a "let's try this" experiment has turned into the most requested appetizer whenever friends come over. There's something deeply satisfying about watching grown adults fight over the last meatball like it's the last chopper out of Saigon. Food that creates that kind of reaction is worth keeping in the regular rotation.
Frequently Asked Questions
- → Can I make these bacon bombs ahead of time?
- Yes! You can prepare these bacon bombs up to a day in advance. Mix the meat, form the meatballs, and wrap them in bacon, then store them covered in the refrigerator until you're ready to cook. You can also fully cook them ahead of time and reheat them in a 350°F oven for 10-15 minutes just before serving. They won't be quite as juicy as freshly made, but still delicious. For best results when making ahead, don't insert the toothpicks until just before cooking.
- → What type of BBQ sauce works best for this recipe?
- Any BBQ sauce you enjoy will work well in this recipe. For a classic flavor, use a sweet and smoky variety like Kansas City style. For a spicier kick, choose a sauce with chipotle or habanero. A honey BBQ sauce adds wonderful sweetness that caramelizes beautifully during cooking. Avoid sauces that are extremely thick as they may make the meat mixture too dense. If your favorite sauce is thick, thin it slightly with a tablespoon of apple cider vinegar before mixing it into the meat.
- → Can I use a different type of meat?
- Absolutely! While ground beef creates a classic flavor, you can easily substitute ground turkey for a leaner option (though they may be slightly less juicy). Ground pork also works wonderfully and adds extra richness. For a truly decadent version, try using a mix of beef and Italian sausage (removed from casings). If using leaner meats like turkey or chicken, you might want to add 1-2 tablespoons of olive oil to the mixture to maintain juiciness.
- → How do I prevent flare-ups when grilling these bacon bombs?
- Bacon fat can cause flare-ups on the grill, so here are a few tips to prevent this: 1) Create a two-zone fire with direct and indirect heat areas, starting the bombs over direct heat to crisp the bacon, then moving to indirect to finish cooking; 2) Keep a spray bottle with water handy to quickly extinguish any flare-ups; 3) Avoid piercing the bacon once it's on the grill, which releases more fat; 4) Consider using a grill basket or aluminum foil tray with holes punched in it to catch dripping fat.
- → What can I serve with these bacon bombs?
- These versatile bacon bombs pair wonderfully with many sides and sauces. For dipping, offer extra BBQ sauce, ranch dressing, or blue cheese dressing. For sides, they go perfectly with classic cookout fare like coleslaw, potato salad, or baked beans. For a fun presentation, serve them on toothpicks with pickles and cubes of cheddar cheese for a deconstructed cheeseburger effect. They also make great sliders when served on small dinner rolls with lettuce and tomato.