
 Pin it
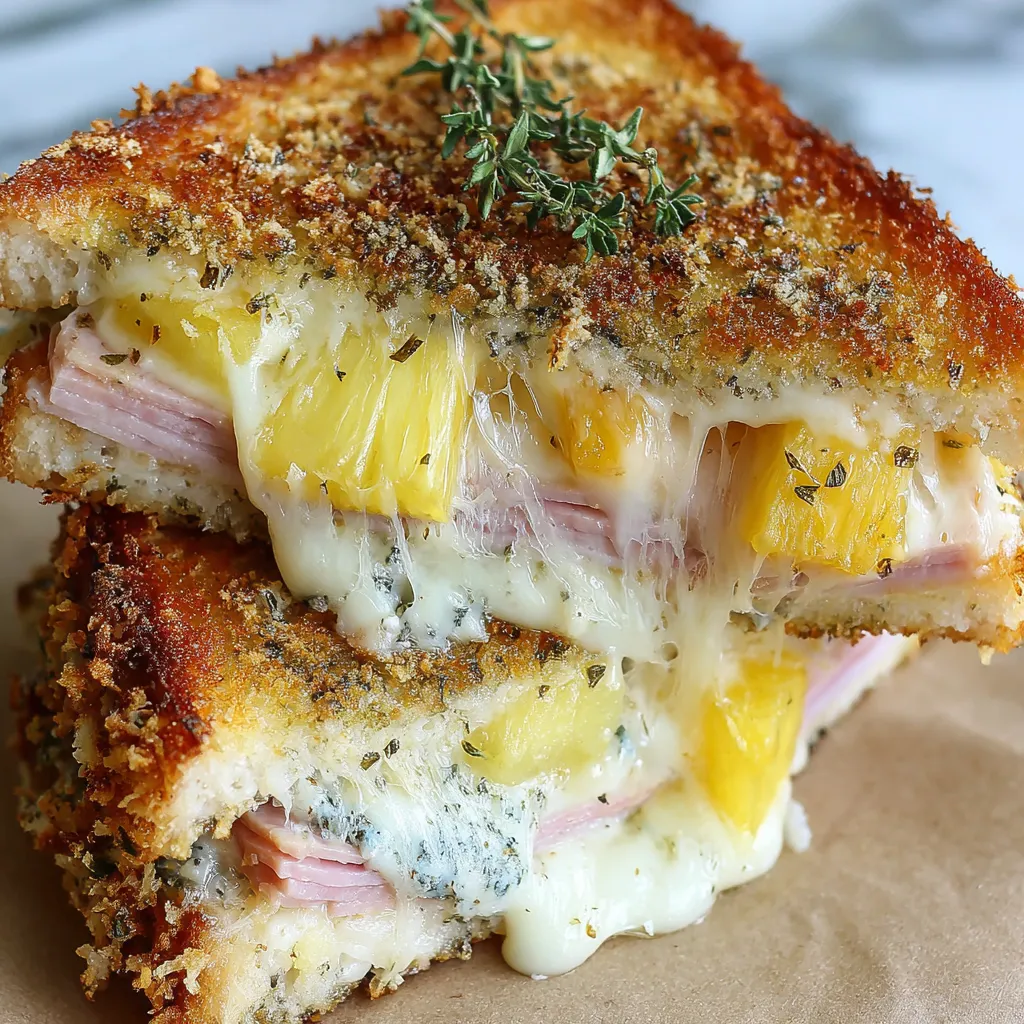
This cheese crusted Hawaiian grilled cheese happened when I was trying to use up leftover ham from Easter dinner and found some random pineapple rings in the back of my fridge. My daughter had been obsessing over Hawaiian pizza lately, so I figured why not try turning those flavors into a grilled cheese sandwich. The cheese crusting technique was something I'd seen online but never tried, and it seemed like the perfect excuse to experiment. After some trial and error with getting the cheese crispy without burning it, we created this incredible sandwich that's become our new favorite comfort food lunch.
My neighbor's teenage son tried one of these when he was over gaming with my kids and immediately asked if I could teach his mom how to make them. She said he's never shown that much enthusiasm about any homemade food that wasn't pizza or chicken nuggets. Now she makes them every Sunday afternoon and he considers himself the family's grilled cheese expert.
Getting the Ingredients Right
- Sourdough bread works best: Sturdy enough to hold all the filling and the tangy flavor complements everything
- Extra thin ham slices: Thick ham makes the sandwich too bulky and harder to bite through
- Canned pineapple is fine: Fresh is great but canned rings or chunks work perfectly and save time
- Mozzarella melts perfectly: Other cheeses work too but mozzarella gives you that perfect stretch and mild flavor
- Real butter matters: Margarine doesn't brown as nicely and doesn't taste as good
- Dried oregano adds depth: Just a pinch but it really brings out the Italian flavors
 Pin it
Making It Step by Step
- Building the sandwich
- Start by laying out one slice of sourdough bread and adding your ham slices - don't pile them too thick or the sandwich becomes unwieldy. Add your pineapple slice or chunks, distributing them evenly so every bite gets some sweetness.
- Adding the cheese layers
- Sprinkle shredded mozzarella over the pineapple, then add a light dusting of dried oregano for extra flavor. Top with the second slice of bread, then here's the key part - sprinkle more shredded cheese on top of the sandwich.
- Getting the pan ready
- Melt butter in a nonstick skillet over medium-high heat. Cast iron works great too if that's what you have. The pan should be hot enough that the butter sizzles but not so hot that it burns immediately.
- First side cooking
- Place the sandwich in the skillet with the cheese-topped side facing up. Cook for three to five minutes until the bottom gets golden brown and crispy. Don't move it around too much or you'll mess up the browning.
- The magical flip
- Here's where it gets interesting - flip the sandwich so the cheese-covered side is now touching the hot pan. Cook for another three to five minutes until that cheese creates a golden, crispy crust on the outside.
- Serving it right
- Take it off the heat and serve immediately while the cheese is still stretchy on the inside and crispy on the outside. Don't let it sit around or the cheese crust gets tough.
I messed up my first few attempts because I used way too much filling and couldn't flip the sandwich without everything sliding out everywhere. I also had the heat too high initially, which burnt the cheese before it got properly crispy. Finding the right balance of ingredients and temperature took some practice.
Perfect Serving Ideas
This sandwich is rich enough to be a complete lunch on its own, but some kettle chips on the side are never a bad idea. A simple fruit salad balances out all the richness and complements the pineapple flavors. Cold lemonade or iced tea works great for drinks.
Making It Different
You can switch up the meat and use turkey or chicken instead of ham for different flavors. Sometimes I add thin apple slices instead of pineapple for a different kind of sweetness. Different cheeses work too - sharp cheddar creates a more intense flavor while Swiss is milder and creamy.
Storage and Leftovers
These are definitely best eaten right away while the cheese crust is still crispy and the inside is gooey. They don't really store well because the crispy coating gets soggy, but if you must save one, reheat it in a dry skillet to try to crisp it up again.
 Pin it
This cheese crusted Hawaiian grilled cheese has become our go-to weekend lunch when we want something that feels indulgent but doesn't require leaving the house. The combination of crispy cheese exterior with gooey melted center creates this amazing texture contrast that regular grilled cheese just can't match. My kids specifically request this version now instead of regular grilled cheese, which says something about how much better the cheese crusting technique makes everything.
Frequently Asked Questions
- → What makes this cheese crusted?
- Instead of just butter on the outside, you put shredded cheese on top of the sandwich. When it hits the hot pan, it creates a crispy golden cheese crust.
- → Can I use fresh pineapple instead?
- Absolutely! Just cut it into thin slices and pat dry with paper towels to remove excess moisture before using.
- → What other cheeses work well?
- Cheddar, Swiss, or provolone all work great. Mozzarella is perfect because it melts so well and gets crispy on the outside.
- → How do I prevent the cheese from burning?
- Keep the heat at medium-high, not high. Watch it carefully and adjust the heat if the cheese starts browning too quickly.
- → Can I make this without ham?
- Sure! You could use turkey, bacon, or even leave it vegetarian with just pineapple and cheese for a sweet grilled cheese.
- → What if my cheese crust sticks to the pan?
- Make sure your pan is well-heated and buttered before adding the sandwich. A good nonstick or well-seasoned cast iron pan works best.