
 Pin it
These chili corn dogs happened when I was staring at a package of frozen corn dogs and leftover chili in my refrigerator, trying to figure out how to turn them into something that would actually excite my family instead of just being another boring weeknight dinner. I'd been making regular corn dogs for my kids for years, but they were starting to feel lazy and predictable, especially when I was trying to use up leftovers without anyone complaining about eating the same thing twice. The genius moment came when I realized I could transform ordinary corn dogs into these incredible loaded creations by cutting them open and stuffing them with chili and cheese, essentially creating handheld chili dogs that were way more fun to eat than either component alone. Now these have become our go-to comfort food mashup that makes everyone feel like we're having fair food at home.
My friend Tom discovered these when he came over during one of our Sunday football watching sessions and saw me pull this tray of loaded corn dogs out of the oven. He'd been struggling with what to make for his weekly poker night that would be substantial enough to keep the guys happy but easy enough that he could focus on the game instead of cooking all evening. He immediately took pictures and made them the following week for his poker group. Two weeks later he texted me saying they'd become the most requested poker night food and his friends were asking him to host more often just to get these chili corn dogs.
Essential Components
- Quality frozen corn dogs: Use a brand you actually like eating plain, since that's your foundation
- Good canned chili: This is a prominent flavor, so use something with beans and real chunks of meat
- Sharp cheddar cheese: The sharpness cuts through all the richness and adds the perfect flavor contrast
- Optional toppings: Sour cream, green onions, jalapeños, or whatever you'd put on regular chili dogs
- Sharp bread knife: Essential for cutting clean openings without destroying the corn dog coating
 Pin it
Creating Comfort Food Magic
- Bake the corn dogs perfectly
- Start by baking your frozen corn dogs according to package directions - typically about 18 minutes at 350 degrees if you're starting from frozen. If you're making a larger batch like we usually do, you'll need to add extra time to ensure they're heated through completely. The coating should be golden brown and crispy when they're done.
- Warm the chili properly
- While the corn dogs are baking, warm your chili in a saucepan over medium heat, stirring occasionally until it's hot throughout. You want it warm enough to melt the cheese when you add it, but not so hot that it makes the corn dog coating soggy.
- Master the cutting technique
- Once the corn dogs are fully baked, carefully remove the wooden sticks and let them cool just enough to handle safely. Using a sharp bread knife, cut a lengthwise opening down the center of each corn dog, being careful not to cut all the way through. You want to create a pocket that will hold the chili without the corn dog falling apart.
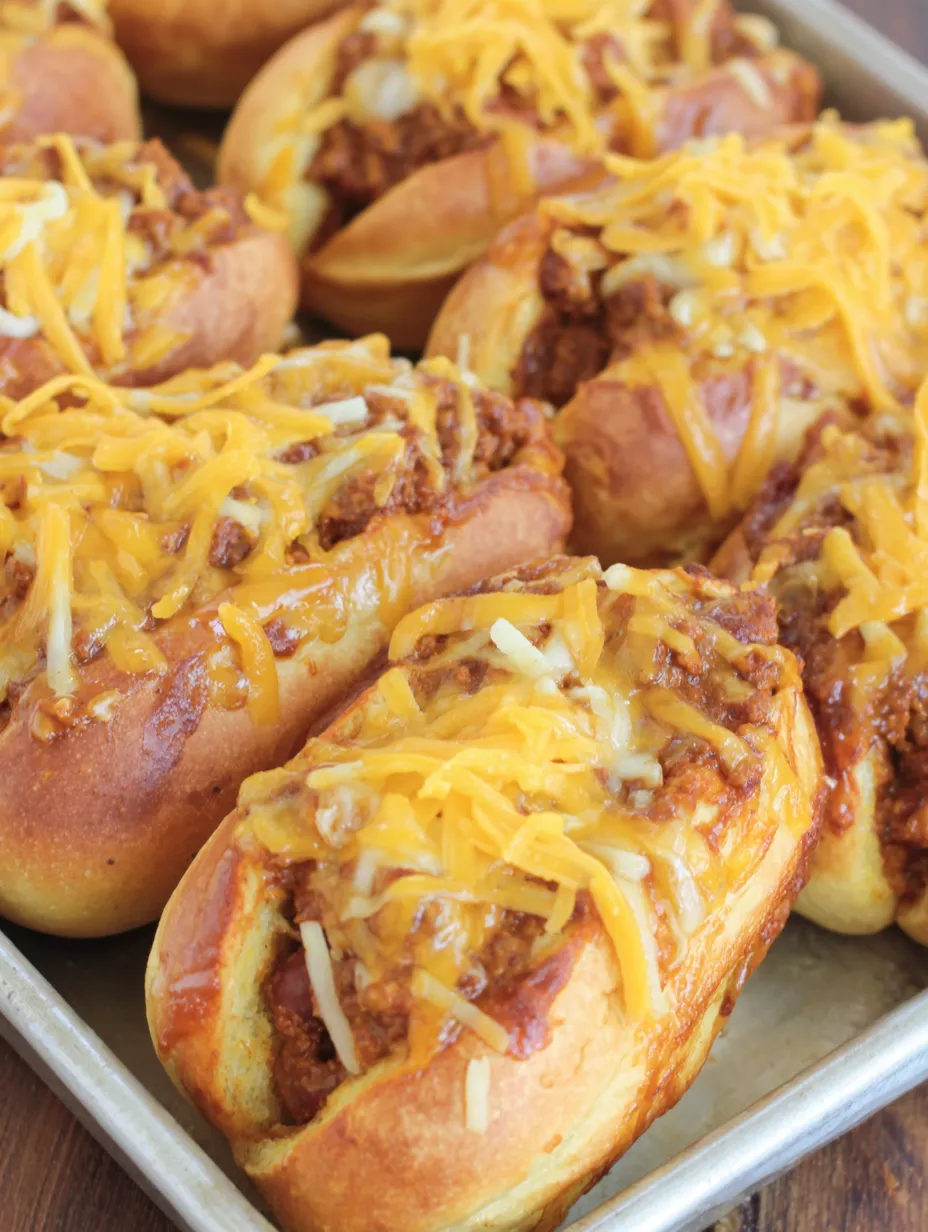
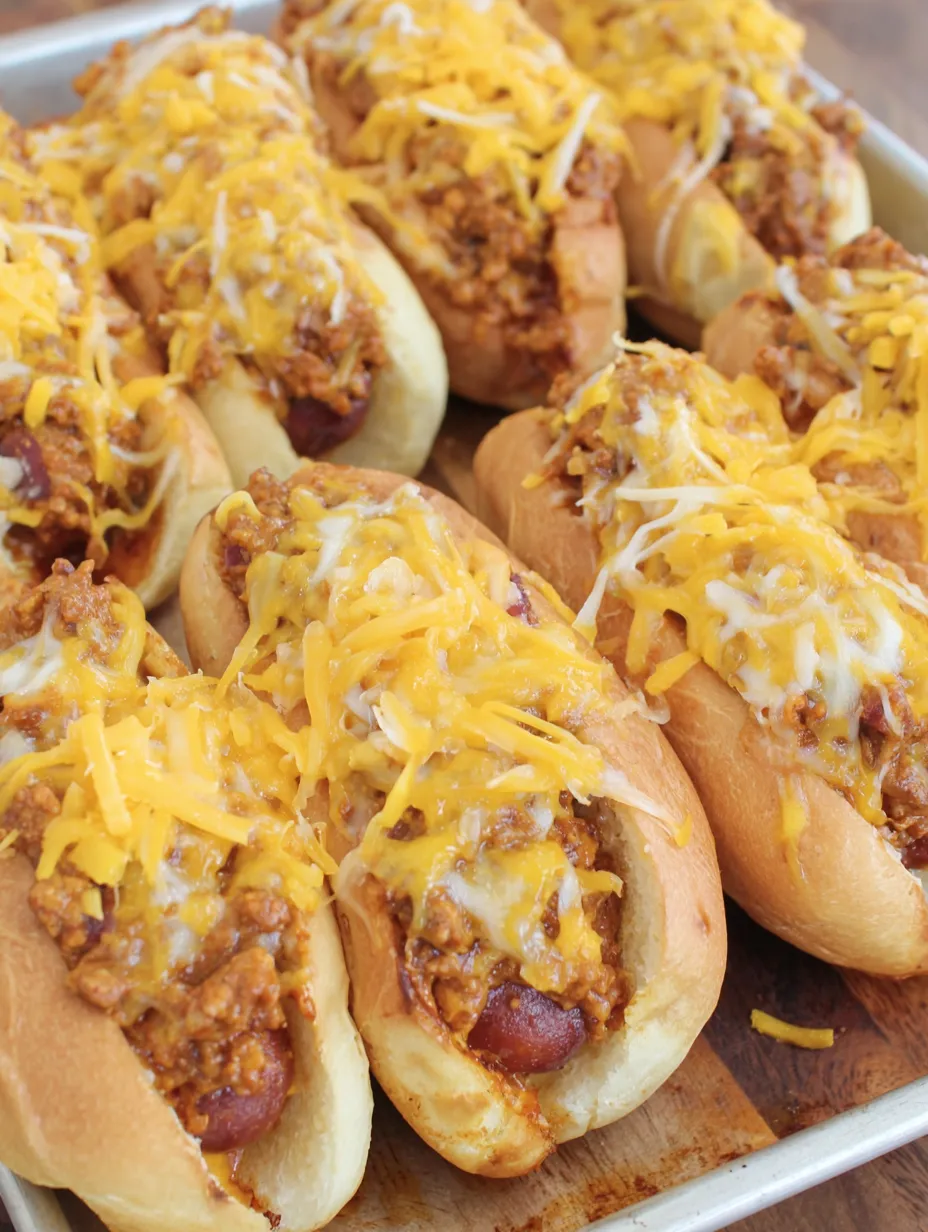
- Stuff with chili
- Carefully spoon the warm chili into each corn dog opening, being generous but not so much that it overflows everywhere. The chili should fill the pocket nicely while still allowing the corn dog coating to contain most of it.
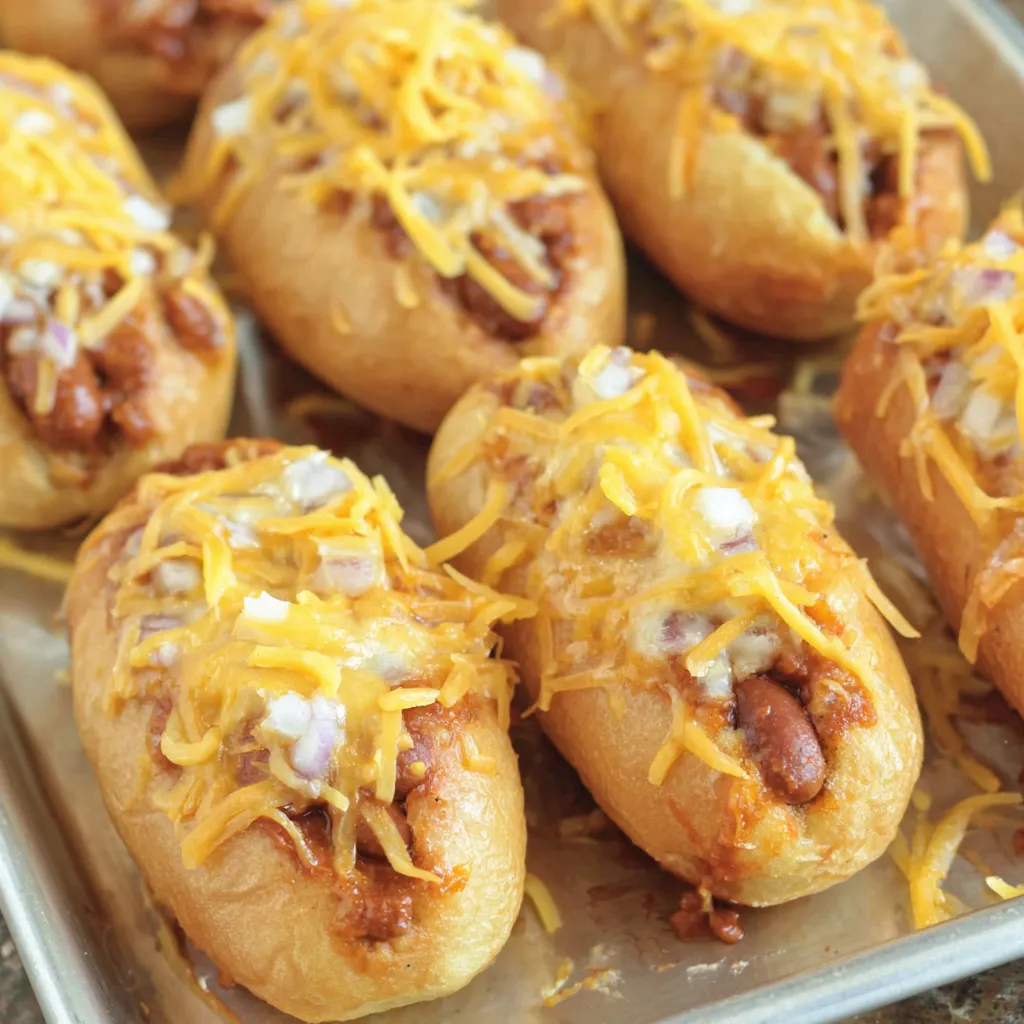
- Add cheese and finish
- Sprinkle a generous amount of shredded cheddar cheese over each stuffed corn dog, making sure to get good coverage. Return them to the oven for about 10 minutes until the cheese is completely melted and starting to bubble slightly.
- Customize and serve
- Remove from the oven and add whatever toppings your family enjoys - sour cream, chopped green onions, diced jalapeños, or anything else you'd put on chili dogs. Serve immediately while the cheese is still melty and the corn dog coating is crispy.
Making chili corn dogs has become my favorite way to transform ordinary leftovers into something that feels like a special treat instead of just reheated food. The combination of crispy corn dog coating with hearty chili and melted cheese creates this incredible comfort food experience that's somehow better than either dish would be on its own.
What I love most about this recipe is how it takes two familiar foods and creates something completely new and exciting. Kids who might turn their noses up at regular chili get excited about it when it's stuffed inside their favorite corn dogs, while adults appreciate the creative twist on classic fair food.
The technique of cutting the corn dogs open is what makes this work so well. That pocket creates the perfect vessel for holding all the chili and cheese while keeping the crispy coating intact. It's like having the best parts of a chili dog and a corn dog all in one incredible package.
One thing I learned through making these multiple times is that the quality of your chili really matters here since it becomes such a prominent part of the final dish. Using something with good chunks of meat and beans makes these feel substantial and satisfying instead of just a novelty.
The timing works perfectly for casual entertaining because you can have these ready with minimal active cooking time, leaving you free to spend time with guests instead of being stuck in the kitchen.
Perfect Game Day Presentation
Serve your chili corn dogs hot from the oven when the cheese is still bubbly and the coating is at its crispiest. Arrange them on a large platter with small bowls of toppings so everyone can customize their own. These are perfect for game day gatherings, casual dinners, or any time you want comfort food that feels fun and special. Provide plenty of napkins because these can get deliciously messy, and cold beer or soda pairs perfectly with all that rich, cheesy goodness.
Creative Variations
These chili corn dogs are incredibly adaptable to different tastes and whatever you have available. Try using different types of chili - white chicken chili, vegetarian chili, or even chili mac for extra heartiness. You can experiment with different cheeses like pepper jack for heat, or a Mexican blend for more complex flavor. Sometimes I'll add diced onions or bell peppers to the chili for extra texture, or use different corn dog varieties like cheese-filled or jalapeño corn dogs for even more flavor layers.
Storage Solutions
Chili corn dogs are definitely best eaten fresh and hot when the coating is crispy and the cheese is melted, but they can be stored and reheated if needed. Keep leftovers in the refrigerator for up to three days and reheat in a 350-degree oven for about 10 minutes until heated through and the coating crisps up again. The microwave works in a pinch but won't maintain that crispy texture that makes these special. You can also prep the components ahead of time and assemble when you're ready to serve.
 Pin it
These chili corn dogs have earned their place as our favorite comfort food mashup because they prove that sometimes the best recipes come from taking two things you already love and finding a creative way to make them even better together. They're the kind of recipe that makes you feel like a genius for thinking of something so simple yet so satisfying, while delivering the kind of indulgent comfort food experience that makes ordinary dinners feel like celebrations.
Frequently Asked Questions
- → Can I use homemade chili instead of canned?
- Absolutely! Homemade chili works great. Just make sure it's not too watery so it stays in the corn dog pocket.
- → What's the best way to cut the corn dogs without breaking them?
- Use a sharp bread knife and cut slowly and carefully. Make sure the corn dogs are fully cooked and cooled slightly before cutting.
- → Can I add other toppings?
- Yes! Try diced onions, sour cream, jalapeños, green onions, or even bacon bits. Get creative with your favorite chili toppings.
- → How do I prevent the chili from spilling out?
- Don't cut the corn dog all the way through - just create a deep pocket. Also, let the chili cool slightly so it's not too runny.
- → Can I make these in an air fryer?
- Yes! Cook the corn dogs in the air fryer first, then stuff with chili and cheese. Return to air fryer for 3-5 minutes to melt cheese.