
 Pin it
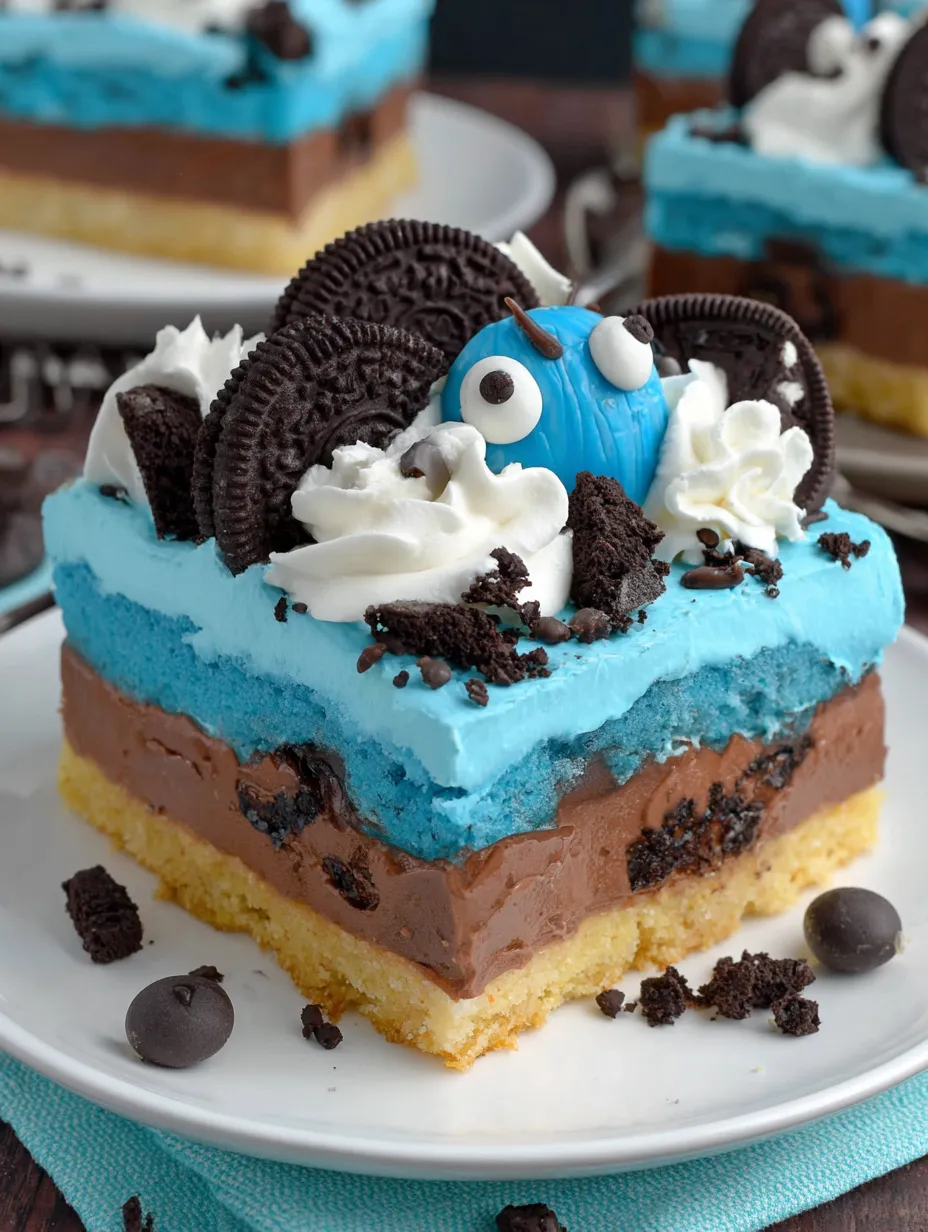
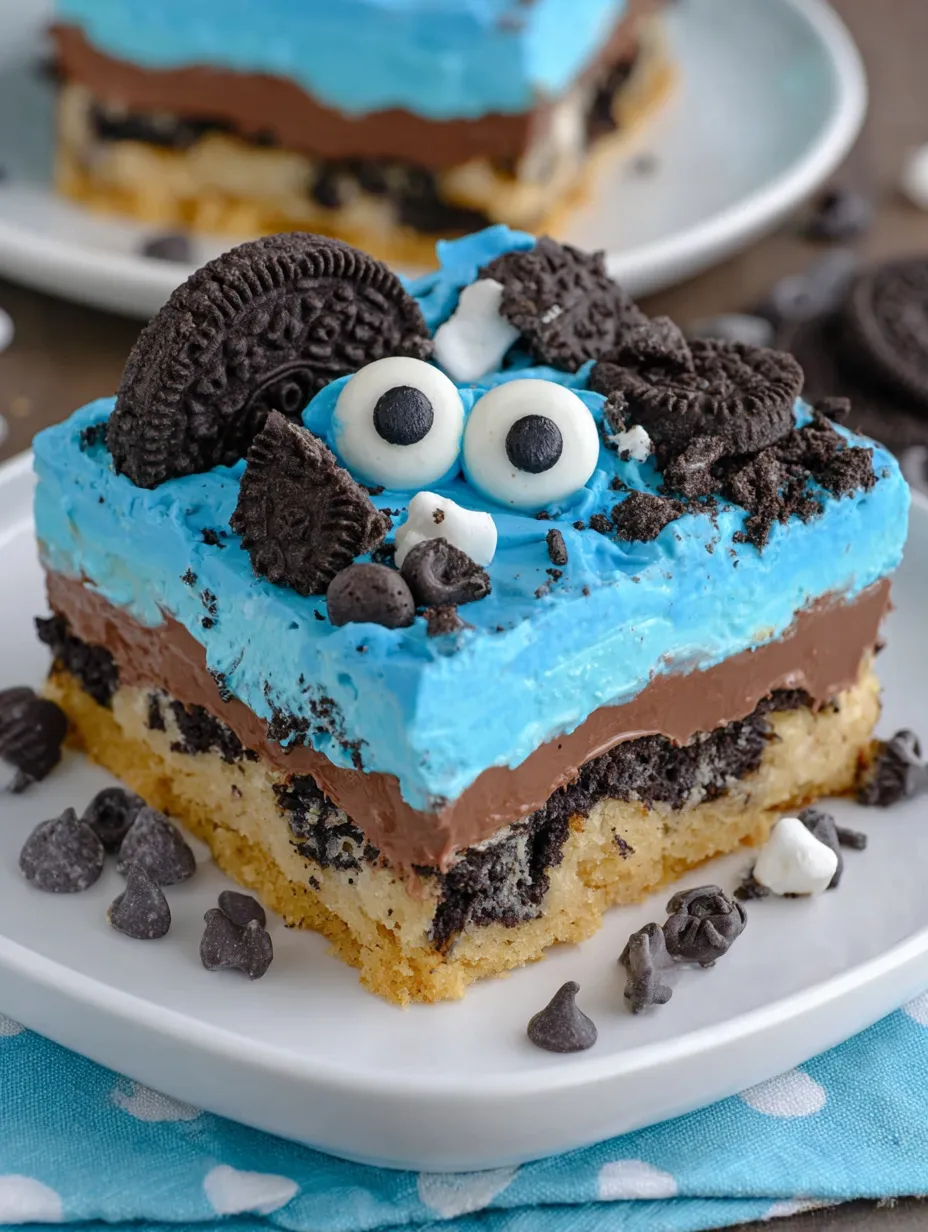
This Cookie Monster dessert transforms a simple layered treat into a whimsical, eye-catching creation that captures the beloved blue character's cookie-obsessed personality in every colorful, indulgent slice. Starting with a golden chocolate chip cookie crust and building through creamy blue cheesecake filling, rich chocolate fudge pudding studded with Oreo chunks, and swirled blue whipped topping decorated with candy eyes and cookie crumbles, each layer contributes both flavor and visual fun. What makes this Cookie Monster dessert so perfect for celebrations is how it combines genuine deliciousness with playful presentation that makes kids and adults alike smile with recognition and anticipation. Whether you're hosting a birthday party, contributing to a potluck, or simply wanting to create something memorable for family dessert night, this layered treat delivers impressive results that taste as good as they look.
I created this Cookie Monster dessert for my nephew's third birthday party after he became absolutely obsessed with the character and demanded a blue cookie dessert for his special day. The bakery wanted an outrageous amount for a custom cake, so I decided to create something myself using layers of his favorite flavors and that signature blue color he loved so much. When I brought out the finished dessert decorated with those googly candy eyes, he literally squealed with excitement and kept pointing at it saying "Cookie!" over and over again. Now, it is a staple at our family gatherings.
Cookie Crust and Cheesecake Ingredients
- Refrigerated chocolate chip cookie dough: One standard 16-ounce tube for a golden, chewy base.
- Cream cheese: 8 ounces, softened, for a rich and tangy filling.
- Powdered sugar: 1 cup to sweeten and stabilize the cheesecake layer.
- Cool Whip: Two 8-ounce containers (divided) for light, airy texture.
- Blue gel food coloring: To achieve that iconic vibrant character color.
Pudding and Topping Components
- Instant chocolate fudge pudding mix: Two boxes for deep chocolate flavor.
- Cold milk: 3 cups to whisk with the pudding mix.
- Whole Oreos: 8 cookies, chopped, to fold into the pudding.
- Cookie Toppings: Mini Oreos and Chips Ahoy cookies for the "messy" finish.
- Candy eyes: Large and small sizes to bring the character to life.
 Pin it
Assembly Instructions Detailed
- Baking The Cookie Crust
- Preheat your oven to 350°F and spray a 9x13 inch glass baking dish with nonstick spray. Press the cookie dough evenly across the bottom. Bake for 14 to 15 minutes until golden brown. Allow the crust to cool completely (about 45–60 minutes) to ensure the following layers don't melt upon contact.
- Creating Blue Cheesecake
- Beat softened cream cheese until smooth. Add powdered sugar and beat for two minutes until fluffy. Fold in one container of Cool Whip gently. Add blue gel food coloring a tiny amount at a time until you achieve a bright, Cookie Monster blue.
- Spreading First Layer
- Spread the blue cheesecake mixture evenly over the cooled crust. Chill in the refrigerator for at least 20 minutes to firm up before adding the next layer.
- Preparing Chocolate Pudding
- Whisk 3 cups cold milk with both packages of instant chocolate fudge pudding for two minutes. Fold in 8 chopped Oreos. Spread this immediately over the chilled cheesecake layer, being careful not to mix the two layers. Chill for another 20 minutes.
- Preparing Swirled Topping
- Reserve 1 cup of plain white Cool Whip. Tint the remaining container blue. Spread the blue Cool Whip over the pudding layer. Drop spoonfuls of the white Cool Whip on top and use a knife to create a marbled swirl effect.
- Decorating and Final Set
- Scatter chopped mini Oreos and Chips Ahoy cookies over the top. Place two large candy eyes in the center for the face, and scatter smaller ones throughout. Cover loosely and refrigerate for at least 2 hours, or preferably overnight, to allow the flavors to meld and the structure to set.
Creating character-themed desserts for children's parties has become one of my favorite baking challenges because the reactions from kids make all the effort worthwhile. Children seem to connect more deeply with food that looks like something they recognize and love, which means they're more excited to eat it. My own children have started requesting specific character desserts for their birthdays, which has pushed me to become more creative with simple decorating techniques that produce impressive results.
Expert Tips for Success
Color Matching Strategy: To ensure a cohesive look, tint all your blue components at the same time if possible, or keep a small "reference" sample of the first batch to match the second. Cookie Crust Uniformity: Use the bottom of a flat measuring cup to press the dough into the corners of the pan for a professional finish. Serving Tip: If serving at an outdoor party, keep the dish in a cooler or on a bed of ice, as the whipped layers can lose their structure in high heat.
Storing and Make Ahead
Your Cookie Monster dessert keeps beautifully in the refrigerator for up to four days. For the best make-ahead results, bake the crust up to two days in advance. Assemble the layers the day before the party, but wait until the morning of the event to add the final cookie crumbles and candy eyes to ensure they stay perfectly crisp and don't "bleed" color into the whipped topping.
 Pin it
This Cookie Monster dessert has become my signature party contribution because it delivers on every level—impressive appearance, genuinely delicious flavor, and the practical ability to feed a crowd without stress. Every time I make this dessert, someone at the gathering tells me it's the most fun thing they've eaten in ages, which reminds me that food should bring joy beyond simply satisfying hunger. Creating something that makes people smile before they even take a bite captures the spirit of celebration.
Frequently Asked Questions
- → Why is it called no-bake if you bake the crust?
- Good question! The crust is the only part that's baked. You can make it truly no-bake by using a store-bought cookie pie crust instead of the refrigerated dough.
- → How do I get the right shade of Cookie Monster blue?
- Add the blue gel food coloring a tiny bit at a time using a toothpick. It's easier to add more than to fix it if it gets too dark. Aim for a bright, vibrant blue.
- → Can I make this ahead of time?
- Yes! This is actually perfect to make a day ahead. The layers need time to set, so making it the night before a party is ideal.
- → What size baking dish should I use?
- A 9x13 inch dish works best. It gives you nice thick layers and the right number of servings.
- → Where do I find candy eyes?
- Look in the baking aisle near the sprinkles and cake decorations. You can also find them at craft stores or online.
- → Can I use homemade whipped cream instead of Cool Whip?
- Cool Whip works best because it holds its shape and doesn't weep. Homemade whipped cream might get watery after sitting in the fridge.