
 Pin it
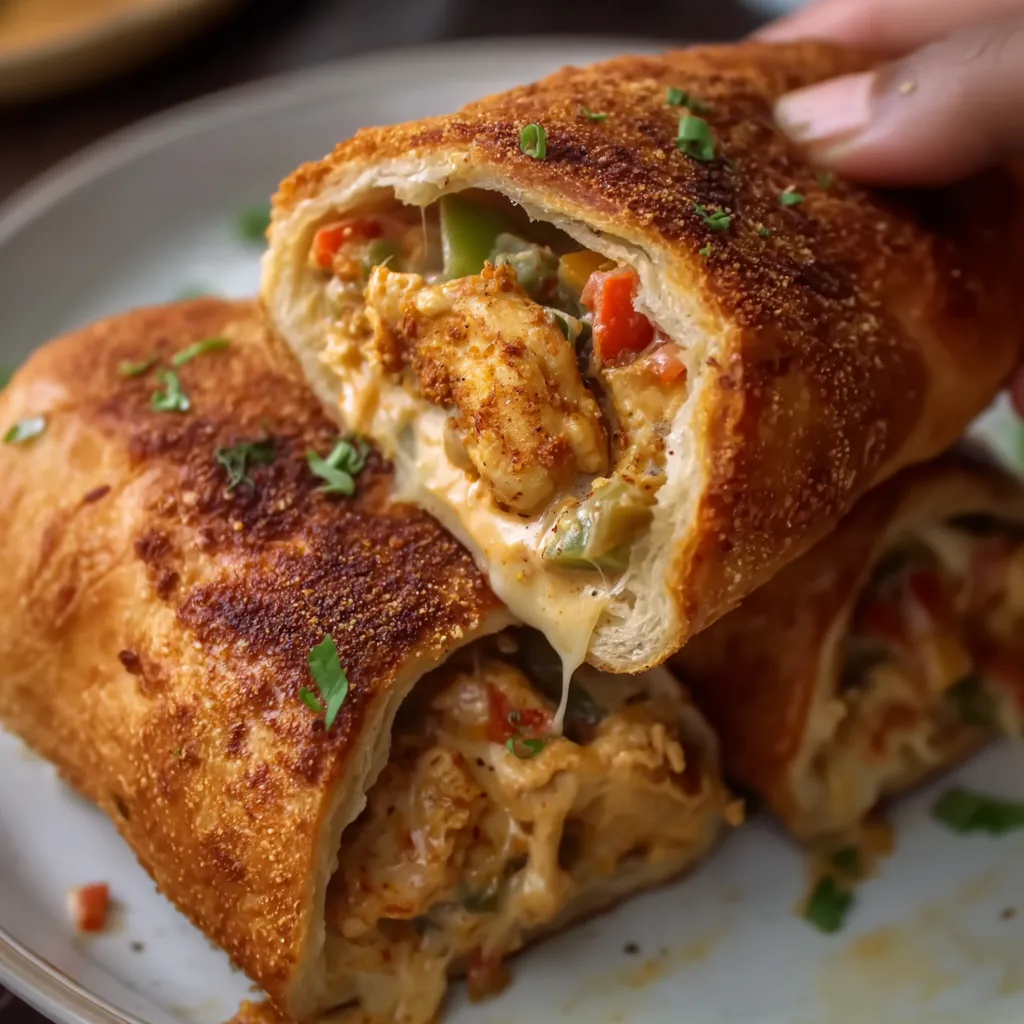
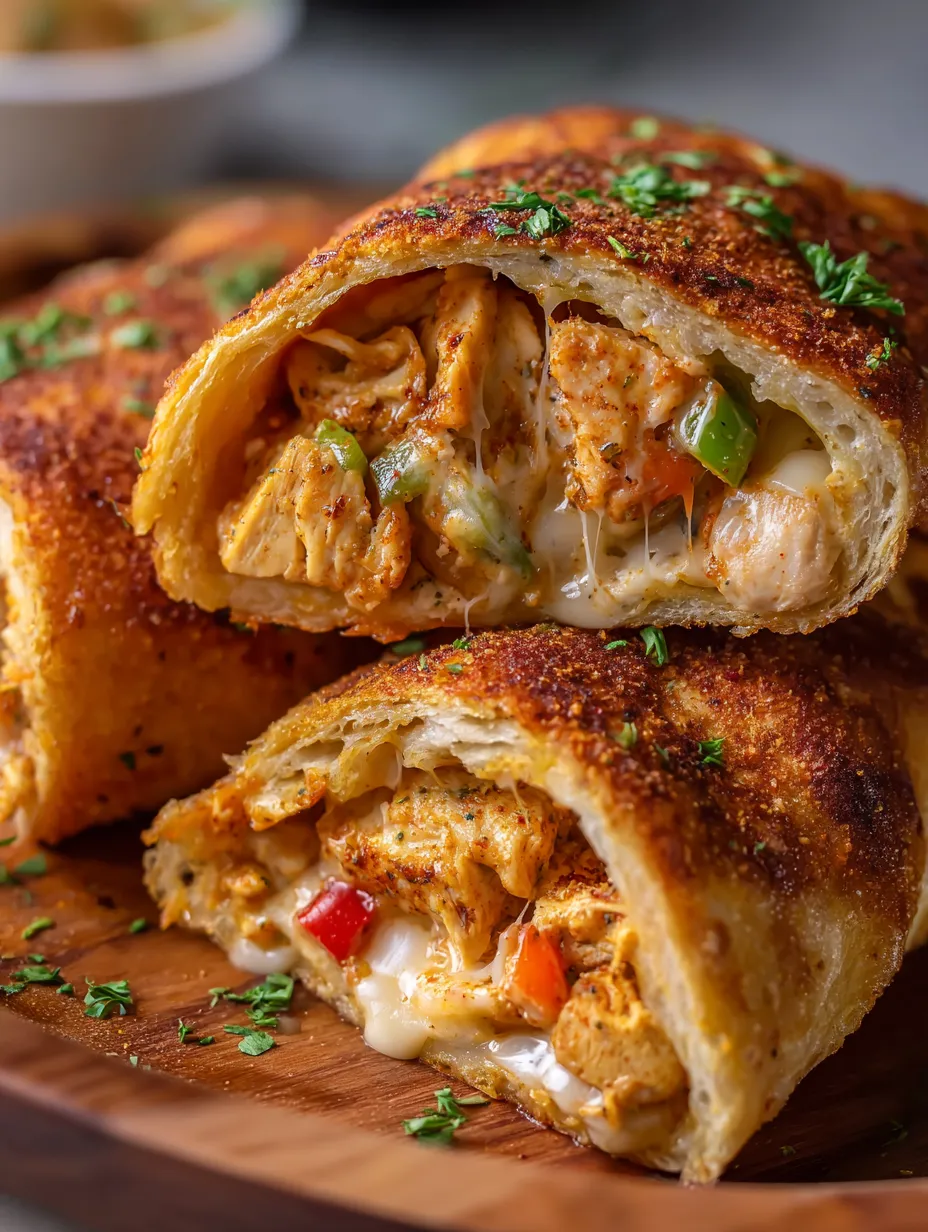
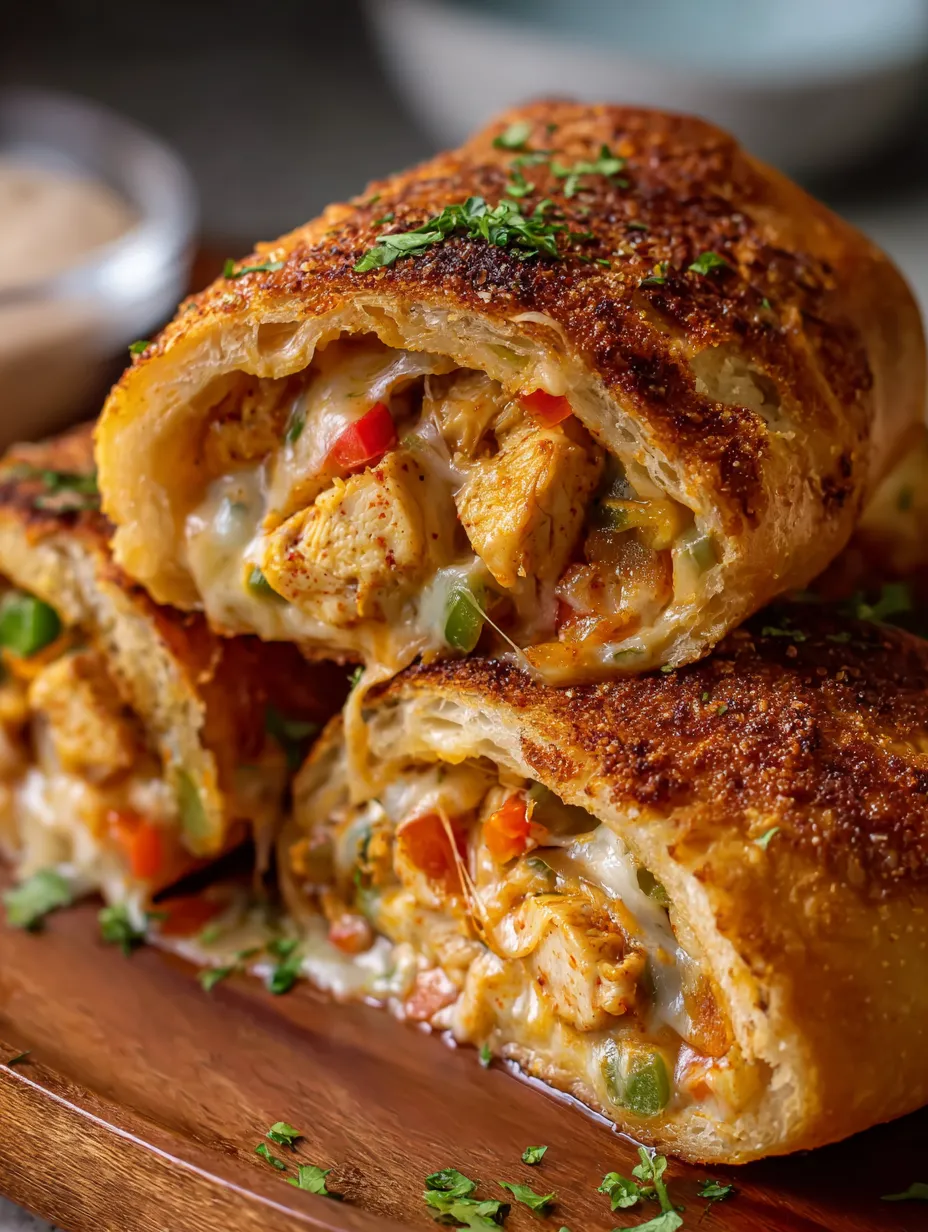
These chicken fajita bread pockets transform ordinary sandwich bread into crispy, golden parcels filled with creamy, cheese-laden fajita chicken that oozes deliciously when you bite through the crunchy panko coating. The filling combines tender seasoned chicken with sautéed peppers and onions, all bound together in a luxurious sauce of heavy cream and melted cheeses that makes each pocket feel like a handheld version of your favorite Tex-Mex restaurant dish. What makes these chicken fajita bread pockets so brilliant is how the flattened bread creates a thin, crispy shell after frying, while the flour slurry seals the edges completely to prevent any of that precious creamy filling from escaping into the oil. Whether you're preparing party appetizers that will disappear within minutes, creating a freezer stash of ready-to-fry snacks for busy weeknights, or simply looking for a creative way to use up leftover chicken and bell peppers, these impressive pockets deliver restaurant-quality results that make everyone ask how you possibly made something so delicious at home.
I developed these chicken fajita bread pockets for my daughter's quinceañera when I needed appetizers that could be prepared ahead and featured the Mexican-inspired flavors appropriate for the celebration. The challenge was creating something impressive enough for a special occasion while being practical enough to make in large quantities. These pockets solved every problem; I assembled and froze them over several days, then fried them in batches during the event. The moment the first platter hit the table, a crowd formed, and I spent the rest of the evening fielding compliments from relatives who couldn't believe these came from my kitchen rather than a catering company.
Chicken Filling Ingredients
- Chicken: One pound boneless chicken breast, cubed into small, uniform half-inch pieces.
- Vegetables: One cup mixed bell peppers (diced) and one large onion (diced).
- Aromatics: One tablespoon fresh minced garlic.
- Fajita Spice Blend: One teaspoon each of smoked paprika, cumin, black pepper, and Italian seasoning, plus one tablespoon of garlic powder.
Creamy Sauce and Coating Elements
- Sauce: One cup heavy whipping cream and half a cup of softened cream cheese.
- Cheesy Finish: One cup shredded mozzarella cheese (added after cooling).
- Wrapper: Approximately three loaves of standard soft white sandwich bread.
- Sealing Slurry: Half a cup of flour mixed with a quarter cup of water to a paste consistency.
- Breading: Two eggs whisked with 1/3 cup milk (egg wash) and two cups of panko bread crumbs.
 Pin it
Assembly Instructions Detailed
- Cooking The Chicken and Veggies
- Heat oil in a large skillet and sauté cubed chicken until white throughout. Season with the spice blend and stir for 8–10 minutes until fully cooked. Add fresh garlic for 30 seconds, then toss in bell peppers and onions. Sauté for 2–3 minutes until slightly tender but still vibrant.
- Making The Cream Sauce
- Pour in heavy cream and simmer until reduced and thick enough to coat a spoon (about 3–4 minutes). Stir in cream cheese chunks until melted and smooth. Transfer to a shallow dish and let cool to room temperature before stirring in the mozzarella.
- Preparing the Bread Wrappers
- Use a rolling pin to flatten each slice of bread firmly until thin and dense. Trim off all crusts to create neat rectangles. Keep flattened slices under a towel to prevent drying.
- Assembly and Sealing
- Spread the flour slurry paste along the edges of the bread. Place one tablespoon of filling on one half, fold over, and press firmly. Use fork tines to crimp the edges closed securely.
- The Double Coating
- Dip each pocket into the egg wash, then press firmly into the panko bread crumbs. Ensure all sides and edges are fully coated for maximum crunch.
- Frying Until Golden
- Heat 2 inches of oil to 350°F–375°F. Fry 2–3 pockets at a time for 3–4 minutes, turning once, until deep golden brown. Drain on a wire rack for two minutes before serving.
The technique of using flattened bread as a wrapper exists in many cultures, and once you master the "rolling and sealing" method, it becomes a versatile kitchen hack. The compression from rolling prevents the bread from becoming oil-logged, resulting in a finish that rivals gourmet pastries.
Expert Tips for Success
Cooling Strategy: Spread your filling in a wide, shallow baking dish to increase surface area and speed up the cooling process. Bread Choice: Stick to standard white sandwich bread; artisanal or sourdough breads often have holes that will leak filling. Frying Prep: If your oil starts to collect loose panko crumbs, carefully skim them out with a slotted spoon between batches to prevent them from burning and sticking to new pockets.
Storing and Make Ahead
These are the ultimate make-ahead snack. Flash-freeze them in a single layer on a parchment-lined tray for 2 hours, then transfer to a freezer bag. They can be fried directly from frozen—just add 1–2 minutes to the cook time. To reheat already-fried pockets, use an air fryer at 350°F for 5 minutes to restore that signature panko crunch.
 Pin it
These chicken fajita bread pockets have become my secret weapon for parties. They deliver impressive results with simple ingredients, proving that a little creativity with a rolling pin can turn a loaf of bread into a five-star appetizer. Every time I serve these, I'm reminded that the best recipes are often the most fun to assemble.
Frequently Asked Questions
- → Can I bake these instead of frying?
- You can! Brush them with oil and bake at 400 degrees for about 15 to 20 minutes, flipping halfway through. They won't be quite as crispy as fried, but they'll still be delicious.
- → How long can I keep these in the freezer?
- Freeze them after coating but before frying, and they'll keep for up to 3 months. Fry them straight from frozen - no need to thaw!
- → What kind of bread works best?
- Regular white sandwich bread works perfectly. You want something soft enough to roll flat but sturdy enough to hold the filling without tearing.
- → Why do I need to let the filling cool before adding mozzarella?
- If the filling is too hot, the mozzarella will melt completely and become too runny. Cooling it first keeps the cheese in nice shreds that melt perfectly when fried.
- → Can I make the filling ahead of time?
- Yes! Make the filling up to 2 days ahead and keep it refrigerated. Just bring it to room temperature before assembling so it's easier to work with.
- → What should I serve these with?
- These are great with sour cream, salsa, guacamole, or ranch dressing for dipping. They're perfect party appetizers!