
 Pin it
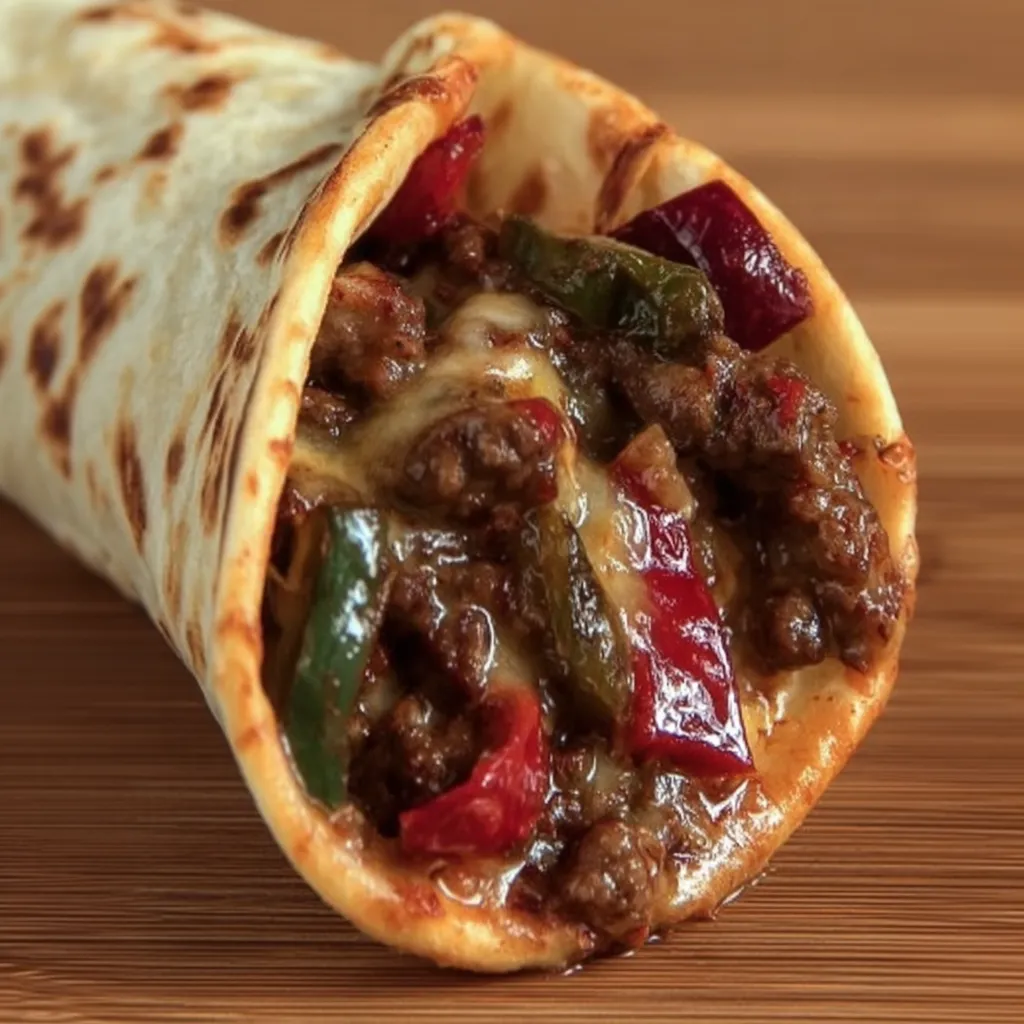
These crispy beef cones transform ordinary flour tortillas into golden, crunchy vessels filled with savory spiced beef, colorful bell peppers, and gooey melted mozzarella that stretches beautifully when you pull them apart. The cone shape makes eating effortlessly fun while keeping all that flavorful filling perfectly contained in each handheld portion, eliminating the mess that traditional tacos create when the bottom falls out halfway through your first bite. What makes these crispy beef cones so irresistible is the contrast between the shatteringly crisp tortilla shell and the tender, boldly seasoned beef mixture inside, all crowned with bubbling cheese that binds everything together. Whether you're serving these as party appetizers, game day snacks, or a creative weeknight dinner that gets the whole family excited, these cones deliver familiar taco flavors in a format that's infinitely more fun to eat and impressive to present.
I invented these crispy beef cones for my son's birthday party when he requested something that was like tacos but cooler, and I had no idea what that meant until I started experimenting with different shapes and presentations. The moment I pulled the first batch of cheese-topped cones from the oven and set them standing upright in their serving dish, he declared them the coolest food he had ever seen and immediately grabbed one before I could even get a photo. His friends spent the entire party asking for more cones, and several parents texted me afterward asking for the recipe because their kids couldn't stop talking about the taco cones they'd eaten. Now these appear at every party we host, and I've gotten so much practice that I can assemble and bake three dozen cones in the time it used to take me to make ordinary tacos.
Spiced Beef Ingredients
- Ground beef: One pound with an 80/20 lean to fat ratio for juicy, flavorful protein.
- Aromatics: One small yellow onion finely chopped and one tablespoon minced fresh garlic.
- Tomato paste: Four tablespoons to add richness and create a thick, clingy sauce.
- Spice blend: A mix of salt, black pepper, garlic powder, smoked paprika, red chili powder, and red chili flakes.
- Fresh peppers: One cup diced mixed bell peppers and one to two Serrano peppers for crunch and heat.
- Water: One cup to simmer and thicken the beef mixture.
Cone Assembly Components
- Flour tortillas: Eight medium tortillas halved into semicircles to form the shell.
- Shredded mozzarella: Eight ounces to provide a gooey, stretchy melted topping.
- Cooking spray: For even browning and a shatteringly crisp texture.
- Toothpicks: To secure the overlapping seams during the initial baking stage.
 Pin it
Cooking Instructions Detailed
- Sautéing The Aromatics
- Heat two tablespoons of oil in a large skillet over medium heat. Add the finely chopped yellow onion and minced fresh garlic, stirring for one to two minutes until the onion is translucent and the garlic is fragrant.
- Browning The Beef
- Add the ground beef to the skillet, breaking it into small pieces. Cook for two to three minutes until the meat changes from pink to brown, ensuring it is well-mixed with the aromatics.
- Adding The Spices
- Sprinkle the salt, black pepper, red chili powder, garlic powder, smoked paprika, and red chili flakes over the beef. Stir vigorously and cook for one to two minutes to allow the spices to bloom.
- Incorporating Tomato Paste
- Add the tomato paste to the beef, stirring continuously for about one minute to coat the meat and allow the paste to caramelize slightly.
- Simmering Until Thick
- Pour in one cup of water and deglaze the pan. Cover and simmer on medium-low for 10 to 12 minutes, stirring occasionally until most liquid has evaporated and the mixture is thick and saucy.
- Adding Fresh Peppers
- Stir in the diced bell peppers and Serrano peppers. Cook uncovered for three to four minutes until the peppers are just tender but still colorful. Remove from heat.
- Preparing Baking Setup
- Preheat the oven to 400 degrees Fahrenheit and line a baking sheet with parchment paper. Prepare a loaf pan to hold the cones upright later.
- Shaping Tortilla Cones
- Roll halved tortilla semicircles into cones, ensuring the bottom point is tightly closed. Secure the overlapping seam with a toothpick inserted about halfway down.
- Baking Empty Shells
- Spray the outside of the cones with cooking spray. Place them seam-side down on the baking sheet and bake for eight to 10 minutes until golden and fully crisp.
- Filling With Beef
- Spoon the beef filling into the crispy cones, packing gently. Stand the filled cones upright in the loaf pan so they support each other.
- Topping With Cheese
- Distribute the shredded mozzarella generously over the tops of the filled cones, pressing slightly so it adheres to the beef.
- Final Baking Stage
- Bake the filled cones in the loaf pan for eight to 10 minutes until the cheese is melted, bubbling, and has golden brown spots.
- Garnishing And Serving
- Sprinkle with dried parsley. Rest for one minute before serving hot. Remind guests to remove any remaining toothpicks before eating.
The inspiration for these crispy beef cones came from watching street food vendors at a local festival create all sorts of handheld foods designed for walking and eating simultaneously. I noticed that the most popular items were always the ones that looked impressive and contained familiar flavors in unexpected formats. Tacos are universally loved, but the traditional flat format requires two hands and often results in filling spilling everywhere before you finish eating. The cone shape solves every problem while adding visual excitement that makes people want to grab one even before they know what's inside. My kids now consider regular tacos boring compared to these cones, which I suppose means I've created a monster, but at least it's a delicious one.
Tortilla Selection Tips
The tortillas you choose for your crispy beef cones affect both the ease of shaping and the final texture after baking. Fresh, soft flour tortillas from the refrigerator section bend easily into cone shapes without cracking or tearing at the fold points. Stale or dry tortillas resist shaping and often crack when rolled, ruining the cone structure before you can even secure it with a toothpick. Medium-sized tortillas around eight inches in diameter produce cones that are substantial enough to fill generously without being so large they become difficult to eat handheld.
Beef Cooking Secrets
Achieving the perfect beef filling consistency requires patience during the simmering stage and attention to how much liquid remains. The mixture should look thick and saucy when finished, clinging to a spoon rather than running off like soup. Breaking the ground beef into small, uniform pieces during browning ensures every bite contains similar texture rather than some bites getting large chunks while others get crumbs. Cooking the spices briefly in the hot fat before adding liquid allows them to bloom and develop their full aromatic potential.
Cheese Melting Guide
The cheese topping needs to melt completely and develop slight browning for the best flavor and appearance on your finished cones. Shredding your own cheese from a block produces better melting than pre-shredded cheese coated in anti-caking agents that can prevent smooth melting. Distributing the cheese evenly across all cones ensures each serving receives equal cheese coverage rather than some cones being over-cheesed while others look sparse. Watching carefully during the final minutes of baking prevents the cheese from going past golden and into burnt territory.
Cone Stability Solutions
Keeping the filled cones standing upright during the second baking requires a vessel that holds them securely without letting them tip. A standard loaf pan fits four cones snugly, so you may need two pans for the full batch or can bake in two rounds. Muffin tins work as an alternative, with each cone fitting into a cup that keeps it perfectly vertical during baking. Arranging the cones so they lean against each other provides additional stability that prevents tipping when you open the oven door.
Serving Ideas Presented
These crispy beef cones stand beautifully on their own but pair wonderfully with classic Mexican accompaniments that complement the bold spiced beef. A side of cool, creamy guacamole provides rich contrast against the spicy filling and adds fresh avocado flavor. Pico de gallo or fresh salsa offers acidic brightness that cuts through the richness of the cheese and meat. Sour cream drizzled over the tops or served alongside for dipping adds tangy creaminess that balances the heat from the peppers.
Flavor Variations Explored
Swapping the ground beef for seasoned ground chicken or turkey creates a lighter version that still delivers on flavor while reducing the fat content. Adding black beans to the beef mixture stretches the filling further while contributing fiber and additional protein. Using pepper jack cheese instead of mozzarella adds another layer of heat that spice lovers particularly appreciate. Drizzling chipotle mayo over the finished cones before serving adds smoky, creamy richness that takes the flavor in a slightly different direction.
Storing Beef Cones
The components of these crispy beef cones store better separately than assembled, since the tortilla shells lose their crispness once they contact the moist filling. Store leftover beef filling in an airtight container in the refrigerator for up to four days, reheating thoroughly before using. Pre-baked empty tortilla cones can be stored in an airtight container at room temperature for up to two days, though they may need brief re-crisping in the oven. For best results, assemble and bake the filled cones just before serving rather than trying to store them completed.
Reheating For Later
Reheating leftover filled cones requires attention to preserve both the crispy shell and the properly heated filling inside. Place assembled cones on a baking sheet and reheat in a 375-degree oven for about eight minutes until the filling is hot and the shell re-crisps. Microwave reheating works for the filling alone but makes the tortilla shell chewy and leathery rather than crisp. Adding fresh cheese to day-old cones before reheating helps restore the gooey, appealing presentation of freshly made versions.
 Pin it
These crispy beef cones have become one of those recipes that I'm genuinely proud of creating because they solve real problems while delivering genuine deliciousness that makes people happy. The format eliminates the mess of traditional tacos while creating visual excitement that makes everyone want to grab one before they even know what's inside. Watching guests at parties carefully select their cone, take that first bite, and then immediately reach for a second one tells me the recipe achieves exactly what I hoped it would. Sometimes the best recipes aren't about complicated techniques or exotic ingredients but about taking familiar flavors and presenting them in ways that feel fresh and fun, and these cones do exactly that.
Frequently Asked Questions
- → How do I keep the cones from unrolling?
- Secure them with toothpicks before baking! The first bake sets the cone shape, then you can remove the toothpicks before filling if you want.
- → Can I make these ahead of time?
- You can cook the beef filling ahead and store it in the fridge for up to 2 days. But the cones are best baked fresh right before serving so they stay crispy.
- → What if I don't have a loaf pan?
- You can use a muffin tin to stand the cones upright, or even prop them against each other on a baking sheet - just make sure they won't tip over and spill.
- → Can I use a different type of tortilla?
- Yes! Flour tortillas work best for this, but you could try corn tortillas if you prefer. Just know they might be more fragile when shaping.
- → How spicy are these?
- They have a moderate kick from the chili powder, chili flakes, and Serrano peppers. Remove the Serrano peppers for mild, or add more for extra heat.
- → Can I use a different cheese?
- Sure! Cheddar, Monterey Jack, or a Mexican cheese blend would all work great. Use whatever melts well and you like the taste of.