
 Pin it
I stumbled upon this recipe last winter when searching for something different from our usual taco night routine. After years of serving the same soft tacos with standard toppings, I was desperate for a change that wouldn't cause a family revolt. These crispy baked versions were an immediate hit – that perfect combination of crunchy exterior and gooey cheese interior creates something that feels more special than regular tacos without requiring any fancy ingredients or techniques. My family now requests these specifically as "those oven tacos" whenever I ask what they want for dinner.
Last month I made these for my nephew who "only eats quesadillas, not tacos" according to my sister. He devoured three before announcing they were "quesadilla tacos" and therefore acceptable to his very particular five year old palate. My sister texted me later asking for the recipe, saying it was the first time he'd eaten anything taco related in over a year. Sometimes the simplest recipe tweaks create the biggest breakthroughs with picky eaters.
Ingredients
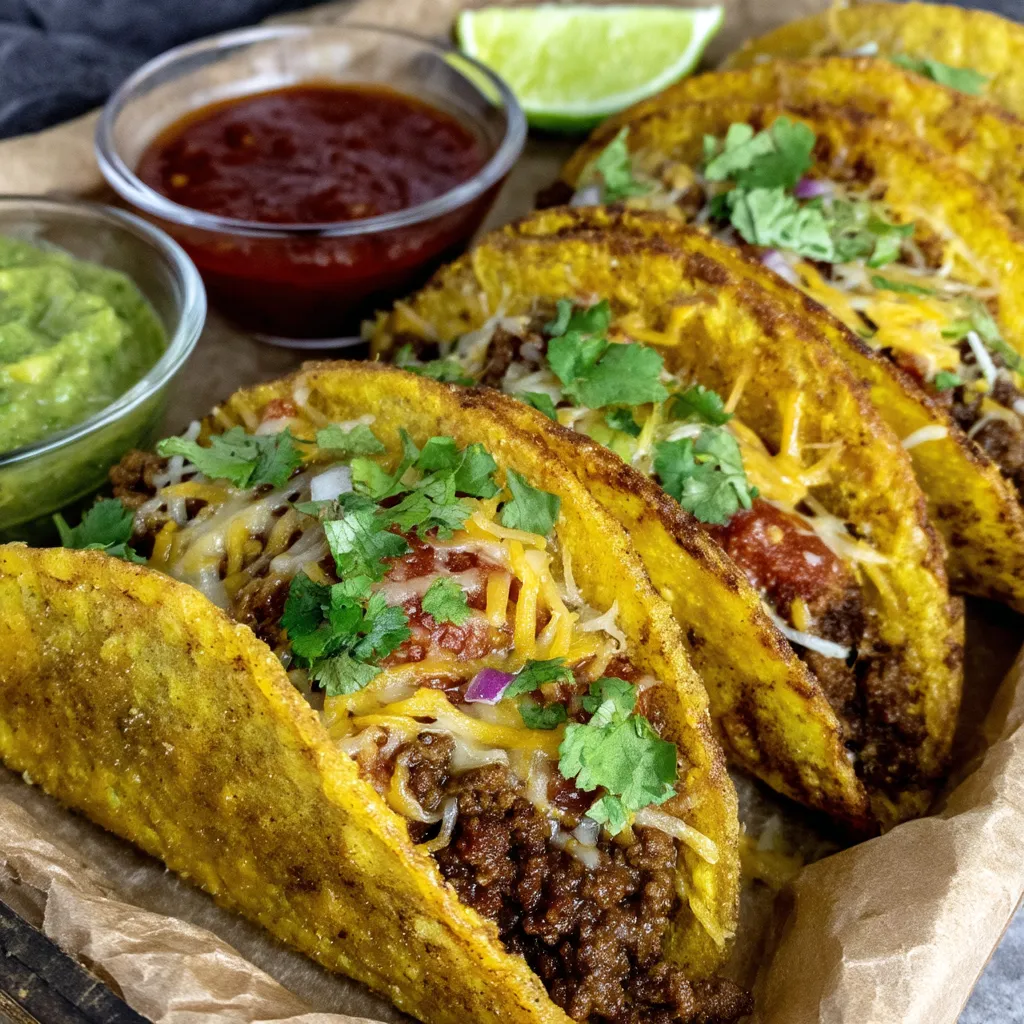
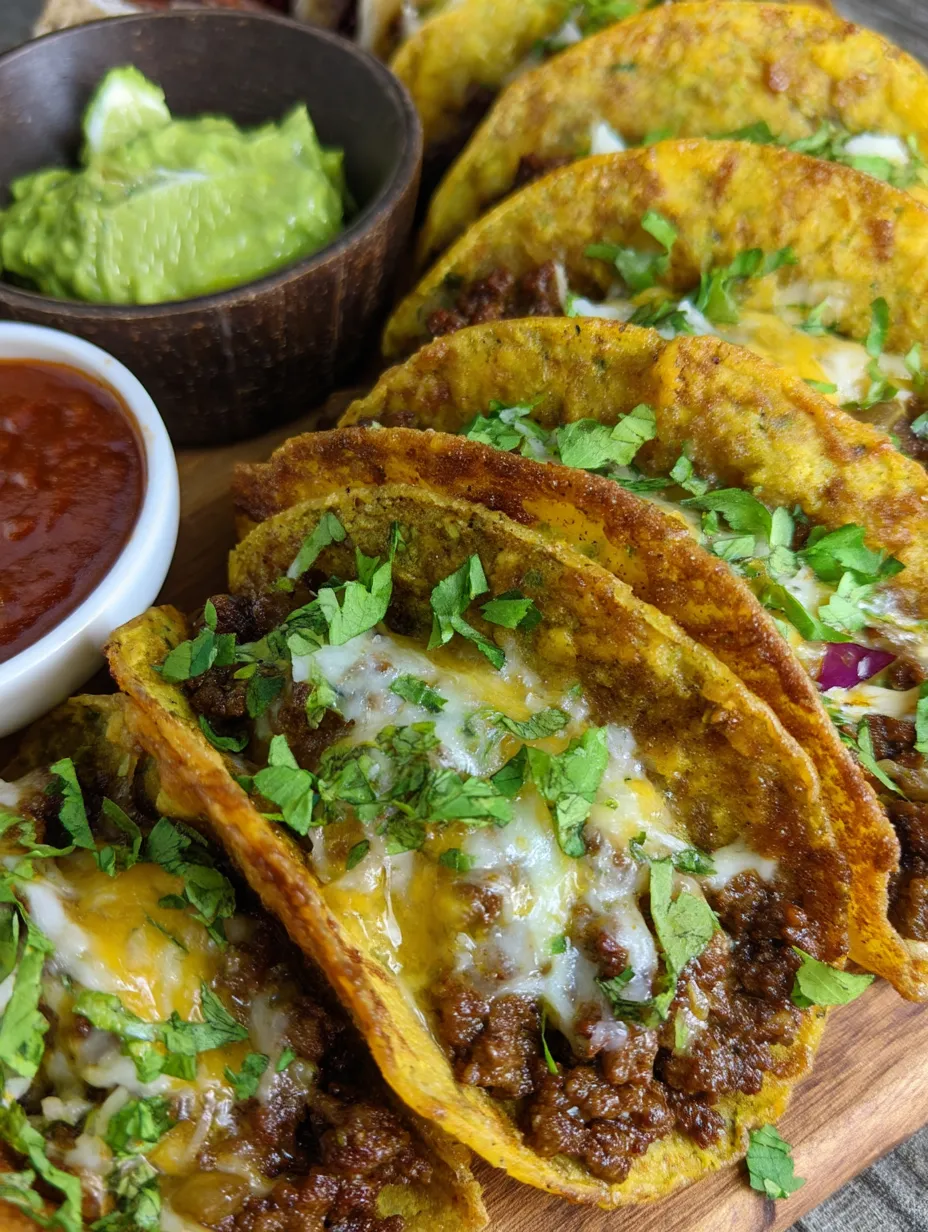
Corn tortillas provide authentic flavor and develop incredible crispness in the oven that flour varieties simply can't match. Their slightly sweet corn taste becomes more pronounced during baking, adding another dimension to the overall flavor experience.
Ground beef benefits from the 90% lean variety that offers perfect balance – enough fat for flavor but not so much that the tacos become greasy messes. The meat stays moist while still browning beautifully.
Enchilada sauce transforms ordinary taco meat into something more complex and interesting. That slight tang and depth of flavor makes people wonder what your secret ingredient might be.
Oaxaca cheese creates that perfect stringy pull when you bite into the taco – similar to mozzarella but with more flavor. The way it melts completely without becoming greasy makes it ideal for these tacos.
Olive oil brush might seem like a small detail, but it's what transforms the tortillas from soft to crispy during baking. That light coating ensures even browning and prevents dry, tough spots.
 Pin it
Step-by-Step Instructions
- Browning beef properly
- requires patience to develop flavor before adding liquid components. That initial caramelization creates depth that makes a noticeable difference in the final flavor.
- Breaking meat finely while cooking
- ensures even distribution throughout each taco rather than having large chunks that make biting through difficult and create uneven flavor.
- Warming tortillas thoroughly before folding
- prevents the cracking and splitting that can lead to filling leakage during baking. This simple step saves enormous frustration later.
- Layering strategically with cheese both under and over the meat
- serves two important purposes – it helps hold everything together while ensuring perfect cheesy flavor in every bite.
- Arranging carefully on the baking sheet
- gives each taco room to crisp properly rather than steaming where they touch. That space for air circulation is essential for achieving the perfect texture.
- Brushing the outside with oil
- creates that beautiful golden exterior that makes these tacos visually appealing while adding another layer of flavor and crispness.
- Resting briefly after baking
- allows the extremely hot filling to cool slightly to prevent burned mouths while giving the exterior a chance to reach its peak crispness.
My first attempt at this recipe taught me some valuable lessons. I initially tried using foil on my baking sheet for easier cleanup, which resulted in the tortillas sticking terribly and tearing when I tried to remove them. Now I use a nonstick baking sheet sprayed lightly with cooking spray with perfect results every time. Another game changing discovery was the importance of that brief rest after baking – my impatient family grabbed them immediately the first time and suffered through burned mouths and slightly less crispy shells.
Perfect Pairings
Simple sides complement these tacos beautifully without creating extra work. Mexican style rice provides the perfect base to catch any filling that might escape. Black beans seasoned simply with cumin and garlic create a traditional pairing that balances the meal. For a fresher option, a simple cabbage slaw dressed with lime juice and salt adds refreshing crunch. Setting out small bowls of various salsas, guacamole, and sour cream allows everyone to customize their tacos to personal preference.
Fresh Variations
Protein swaps work seamlessly in this flexible format. Ground turkey creates a lighter version while still delivering satisfying flavor when seasoned properly. Shredded chicken offers different texture while maintaining the overall experience for those who prefer white meat. Bean lovers' adaptation incorporates mashed black or pinto beans with the meat (or replacing it entirely) for added fiber and slightly different flavor profile. Breakfast twist uses scrambled eggs and chorizo in place of beef for amazing morning variation.
Keeping It Good
Reheating strategies maintain that coveted crispy texture. Toaster oven or regular oven at 350°F for about 5 minutes revives leftover tacos beautifully, while microwaving tends to create soggy disappointment. Component preparation allows make ahead convenience by cooking the beef mixture up to two days ahead and storing in the refrigerator until ready to assemble and bake. Assembly line approach simplifies the process when cooking for a crowd – prepare all components and then enlist help with the folding and arranging for faster preparation.
 Pin it
These crispy ground beef tacos have become my reliable solution for those evenings when I need something that satisfies everyone without creating hours of kitchen work. The familiar flavors transformed by this baking method creates something that feels special without requiring special ingredients or complicated techniques. The combination of that crunchy exterior, melty cheese, and seasoned beef hits all the right notes between comfort food and something slightly elevated. Even better, the basic technique adapts beautifully to whatever ingredients I have on hand, making it perfect for those nights when a grocery store run isn't happening but dinner still needs to make it to the table.
Frequently Asked Questions
- → Can I make these tacos ahead of time?
- You can prepare the beef filling up to 3 days ahead and store it in the refrigerator. For best results, assemble and bake the tacos just before serving to ensure they're at their crispiest. If you need to make them completely ahead, you can reheat already-baked tacos in a 350°F oven for 5-7 minutes, though they won't be quite as crispy as freshly made ones.
- → Why do my corn tortillas keep cracking when I fold them?
- Corn tortillas crack when they're not warm enough or if they're old. Make sure to heat them properly using the damp paper towel method in the microwave until very pliable. Alternatively, you can quickly dip each tortilla in warm enchilada sauce before filling to add moisture and flavor. Fresh tortillas also fold better than older ones, so check the date on your package.
- → Can I use flour tortillas instead of corn?
- Yes, you can substitute flour tortillas, though the texture and flavor will be different. Flour tortillas tend to get more of a crisp rather than the crunch you get from corn. If using flour tortillas, they don't need to be warmed as much to prevent cracking, and you may need to reduce the baking time by 1-2 minutes as they can brown more quickly.
- → What if I don't have enchilada sauce?
- If you don't have enchilada sauce, you can substitute with 3/4 cup of your favorite salsa, 1/2 cup tomato sauce mixed with 1/4 cup water and extra taco seasoning, or a combination of 1/2 cup tomato sauce and 1/4 cup chicken broth with a pinch of cumin and chili powder. Each alternative will give a slightly different flavor profile.
- → Can I add beans to the filling?
- Absolutely! Adding 1/2 cup of drained and rinsed black beans or pinto beans to the meat mixture is a great way to extend the filling and add fiber. You can even replace half the meat with beans for a lighter option. Just be careful not to overfill the tacos, as too much filling can make them difficult to fold and may cause the tortillas to tear.
- → How do I store and reheat leftovers?
- Store leftover tacos in an airtight container in the refrigerator for up to 3 days. To reheat, place them on a baking sheet in a 350°F oven for 7-10 minutes until heated through and crispy again. Avoid using the microwave as it will make the tortillas soggy. These tacos also freeze well - wrap individually in foil, then place in a freezer bag for up to 2 months. Reheat frozen tacos (unwrapped) at 375°F for 15-20 minutes.