
 Pin it
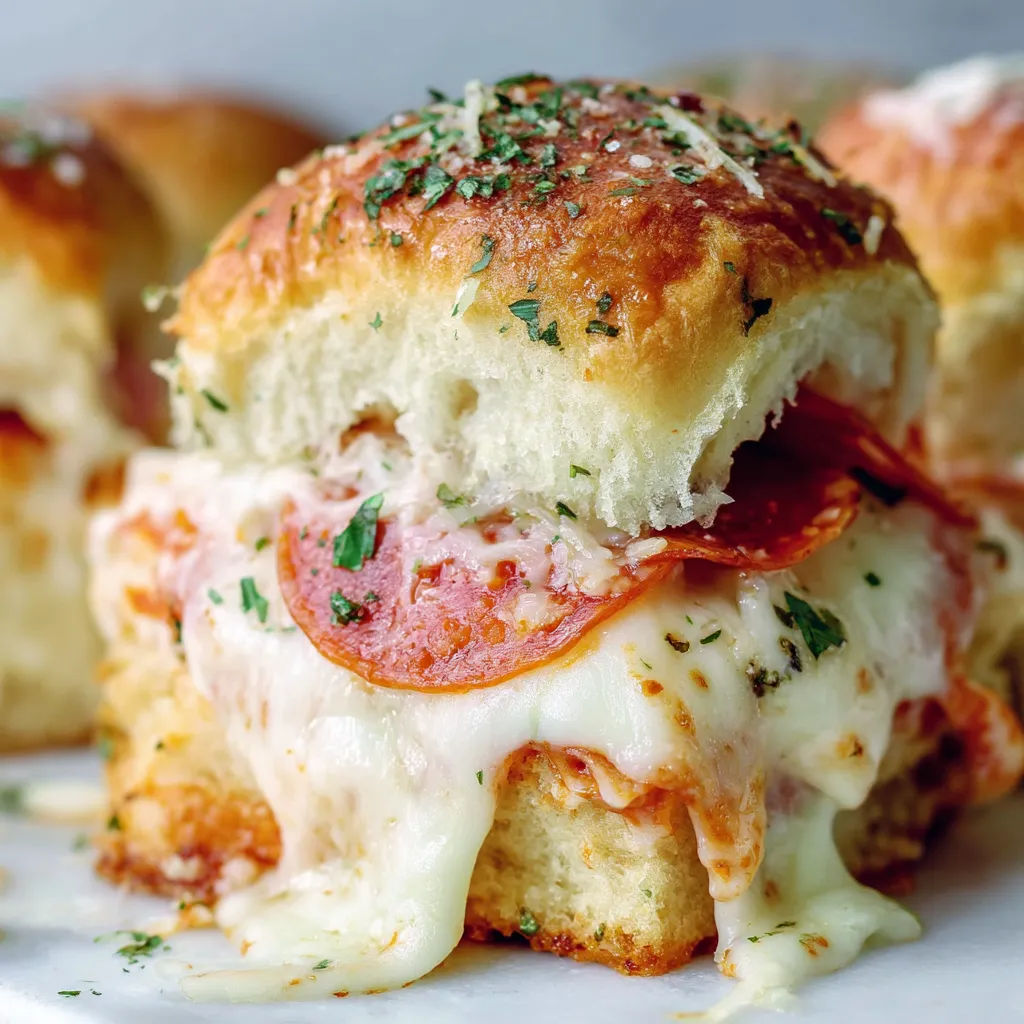
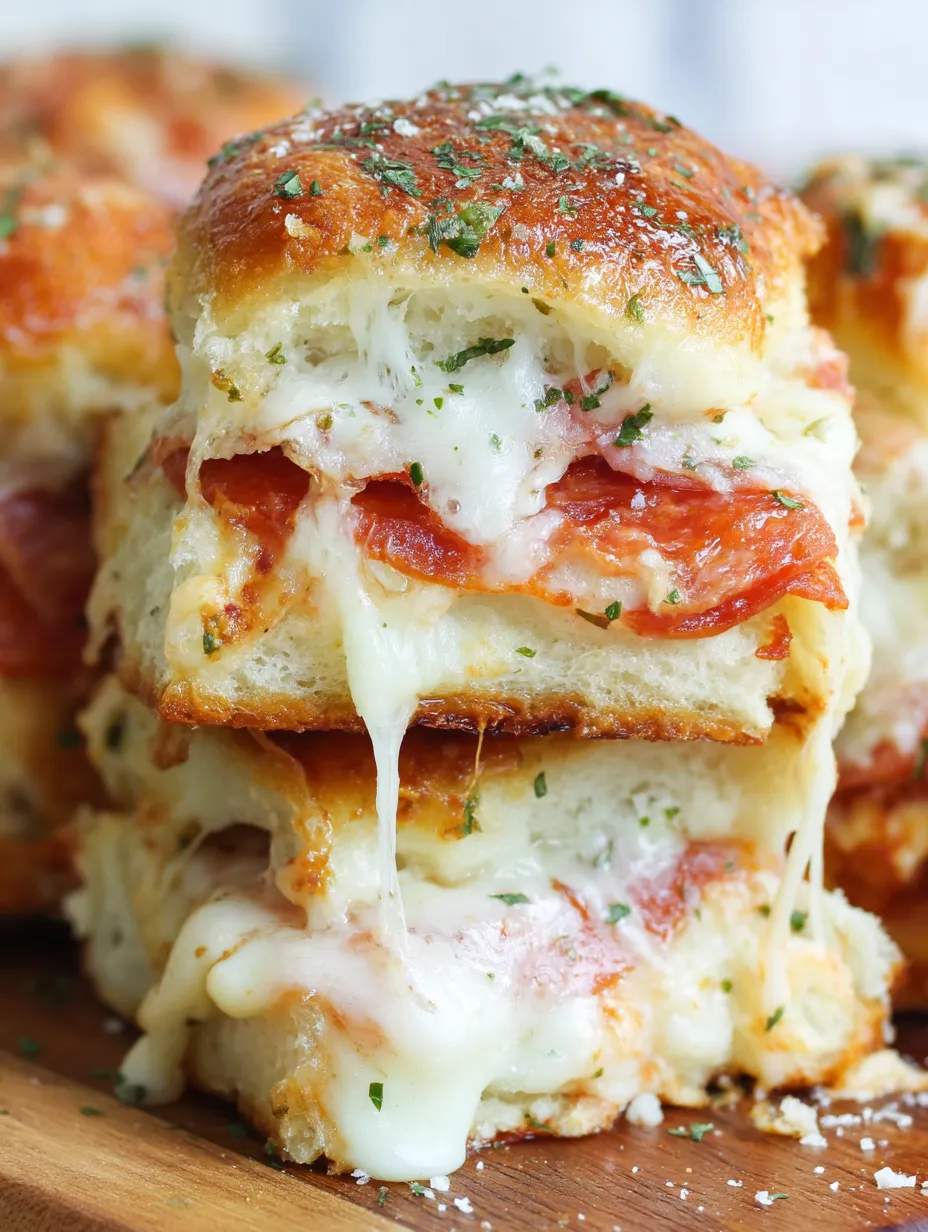
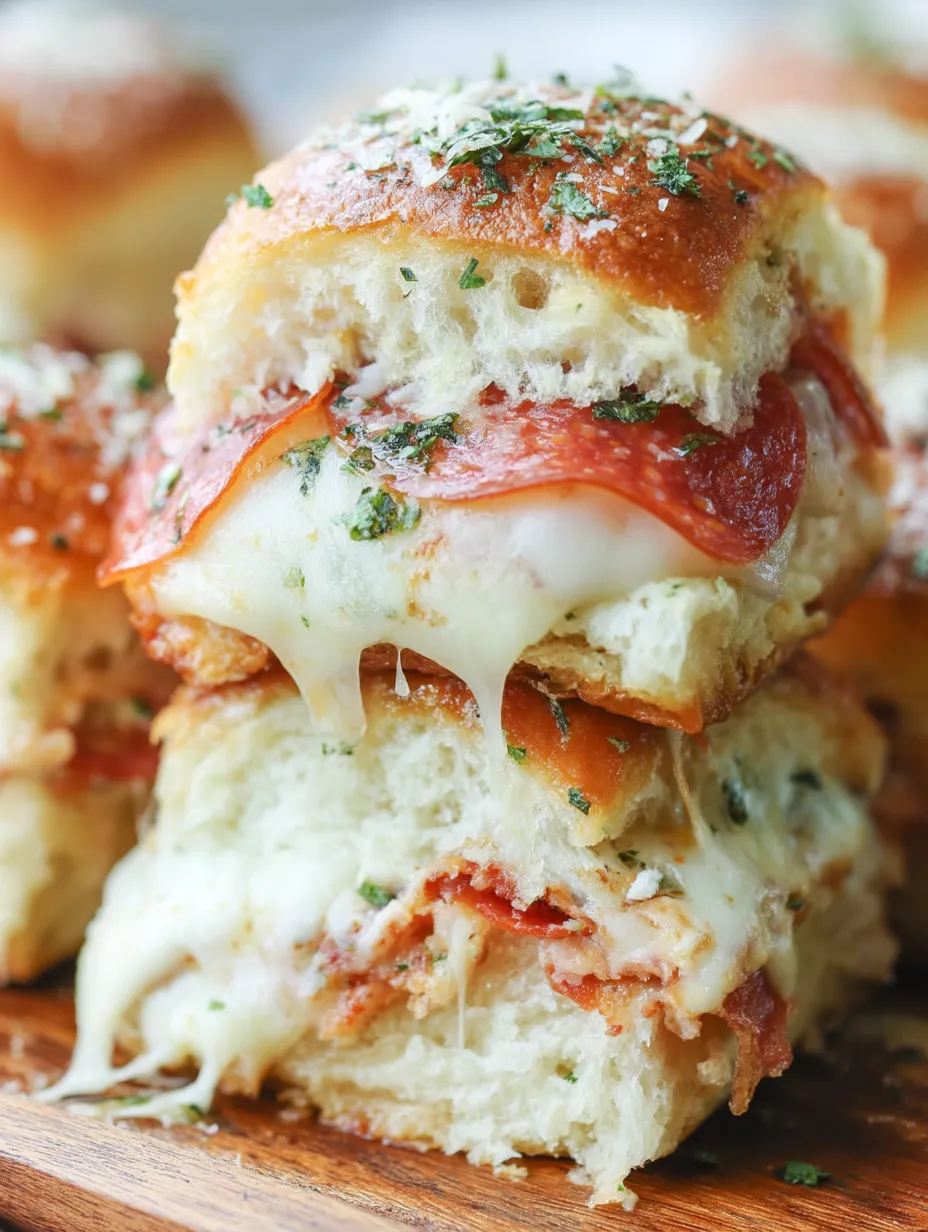
I threw these together last football season when I needed something beyond the usual chips and dip routine but didn't have time for anything complicated. What started as kitchen desperation has become our go to for game days, kids' sleepovers, or anytime we need crowd pleasing food without much effort. There's something magical about the combination of those slightly sweet Hawaiian rolls, tangy pizza sauce, and crispy edged pepperoni all topped with that herb loaded butter that makes people forget their manners and reach for seconds before they've finished their first helping.
My teenage nephew, who typically communicates entirely in grunts and eye rolls, actually said complete sentences after trying these – specifically, "These are fire" and "Can I take some home?" When a 16 year old boy voluntarily compliments your cooking and asks for leftovers, you know you've struck culinary gold.
Ingredients
Hawaiian rolls provide the perfect sweet base that balances the savory toppings. Their soft, slightly chewy texture holds up to the fillings without getting soggy like regular white bread might.
Mini pepperoni creates better distribution throughout each slider so you get that perfect pepperoni flavor in every bite. They also crisp up beautifully around the edges during baking.
Two layers of cheese – one below and one above the pepperoni – ensures proper melting throughout and creates that ideal cheese pull moment that makes everyone happy.
Herb butter topping might seem like gilding the lily, but it transforms these from good to can't stop eating. The way it seeps into the nooks and crannies of the rolls creates flavor in every bite.
Baking covered then uncovered creates the perfect balance of melty insides and toasty tops. This two stage approach ensures nothing burns before the cheese gets properly gooey.
 Pin it
Step-by-Step Instructions
- Cutting rolls horizontally while keeping them connected
- creates easy assembly and perfect portioning. This approach makes preparation infinitely easier than trying to work with individual rolls.
- Spreading sauce carefully
- ensures even coverage without making the rolls soggy. That restrained hand with the sauce makes the difference between structurally sound sliders and a messy collapse.
- Layering strategically with cheese both below and above the pepperoni
- creates the perfect melty environment that holds everything together. This technique prevents toppings from sliding out with the first bite.
- Combining butter with seasonings
- creates flavor infused topping that distributes herbs and spices evenly. This mixture ensures every roll gets its fair share of that amazing flavor.
- Brushing tops thoroughly
- allows the butter mixture to seep down into the rolls while creating golden brown tops. Don't rush this step - the more even your coverage, the better they'll taste.
- Covering initially with foil
- prevents premature browning before the cheese melts. This protection ensures perfectly toasted tops rather than burnt rolls with cold centers.
- Letting them rest briefly after baking
- allows the cheese to set slightly for easier serving. Those few minutes of patience prevent burned mouths and messy cutting.
My first attempt at these sliders taught me valuable lessons about sauce consistency. I initially used thin, runny sauce, resulting in soggy bottoms that fell apart when picked up. Switching to thicker sauce (or reducing store bought sauce slightly) creates perfect texture throughout. Another game changing discovery was adding the red pepper flakes to the butter mixture - that subtle heat balances the sweetness of the Hawaiian rolls perfectly.
Serving Ideas
Simple sides complement these hearty sliders beautifully. Green salad with Italian dressing provides fresh contrast to the rich, cheesy sliders. Vegetable platter with ranch dip offers crunchy balance while keeping the casual vibe. For game day spreads, serving alongside other finger foods like wings and potato skins creates the ultimate viewing party spread. When serving as dinner rather than appetizers, roasted vegetables or a simple pasta salad rounds out the meal.
Switch It Up
Topping variations transform this adaptable base. Supreme pizza edition incorporates diced green peppers, onions, olives, and sausage for loaded flavor experience. BBQ chicken version substitutes shredded rotisserie chicken tossed in barbecue sauce for the pepperoni. Vegetarian adaptation works beautifully with sautéed mushrooms, bell peppers, and onions replacing the meat. Breakfast spin creates morning friendly version with scrambled eggs, bacon, and American cheese for weekend brunch.
Keeping It Fresh
Make ahead strategies streamline busy days. Prepare completely up to 24 hours ahead and refrigerate covered, then add 5 10 minutes to baking time when cooking from cold. Component preparation saves time by mixing butter topping ahead and storing in refrigerator - just warm slightly before using. Reheating techniques maintain quality - wrap leftover sliders in foil and warm in 350°F oven for 10 minutes rather than microwaving, which makes them soggy. Storage considerations maintain freshness for quick next day lunches - keep in airtight container in refrigerator for up to 3 days.
 Pin it
These pepperoni pizza sliders have become our family's go to solution for those occasions when we need something that makes everyone happy without requiring hours in the kitchen. The combination of familiar pizza flavors in an easy to eat format creates something that appeals to kids and adults alike while being substantial enough for dinner or perfect for grazing during the big game. While not particularly fancy or revolutionary, they hit that perfect sweet spot between crowd pleasing and minimal effort that makes entertaining enjoyable rather than stressful. Sometimes the best recipes aren't about culinary innovation but rather practical, delicious food that lets you enjoy the company rather than being stuck in the kitchen.
Frequently Asked Questions
- → Can I make these pizza sliders ahead of time?
- Yes! You can assemble these sliders up to 24 hours in advance and store them covered in the refrigerator. When ready to bake, you may need to add 5-7 extra minutes to the baking time since they'll be cold. For best results, add the butter topping just before baking.
- → What can I use besides Hawaiian rolls?
- While Hawaiian rolls provide a nice sweet contrast to the savory filling, you can substitute any dinner rolls or slider buns. Brioche rolls work especially well, as do potato rolls. Just make sure they're connected or very close together when assembling for easier preparation.
- → Can I add other pizza toppings to these sliders?
- Absolutely! These sliders are highly customizable. Try adding cooked Italian sausage, diced bell peppers, sliced olives, mushrooms, or any of your favorite pizza toppings. Just be careful not to overstuff, and if adding vegetables, consider pre-cooking or patting them dry to prevent excess moisture.
- → How do I store and reheat leftovers?
- Store leftover sliders in an airtight container in the refrigerator for up to 3 days. For best results, reheat in a 350°F oven for 10-15 minutes until heated through and the cheese is melty again. You can also microwave individual sliders for 30-40 seconds, though they won't be as crispy.
- → What sides pair well with these pizza sliders?
- These sliders pair perfectly with a simple garden salad, roasted vegetables, or a cup of tomato soup for dipping. For a party spread, serve them alongside vegetable platters, chips and dip, mozzarella sticks, or buffalo wings for a complete game day feast.