
 Pin it
I came up with these frozen banana yogurt bites a few summers ago when my kids were constantly begging for ice cream and I wanted something healthier but still fun. They've become our go-to summer treat that I don't feel guilty about serving for breakfast on particularly hot mornings. My 6-year-old loves helping make them almost as much as she loves eating them, and my toddler thinks they're "special ice cream." Win-win in my book!
Last week, I served these to my daughter's playdate friends, and one mom texted me later asking for the recipe because her picky eater had come home raving about the "banana ice cream dots." Now she makes them regularly too!
Simple Stuff
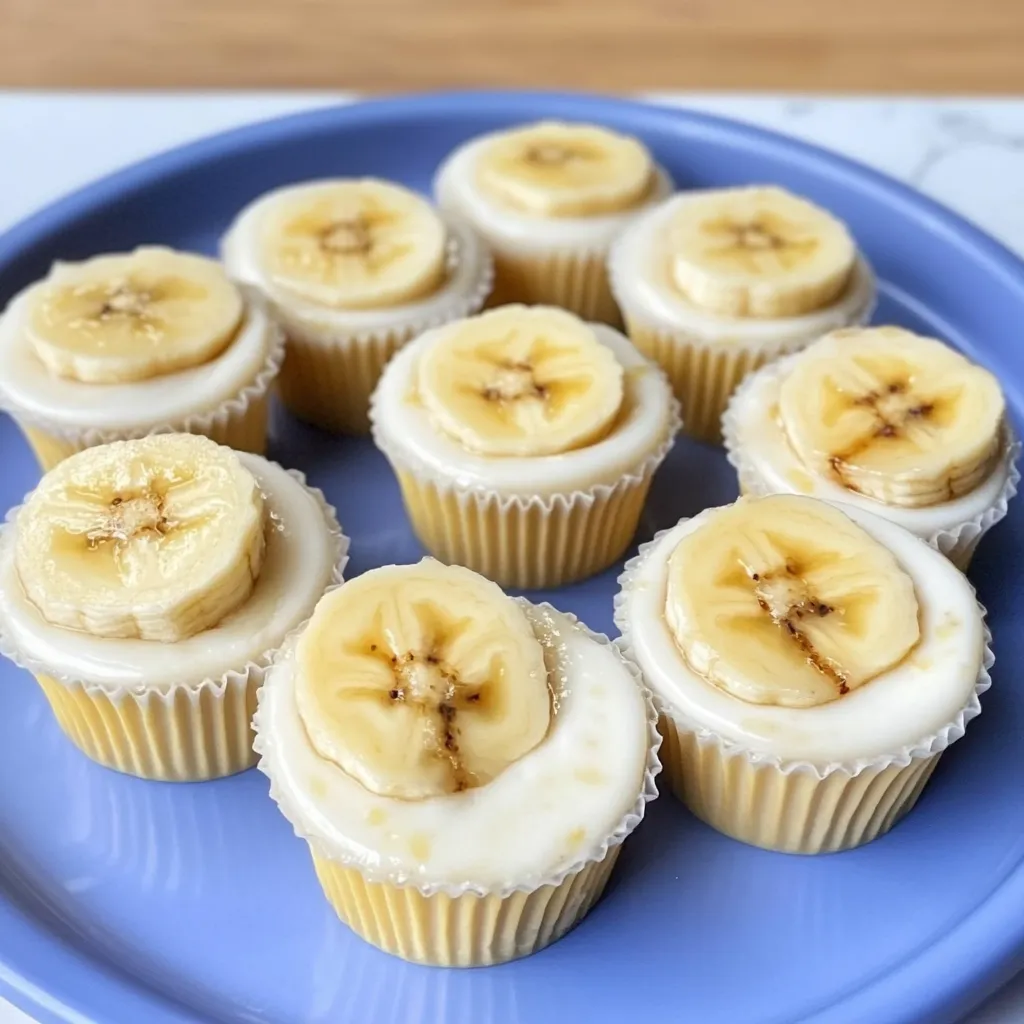
- Ripe bananas: work best - those spotty ones that are too mushy for regular eating are perfect here
- Any yogurt: works well - we've used plain, vanilla, and even strawberry with great results
- Banana chips: add a nice crunch contrast, but they're completely optional
- Cupcake liners: make portioning easy, but silicone molds work even better if you have them
After many batches, I've found that the more ripe the bananas, the sweeter the final result. Those ones with brown spots that nobody wants to eat are absolutely perfect for this recipe. And while I started making these with plain yogurt, my kids definitely prefer when I use vanilla – it makes them taste more like a real treat.
 Pin it
Making Magic
- Setup step:
- Grab a baking sheet or tray that will fit in your freezer. This might sound obvious, but I've assembled a whole batch before realizing my tray was too big for our freezer! Line it with cupcake cases or silicone molds – I started with paper liners but switched to silicone because they're easier to peel off when frozen. Regular muffin tins work too, but the frozen bites can be tricky to remove without mangling them.
- Banana smashing:
- Peel your banana and drop it on a plate. Now for the fun part that kids love – mashing! A fork works fine, but my little one struggles with it, so we use a potato masher which gives her better leverage. Don't worry about getting it completely smooth; a few small lumps add nice texture to the final bites. My first time making these, I tried using a blender which was complete overkill and created extra dishes for no reason.
- Mixing madness:
- Scoop the mashed banana into a mixing bowl and add your yogurt. We usually eyeball the yogurt rather than measuring precisely – about a small container's worth. Whisk them together until combined. The mixture should be thick but spoonable. If it seems too thick (sometimes happens with Greek yogurt), just add a splash more yogurt until it reaches a nice consistency.
- Filling fun:
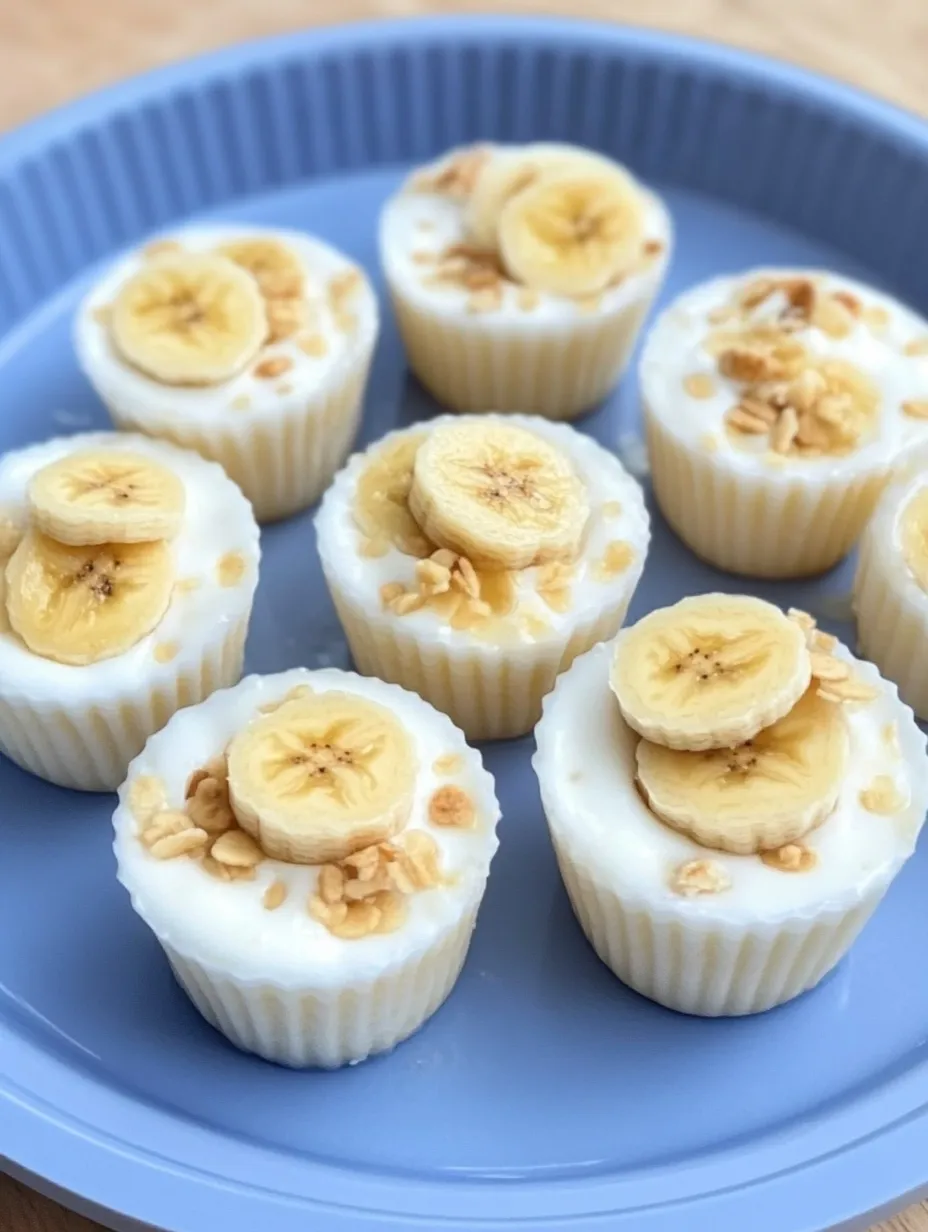
- This is where little helpers excel – spooning the mixture into the cups! Each cup gets filled about ¾ full. The mixture doesn't expand when freezing, but it's easier to eat if they're not filled to the absolute brim. My daughter takes this job very seriously and insists on making sure each cup has "exactly the same amount" (they never do, but I don't point that out).
- Topping time:
- If you're using banana chips, now's the time to add them. We've tried both whole chips sticking up like little sails and broken pieces sprinkled on top. Both look cute! My kids prefer the broken pieces because they're easier to eat when frozen. We've also experimented with other toppings – mini chocolate chips are a favorite for special occasions, and granola adds a nice crunch.
- Freezer phase:
- Carefully transfer your tray to the freezer, trying not to slosh the filling around too much. Now comes the hardest part – waiting! They need about two hours to freeze solid. The first time we made these, my daughter checked the freezer approximately every seven minutes asking if they were ready. We now have a special timer we set so she knows when she can start asking again!
My biggest disaster with these happened when I decided to get fancy and swirl in some peanut butter. Sounds good in theory, but the peanut butter freezes rock hard and became a choking hazard for my toddler. We stick to softer mix-ins now. I've also learned to label the container if I put them back in the freezer – my husband once thought they were regular yogurt and tried to spoon one out, creating a very confused moment!
 Pin it
Tasty Twists
Try using different yogurt flavors to change things up – mango yogurt with a sprinkle of shredded coconut gives a tropical vibe. Add a tiny drop of food coloring to the mixture for "special occasion" colored bites that kids go crazy for. For a more grown-up version, mix in some coffee granules and top with a sprinkle of cocoa powder. During fall, we add a pinch of cinnamon to the mixture and top with crushed graham crackers for a banana bread-inspired flavor.
These frozen banana yogurt bites have saved many summer afternoons at our house. There's something satisfying about having a stash of healthy treats in the freezer that my kids think are special desserts. The fact that they take just minutes to prepare makes them my secret weapon during those hot days when everyone's cranky and needs a quick cool-down!
Frequently Asked Questions
- → Can I use flavored yogurt instead of plain?
- Absolutely! Vanilla, strawberry or any flavored yogurt works great. Just be aware this might increase the sugar content.
- → How long do these banana yogurt bites last in the freezer?
- They'll keep well for up to a month if stored in an airtight container or freezer bag.
- → Can I make these dairy-free?
- Yes, simply substitute with your favorite plant-based yogurt like coconut, almond, or soy yogurt.
- → What other toppings could I use besides banana chips?
- Try granola, chopped nuts, mini chocolate chips, fresh berries, or a drizzle of honey depending on your preference.
- → Why are my bites too hard when frozen?
- Let them sit at room temperature for 2-3 minutes before eating for a softer, more scoopable texture.
- → Can these be made without the banana?
- The banana provides structure and natural sweetness. You could try using mashed mango or avocado for a different flavor, but it will change the texture.