
 Pin it
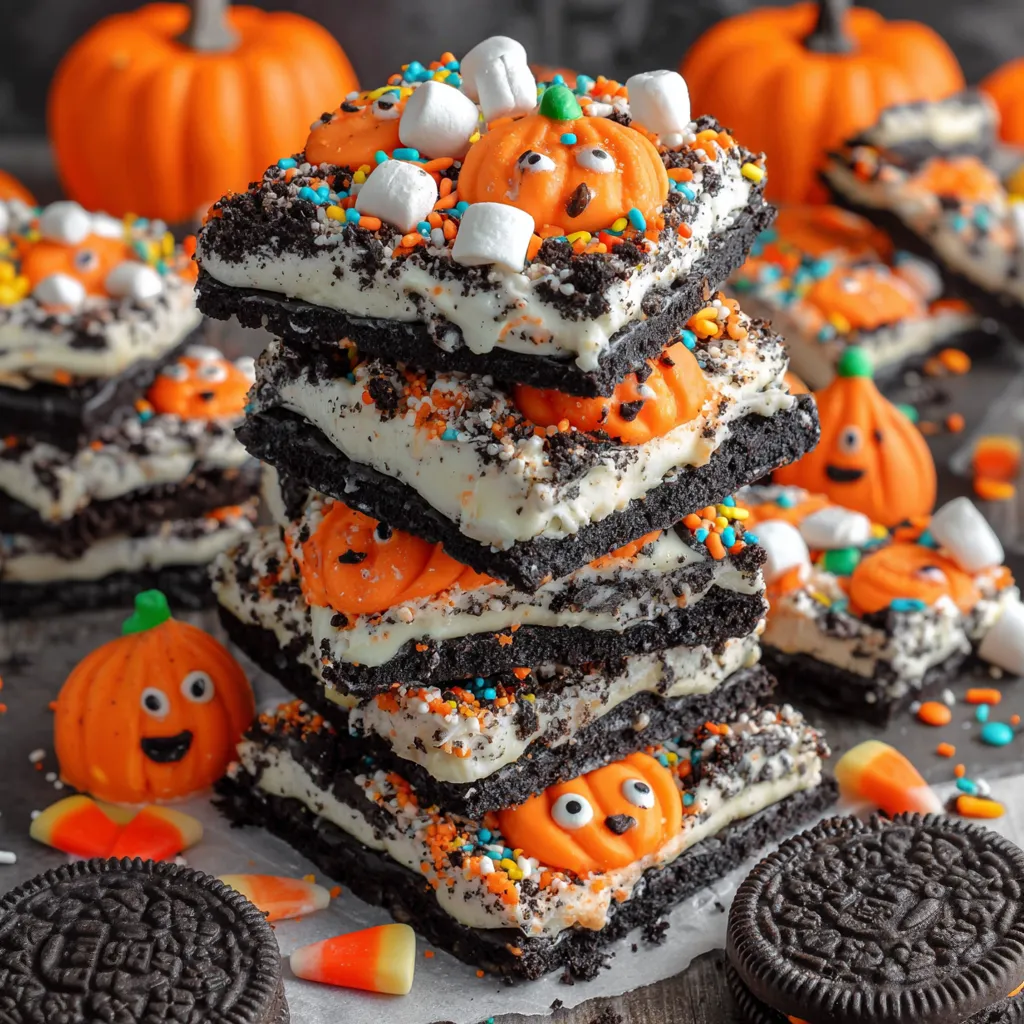
This Halloween Oreo chocolate bark transforms simple ingredients into a festive, eye-catching treat that captures all the fun and excitement of the spooky season in every colorful piece. Orange cream-filled Oreos get nestled into smooth white chocolate and surrounded by pumpkin marshmallows, candy corn, M&M's, candy eyes, and Halloween sprinkles that create a candy-studded masterpiece everyone will want to photograph before devouring. What makes this Halloween Oreo chocolate bark so perfect for the season is how the bright orange cookie filling peeks through the white chocolate while all those candy additions create a delightfully chaotic, party-ready appearance. With just 20 minutes of total time and absolutely no baking required, this is the kind of holiday treat that delivers maximum festive impact with minimal effort, making it ideal for busy October days filled with costume planning and pumpkin carving.
I started making this Halloween chocolate bark five years ago when I needed a last-minute treat for my son's classroom party and realized I had neither the time nor the oven availability to bake anything from scratch. Desperation led me to melt some white chocolate, throw in the Halloween Oreos I'd bought for trick-or-treaters, and top everything with whatever festive candy I could find in my pantry. The teacher sent me a photo of the empty tray along with a message that the kids had devoured every piece within minutes of the party starting. Now this bark has become our official Halloween tradition, and my children fight over who gets to press the candy eyes into the chocolate each year, which has become as much a part of our October celebration as carving pumpkins.
Cookie And Chocolate Components
- Orange cream-filled Oreos: 30 cookies to provide signature Halloween color and crunch.
- White chocolate melting wafers: Two 10-ounce bags to create a smooth, creamy base.
Festive Candy Toppings
- Pumpkin marshmallows: 12 marshmallows for soft texture and iconic shapes.
- M&M's: 1/4 cup of seasonal colors for chocolate flavor and shell crunch.
- Candy corn: 1/4 cup to deliver that classic, unmistakable Halloween taste.
- Sprinkles and candy eyes: 1/4 cup combined for a professional, spooky finish.
 Pin it
Bark Assembly Method
- Preparing Your Workspace
- Line a large sheet pan with parchment paper, pressing it flat against the surface and into the corners to create a smooth, non-stick foundation for your bark. The parchment paper makes removing the finished bark effortless and eliminates the scraping and cleanup that would otherwise follow chocolate making. Choose a sheet pan large enough to accommodate all thirty Oreos spread in a single layer with room for the candy toppings surrounding each cookie. Gather all your toppings and have them opened and ready before you begin melting the chocolate since you need to work quickly once the chocolate is liquid.
- Melting White Chocolate
- Pour all your white chocolate melting wafers into a large microwave-safe bowl that gives you plenty of room to stir without splashing. Heat the chocolate at 50% power for 30 seconds, then remove the bowl and stir thoroughly even though the wafers will still look mostly solid at this point. Return the bowl to the microwave and continue heating in 30-second intervals at half power, stirring completely between each session until the chocolate melts into a completely smooth, fluid consistency. The key to perfectly melted chocolate is patience and stirring, since overheating causes the chocolate to seize into a thick, grainy mass that cannot be rescued.
- Placing The Cookies
- Spoon a small dollop of melted chocolate onto the prepared parchment paper for each Oreo placement, then press the back of each cookie into the chocolate to secure it in position. Arrange all thirty Oreos across the parchment in a single layer with small gaps between each cookie that will eventually fill with chocolate and toppings. Working in rows creates a more organized look while random placement produces a more whimsical, chaotic appearance that some people prefer for Halloween treats. Once all cookies are positioned, pour the remaining melted chocolate around and over the Oreos, using a spatula to spread it between cookies and create an even layer.
- Adding The Toppings
- Work quickly while the chocolate remains wet to press your pumpkin marshmallows into the chocolate in the spaces between and around the Oreos. Scatter the M&M's across the entire surface, pressing each candy gently into the soft chocolate so it embeds partially for secure adhesion. Distribute the candy corn throughout the remaining spaces, pushing each piece slightly into the wet chocolate to anchor it in place. Finish by sprinkling the candy eyes and decorative sprinkles over the entire surface, filling any remaining bare spots and creating that festive, fully-decorated appearance.
- Setting Until Firm
- Allow your completed Halloween Oreo chocolate bark to rest at room temperature until the chocolate hardens completely, which takes approximately 30 to 45 minutes depending on your kitchen temperature. Avoid refrigerating the bark to speed setting, as rapid cooling can cause the chocolate to develop white streaks called bloom that affect appearance though not flavor. The bark is fully set when pressing gently on the chocolate surface leaves no indentation and the entire sheet lifts easily from the parchment paper. Once completely hardened, break or cut the bark into irregular pieces that each contain portions of cookies, chocolate, and assorted candy toppings.
- Breaking Into Pieces
- Use your hands to break the set bark into pieces by pressing down and snapping along natural break lines, or use a sharp knife to cut more uniform pieces if you prefer that appearance. Breaking produces rustic, irregular pieces that look artisanal and homemade, while cutting creates neat squares or rectangles for more formal presentation. Either approach works perfectly, so choose based on your preference and how you plan to serve or package the bark. Aim for pieces roughly three inches across, large enough to showcase multiple elements but small enough to eat comfortably without making a mess.
Halloween candy crafting has become one of my favorite seasonal traditions because it allows me to involve my children in creating something delicious without the stress and supervision that hot ovens and complicated baking require. The simplicity of this bark means even my youngest can participate meaningfully, pressing candy eyes into chocolate and arranging marshmallows while developing fine motor skills and feeling proud of contributing to our holiday celebration. We put on spooky music, spread newspaper across the table to catch any chocolate drips, and spend an hour together creating something that tastes as good as it looks. Those moments of togetherness have become as valuable to me as the bark itself, and I treasure the photos I've taken over the years of chocolate-smeared faces and proud smiles.
Chocolate Melting Mastery
White chocolate requires more careful handling than dark chocolate because it contains milk solids that scorch easily under high heat. The 50% power setting on your microwave provides gentler heating that melts the wafers gradually without creating hot spots that could ruin the entire batch. Stirring thoroughly between each heating interval distributes the heat evenly and allows residual warmth to melt remaining solid pieces without additional microwave time. If your melted chocolate starts to thicken while you're working, brief additional heating at low power restores the fluid consistency needed for coating and embedding toppings.
Quality Ingredient Impact
The brand and quality of your white chocolate melting wafers noticeably affects both the taste and texture of your finished Halloween Oreo chocolate bark. Higher-quality wafers contain more cocoa butter, which creates smoother texture and richer flavor compared to budget brands heavy with vegetable oils. Ghirardelli, Guittard, and Merckens all produce excellent melting wafers that candy makers recommend for professional results at home. The few extra dollars spent on quality chocolate pays off in a finished product that tastes as good as it looks.
Topping Distribution Strategy
How you arrange your toppings affects both the appearance and the eating experience of your finished bark pieces. Distributing the larger elements like pumpkin marshmallows first ensures they have prime positioning and adequate space without crowding. Medium-sized candies like M&M's and candy corn fill the gaps between larger pieces, creating layers of interest throughout the bark. Finishing with small elements like sprinkles and candy eyes covers any remaining bare spots and adds the final festive flourish that makes the bark look complete.
Classroom Treat Considerations
Many schools now have strict policies about homemade treats, so check with teachers before planning to send this Halloween Oreo chocolate bark for classroom parties. Some schools allow homemade items with ingredient lists, while others require only commercially packaged treats for allergy and safety reasons. If homemade treats are permitted, including an ingredient list helps parents of children with allergies make informed decisions about what their kids can safely eat. Individually wrapping pieces in small cellophane bags tied with ribbon creates a professional appearance and makes distribution easier for teachers.
Party Presentation Ideas
Displaying your Halloween Oreo chocolate bark attractively amplifies its festive impact and makes it even more appealing to party guests. Arranging pieces on a black or orange platter emphasizes the Halloween theme and creates striking color contrast against the white chocolate base. Stacking pieces at varying heights rather than laying them flat adds visual interest and makes the display look more abundant and appealing. Surrounding the bark with additional candy corn or Halloween-themed decorations creates a cohesive dessert table focal point that draws guests toward the sweets.
Flavor Variations Explored
Swapping the white chocolate for orange candy melts doubles down on the Halloween color theme and creates a slightly different flavor profile with more intense sweetness. Using mint-flavored Oreos instead of orange cream creates a completely different taste experience while maintaining the visual appeal of the cookie-studded bark. Dark chocolate melting wafers appeal to those who find white chocolate too sweet, though the darker color makes the festive toppings stand out less dramatically. Adding a drizzle of contrasting chocolate color over the finished bark before it sets creates an elegant marbled effect that elevates the presentation.
Storing For Freshness
Your Halloween Oreo chocolate bark keeps beautifully at room temperature for up to two weeks when stored in an airtight container, making it ideal for preparing well before your Halloween events. The chocolate coating actually helps preserve the Oreo cookies inside, keeping them crunchy longer than they would remain if stored on their own. Layer pieces between sheets of parchment or wax paper to prevent them from sticking together or damaging each other's candy toppings. Avoid refrigerating the bark unless your kitchen is very warm, as cold temperatures can cause moisture condensation that affects the candy appearance.
Gifting And Packaging Ideas
This Halloween Oreo chocolate bark makes wonderful gifts for neighbors, teachers, coworkers, or anyone who appreciates festive homemade treats during the Halloween season. Clear cellophane bags showcase the colorful candy toppings while keeping pieces fresh and protected during transport. Tying bags with orange and black ribbon adds a polished finishing touch that makes your gift look thoughtfully prepared. Including a small tag with the recipient's name and perhaps a punny Halloween message personalizes each gift and spreads additional holiday cheer.
 Pin it
This Halloween Oreo chocolate bark embodies everything I love about seasonal candy making, the way simple techniques and festive ingredients combine into something that looks impressive, tastes delicious, and creates joyful memories for everyone involved in making and eating it. The recipe requires no special skills or equipment, just basic melting and arranging that anyone can accomplish regardless of their kitchen experience level. Every October when I pull out the sheet pans and gather the seasonal Oreos and Halloween candy, my children appear at my elbow asking if they can help, which tells me this tradition has become as meaningful to them as it has to me. Sharing these simple treats with friends, family, and neighbors spreads Halloween happiness in a tangible, edible form that lasts long after the candy has been eaten and the holiday has passed.
Frequently Asked Questions
- → Can I use regular Oreos instead of orange ones?
- Yes! Regular Oreos, or even the Halloween-colored ones with orange filling, work great. The orange ones just add to the Halloween theme.
- → What if I don't have white chocolate melting wafers?
- You can use white chocolate chips instead. Just add a teaspoon of coconut oil or shortening to help them melt smoothly.
- → How long does this bark keep?
- Store it in an airtight container at room temperature for up to a week, or in the fridge for up to 2 weeks.
- → Can I customize the toppings?
- Absolutely! Use any Halloween candies you like - Reese's Pieces, chocolate chips, mini pretzels, or even crushed cookies all work great.
- → Why does my chocolate get clumpy when melting?
- This usually means water got into the chocolate or it was heated too quickly. Use 50% power and stir well between intervals to avoid this.
- → Can I make this ahead for a party?
- Yes! This is perfect to make a day or two ahead. Just store it in an airtight container and break it into pieces when you're ready to serve.