
 Pin it
I discovered this shortcut for maple bacon doughnuts a few years back when my kids were begging for doughnuts on a lazy Sunday morning. I wasn'-t about to make yeast dough from scratch, but I remembered my mom used to fry up canned biscuits as a quick treat. With some bacon leftover from breakfast and maple syrup in the pantry, these maple bacon doughnuts were born. Now they're requested almost every weekend, and honestly, they're so easy I don't mind making them. The combination of sweet maple glaze and salty bacon bits creates that perfect sweet-savory balance that's completely addictive.
Last month when my brother visited with his family, I made these for breakfast and his teenage son (who normally grunts single-word responses) actually said, "These are insane!" He ate four of them and then asked if I could teach him how to make them. Victory!
Simple Stuff
- Grands! biscuits: work perfectly because they're already the right size and thickness
- Real maple syrup: makes a huge difference in flavor - the fake stuff just isn't the same
- Crispy bacon: is essential - floppy bacon ruins the texture contrast
- Powdered sugar: creates that smooth, doughnut shop-style glaze
- A touch of vanilla: in the glaze adds depth that complements the maple
I've tried making these with the smaller biscuits, but the Grands! size gives you that perfect doughnut shop look and feel. The first time I made the glaze, I used pancake syrup instead of real maple syrup... big mistake. The real stuff has this complex sweetness that makes these taste gourmet instead of just doctored-up biscuits.
 Pin it
Frying Steps
- Oil prep:
- Pour about 2 inches of vegetable oil into a deep pot or pan. I use my Dutch oven because it's heavy and holds heat well. Turn the heat to high and let it get nice and hot while you prep the biscuits. You want the oil around 350°F if you have a thermometer, but if not, you can test it by dropping in a tiny piece of biscuit dough - it should bubble up immediately and start browning within about 30 seconds. The first time I made these, my oil wasn't hot enough and the doughnuts soaked up way too much grease. Now I'm careful to let it heat properly.
- Doughnut cutting:
- Pop open your can of biscuits and separate them. Now for the fun part - making the holes! I discovered that the plastic cap from my vegetable oil bottle makes the perfect size hole cutter. Just press it into the center of each biscuit and twist slightly to cut out a clean circle. You can fry up these little holes too for doughnut "holes" - my kids fight over these! If you don't have a bottle cap, a shot glass or small cookie cutter works too. I save the dough circles in a pile to fry after the main doughnuts are done.
- Frying technique:
- Carefully lower 2-3 doughnuts into the hot oil. Don't crowd the pan or the temperature will drop too much. I use a metal slotted spoon to place them in the oil and flip them. They cook super fast - about 1-2 minutes per side until they're golden brown. Keep a close eye on them because they can go from perfect to burnt in seconds! Flip them once you see that golden color developing around the edges. The doughnut holes cook even faster, usually less than a minute total. Have a cooling rack ready with paper towels underneath to catch any drips.
- Draining moment:
- Use your slotted spoon to remove the doughnuts from the oil and transfer them to the cooling rack. Let them drain for a minute or two while you work on the glaze. The paper towels underneath will catch the excess oil without making the bottoms soggy. I rotate the doughnuts once while they're cooling so both sides can drain properly. There's nothing worse than biting into an oil-soaked doughnut!
- Glaze creation:
- While the doughnuts are still warm (but not hot), make the glaze. In a medium bowl, whisk together the powdered sugar, melted butter, maple syrup, and vanilla until smooth. The consistency should be thick but pourable - kind of like honey. If it's too thick, add a tiny splash more maple syrup. If it's too thin, add a bit more powdered sugar. I like to put my bowl on a kitchen towel to keep it from sliding around while I'm whisking vigorously to get rid of any powdered sugar lumps.
- Glazing magic:
- Once your glaze is ready, dip the top of each doughnut into it, letting the excess drip off for a second before placing it back on the rack. I hold each doughnut upside down and dip just about halfway into the glaze. If you dip while the doughnuts are still slightly warm, the glaze sets perfectly with that characteristic crackly doughnut shop finish. Work quickly so the remaining doughnuts don't get too cool before glazing. For the little doughnut holes, I just drop them in the glaze and fish them out with a fork.
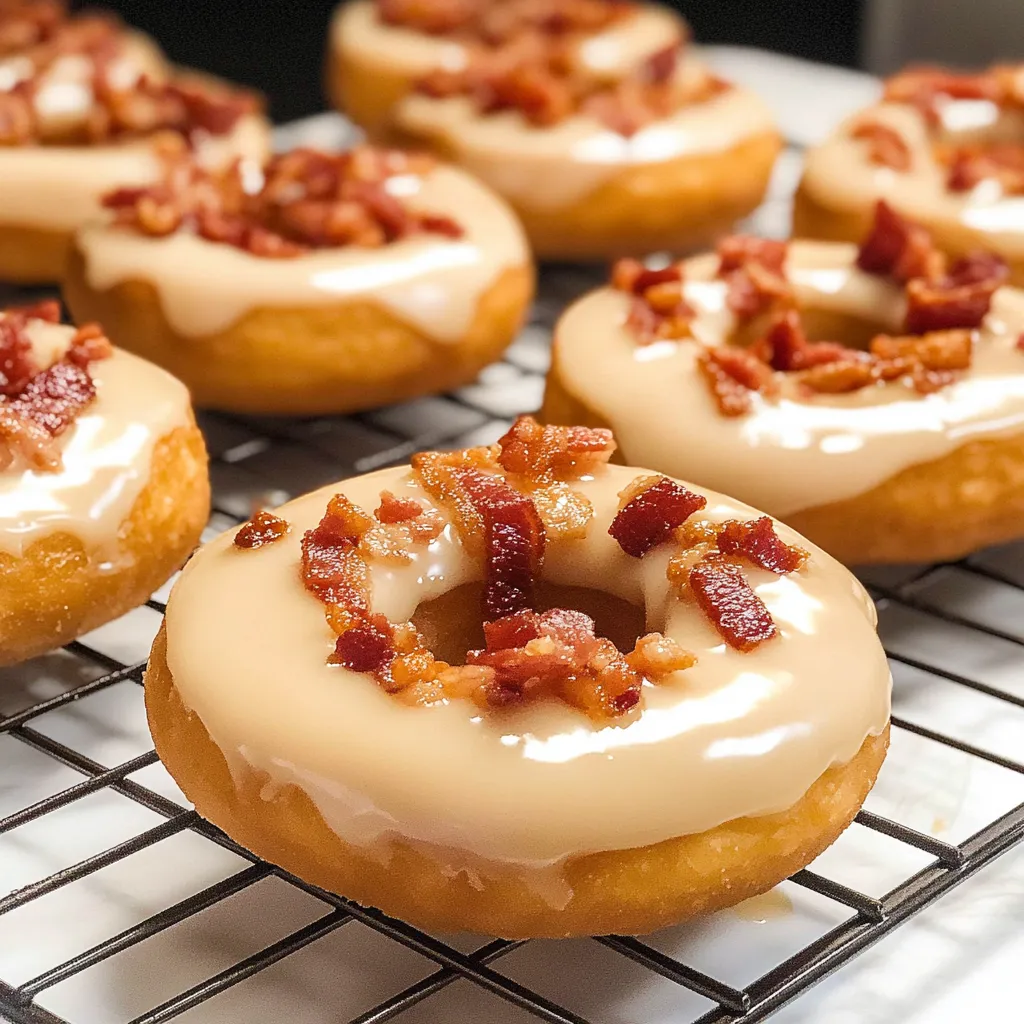
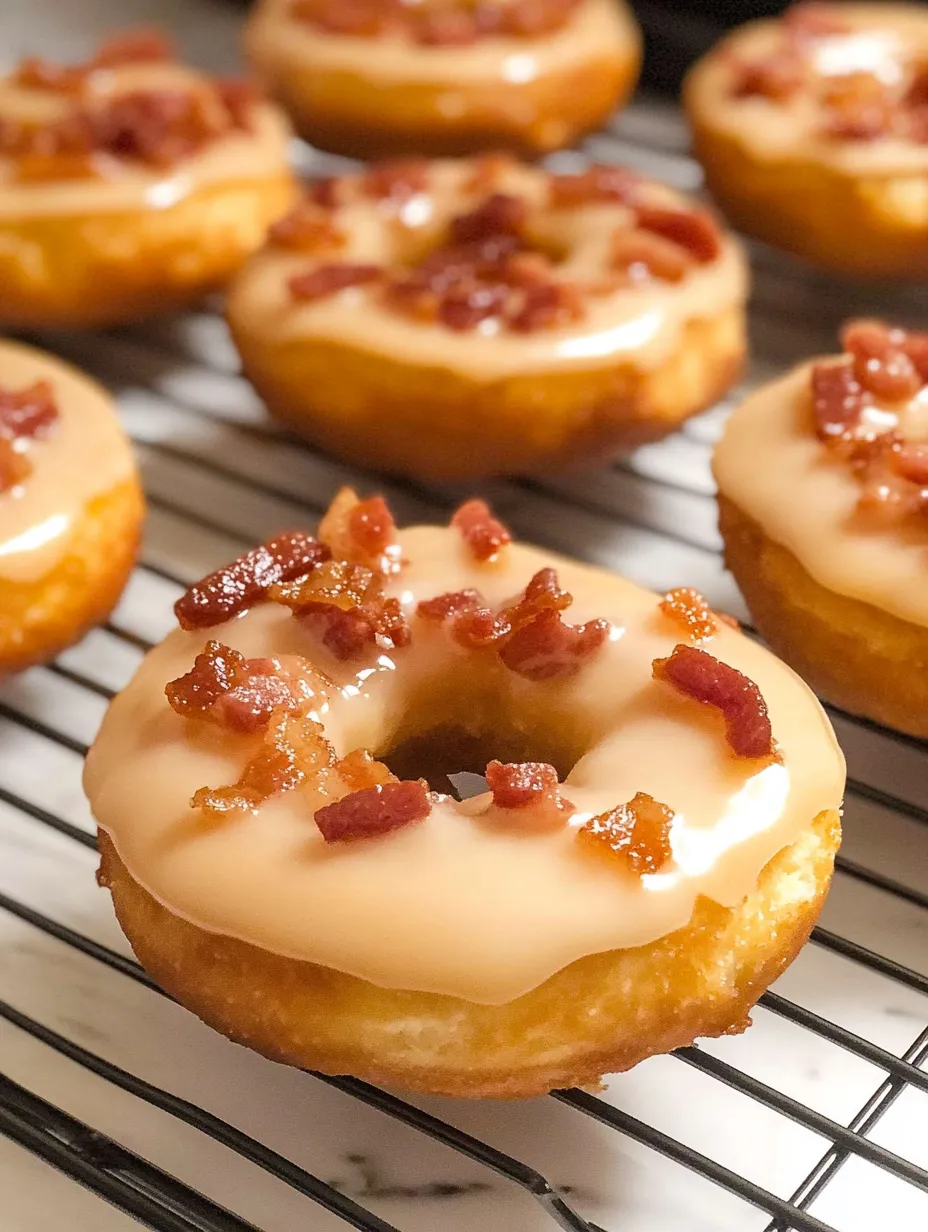
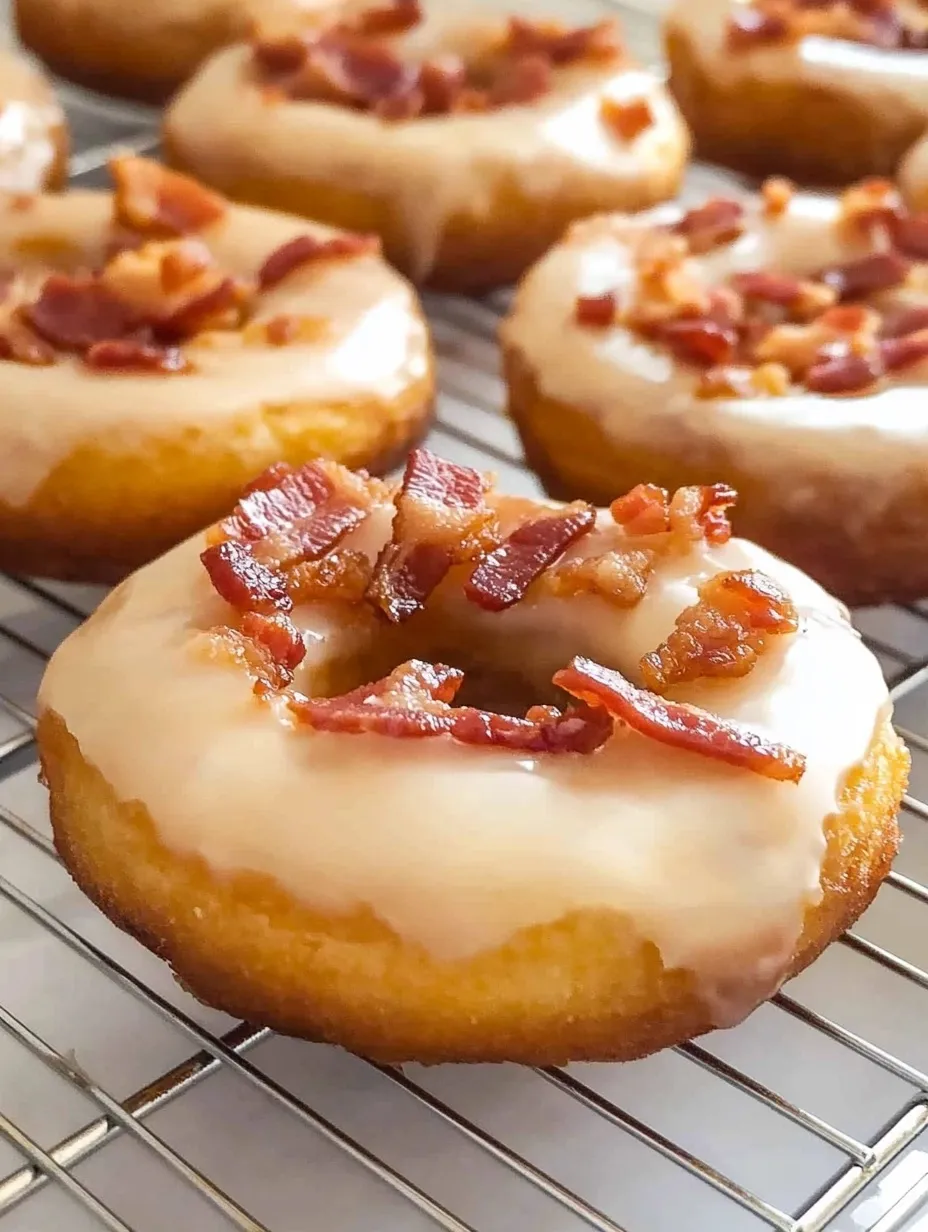
Bacon Finish
After glazing each doughnut, immediately sprinkle the bacon pieces over the top so they stick to the wet glaze. I've found it's best to sprinkle rather than press the bacon in, which can mess up your perfect glaze. The bacon should be super crispy and chopped into small pieces - big chunks make the doughnuts hard to eat. I usually cook a few extra slices of bacon than the recipe calls for because, let's be honest, some of it never makes it to the doughnuts!
My biggest disaster with these happened when I tried to multitask and left the oil unattended for a minute. The temperature got way too high and I ended up with doughnuts that were burnt on the outside and doughy in the middle. Now I focus just on the frying until all the doughnuts are done. I've also learned that chopping the bacon before it's completely cooled makes it less likely to crumble into dust.
 Pin it
Easy Variations
Try adding a sprinkle of cinnamon to the glaze for a fall-inspired flavor. For a less sweet version, drizzle the glaze over the doughnuts instead of dipping them. Around the holidays, I sometimes add a tiny splash of bourbon to the glaze for grown-up doughnuts. If you're not a bacon fan (though I can't relate), these are still delicious with just the maple glaze or with chopped pecans on top instead.
I've made these maple bacon doughnuts for weekend breakfasts, brunch gatherings, and even as a unique dessert option. They're always a hit and people are amazed when I tell them how simple they are to make. The combination of that sweet maple glaze with salty, smoky bacon creates something that tastes so much more sophisticated than its humble canned biscuit origins. And the fact that they come together in about 20 minutes makes them the perfect treat for those mornings when you want something special without a ton of effort.
Frequently Asked Questions
- → Can I bake these doughnuts instead of frying them?
- Yes, you can bake the biscuit dough according to the package directions (usually around 350°F for 13-17 minutes). The texture will be different, but you can still add the maple glaze and bacon topping.
- → What can I use to cut the holes if I don't have a doughnut cutter?
- Any small round object works great - a shot glass, the cap from a water bottle, a small cookie cutter, or even the wide end of a piping tip.
- → Can I make these in advance?
- These doughnuts are best enjoyed fresh, but you can prepare the bacon and glaze ahead of time. Store fried doughnuts in an airtight container and glaze just before serving for best results.
- → What type of oil is best for frying?
- Vegetable oil, canola oil, or peanut oil all work well for frying doughnuts. Choose an oil with a high smoke point and neutral flavor.
- → Can I use turkey bacon instead of regular bacon?
- Absolutely! Turkey bacon works fine, just make sure to cook it until very crispy since it tends to be less crunchy than pork bacon.