
 Pin it
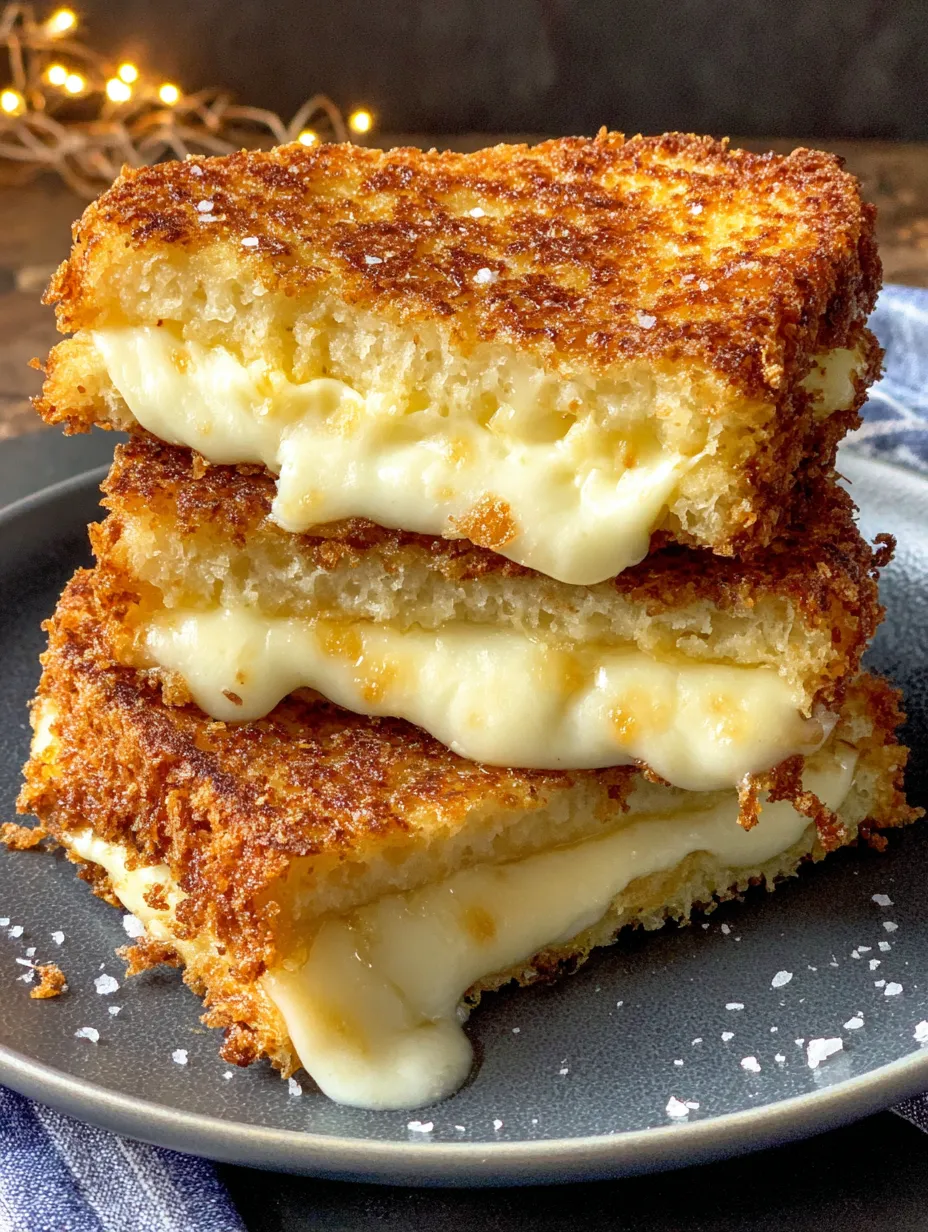
This mozzarella in carrozza recipe came into my life during a trip to Naples when I watched a street vendor create these incredible fried cheese sandwiches that had tourists lining up around the block. The name literally means "mozzarella in a carriage," and once you see that molten cheese stretching between golden, crispy bread slices, you'll understand why. I begged the vendor to show me his technique, and after several attempts back home, I finally nailed that perfect combination of crunchy exterior and gooey interior. Now these have become my go-to comfort food when I need something that feels like a warm hug but also incredibly indulgent.
The first time I made these for my family, my husband took one bite and immediately asked where I'd learned to make them. When I told him about the street vendor in Italy, he said these tasted exactly like vacation and asked if I could make them every time he had a bad day at work. My kids now refer to them as "the cheese sandwiches that changed everything," which might be dramatic but honestly isn't wrong.
Essential Ingredient Guide
- Fresh low-moisture mozzarella: The key is finding mozzarella that's firm enough to slice but will melt beautifully. Avoid the super wet kind that comes in water.
- White bread with crusts removed: Classic white sandwich bread works perfectly here. Removing the crusts helps the coating adhere better and creates cleaner edges.
- Whole milk: The fat content is important for creating the right texture in your egg wash. Don't substitute with lower fat milk.
- Fresh eggs at room temperature: Room temperature eggs mix more easily with the milk and create a smoother coating.
- All-purpose flour: Creates that crucial first coating layer that helps everything else stick properly.
- Neutral oil for frying: Choose an oil with a high smoke point like vegetable or canola oil for the best frying results.
 Pin it
Complete Preparation Process
- Sandwich Assembly:
- Start by spreading a thin layer of mayonnaise on one side of each bread slice if you're using it - this adds richness and helps create a moisture barrier. Divide your sliced mozzarella between two bread slices, making sure to cover the surface evenly but leaving a small border around the edges. Top with the remaining bread slices to create two complete sandwiches.
- Coating Station Setup:
- Set up your breading station with two shallow bowls. In the first bowl, whisk together the eggs and milk until completely smooth, then season with salt and pepper. In the second bowl, whisk the flour with salt and pepper, adding panko breadcrumbs if you want extra crunch on the exterior.
- Initial Coating Process:
- Working with one sandwich at a time, dip it completely in the egg and milk mixture, making sure all surfaces are coated. Let any excess drip off, then transfer the sandwich to the flour mixture. Coat all sides thoroughly, pressing gently to help the flour adhere to the wet surface.
- Chilling for Success:
- Place both coated sandwiches on a parchment-lined tray and refrigerate for exactly 20 minutes. This step is crucial because it helps the coating set and prevents the cheese from melting out during frying. Don't skip this or rush it - the timing matters for perfect results.
- Oil Temperature Management:
- While the sandwiches chill, heat your oil in a heavy-bottomed skillet or Dutch oven until it's about one inch deep. The oil should reach 350 degrees, which you can test by dropping a small piece of bread into it - it should sizzle immediately and turn golden in about 30 seconds.
- Frying Technique:
- Carefully lower the chilled sandwiches into the hot oil using a spatula. Don't overcrowd the pan - fry them one at a time if your pan isn't large enough. Fry for about 2 minutes on the first side until golden brown, then flip carefully and fry for another 2 minutes on the second side.
- Proper Cutting Method:
- Transfer the fried sandwiches to a cutting board and let them cool for just a minute - not long enough for the cheese to solidify, but enough so you can handle them safely. Use a sharp serrated knife to cut through each sandwich, but here's the trick: cut halfway through from one side, then flip and cut from the other side, stopping just before you cut through the cheese center. This creates clean edges while keeping that amazing cheese pull intact.
My first attempts were disasters because I was impatient and skipped the refrigeration step. The cheese melted right out into the oil, leaving me with empty bread shells and a mess to clean up. Now I always set a timer for those 20 minutes and use the time to get my oil ready and clean up the breading station. The patience pays off with perfect results every time.
Mozzarella Selection Secrets
The type of mozzarella you choose makes or breaks this recipe. You want fresh mozzarella that's been drained well, not the kind that's sitting in a pool of water. It should be firm enough to slice cleanly but still have that creamy texture that melts beautifully. Low-moisture mozzarella works best because it won't make your sandwich soggy.
Bread Preparation Tips
Removing the crusts isn't just for looks - it helps the coating stick better and creates more even browning. The bread should be fresh but not super soft, as it needs to hold up to the egg wash and frying process. Day-old bread actually works slightly better than completely fresh because it's a bit firmer.
Coating Technique
The double coating of egg wash and flour creates that perfect crispy exterior that contrasts so beautifully with the molten cheese inside. Make sure to coat all surfaces evenly, including the edges where the cheese might try to escape. Press the flour coating gently but firmly to help it adhere.
Temperature Control
Maintaining the right oil temperature is crucial for success. If the oil is too hot, the outside will burn before the cheese has time to melt properly. Too cool, and the sandwiches will absorb oil and become greasy. Use a thermometer if you have one, or test with a small piece of bread.
Timing Perfection
The 2-minute frying time on each side is usually perfect, but watch for visual cues too. The exterior should be golden brown and crispy, and you might see just a hint of cheese starting to ooze at the edges. That's when you know the inside is perfectly molten.
Serving Suggestions
These are best served immediately while the cheese is still molten and stretchy. They're rich enough to be a light meal on their own, or you can serve them as an appetizer with a simple salad dressed with lemon and olive oil. The contrast between the rich, cheesy sandwich and fresh, acidic greens is perfect.
Creative Variations
While the classic version is perfect, small additions can create interesting variations. Try adding thin slices of prosciutto or ham for a more substantial sandwich, or add fresh basil leaves for an extra Italian flavor. Some people love a thin spread of pesto instead of mayonnaise.
Make-Ahead Options
You can assemble and coat the sandwiches several hours ahead and keep them refrigerated until you're ready to fry. Just cover them well so they don't dry out. The actual frying should be done right before serving for the best texture and temperature.
Storage and Reheating
These are definitely best eaten fresh and hot, but if you have leftovers, you can reheat them in a 350-degree oven for about 5 minutes to restore some crispiness. Don't use the microwave or they'll become soggy. Honestly though, they're so good that leftovers are rarely an issue.
 Pin it
These mozzarella in carrozza sandwiches represent everything I love about Italian comfort food - simple ingredients transformed through technique into something absolutely magical. The contrast between that crispy, golden exterior and the molten cheese interior creates a textural experience that's pure indulgence. Every time I make them, I'm transported back to that street corner in Naples, watching that vendor create edible magic with just bread, cheese, and hot oil.
Frequently Asked Questions
- → What type of mozzarella works best?
- Use firm, low-moisture mozzarella rather than fresh buffalo mozzarella, which has too much water and will make the sandwich soggy.
- → Can I bake these instead of frying?
- While frying gives the best results, you can bake at 425°F for 12-15 minutes, flipping halfway through for a lighter version.
- → Why do I need to chill the coated sandwiches?
- Chilling helps the coating set and stick better to the bread, preventing it from falling off during frying.
- → How do I know when the oil is the right temperature?
- The oil should be around 350°F. If you don't have a thermometer, drop a small piece of bread in - it should sizzle immediately.
- → Can I make these ahead of time?
- You can coat the sandwiches and refrigerate for up to 4 hours before frying, but they're best served immediately after cooking.