
 Pin it
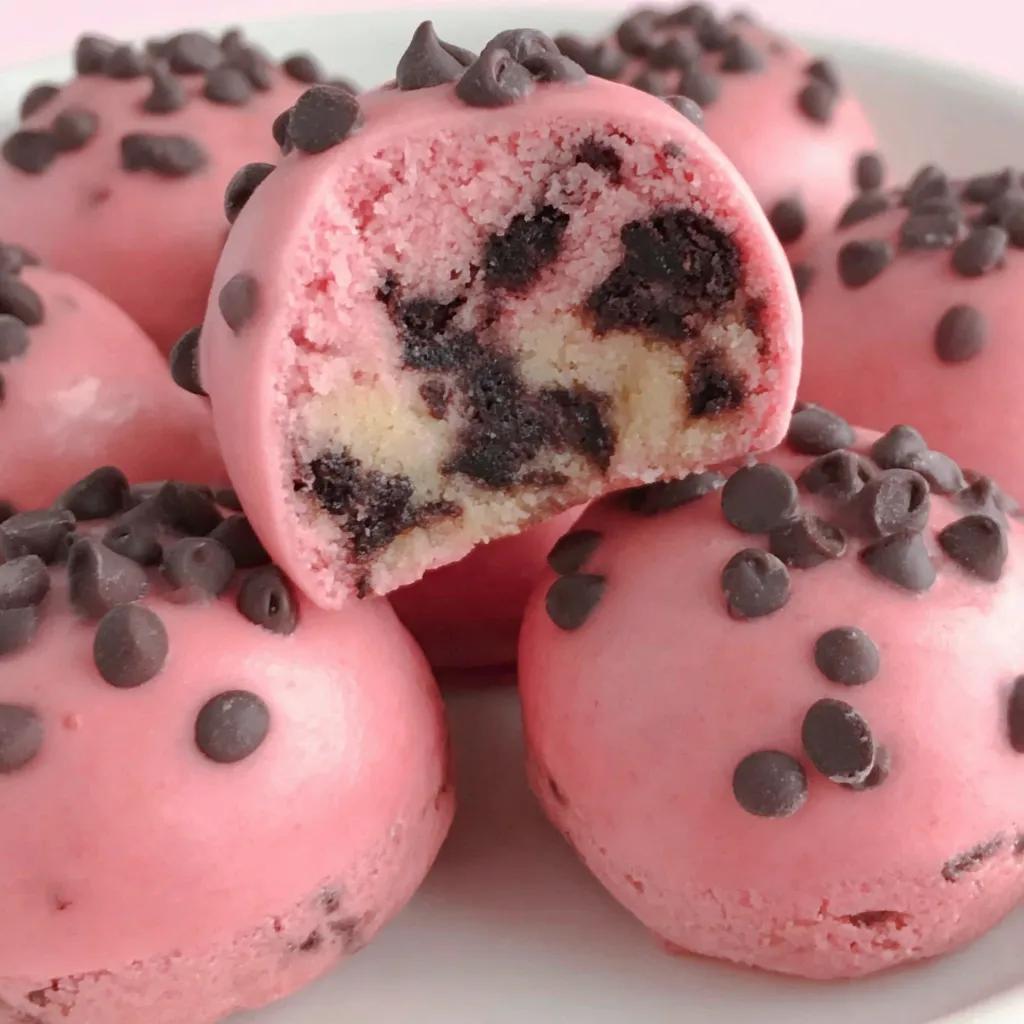
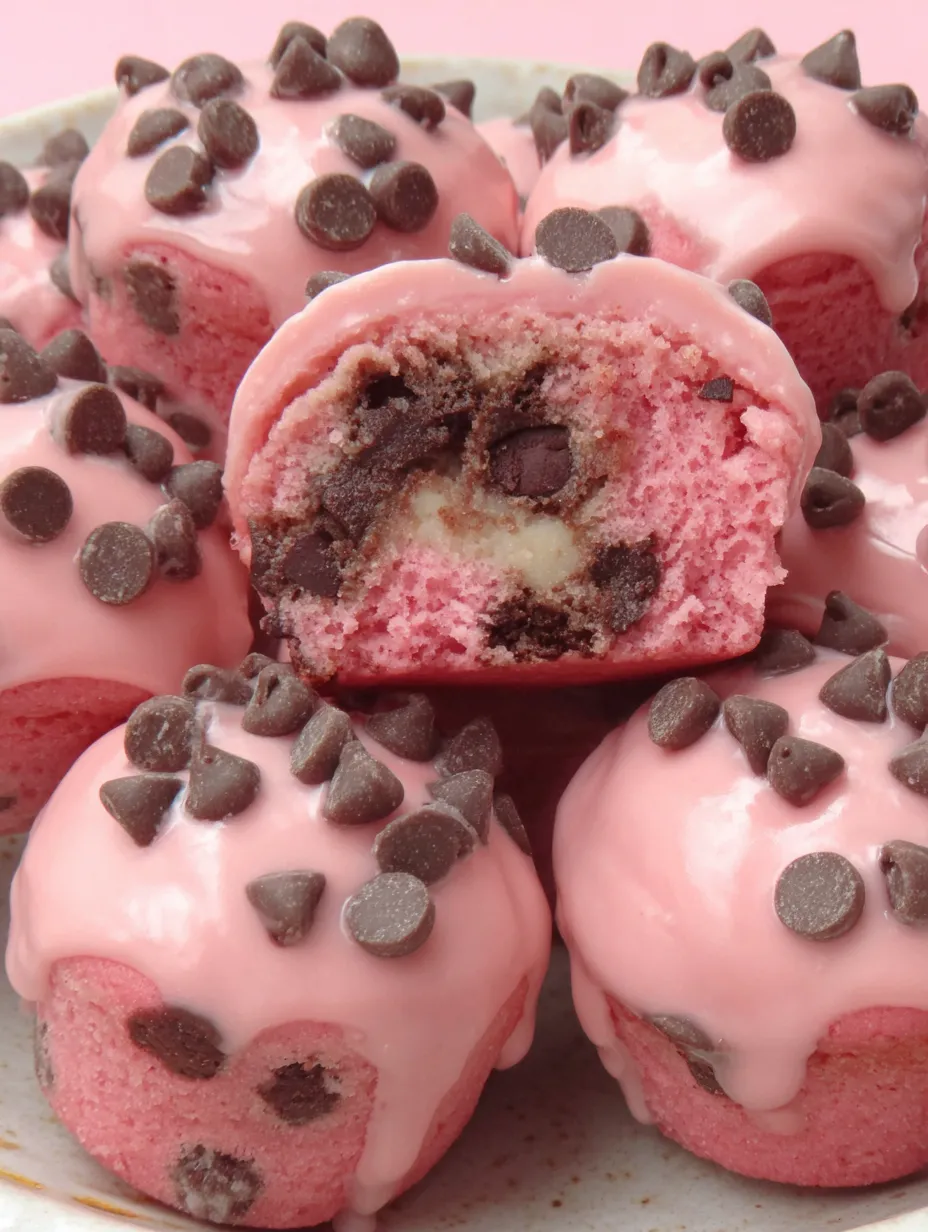
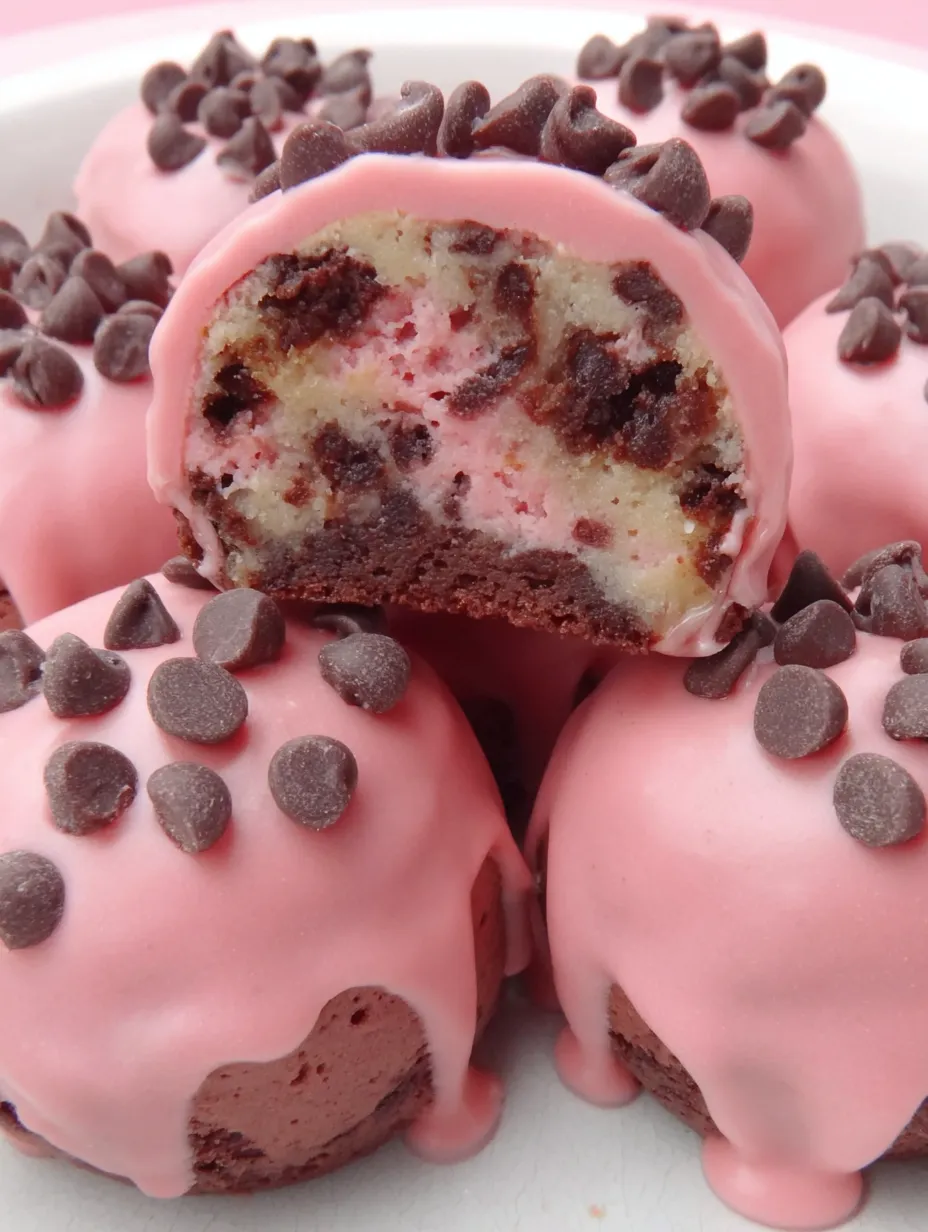
These cookie dough brownie bites combine two of the most beloved desserts into perfectly portioned treats that disappear from party trays faster than you can say seconds. Each bite-sized cup starts with a fudgy, rich brownie base baked in a mini muffin pan, then gets topped with creamy, egg-free cookie dough studded with mini chocolate chips and finished with an elegant chocolate drizzle. What makes these cookie dough brownie bites absolutely irresistible is how they deliver the satisfaction of eating raw cookie dough without any food safety concerns, thanks to heat-treated flour that makes the dough completely safe to enjoy. Whether you're preparing for a special celebration, contributing to a bake sale, or simply craving something that combines chocolate brownie richness with cookie dough indulgence, these adorable little cups deliver maximum impact with surprisingly simple preparation.
I made these cookie dough brownie bites for my daughter's school bake sale last spring, expecting them to be just another option on the table alongside the usual cupcakes and rice krispie treats. Within the first fifteen minutes, every single one had sold, and parents were asking if I had more hidden somewhere that I could bring out. The volunteer running the table told me later that people kept coming back asking specifically for the brownie cookie dough things, and she had to keep disappointing them because they sold out so fast. Now I make double batches whenever there's an event because I know from experience that one batch simply isn't enough to satisfy demand once people discover how incredible these little bites taste.
Brownie Base Ingredients
- Unsalted butter: Half a cup, melted and cooled slightly for a rich, moist foundation.
- Granulated sugar: 1 full cup to sweeten and create a crackly brownie top.
- Eggs: 2 large, room temperature eggs to bind the batter and add structure.
- Unsweetened cocoa powder: 1/3 cup for deep chocolate intensity.
- All-purpose flour: Half a cup for a dense, fudgy texture.
Cookie Dough Ingredients
- Softened butter: Half a cup, creamed for a smooth and spreadable consistency.
- Brown sugar: Half a cup packed to provide moisture and caramel flavor.
- Heat-treated flour: 1 cup of all-purpose flour warmed to ensure food safety.
- Mini chocolate chips: Half a cup for even chocolate distribution in every bite.
Chocolate Drizzle Ingredients
- Semi-sweet chocolate chips: Half a cup for a glossy, snappable finish.
- Butter or cream: 1 tablespoon to achieve the perfect drizzling consistency.
 Pin it
Assembly Method Detailed
- Preparing The Pan
- Preheat your oven to 350 degrees Fahrenheit and position a rack in the center where heat circulates evenly around your mini muffin pan. Prepare your mini muffin pan by either greasing each cavity generously with butter or cooking spray, or lining them with mini paper liners for easier removal and prettier presentation. If using liners, choose paper ones rather than foil since the brownie batter releases more easily from paper after baking. Preparing the pan thoroughly prevents frustrating sticking that can ruin your beautiful brownie cups when you try to remove them.
- Heat-Treating The Flour
- Place your measured cup of all-purpose flour in a microwave-safe bowl large enough to stir without spilling over the sides. Microwave the flour for 20 seconds, then remove and stir thoroughly to distribute the heat evenly throughout the entire amount. Return the bowl to the microwave and continue heating in 20-second intervals, stirring after each session, until you've reached a total of about one minute of heating time. The flour should feel warm to the touch and may look slightly different in texture, indicating the starches have been affected by the heat that also destroyed any potential bacteria. Let the flour cool completely to room temperature before using in your cookie dough, as warm flour would melt the butter and completely change the texture.
- Mixing Brownie Batter
- Melt your half cup of butter completely in a large microwave-safe bowl or in a saucepan over low heat, then let it cool for about two minutes so it won't cook the eggs when they're added. Add the granulated sugar to the warm melted butter and whisk vigorously until the mixture looks slightly lighter and the sugar has partially dissolved into the butter. Crack the eggs into a small dish first to catch any shell pieces, then add them to the butter mixture along with the vanilla extract, whisking until smooth and slightly thickened. Sift or whisk together the cocoa powder, flour, and salt in a separate bowl, then add these dry ingredients to the wet mixture, stirring with a spatula until the batter comes together with no dry streaks remaining. The finished batter should look glossy and thick, falling from your spatula in ribbons that slowly sink back into the bowl.
- Baking Brownie Cups
- Spoon or pipe the brownie batter into your prepared mini muffin cavities, filling each one approximately two-thirds full to allow room for slight rising during baking. Work carefully to avoid drips on the pan surface between cavities, which would burn during baking and make removal more difficult. Tap the filled pan gently on your counter a few times to settle the batter and release any large air bubbles that could create holes in your finished brownie cups. Bake for 15 to 18 minutes, watching for the tops to look set and slightly cracked while the centers still appear slightly underdone and fudgy when you gently touch them. Remove from the oven and let the brownie cups cool completely in the pan, which takes about 30 minutes and allows them to firm up enough to remove without falling apart.
- Creating Cookie Dough
- Place your softened butter in a large mixing bowl and beat with an electric mixer on medium speed until it becomes light and creamy, about one minute of beating. Add the brown sugar and granulated sugar to the butter and continue creaming on medium speed for about three minutes until the mixture becomes noticeably fluffy and lighter in color. Pour in the milk and vanilla extract, mixing on low speed until both incorporate completely into the creamy butter mixture. Add your cooled, heat-treated flour and mix on low speed just until the flour disappears into the dough and no dry spots remain visible. Fold in the mini chocolate chips using a spatula or wooden spoon, distributing them evenly throughout the dough without overmixing, which could make the dough tough.
- Topping The Brownies
- Remove the completely cooled brownie cups from the mini muffin pan carefully, using a small offset spatula or butter knife to loosen any that stick around the edges. Arrange the brownie cups on a baking sheet or large plate, spacing them slightly apart to give yourself room to work during the topping process. Scoop small portions of cookie dough, about a teaspoon each, and roll them gently between your palms to form smooth balls. Press each cookie dough ball onto the top of a brownie cup, flattening it slightly so it adheres to the brownie surface and creates an attractive mounded topping. Continue until all brownie cups have been topped, then place the tray in the refrigerator for about ten minutes to firm the cookie dough before adding the chocolate drizzle.
- Drizzling With Chocolate
- Place your semi-sweet chocolate chips in a small microwave-safe bowl along with the butter or cream if using, which helps the chocolate melt more smoothly and drizzle more easily. Microwave in 30-second intervals, stirring thoroughly between each heating session, until the chocolate melts completely into a glossy, pourable consistency. Let the melted chocolate cool for about one minute so it thickens slightly and holds its shape better when drizzled rather than running immediately off the sides. Use a fork or small spoon to drizzle the chocolate over the cookie dough topped brownie bites in a back-and-forth motion, creating attractive zigzag patterns across all the cups. Refrigerate the finished cookie dough brownie bites for about 20 minutes until the chocolate drizzle sets completely with a shiny, professional-looking finish.
Creating egg-free cookie dough that tastes authentic took me several attempts before I understood how the ingredients work together to replicate that beloved raw dough experience. The combination of brown sugar for moisture and flavor, proper butter consistency for creaminess, and heat-treated flour for safety produces results that honestly taste better than sneaking bites from regular cookie dough because you can enjoy it without any guilt or concern. My children have become cookie dough connoisseurs thanks to this recipe, and they now help me make the topping layer while I handle the brownie baking. We've established an assembly line system where everyone gets a job, and somehow that shared effort makes the finished cookie dough brownie bites taste even better.
Heat Treatment Explained
The flour heat treatment step might seem unusual or unnecessary, but understanding why it matters helps you appreciate its importance for safe raw consumption. Raw flour can harbor bacteria including E. coli that survives in the dry environment and only gets destroyed through cooking or heat treatment. Microwaving the flour in intervals with stirring ensures all the flour reaches a safe temperature rather than having hot spots and cool spots that would leave some bacteria alive. The flour texture may change slightly after heat treatment, appearing a bit finer or different in color, but these changes don't affect its performance in the cookie dough recipe. Always let the flour cool completely before using it in your dough, as adding it while still warm would melt the butter and completely change the final texture.
Brownie Texture Tips
Getting the perfect fudgy texture in mini muffin-sized brownie cups requires paying attention to a few key details during mixing and baking. The relatively high ratio of fat and sugar to flour keeps these brownies firmly in fudgy territory rather than veering toward cakey texture that wouldn't complement the soft cookie dough topping as well. Avoid overmixing the batter once you add the flour, as excessive stirring develops gluten that makes brownies tough and chewy in the wrong way. Pulling the brownie cups from the oven when the centers still look slightly underdone allows carryover cooking to finish them perfectly without overbaking into dry, crumbly texture.
Color Customization Options
Adding a few drops of pink food coloring to the cookie dough layer transforms these into stunning party treats perfect for baby showers, Valentine's Day, or princess-themed birthday celebrations. Gel food coloring works better than liquid because it provides vibrant color without adding extra moisture that could affect the dough texture. Start with just two or three drops and mix thoroughly before adding more, since gel coloring is concentrated and you can always add more but cannot remove excess. The pink cookie dough creates beautiful contrast against the dark brownie base and chocolate drizzle, making these bites absolutely Instagram-worthy for any special occasion.
Serving Suggestions Presented
These cookie dough brownie bites look stunning arranged on a tiered serving stand that shows off their beautiful layers and elegant chocolate drizzle to party guests. Placing them in individual mini cupcake liners before serving makes picking them up easy and keeps fingers clean from any chocolate that might transfer during handling. For an extra special presentation, dust the tops lightly with powdered sugar or edible glitter just before serving to add sparkle that catches the light beautifully. These bites pair wonderfully with cold milk for kids or coffee for adults, and make excellent additions to dessert tables alongside cookies and cupcakes.
Creative Variations Explored
Swapping the semi-sweet chocolate drizzle for white chocolate creates a sweeter, creamier finish that looks particularly beautiful against pink-tinted cookie dough. Adding a sprinkle of flaky sea salt over the chocolate drizzle before it sets elevates these bites into sophisticated salted chocolate territory that appeals to adult palates. Mixing peanut butter chips or butterscotch chips into the cookie dough layer instead of chocolate chips creates entirely different flavor variations that some families might prefer. For mint chocolate lovers, adding a few drops of peppermint extract to the cookie dough along with green food coloring creates festive bites perfect for holiday gatherings.
Storage Tips Detailed
Your finished cookie dough brownie bites store beautifully in the refrigerator for up to one week when kept in an airtight container, maintaining their texture and freshness throughout the storage period. The cookie dough layer actually benefits from refrigeration, becoming firmer and easier to bite through cleanly rather than squishing when you pick up the treats. Layer the bites between sheets of parchment paper to prevent the chocolate drizzles from sticking together and ruining your beautiful decorative work. Bring the bites to room temperature for about ten minutes before serving if you prefer softer cookie dough texture, though many people enjoy them straight from the refrigerator.
Freezing For Later
These cookie dough brownie bites freeze exceptionally well for up to two months, making them perfect for preparing ahead of events or keeping on hand for unexpected guests. Freeze the completed bites in a single layer on a baking sheet first until solid, then transfer to freezer bags or containers with parchment between layers. Thaw frozen bites in the refrigerator overnight rather than at room temperature, which prevents condensation from forming on the chocolate and making it look dull. The brownie base and cookie dough both maintain their textures beautifully through freezing when properly stored, tasting nearly as good as freshly made.
 Pin it
These cookie dough brownie bites represent the kind of dessert that makes people stop mid-conversation to ask who made them and whether they can have the recipe immediately. The combination of textures and flavors in each tiny cup delivers a complete dessert experience that somehow feels more satisfying than a full-sized brownie or a whole cookie would provide. I've brought these to office parties, family gatherings, school events, and casual get-togethers with friends, and the reaction is always the same mixture of surprise and delight when people realize how good something so small can taste. Making these has become one of my favorite baking projects because the results look impressive enough to photograph while the process remains simple enough to complete with children helping alongside me.
Frequently Asked Questions
- → Why do I need to heat-treat the flour?
- Raw flour can contain bacteria, so heating it in the microwave kills any germs and makes it safe to eat in the cookie dough layer without baking.
- → Can I use regular-sized chocolate chips instead of mini?
- You can, but mini chips work better in the small cookie dough portions. If you use regular chips, you might want to chop them a bit smaller.
- → Can I make these in a regular muffin pan?
- You could, but they're designed as bite-sized treats. In a regular muffin pan, you'd only get about 12 and they'd be much bigger.
- → How do I store these?
- Keep them in an airtight container in the fridge for up to 5 days. The cookie dough layer contains dairy and should stay cold.
- → Can I freeze these?
- Yes! Freeze them in a single layer on a baking sheet, then transfer to a freezer bag. They'll keep for up to 2 months. Thaw in the fridge before serving.
- → Do these need to stay refrigerated?
- Yes, since the cookie dough layer contains butter and milk, these should be kept in the fridge. Take them out about 10 minutes before serving if you want them less cold.