
 Pin it
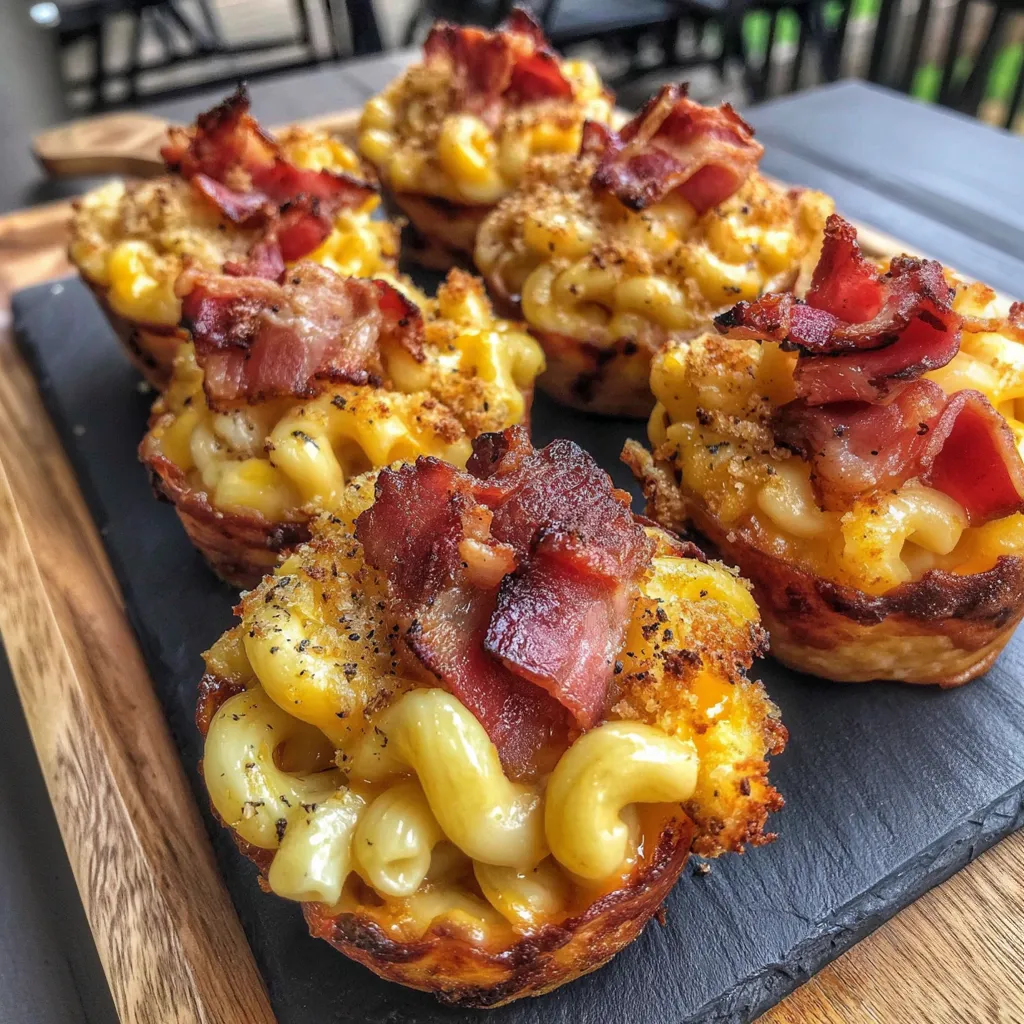
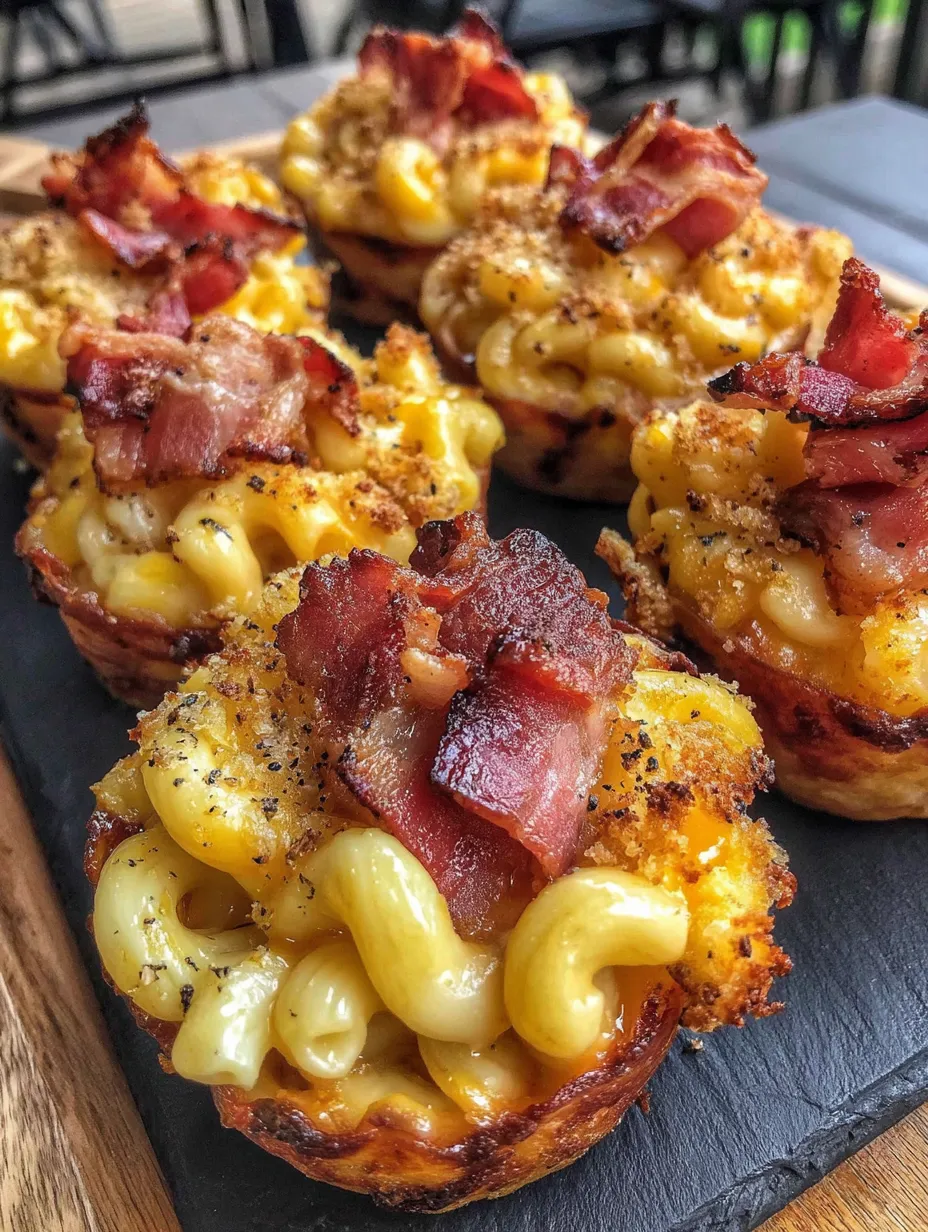
Bacon cups filled with mac and cheese might sound over the top, but that's exactly why they're so good. I made these for a backyard barbecue last summer when I wanted something different from the usual sides people bring, and they caused kind of a scene. You wrap bacon around an upside-down muffin tin, smoke it until it holds its shape, then fill those bacon bowls with mac and cheese made with smoked gouda and cheddar. The whole thing goes back on the grill to get bubbly and golden. My brother-in-law ate three of them standing by the grill and then asked if I could make them for his birthday party. His wife was less thrilled since she'd spent all morning making a fancy salad that nobody touched.
The first time I brought these to a potluck, my friend Mark literally stopped mid-conversation when he saw them. He walked over, stared at the platter, and said "are those actually what I think they are?" When I told him they were bacon bowls filled with mac and cheese, he picked one up immediately and took a bite without even waiting for everyone else to start eating. He spent the rest of the afternoon telling anyone who would listen that I'd "won" the potluck. His girlfriend still brings it up whenever we see them, joking that he talks about those bacon cups more than he talks about her cooking.
What Goes Into Them
- Bacon strips: Regular cut bacon works better than thick cut because it's more flexible and easier to wrap around the muffin cups. You need 12 strips total, which usually means buying two packages depending on how many slices come in each.
- Small pasta shells or elbow macaroni: The smaller shapes work better in these cups because they're easier to scoop up and eat. Elbows are classic, but shells hold onto more cheese sauce which is never a bad thing.
- Bread crumbs: Plain or Italian style both work fine. These get mixed with butter and seasoning to create that crunchy topping that contrasts with the creamy pasta underneath.
- Unsalted butter: You'll use this for both the cheese sauce and the breadcrumb topping. Unsalted lets you control the salt level since bacon and cheese already add plenty.
- All-purpose flour: Creates the roux that thickens your cheese sauce and keeps it from being thin and watery.
- Milk: Whole milk works best for the richest, creamiest sauce. You need quite a bit since this recipe makes enough mac and cheese to fill all those bacon cups generously.
- Smoked gouda cheese: This is what gives the mac and cheese that deep, smoky flavor without needing to keep it in the smoker for hours. It melts beautifully and has a slightly sweet, nutty taste.
- Smoked cheddar cheese: Adds more smokiness and that classic sharp cheddar flavor everyone expects from mac and cheese. Buy a block and shred it yourself for better melting.
- Parmesan cheese: The salty, nutty flavor adds depth to the cheese sauce and helps it taste more complex than just gouda and cheddar alone.
- Mozzarella cheese: Gives you that stretchy, melty quality that makes the mac and cheese pull apart in those satisfying cheese strings when people dig in.
- BBQ rubs: The recipe calls for specific brands, but any good all-purpose BBQ rub and a sweeter brown sugar-based rub will work. These season the bacon and the breadcrumb topping.
 Pin it
Creating Bacon Cups
- Preparing your grill:
- Get your grill or smoker heated up to 350 degrees, which is hot enough to cook the bacon through but not so hot it'll burn before it crisps up properly. If you're using charcoal, arrange the coals for indirect heat so the bacon cups aren't sitting directly over the flames. Gas grills are easier for this since you can control the temperature more precisely.
- Forming bacon bowls:
- Flip your muffin tin upside down on the counter so the rounded bottoms of the cups are facing up. For each bacon cup, you'll use two strips of bacon. Take one strip and cut it in half, then lay those two halves over one muffin cup in an X shape so they cross in the middle. Take a second full strip and wrap it all the way around the sides of that same cup, overlapping the ends so they stick together. The bottom X pieces will form the base of your cup while the wrapped strip creates the walls. Press everything gently so the bacon pieces stick to each other. Repeat this with the remaining bacon until you've covered six muffin cups with bacon. Sprinkle your sweet BBQ rub over all the bacon cups, getting some on all the exposed surfaces.
- Smoking the bacon:
- Carefully transfer your upside-down muffin tin with the bacon onto the grill. Close the lid and let them cook for 45 to 55 minutes, checking them around the 45-minute mark. You want the bacon cooked all the way through and holding its shape, but not so crispy that it shatters when you try to remove it from the tin. The bacon should feel firm but still have a little give when you press on it gently. When it's done, take the whole muffin tin off the grill and let it cool for at least 10 minutes. The bacon needs to cool and firm up before you try removing the cups or they'll fall apart. Once cool, carefully lift each bacon cup off its muffin mold and set them aside while you make the filling.
- Making breadcrumb topping:
- In a small bowl, melt 2 tablespoons of butter in the microwave for about 30 seconds. Add your breadcrumbs and a tablespoon of your all-purpose BBQ rub to the melted butter and stir everything together until the breadcrumbs are evenly coated and the mixture looks like wet sand. Set this aside for topping the filled cups later.
- Building cheese sauce:
- Put a medium saucepan on your stove over medium heat and drop in 6 tablespoons of butter. Let it melt completely, swirling the pan occasionally so it melts evenly. When the butter is fully melted and starting to foam slightly, sprinkle in your flour and immediately start whisking. Keep whisking constantly for a full minute, watching as the flour and butter combine into a thick paste called a roux. This cooking step gets rid of the raw flour taste. After a minute of constant whisking, start pouring in your milk very slowly while still whisking. Add maybe a quarter cup at a time, whisking it in completely before adding more. This gradual addition prevents lumps from forming. Once all the milk is incorporated, keep cooking and whisking frequently. The mixture will seem thin at first but it'll start bubbling and thickening after several minutes. When it's thick enough to coat the back of a spoon, take the pan off the heat. Add all four of your cheeses—the smoked gouda, smoked cheddar, parmesan, and mozzarella—and stir until everything melts into the hot milk mixture and creates a smooth, creamy cheese sauce. Set this pan aside while you cook the pasta.
- Cooking the macaroni:
- Fill a large pot with water and bring it to a rolling boil over high heat. Add a good amount of salt to the water—it should taste like the ocean. Dump in your pasta and stir it immediately so it doesn't stick together. Cook the pasta for one minute less than the package directions say. If the box says 8 minutes, cook it for 7. You want it slightly underdone because it'll finish cooking when you bake the filled cups later. Drain the pasta in a colander, shaking out as much water as possible, then dump it back into the pot it cooked in. Pour your cheese sauce over the drained pasta and stir everything together until every piece of pasta is coated in that creamy, smoky cheese sauce.
- Filling and baking:
- Grab your cooled bacon cups and a large spoon. Scoop the mac and cheese into each bacon cup, packing it in gently and mounding it slightly on top. You want them filled generously but not so full that mac and cheese is spilling over the sides. Sprinkle some of your prepared breadcrumb mixture over the top of each filled cup, covering the exposed mac and cheese with a light layer. Set all your filled bacon cups in a disposable foil pan so they don't tip over and so any cheese that bubbles out doesn't make a mess in your grill. Put the foil pan on your grill, close the lid, and bake for about 30 minutes. You're looking for the tops to turn golden brown and the cheese sauce to be bubbling around the edges of the cups. When you see that golden crust forming on the breadcrumbs and everything looks hot and bubbly, they're ready to come off.
Things You Need to Know
- Cooling: The bacon cups need to cool completely before you try removing them from the muffin tin or they'll tear and fall apart since they're still soft and pliable when hot
- Pasta: Cooking the pasta one minute under means it won't get mushy and overcooked during the final baking step when the cups go back on the grill
- Cheese: Using smoked versions of gouda and cheddar gives you that smoky flavor throughout without needing to keep the mac and cheese in the smoker for hours like some complicated recipes require
I learned about cooling the bacon cups the hard way my first attempt. I was impatient and tried peeling them off the muffin tin when they were still warm, and every single one tore or collapsed. Ended up having to start completely over with new bacon. Now I make the bacon cups first thing, let them cool while I do everything else, and they come off the tin perfectly every time. That cooling step is absolutely not optional.
The type of cheese really matters here. I tried making these with regular gouda and cheddar once instead of the smoked versions because the store was out, and while they were still good, they were missing that depth of flavor that makes these special. The smokiness from the cheese is what ties everything together with the smoked bacon and makes the whole thing taste cohesive. Regular cheese just tastes like normal mac and cheese in a bacon cup, which is fine but not as interesting.
Shredding your own cheese from blocks makes a noticeable difference compared to pre-shredded. The pre-shredded stuff has this coating on it that prevents clumping in the bag, but that same coating makes it not melt as smoothly. I've used both and the sauce is definitely creamier and smoother when you shred your own. Takes an extra few minutes but worth it.
Getting the grill temperature right is probably the trickiest part of this whole recipe. Too hot and the bacon burns before it cooks through. Too cool and it takes forever and never really crisps up properly. I use a thermometer now to check the actual grill temp instead of trusting the built-in gauge, which helped me get consistent results every time.
The breadcrumb topping seems like a small detail but it adds this textural contrast that makes each bite more interesting. Without it, you just have soft mac and cheese in soft-ish bacon, which is still good but kind of one-note. Those crunchy breadcrumbs on top give you different textures in each bite.
Presenting These Cups
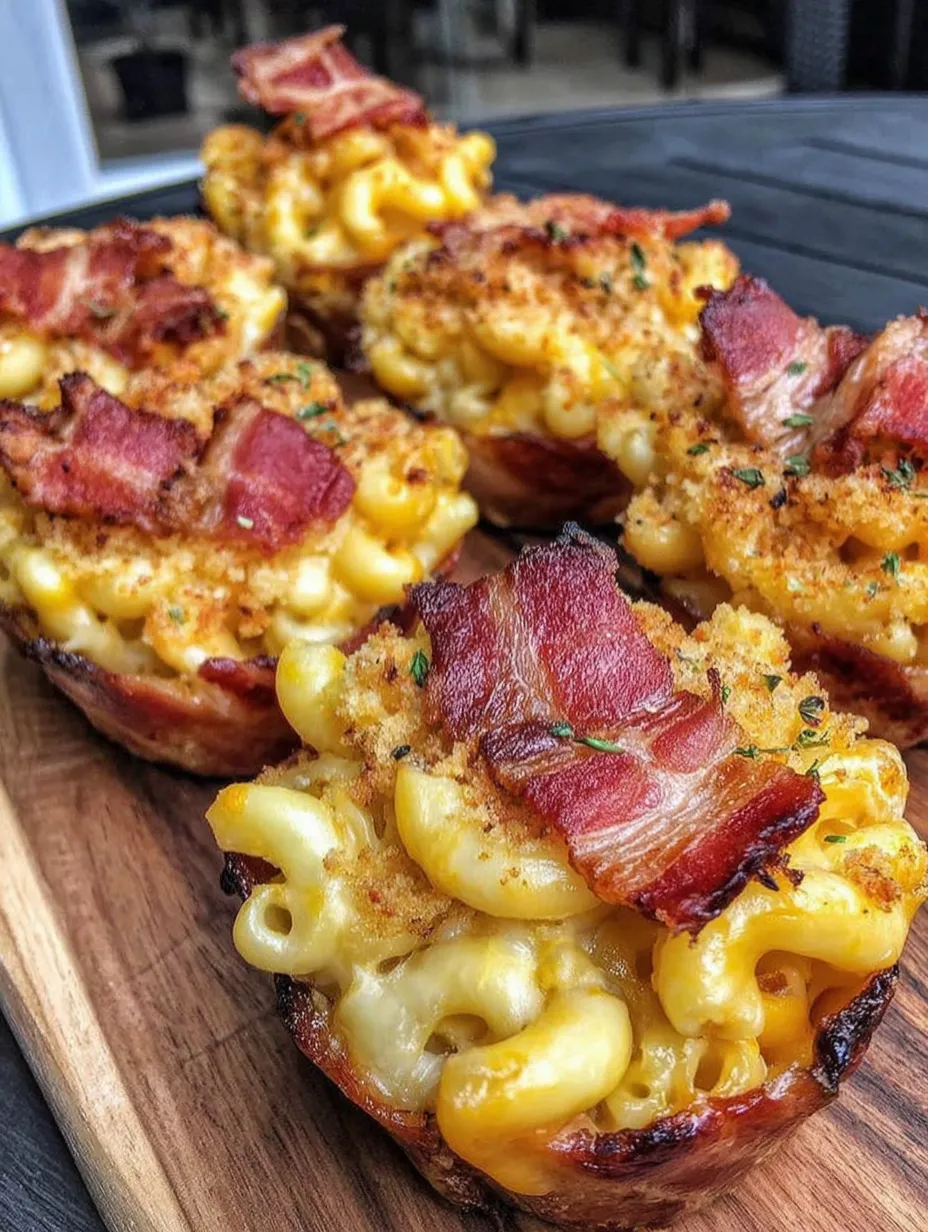
Arrange these on a large platter while they're still warm and watch people's reactions when they realize what they're looking at. They're perfect for any outdoor gathering where you're already grilling—barbecues, tailgates, pool parties, summer cookouts. Set them out with some napkins because eating a bacon cup filled with mac and cheese is inherently messy, and people will need to wipe their hands. These work as either a side dish or an appetizer depending on how you're framing your meal. For a barbecue spread, put them out alongside traditional sides like coleslaw, baked beans, and cornbread. They also make an impressive addition to a game day spread with wings and other finger foods. I usually serve these right off the grill while they're at their hottest and the cheese is still super melty, which is when they look and taste their absolute best.
Ways to Switch It Up
Try using different smoked cheeses like smoked provolone or smoked gruyere for different flavor profiles. Add some diced jalapeños to the mac and cheese for heat that cuts through all that richness. Mix in some pulled pork or chopped brisket to make these even more substantial and turn them into a full meal. Use different BBQ rubs depending on what flavors you like—a spicier rub makes the bacon cups more complex while a sweeter one plays up the caramelization. Top with crumbled extra bacon before the final baking for people who think you can never have too much bacon. Add some caramelized onions to the mac and cheese for sweetness and depth. Try mixing in some buffalo sauce with the cheese sauce and topping with blue cheese crumbles for a buffalo mac variation. Use turkey bacon if you want a slightly lighter version, though it won't have quite the same flavor or texture as regular bacon.
Keeping and Reheating Them
These really are best eaten fresh and hot right after baking. The bacon stays crispier and the mac and cheese is at peak creaminess when they're first made. If you need to make components ahead, you can form and cook the bacon cups a day in advance and store them in an airtight container in the fridge, then make the mac and cheese fresh and assemble everything right before the final baking. Fully assembled and baked cups will keep in the fridge for up to 2 days covered tightly, but the bacon will soften significantly from all the moisture in the mac and cheese. Reheat them in a 350-degree oven or on the grill for about 15 minutes until heated through. The bacon won't get crispy again, but they'll still taste good. Don't microwave these if you can avoid it because the bacon gets rubbery and weird. I wouldn't freeze these since the texture of both the bacon and the mac and cheese changes too much when frozen and thawed.
 Pin it
I've made these smoked mac and cheese bacon cups for probably a dozen different gatherings now, and they never fail to get a reaction. There's something about the combination of bacon, cheese, and carbs that just makes people happy, and wrapping it all up in this individual serving format makes it feel special and fun. They take some effort compared to just making a regular pan of mac and cheese, but the presentation and flavor payoff is totally worth it. The smoky cheese combined with the bacon that's been on the grill creates these deep, complex flavors that regular mac and cheese just doesn't have. My favorite part is watching people try to figure out the best way to eat them—some people try using a fork, others just pick them up with their hands and go for it. Either way works. These have become my signature dish for any outdoor gathering where I'm in charge of bringing something, and I've stopped fighting it. People expect them now, and honestly I'm happy to keep making them because they're just really damn good and always disappear completely!
Frequently Asked Questions
- → Can I make these in a regular oven instead of on the grill?
- Yes! You can bake everything at 350 degrees in your oven. You'll miss out on some of that smoky flavor, but they'll still be delicious.
- → How do I keep the bacon cups from falling apart?
- Make sure to overlap the bacon strips well and don't cook them until they're too crispy. They need to stay flexible enough to hold their shape but be cooked through.
- → Can I use regular cheddar instead of smoked cheese?
- You can, but the smoky cheeses really make this recipe special. If you use regular cheese, the grill smoke will still add some flavor.
- → How far ahead can I make these?
- You can make the bacon cups a day ahead and keep them in the fridge. The mac and cheese is best made fresh, but you can prep it a few hours ahead and just bake when ready.
- → What if my cheese sauce is too thick?
- Just add a splash more milk and whisk it in. The sauce should be creamy and coat the pasta nicely, not be gloppy.
- → Can I freeze these?
- The bacon cups don't freeze well because they get soggy. These are best made and eaten fresh or within a day or two.