


Sweet potato casserole with marshmallows combines deeply roasted sweet potatoes with butter, pure maple syrup, cinnamon, and a pinch of salt. The filling is smooth and rich without being complicated, and a full layer of mini marshmallows creates the familiar golden top. It is especially useful for Thanksgiving or Christmas because the sweet potato base can be prepared ahead, leaving only the topping and final bake for serving day.
Roasting is the important first choice. It concentrates the potatoes' natural flavor and avoids the extra water they would absorb during boiling. Once the potatoes are tender, the rest of the recipe is simple mixing and assembly. The only stage that demands close attention is the final marshmallow bake, when a perfectly toasted surface can darken quickly.
Ingredients for Sweet Potato Casserole
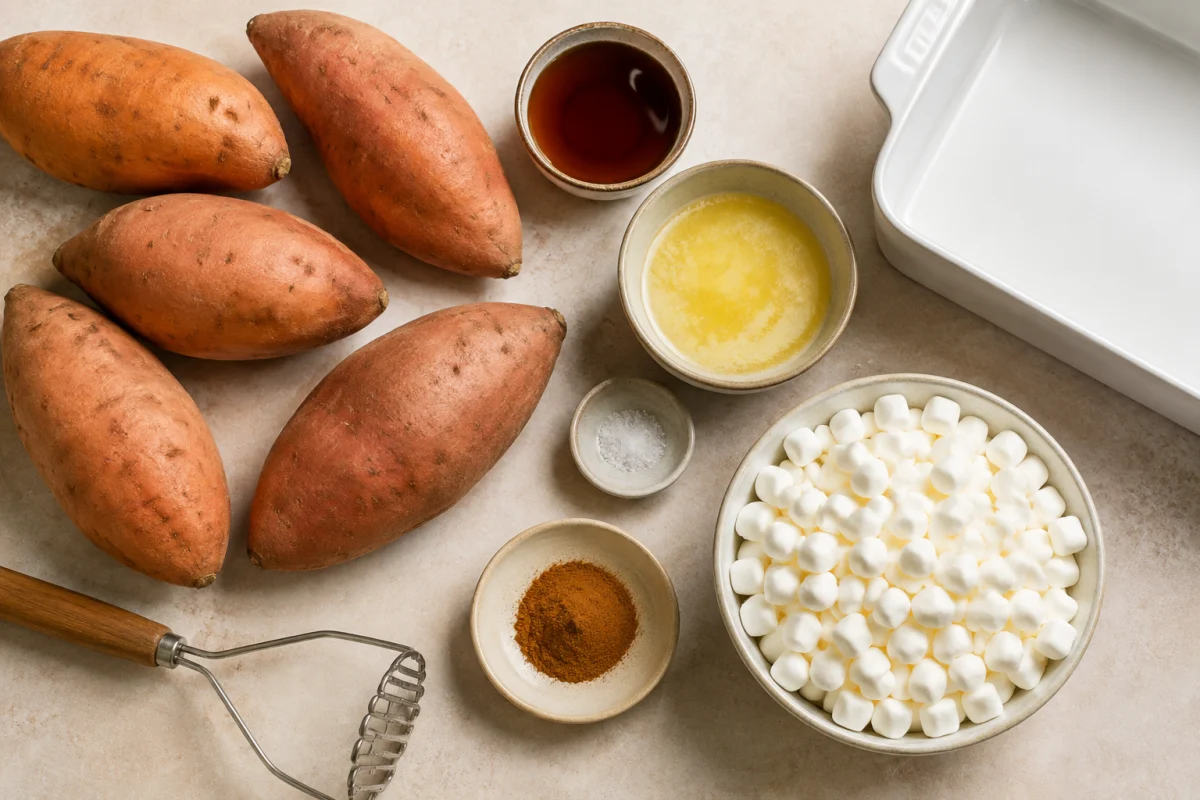
The sweet potato base needs five to six medium sweet potatoes, one-third cup maple syrup, one stick of melted butter, one tablespoon ground cinnamon, and a pinch of salt. Choose potatoes that feel firm and heavy, without soft patches. Similar sizes help them finish roasting at roughly the same time.
For the topping, use one 10-ounce bag of mini marshmallows. Their small size makes it easy to cover the whole 9-by-13-inch dish and produces more toasted edges than a sparse layer of large marshmallows. Cooking spray is also useful for preparing the casserole dish, while parchment keeps any syrup that escapes from the roasting potatoes off the pan.
If you enjoy this recipe, you may also like Green Bean Bundles.
How to Make the Casserole
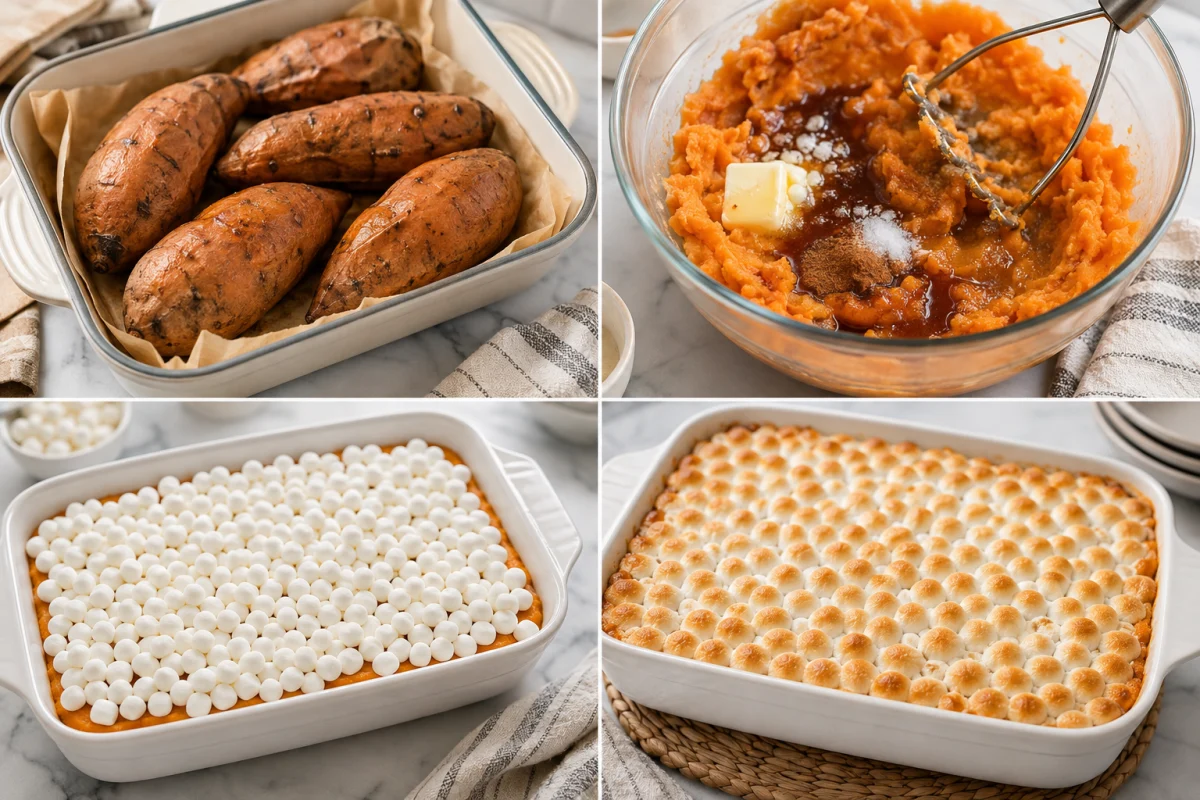
- Heat the oven. Set the oven to 400°F and line a sturdy baking pan with parchment paper.
- Roast the potatoes. Scrub and dry the sweet potatoes, pierce each one several times, and place them on the lined pan. Roast for about one hour, until a fork or thin knife slides easily through the thickest part.
- Peel and mash. Cool the potatoes until safe to handle. Remove the skins and mash the flesh with maple syrup, melted butter, cinnamon, and salt.
- Fill the dish. Grease a 9-by-13-inch baking dish and spread the sweet potato mixture into an even layer.
- Add the topping. Scatter the entire bag of mini marshmallows from edge to edge and press them very lightly into the surface.
- Toast carefully. Bake on the middle rack for 10 to 20 minutes. Begin checking at 10 minutes and remove the casserole when the marshmallows are puffed and golden.
- Rest. Let the dish stand for about five minutes before serving.
For storage details after serving, the USDA leftovers and food safety guidance.
Roast the Potatoes Until Completely Tender
Roasting time depends on the thickness of the potatoes, so use texture rather than the clock as the final test. A properly cooked potato gives easily when squeezed with an oven mitt, and a fork reaches the center without resistance. If the center is still firm, the finished mash will contain hard pieces that are difficult to fix later.
Keep the potatoes whole during roasting. The skins trap steam, helping the interior become soft while the dry heat builds a concentrated flavor. A little caramelized liquid may appear on the parchment; that is normal. Piercing the skins before baking gives steam a controlled way to escape.
If you enjoy this recipe, you may also like Cheesy Stuffed Potato Cakes.
Build a Smooth, Balanced Filling
Peel the potatoes while they are still warm but comfortable to handle. The skins usually pull away easily after roasting. Mash the flesh first to break up the larger pieces, then add the maple syrup, melted butter, cinnamon, and salt. This order makes it easier to judge the final texture and prevents pockets of concentrated spice.
A potato masher creates a soft filling with a little natural texture. For a smoother result, press thoroughly with the masher or use a sturdy fork. Avoid extended high-speed mixing because it can make sweet potatoes feel pasty. The filling should hold its shape on a spoon while still spreading easily across the baking dish.
Spread an Even Layer
Coat the 9-by-13-inch dish with cooking spray, including the corners. Spoon in the warm mash and spread it with a flexible spatula. An even depth matters because thin edges heat more quickly than a thick center. Smooth the top enough that the marshmallows sit in one level layer rather than sliding into low spots.
The casserole is not meant to be packed down firmly. Gentle spreading keeps the filling lighter and makes it easier to scoop at the table. If the sweet potato base was refrigerated, let it lose some of its chill before the final bake or allow additional heating time before adding the marshmallows.
Toast Marshmallows Without Burning Them
Distribute the mini marshmallows all the way to the edges, then press just enough to anchor them. Set the dish on the middle rack, where the topping receives steady heat without sitting too close to the upper element. Start checking at 10 minutes even though the full bake may take closer to 20.
Marshmallows can move from pale to deeply browned in less than a minute. Stay near the oven once they begin to color and rotate the dish if one side browns first. Remove it when the tops are golden and the centers look puffed. Carryover heat will continue softening the topping as the casserole rests.

Make-Ahead Instructions
The sweet potato base can be completed up to two days ahead. Spread it in the greased dish, cool it, cover tightly, and refrigerate without marshmallows. Keeping the topping separate prevents the marshmallows from absorbing moisture and dissolving into the filling.
Before serving, allow the dish to sit at room temperature while the oven heats. Warm the base, covered, until it is hot through the center, then add the marshmallows and complete the uncovered toasting stage. If the base is only one day old and not extremely cold, it may be baked as assembled, but confirm the center is hot before serving.
Serving and Practical Variations
Let the casserole settle for five minutes so each spoonful holds together and the melted marshmallows are not dangerously hot. A broad serving spoon works better than a flat spatula. The dish pairs naturally with roast turkey, baked ham, green vegetables, and tart cranberry sauce, which offsets its sweetness.
For extra texture, scatter chopped pecans over part of the marshmallow layer, keeping a nut-free section clearly separate when needed. Orange zest or a small amount of vanilla can change the aroma without altering the method. Any variation should support the roasted sweet potato flavor rather than covering it with more sugar.
Storage and Reheating
Cover leftovers and refrigerate them for up to four days. The marshmallows will soften and lose some volume, but the flavor remains good. Reheat individual portions gently in the microwave, or cover the baking dish and warm it in a 350°F oven until the center is hot.
For a fresher-looking top, add a small handful of new marshmallows during the final minutes of oven reheating. Watch them with the same care as the original topping. Freezing is possible for the sweet potato base alone, but the texture and appearance are best when the marshmallow-topped casserole is served fresh or refrigerated rather than frozen.
Conclusion
Roast five to six medium sweet potatoes at 400°F until completely tender. Peel and mash them with maple syrup, melted butter, cinnamon, and salt, then spread the mixture in a greased 9-by-13-inch dish. Cover with mini marshmallows and bake on the middle rack for 10 to 20 minutes, watching closely once the topping begins to brown.
Frequently Asked Questions
- → Can I prepare sweet potato casserole ahead?
Yes. Prepare and refrigerate the sweet potato base for up to two days, but wait to add the marshmallows until the casserole is ready for its final bake.
- → How do I know when the sweet potatoes are roasted?
A fork or thin knife should slide into the thickest part with almost no resistance. Firm centers will leave hard pieces in the mash.
- → Why did my marshmallows burn?
They brown very quickly once hot. Use the middle rack, begin checking at 10 minutes, and stay beside the oven as soon as the first marshmallows turn golden.
- → Can I use large marshmallows?
Yes, but cut or arrange them carefully for even coverage. Mini marshmallows create a more uniform layer and more consistent browning.