

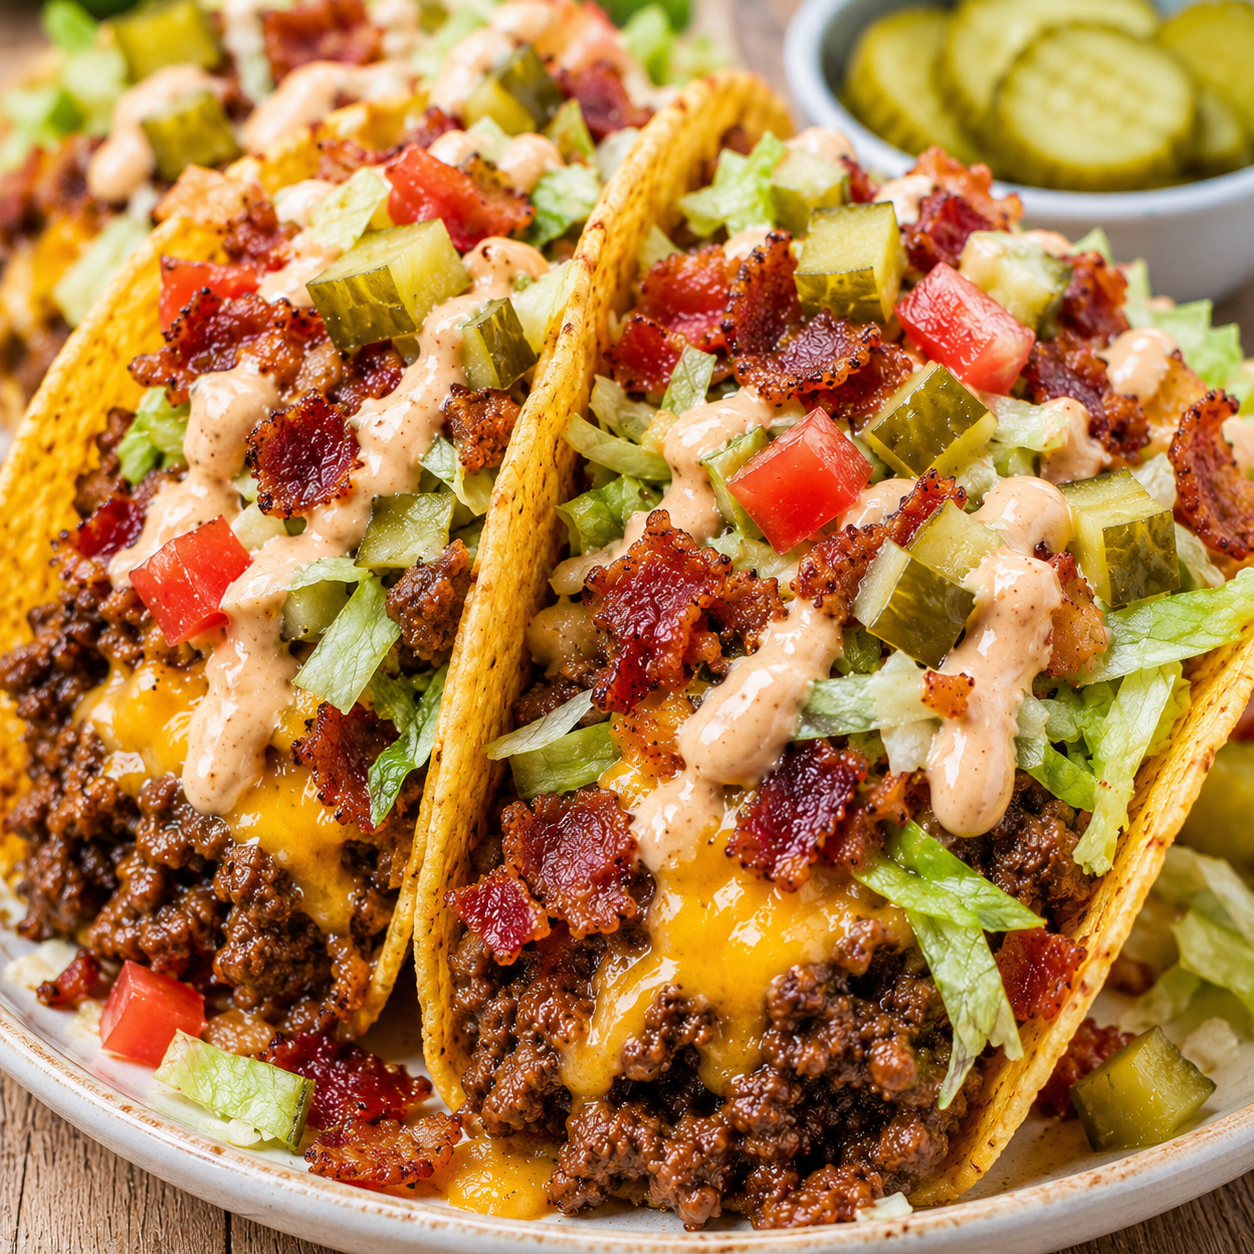
Loaded bacon cheeseburger tacos take everything good about a drive-thru double cheeseburger and stuff it into a crunchy shell. Seasoned beef, crisp bacon, melted cheddar, and a tangy burger sauce replace the usual taco fillings, so the first bite tastes like a cheeseburger that happens to be easier to eat with your hands.
This is the recipe to make when half your house wants tacos and half wants burgers. It uses one skillet, takes about half an hour start to finish, and lets everyone build their own shell with exactly the toppings they want.
What Goes Into Every Shell
Everything here is a grocery-store staple, the kind of ingredients you'd buy for burger night anyway. Buy a block of cheddar and shred it yourself if you can, it melts smoother into the filling than the bagged kind.
If you enjoy this recipe, you may also like Creamy Shrimp Parmesan Ravioli.
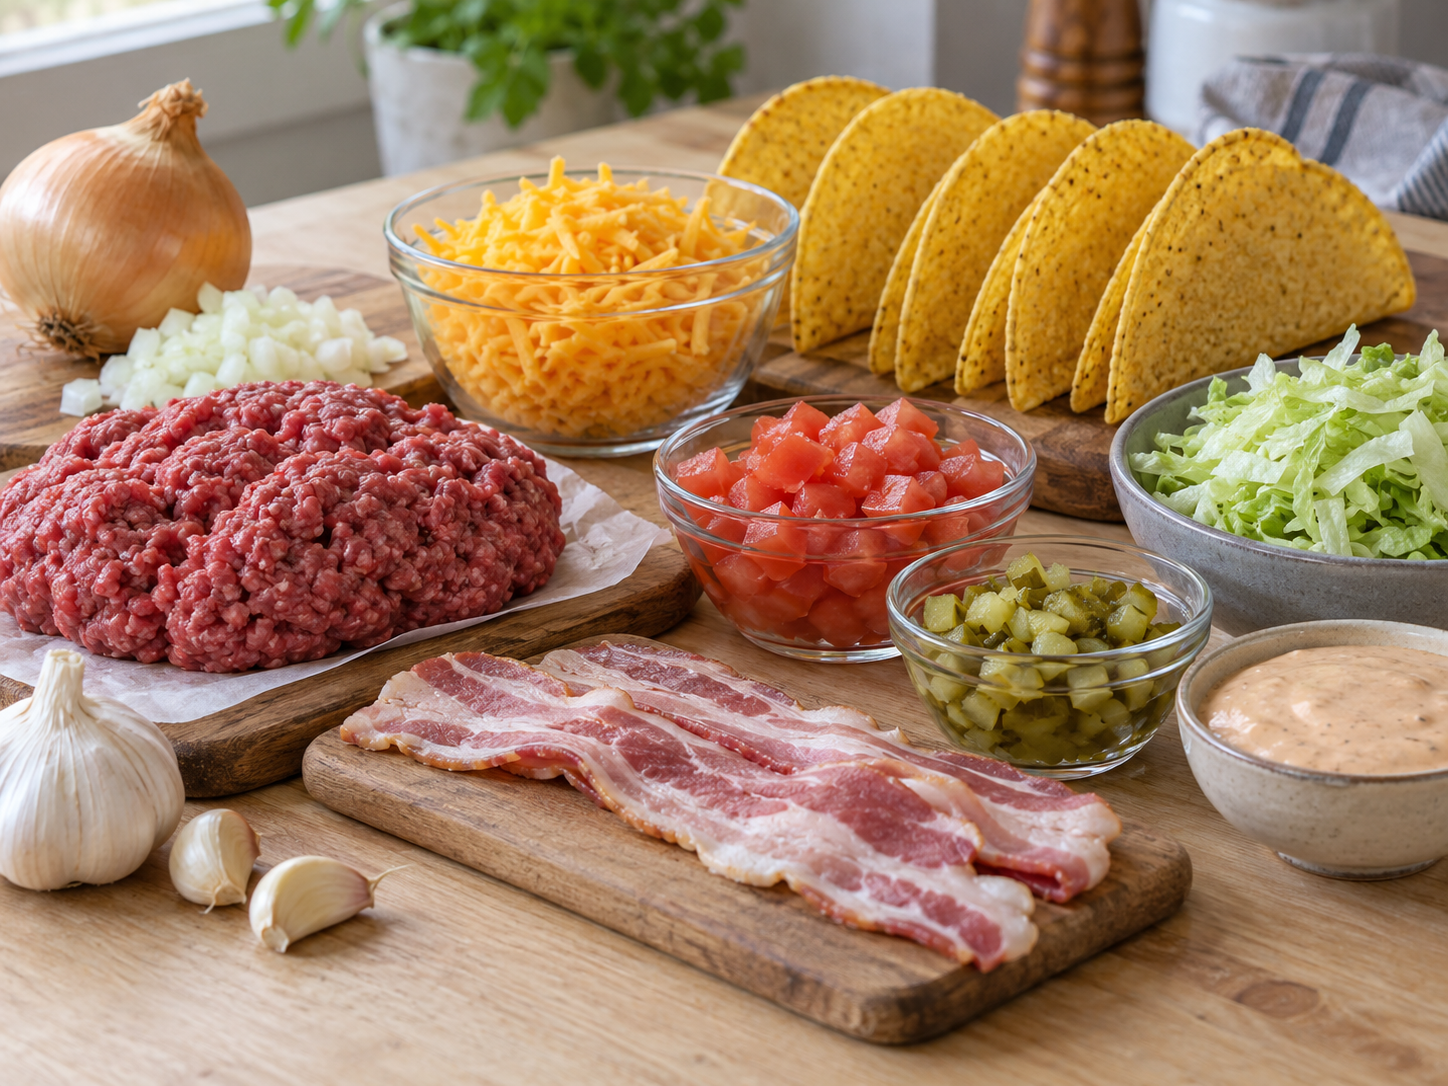
- Ground beef. An 80/20 blend browns well and stays juicy once it's tucked into a warm shell.
- Bacon. Cooked until crisp and chopped, it adds smoke and crunch that regular taco fillings don't have.
- Onion and garlic. Cooked into the beef, they build the savory backbone of a good burger patty.
- Smoked paprika, onion powder, and garlic powder. A simple seasoning blend that leans the beef toward cheeseburger flavor instead of taco flavor.
- Sharp cheddar. Melts right into the hot filling so every bite is cheesy, not just the top.
- Hard taco shells. Warmed until crisp, they stand in for the bun and hold everything without going soft.
- Lettuce, tomato, and diced pickles. The classic burger crunch and acidity that balances the rich filling.
- Mayonnaise, ketchup, mustard, and pickle juice. Whisked together into a quick burger sauce that ties the whole taco back to a cheeseburger.
For storage details after serving, the USDA leftovers and food safety guidance.
Cooking The Loaded Beef Filling
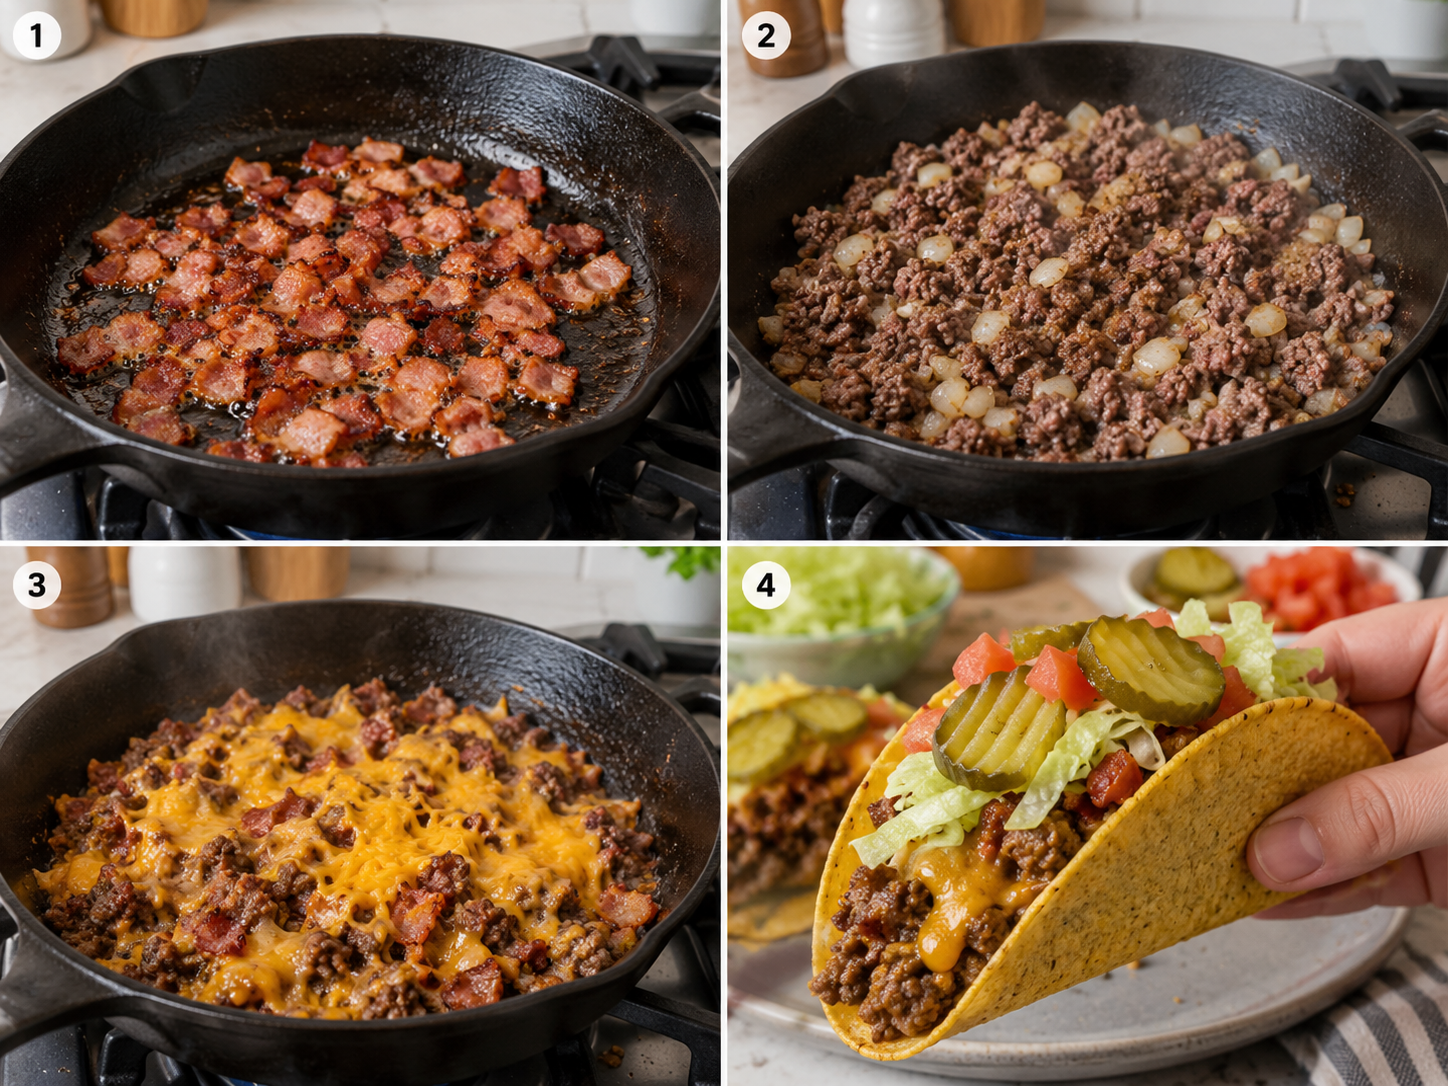
- Crisp the bacon. Cook the chopped bacon in a large skillet over medium heat for 6 to 8 minutes until deeply crisp, then move it to a paper-towel-lined plate and leave about a tablespoon of the fat in the pan.
- Mix the burger sauce. Whisk the mayonnaise, ketchup, mustard, and pickle juice together in a small bowl and set it in the fridge while you cook, the flavor rounds out as it sits.
- Soften the onion and garlic. Add the diced onion to the bacon fat and cook for 2 to 3 minutes until soft, then stir in the garlic for another 30 seconds.
- Brown the beef. Add the ground beef, breaking it up with a spoon, and cook for 6 to 8 minutes until no pink remains and it reaches a safe internal temperature of 160°F (71°C), checked with a food thermometer. Drain any excess grease, then stir in the smoked paprika, onion powder, garlic powder, salt, and pepper.
- Melt in the cheese and bacon. Return the crispy bacon to the pan, sprinkle the cheddar over the hot beef, and cover for 1 to 2 minutes off the heat until the cheese melts into the filling.
- Warm the shells and build. Crisp the taco shells in a 350°F (175°C) oven for 4 to 5 minutes, then fill each with the beef mixture and top with lettuce, tomato, diced pickles, and a drizzle of burger sauce.
If you enjoy this recipe, you may also like Cajun Surf and Turf Stuffed Peppers.
Why Bacon Fat Matters Here
Cooking the onion and garlic in the leftover bacon fat instead of fresh oil is the move that makes this filling taste like a cheeseburger, not taco meat with bacon on top. USDA guidance on bacon notes it should be cooked through until crisp rather than left soft or chewy, so render it fully before you pull it from the pan. That rendered fat carries smoky flavor through the beef and onions that cook after it. If your bacon gave up less fat than expected, add a teaspoon of butter so the onions don't stick and scorch.
Getting Shells That Stay Crisp
Hard taco shells go soft the moment wet filling sits in them, so timing matters more than any single ingredient here. Warm them in the oven rather than the microwave, which leaves them limp, and fill them right before serving rather than staging them ahead. Draining the beef well after browning also makes a real difference, excess grease is what usually turns a crisp shell soggy within minutes. If you're serving a group, keep the warm shells upright in a wire rack or a muffin tin so air reaches both sides while they wait.
Easy Swaps For Your Taco Bar
Ground turkey or chicken works in place of beef if you want something lighter, just season it a little more assertively since it carries less natural flavor. Pepper jack or a sharp Monterey Jack stand in well for cheddar if you want more bite. Stir diced jalapeño or a few dashes of hot sauce into the beef for heat, or swap the hard shells for warm flour tortillas if you'd rather have a soft taco. Dill pickle lovers can double the amount folded into the burger sauce itself instead of just scattering them on top.
Storing And Reheating The Filling
Get the cooked beef and bacon filling into the refrigerator within two hours of cooking, and plan to eat it within 3 to 4 days, the USDA's window for cooked leftovers. Store the taco shells separately at room temperature in a sealed bag so they don't pick up moisture from the fridge. Reheat the filling gently in a skillet over medium-low heat with a splash of water, the microwave tends to dry the beef out and turn the bacon chewy.
What To Serve Alongside
These tacos don't need much alongside them since the filling is already rich. A simple slaw or a pile of salted kettle chips covers the crunch side of things, and a cold glass of lemonade or iced tea cuts through the richness well. If you're feeding a group, set the beef filling, cheese, and toppings out separately next to a stack of warm shells so everyone builds their own, it keeps the shells crisp until the very last minute.
Frequently Asked Questions
- → Can I use soft tortillas instead of hard shells?
Yes, warm flour or corn tortillas work well if you prefer a softer taco. Heat them in a dry skillet for about 30 seconds per side so they're pliable and slightly toasted before filling.
- → How do I keep the taco shells from going soggy?
Drain the beef filling well before filling the shells, and fill them right before you serve rather than letting them sit. Standing the warm, crisp shells upright for a minute after the oven also helps them hold their shape.
- → Can I make the burger sauce ahead of time?
Yes, it keeps in an airtight container in the fridge for up to five days and actually tastes better after an hour or two, once the flavors settle.
- → What can I use instead of ground beef?
Ground turkey or chicken both work, though the flavor leans less like a cheeseburger. Season a bit more assertively with the paprika and onion powder to compensate.
- → How long do leftovers keep, and how should I store them?
Refrigerate the cooked beef and bacon filling in an airtight container within two hours of cooking and use it within 3 to 4 days, the USDA guideline for cooked leftovers. Store the shells separately at room temperature so they stay crisp.
- → Can I make these for a crowd?
Double or triple the beef and bacon quantities and keep the filling warm in the skillet on low heat. Set out the shells, cheese, and toppings separately so people can build their own right before eating.
- → Why does my beef filling turn out greasy?
Drain the excess fat from the skillet after browning the beef and before adding the cheese. Starting with a leaner blend, like 85/15, also helps keep the filling from feeling heavy.
References
Reliable references aided in composing and refining this content.
- https://www.fsis.usda.gov/food-safety/safe-food-handling-and-preparation/meat/ground-beef-and-food-safety
- https://www.fsis.usda.gov/food-safety/safe-food-handling-and-preparation/meat-catfish/bacon-and-food-safety
- https://www.fsis.usda.gov/food-safety/safe-food-handling-and-preparation/food-safety-basics/leftovers-and-food-safety