

Rocky Road Candy is presented with its verified ingredients and recorded method, plus practical editorial guidance for following those facts accurately. Use the exact quantities, temperatures, and timings from the source rather than making unrecorded changes.
Rocky Road Candy Ingredients
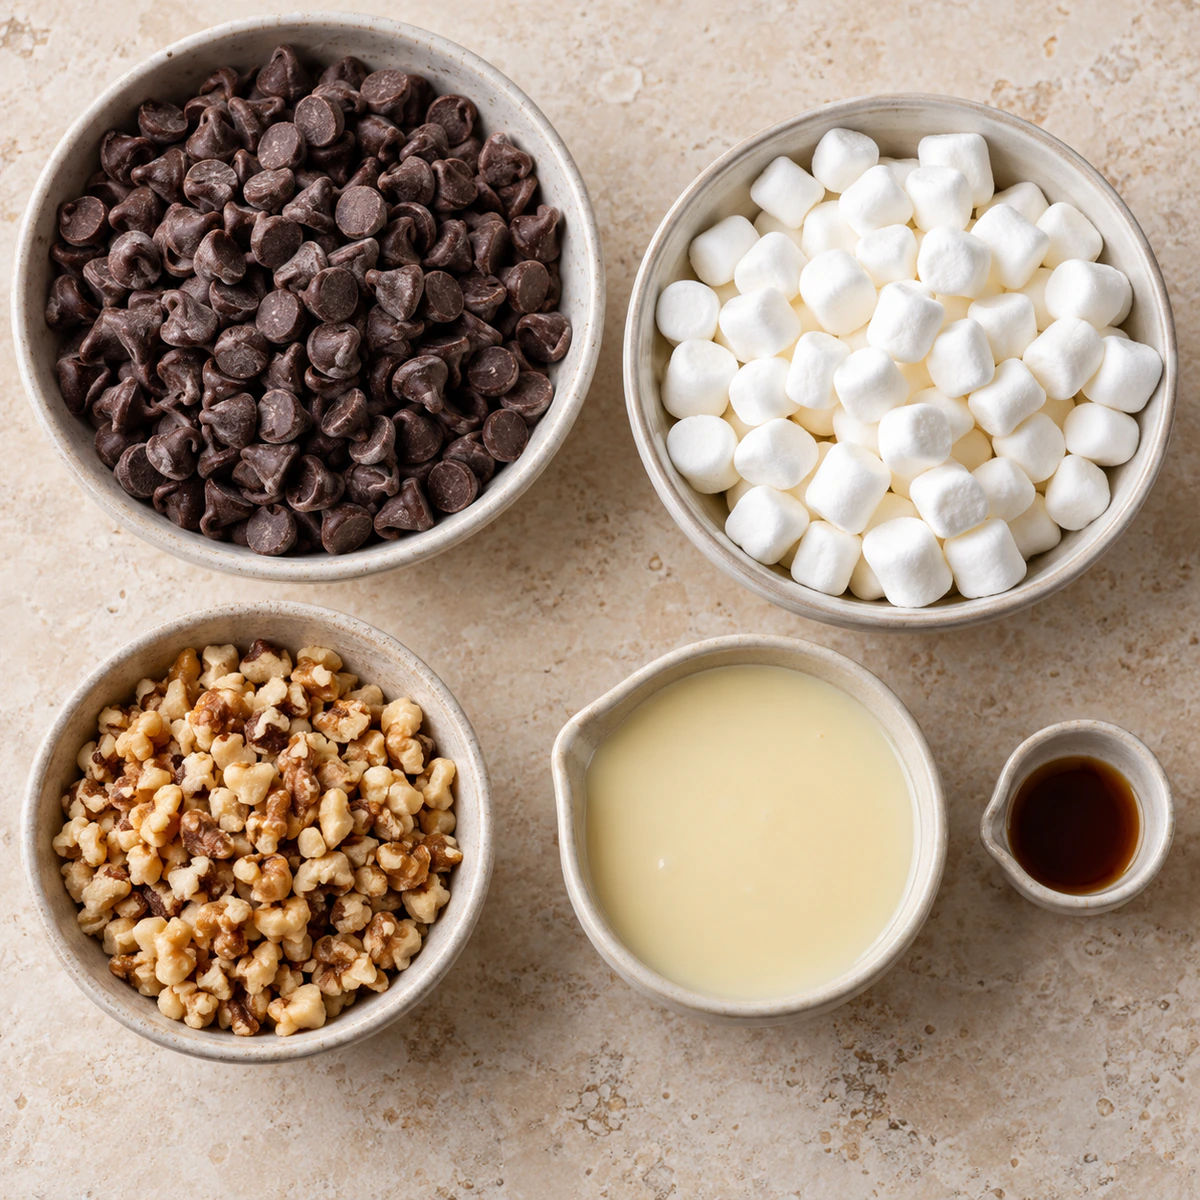
Ingredients: 2 cups semi-sweet chocolate chips.; 2 cups mini marshmallows.; 1 cup chopped walnuts or peanuts.; 1/2 cup sweetened condensed milk.; 1/2 tsp vanilla extract.
If you enjoy this recipe, you may also like Banana Malva.
How to Make Rocky Road Candy
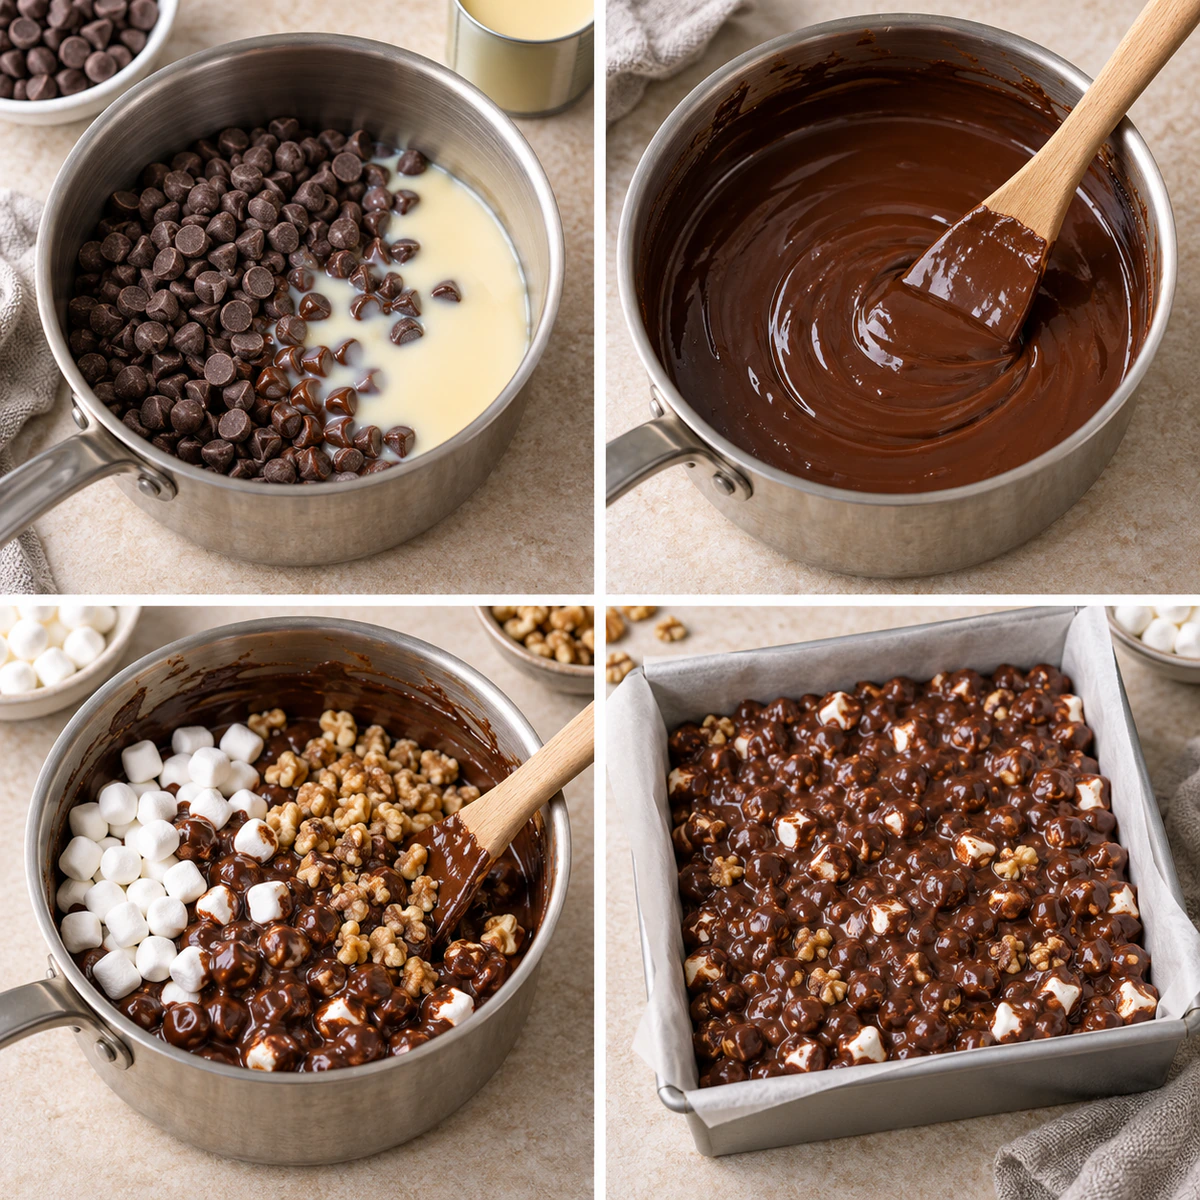
- Melt Chocolate: In a microwave-safe bowl, melt chocolate chips and sweetened condensed milk in 30-second intervals, stirring until smooth.
- Add Vanilla: Stir in vanilla extract.
- Mix Ingredients: Fold in mini marshmallows and chopped nuts until evenly mixed.
- Spread Mixture: Spread the mixture evenly in a parchment-lined 8x8 pan.
- Refrigerate: Refrigerate for 2 hours or until set.
- Serve: Cut into squares and enjoy.
For storage details after serving, the USDA leftovers and food safety guidance.
Prepare With the Original Recipe in View
Begin with the complete recorded ingredient list and keep each quantity exactly as written. Arrange ingredients in the order they are used, and confirm the named form of each item before mixing. This simple setup prevents accidental substitutions and keeps the recipe aligned with its verified source.
If you enjoy this recipe, you may also like Christmas Crack.
Why the Recorded Order Matters
Follow the recorded method as the controlling plan. Each mixing, cooking, resting, chilling, or cooling stage affects the intended texture, so complete the named action before moving on. Do not add ingredients, alter a pan size, or change heat just because another familiar recipe uses a different approach.
Temperature, Timing, and Safe Handling
Treat the written temperature and minutes as a pair. Preheat when directed, cook for the listed time, and use the source cue such as smooth, set, golden, thickened, cooled, or chilled. Keep dairy and eggs properly handled and refrigerate leftovers promptly after serving.
Image and Recipe Integrity
The ingredient and four-panel process photographs are editorial visual aids. They show the measured components and a chronological overview, while the original hero remains untouched at its existing path. The distinct source final image remains the third body image.
A Reliable Finish
Prepare the correct pan, parchment, rack, pot, skillet, or serving vessels before the final stage. Give resting, cooling, and chilling the full recorded time rather than rushing a soft mixture or warm bake. These pauses allow structure to set without changing the documented formula.
Measure and Mix as Written
For dependable results, use appropriate measuring tools and keep optional items optional. A dry cup and level measure suit dry ingredients, while liquid measures keep wet quantities accurate. When the method says fold, use gentle strokes; when it says beat, stop at the stated smooth texture.
Equipment and Visual Cues
Keep the workspace organized from start to finish. Use the stated equipment and avoid changing the recipe merely to match a photograph. The images preserve dish context, but the ingredients and numbered instructions remain the factual authority.
Serving and Storage
After the final step, cool food safely on a heat-safe surface and cover it only after steam has settled. Store leftovers in a clean covered container and return foods containing dairy or eggs to refrigeration promptly.
Check Each Stage Before Moving On
Before beginning the final assembly or baking stage, compare the written method with what is in the bowl, pan, pot, or skillet. Ingredients should be in the form the recipe specifies, and a cooled or chilled component should not be substituted with a warm one.
Keep the Recorded Formula in Control
Work deliberately and avoid small changes that accumulate. Use clean utensils between tasks, scrape the bowl when the method calls for thorough mixing, and leave toppings or optional finishing ingredients separate until their recorded step. The recipe—not a photograph or a guess—determines when to continue. Pause briefly after each major action to compare the bowl, pan, pot, or skillet with the wording of the next instruction. That habit is especially useful when the recipe includes a rest, a refrigeration period, an al dente pasta cue, a simmer, or a cooling period: those details are part of the method rather than optional styling. Keep the stated yield in mind when dividing dough, serving a soup, or portioning a finished bake, but do not alter the listed amounts to make larger portions. If an ingredient is marked optional, it can remain optional; otherwise use it as recorded. Keep a clean spoon for tasting where appropriate, protect raw ingredients from cross-contact, and allow leftovers to cool safely before storing them. These practical checks support the documented result while leaving its formula, flavor, timing, temperature, and sequence intact.
Practical Checks While You Cook
Work from the written recipe rather than adjusting the mixture to resemble a photograph. Have the pan lined and the measured marshmallows and nuts ready before the chocolate is fully smooth, because the mixture changes texture as it cools. Stir just until the ingredients are distributed, then spread it without compressing the pieces excessively. Keep the source's cooling or chilling time intact so the candy has time to set cleanly. Use a clean dry utensil, keep optional nuts optional, and store the finished candy in a covered container after it has fully set. The editorial images show the order of work, while the listed quantities, temperatures, timing, and instructions remain the factual authority.
Recorded Recipe Tips
- This no-bake Rocky Road Candy is a sweet and salty treat with only 5 ingredients, making it perfect for parties, gifting, or snacking.

Conclusion
Rocky Road Candy makes 16 squares in 10 recorded minutes. Preserve the listed quantities, temperatures, timings, and method.
Frequently Asked Questions
- → How many servings does Rocky Road Candy make?
It makes 16 squares and serves 16.
- → How long does Rocky Road Candy take?
The recipe records 10 minutes of preparation, null minutes of cooking, and 10 minutes total.
- → How do I keep Rocky Road Candy consistent?
Measure every listed ingredient and follow the original sequence, visual cues, temperature, and timing without adding unrecorded changes.
- → Why preserve the written method?
The verified sequence guides texture, safe handling, and the intended finish while keeping the original formula intact.