

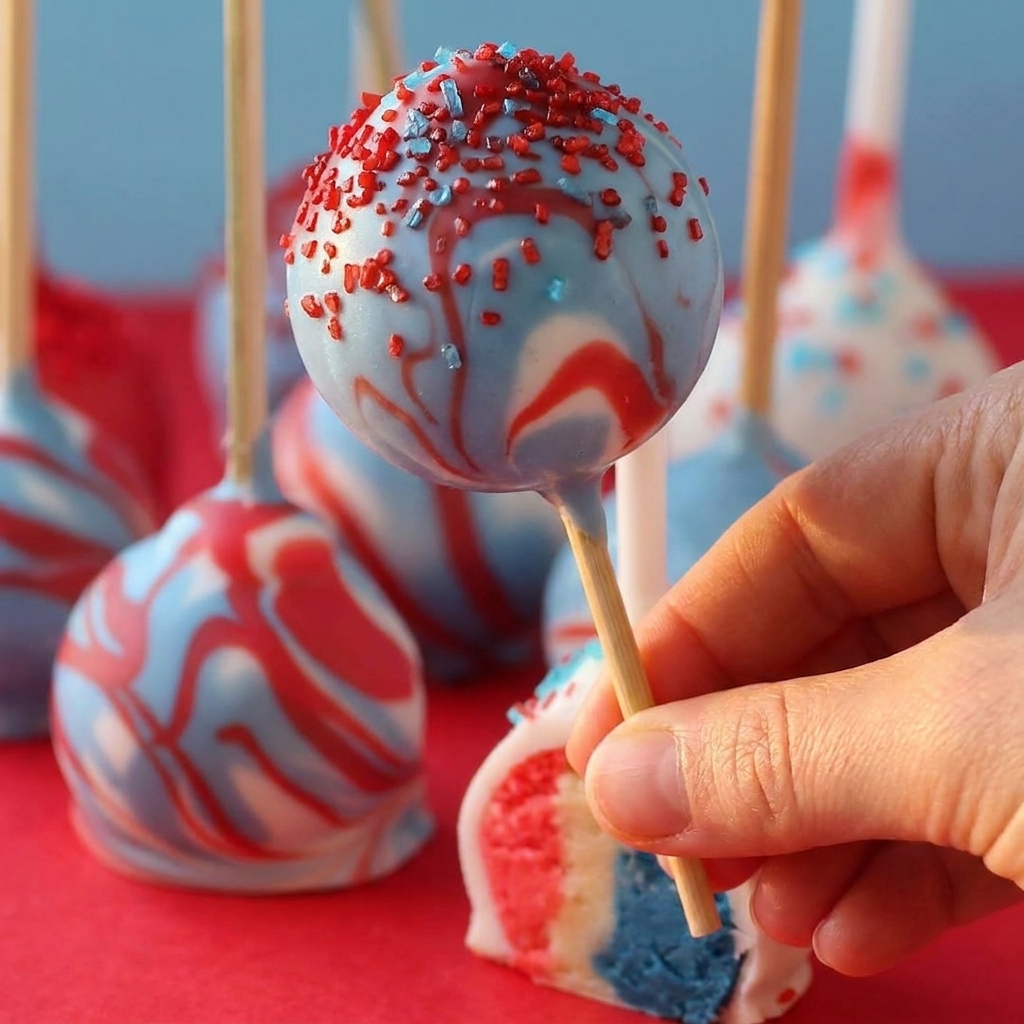
These 4th of July cake pops carry their red, white, and blue theme all the way to the center. Three separately colored vanilla cakes are crumbled, lightly bound with frosting, and pressed together so every bite reveals clean sections of color instead of a muddy swirl. A candy coating and a small shower of sprinkles finish the outside.
The project takes more time than a sheet cake, but each job is simple and can be divided across a day: bake and cool the cakes, shape and chill the balls, then dip and decorate. Careful cooling and restrained use of frosting are the two details that make the biggest difference.
What You Need for Clean, Colorful Cake Pops
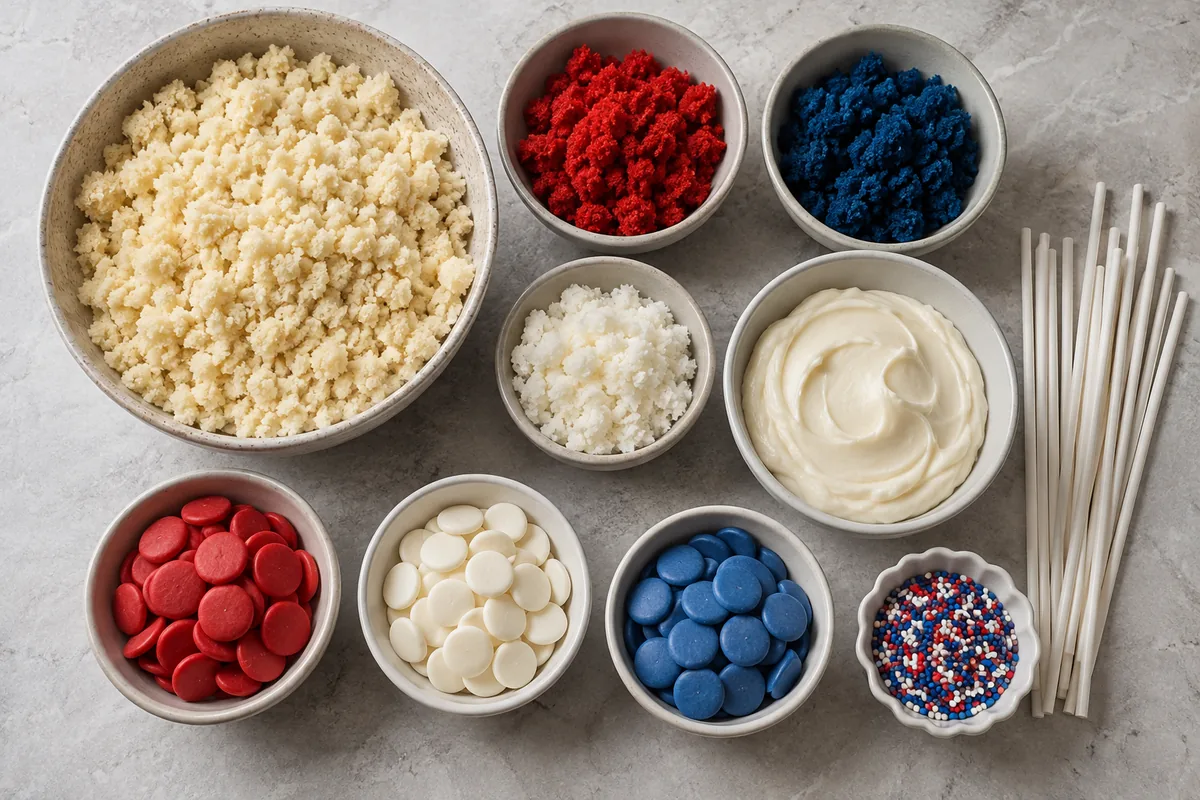
A white or vanilla boxed cake mix gives the food coloring a neutral base. Prepare it with every ingredient listed on the package, then divide the batter evenly before adding red gel color to one bowl and blue gel color to another. Leave the third bowl plain. Gel color is especially useful because it produces saturated color without adding much extra liquid.
- White cake mix: One box supplies all three colored layers. Follow its directions for the eggs, oil, or water it requires.
- Red and blue food coloring: Add gradually and stop when the batter is vivid; the baked cake may look a little softer in color.
- Vanilla frosting: Begin with one tablespoon per color. Its job is only to hold the crumbs together.
- Red, white, and blue candy melts: Melt each color separately so the coating stays clean.
- Cake-pop sticks: Thirty plain sticks or sturdy decorative drink stirrers support the finished pops.
- Sprinkles: Apply them while the coating is still wet so they adhere.
If you enjoy this recipe, you may also like Strawberry Cheesecake Cookies.
The Method, from Cake Crumbs to Coating
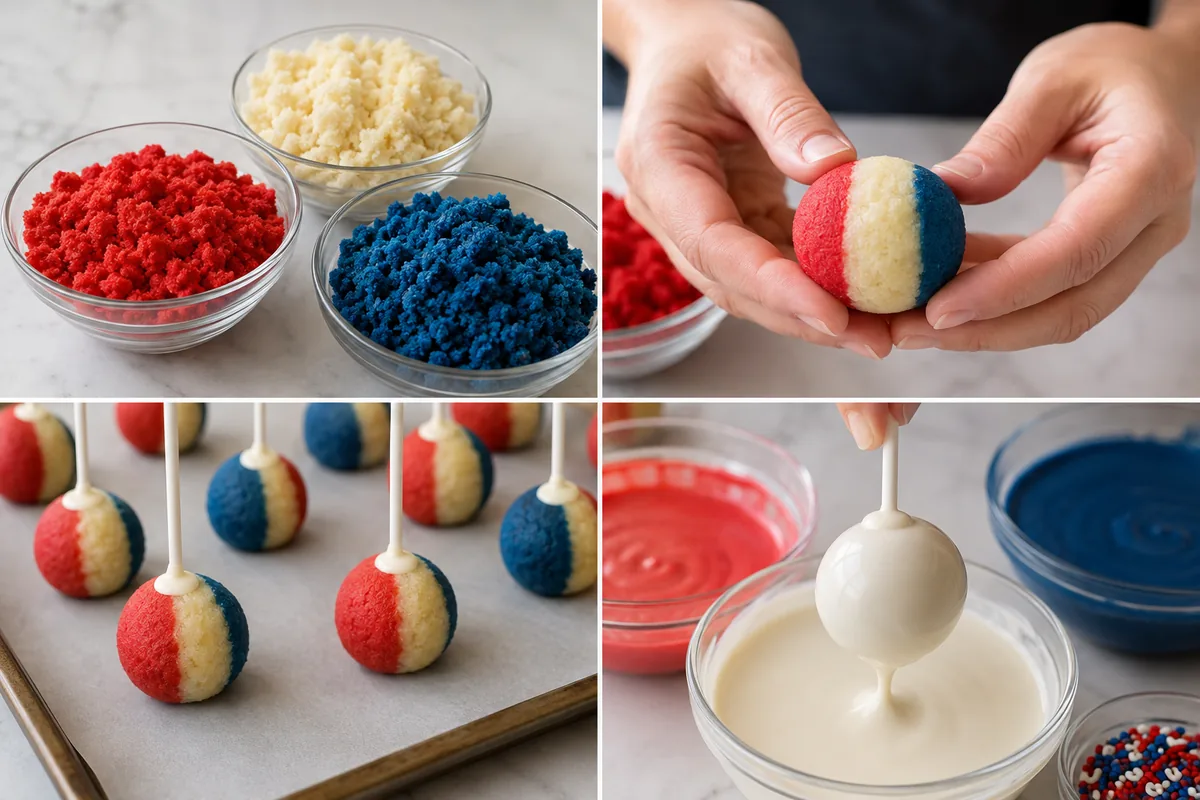
- Bake three colors. Prepare the cake mix, divide it into three equal portions, color one red and one blue, and keep one white. Bake in 8-inch pans according to the box directions. Cool every cake completely.
- Crumble and bind. Crumble each color into a separate bowl until no large pieces remain. Work one tablespoon of frosting into each bowl. Squeeze a small amount in your palm; add frosting one teaspoon at a time only if it will not hold together.
- Portion the colors. Use a 2-tablespoon scoop to make ten balls of each color. Cut every ball into three pieces. Press one red, one white, and one blue piece together, then roll just enough to join them. Do not knead or swirl.
- Chill. Arrange the 30 tricolor balls on wax paper, cover, and refrigerate while the coatings are prepared.
- Melt the candy. Place one color in a completely dry glass or ceramic mug. Microwave for one minute, stir, then heat at 70 percent power for 45 seconds. Stir until smooth and repeat with the other colors.
- Anchor the sticks. Dip the end of each stick into melted candy and push it partway into a chilled ball. Allow the small candy seal to firm before dipping.
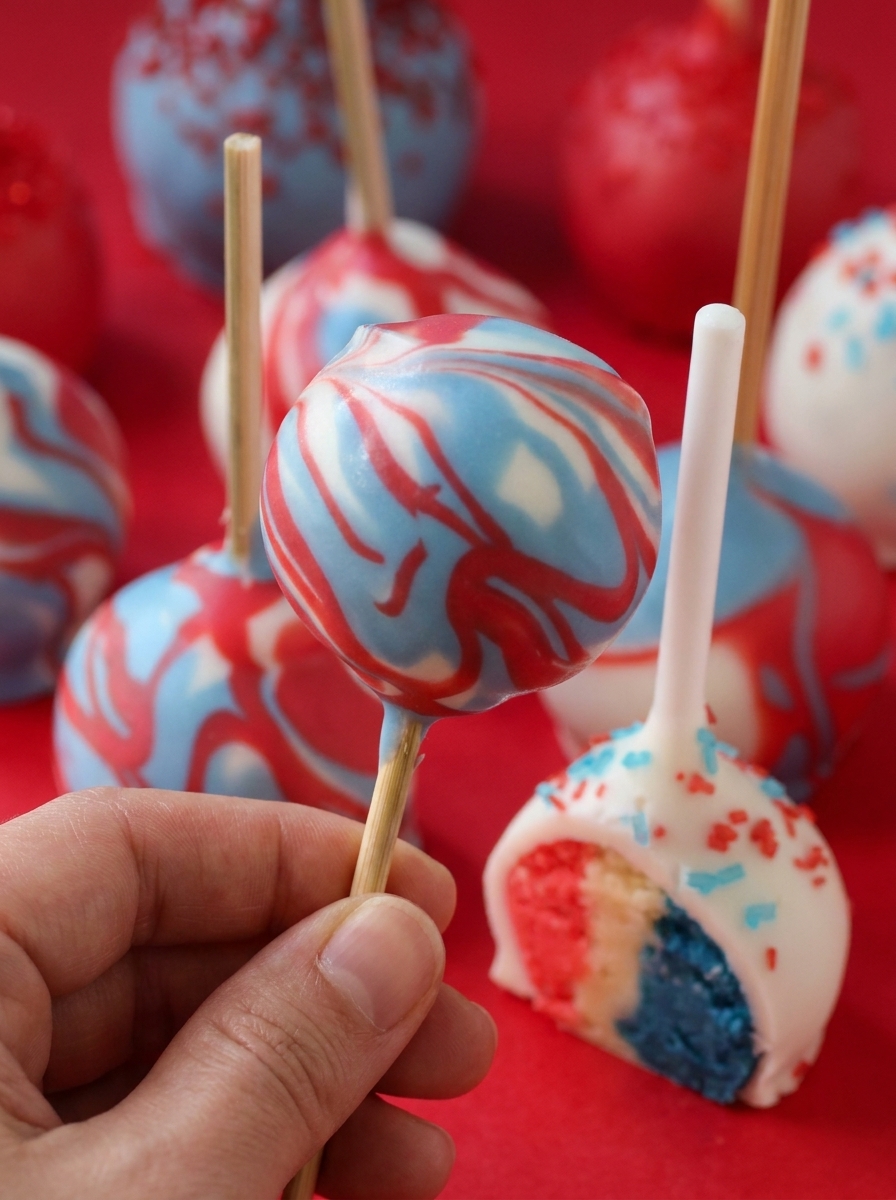
- Coat and decorate. Lower one pop straight into the coating, lift it out, and tap gently to remove excess. Add sprinkles immediately. For a marbled pop, coat it in white and quickly drizzle red and blue over the still-wet surface.
- Dry upright. Set the sticks in a cake-pop stand or a clean foam block until the shell is fully hard.
For storage details after serving, the USDA leftovers and food safety guidance.
Use Less Frosting Than You Think
Cake-pop dough should feel like a soft, compact crumb, not buttercream. Too much frosting makes the balls heavy and slick, and that soft center can slide off the stick when it meets warm coating. Start with the measured tablespoon in each bowl and test before adding more. Fresh, moist cake may not need the extra teaspoon at all.
Keep the three colors in separate bowls and use clean utensils for each one. When joining the pieces, roll with light pressure for only a few seconds. The goal is a ball with distinct red, white, and blue sections, not a fully blended purple center.
If you enjoy this recipe, you may also like Blueberry Cheesecake Cake.
Keep Candy Melts Smooth
Candy melts dislike moisture and excessive heat. Use dry bowls, dry spoons, and short heating intervals. Stirring is part of the melting process; the pieces often retain their shape even when their centers are warm. If the coating becomes thick while you work, warm it briefly at reduced power and stir again rather than giving it a long burst of full heat.
A tall mug is easier than a shallow bowl because a cake pop can be covered in one controlled dip. Let excess coating fall back into the mug. Hard tapping can loosen the stick, while a gentle tap against the wrist holding the pop smooths the shell without stressing the center.
Timing, Decorating, and Serving
Work with a small group of chilled balls at a time and return the rest to the refrigerator. The centers should be firm but not frozen; an extremely cold center can make a warm shell crack as the temperatures equalize. Set out the sprinkles before dipping because the coating can harden in less than a minute.
Solid red, white, and blue pops make a graphic tray, while white-coated pops with thin red and blue drizzles add variety. Stand them in a weighted jar, a cake-pop stand, or a foam block covered with clean paper. Keep the display away from direct sun at an outdoor party so the coating and centers remain firm.
Troubleshooting the Common Problems
- The ball cracks or crumbles: The crumbs may be too dry. Work in one additional teaspoon of frosting and test again.
- The pop falls from the stick: Chill the balls, use the candy seal, and avoid making the centers larger than the 2-tablespoon portion.
- The coating is lumpy: Continue stirring and rewarm briefly. Do not add water.
- The shell cracks after dipping: Let very cold balls sit for a few minutes before coating so the temperature difference is less severe.
- The colors smear together: Use separate mugs and utensils. Add drizzles only when you intentionally want a marbled finish.
Make-Ahead and Storage
Bake the three cakes one day ahead, cool them completely, and keep them well wrapped. The formed, undipped balls can also be refrigerated overnight. Once coated and fully set, store the pops in a single layer in an airtight container at cool room temperature for up to two days or in the refrigerator for up to one week.
If refrigerated, let the closed container stand at room temperature before opening it. This slows condensation, which can otherwise leave droplets on the candy shell and make the sprinkles bleed. Cake pops are not ideal for a warm car or direct sun, so transport them chilled and upright when possible.
Conclusion
For sturdy 4th of July cake pops, cool the cakes completely, add frosting sparingly, keep the three colors distinct, and chill the shaped centers before dipping. Anchor every stick with melted candy, keep all equipment dry, and decorate each pop before its coating sets.
Frequently Asked Questions
- → Can I bake the cake layers a day before making the pops?
Yes. Cool the red, white, and blue cakes completely, wrap each color separately, and keep them at room temperature overnight. Crumble and shape them the next day.
- → Why are my cake pops sliding off the sticks?
The centers may be too warm, too large, or mixed with too much frosting. Chill 2-tablespoon portions and dip each stick tip in melted candy before inserting it halfway.
- → Can I use homemade vanilla cake?
Yes. Choose a pale vanilla or white cake so the red and blue colors stay bright, and use only enough frosting to make the cooled crumbs hold together.
- → How should I transport cake pops to a party?
Let the shells set completely, place the pops in a fitted stand or a single layer in a container, and keep them cool and out of direct sunlight during transport.