
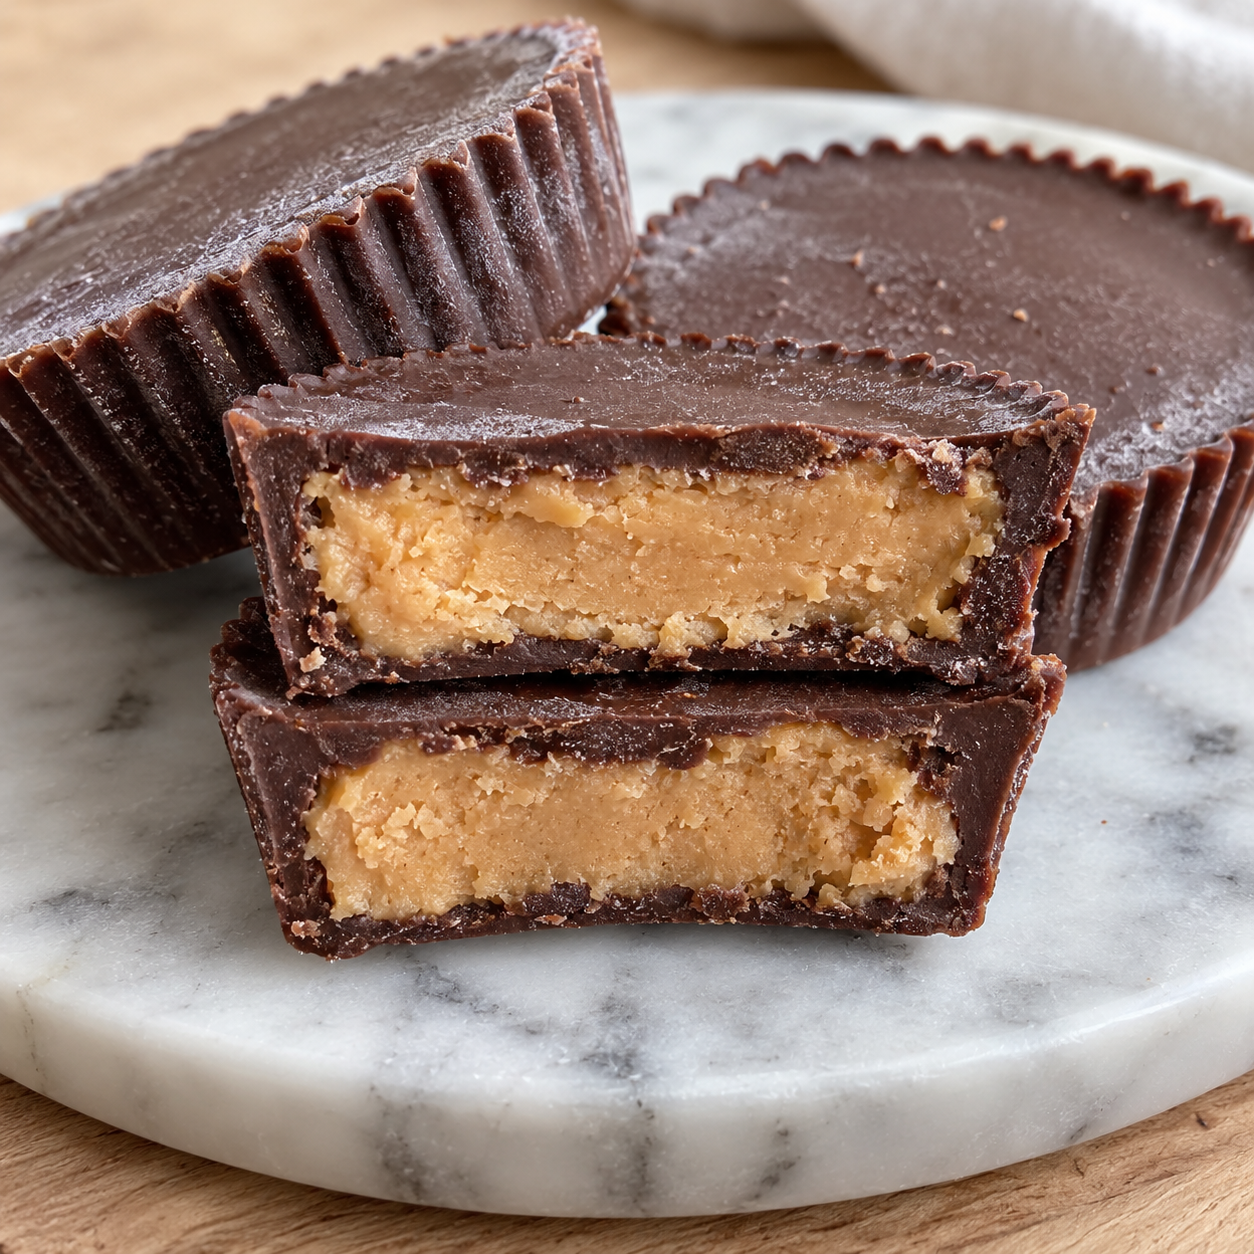
Frozen peanut butter cups are the dessert you make when you want something rich and candy-shop good but don't want to turn on the oven. A firm chocolate shell gives way to a dense, slightly salty peanut butter center, and the freezer does all the real work.
They come together with six pantry ingredients and about twenty minutes of active time. The rest is just waiting for the freezer, which makes this a good one to start while you're doing something else in the kitchen.
What Goes Into Each Layer
Good semisweet chocolate and real peanut butter carry this whole recipe. Buy the kind you would eat with a spoon. Skip oil-separated natural peanut butter here, since the stirred, creamy style scoops smoother and holds its shape once frozen.
If you enjoy this recipe, you may also like 4th of July Cake Pops.
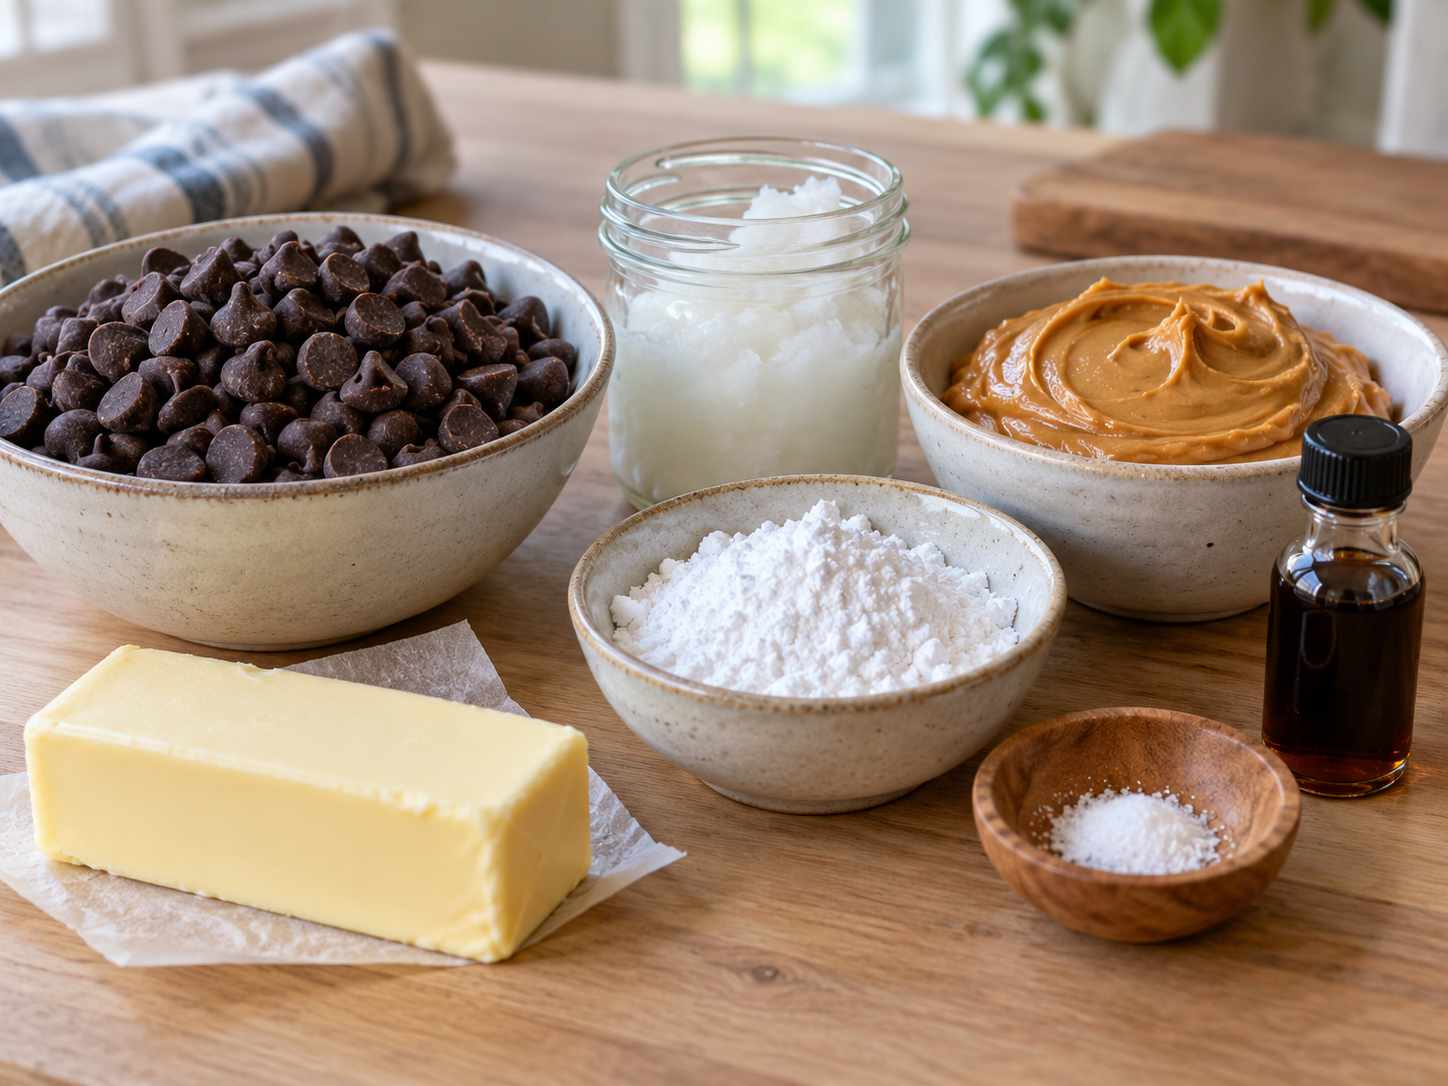
- Semisweet chocolate chips. Melts into the shell that holds everything together and gives the candy-shop snap.
- Coconut oil. Thins the chocolate slightly so the frozen shell bites cleanly instead of shattering.
- Creamy peanut butter. The main filling flavor, a stirred, no-separation style keeps the center smooth.
- Unsalted butter. Softens the peanut butter filling so it stays scoopable even after hours in the freezer.
- Powdered sugar. Sweetens and firms the filling without leaving a grainy texture.
- Vanilla extract and salt. Round out the filling's flavor and balance the sweetness.
For storage details after serving, the USDA leftovers and food safety guidance.
Layering The Cups Correctly
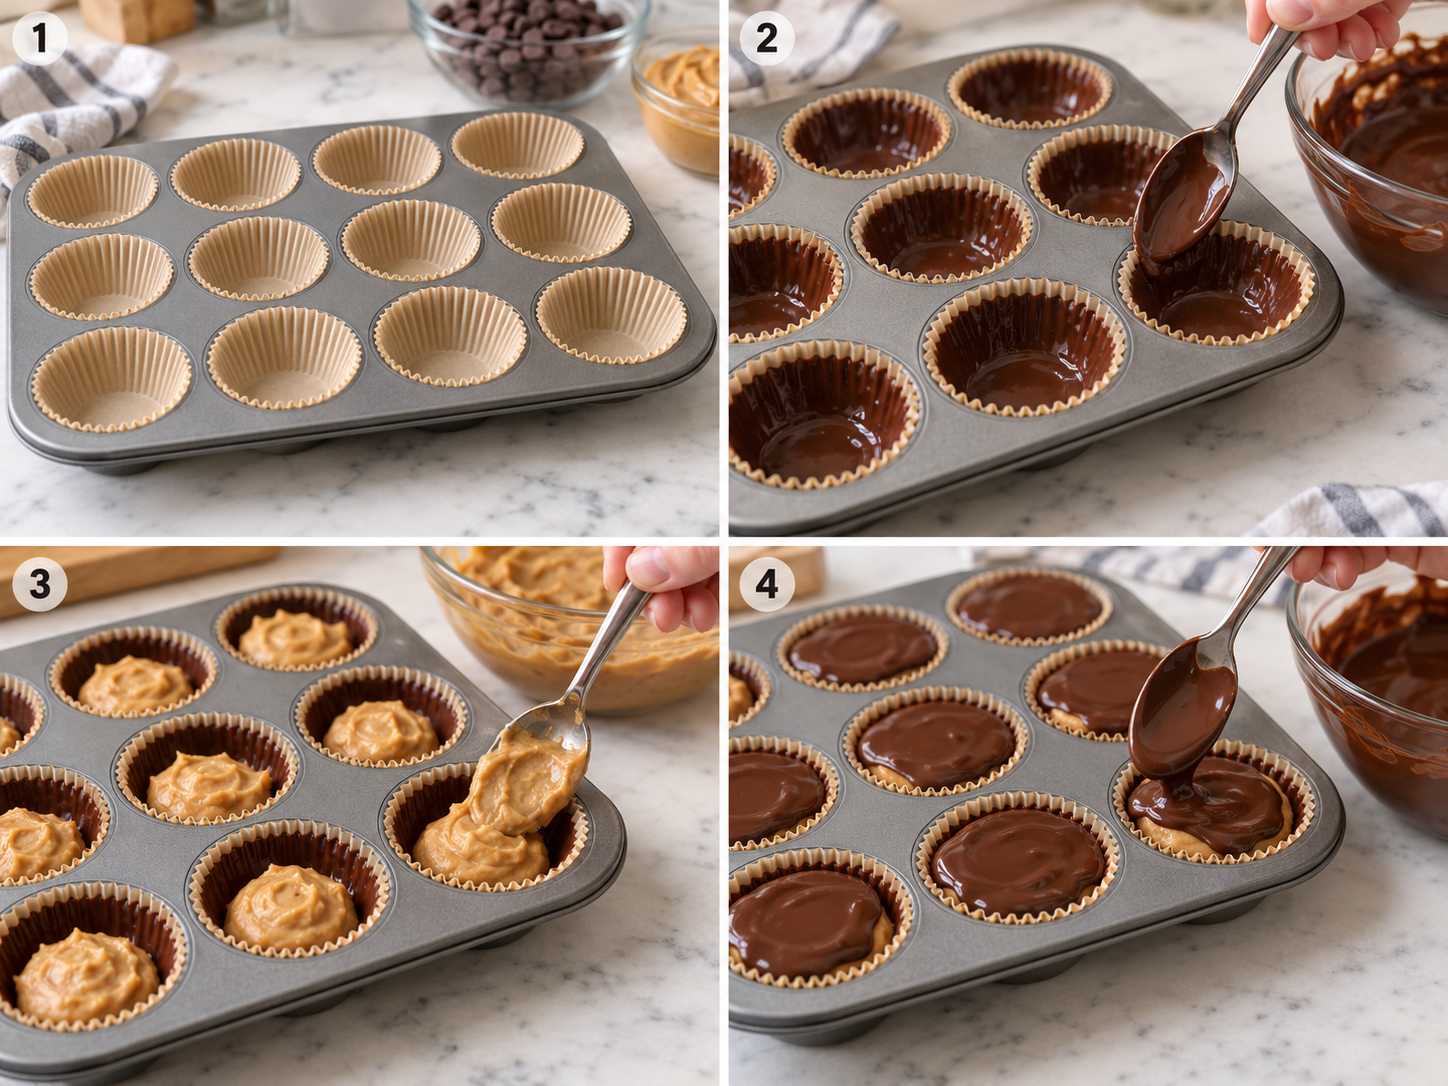
- Line the pan. Set 12 paper or silicone liners into a standard muffin pan so the cups hold their shape as they freeze.
- Melt the chocolate. Combine the chocolate chips and coconut oil in a microwave-safe bowl and melt in 20-second bursts, stirring between each, until smooth.
- Shape the shells. Spoon about a tablespoon of melted chocolate into each liner and use the back of a spoon to spread it up the sides. Freeze for 10 minutes, until firm.
- Mix the filling. Beat the peanut butter, butter, powdered sugar, vanilla, and salt together until smooth and fully combined.
- Fill the cups. Spoon the peanut butter mixture into the chilled chocolate shells and press it down gently so it sits flat, leaving room at the top for the final chocolate layer.
- Seal the tops. Rewarm the remaining chocolate if it has thickened, then spoon it over the peanut butter layer, spreading it to the edges so the filling is fully covered.
- Freeze until solid. Freeze the cups for at least 1 hour, or until completely firm, before peeling off the liners.
If you enjoy this recipe, you may also like Fireworks Sugar Cookie Cake.
Why Coconut Oil Belongs Here
Pure melted chocolate turns rock hard in the freezer and can crack unevenly the moment you bite into it. A small amount of fat loosens that structure just enough. Coconut oil works well because it's solid at room temperature but melts clean, so the shell stays glossy and snaps cleanly instead of shattering into shards.
Use refined coconut oil if you don't want any coconut flavor coming through. A neutral vegetable shortening works too, though the texture is slightly less crisp.
Keeping The Layers From Blurring
The biggest mix-up when building these cups is rushing between layers. If the chocolate shell isn't fully set before you add the peanut butter filling, the two layers slide into each other and you lose the clean bite.
Give each layer its full ten minutes in the freezer before moving on. A quick touch test works. The surface should feel firm and cold, not tacky.
Storing Them Without Freezer Burn
Keep finished cups in an airtight container or a zip-top freezer bag with the air pressed out, not loosely wrapped in foil. Air is what causes freezer burn, and freezer burn is a quality problem rather than a safety one. Stored at 0°F or below, the cups stay safe to eat well past the point where they taste their best, but a tight seal keeps that good texture around for longer.
Let a cup sit at room temperature for two or three minutes before eating it straight from the freezer. The chocolate shell softens just enough to bite through cleanly instead of fighting your teeth.
That Dusty Film Isn't Mold
Open the container a few days in and you might see a pale, dusty streak across the chocolate. That isn't mold and it isn't spoiled candy. It's bloom, a harmless shift in the chocolate's fat structure that can happen with temperature swings in the freezer. Food science extension educators note that bloom changes only appearance, not taste or safety.
To keep it from showing up in the first place, avoid letting the container warm up and refreeze repeatedly. One steady temperature is kinder to the chocolate than a freezer door that opens all day.
Easy Swaps For This Base
Crunchy peanut butter works in place of creamy if you want texture in the filling. Dark chocolate chips make a less sweet shell and pair nicely with the salty center. For a dairy-free version, use dairy-free chocolate chips and a plant-based butter substitute in place of the dairy butter in the filling.
Swap the powdered sugar for a powdered sugar substitute in equal amount if you're cutting sugar, though the filling will be slightly softer and should stay a little longer in the freezer before serving.
A Note On Peanut Allergies
Peanuts are one of the most common food allergens, and the FDA lists peanuts among the major allergens that must be clearly labeled on packaged food. This recipe is not safe for anyone with a peanut allergy as written.
For a peanut-free version, sunflower seed butter swaps in at the same amount and sets up with a similar texture. Check that your chocolate chips were also made in a peanut-free facility if you're serving someone with a serious allergy, since cross-contact during manufacturing is a separate risk from the ingredients you add yourself.
Frequently Asked Questions
- → Can I use crunchy peanut butter instead of creamy?
Yes. Crunchy peanut butter works the same way and adds texture to the filling. The layers still set up just as firm, so there's no need to change any other measurement.
- → How long do frozen peanut butter cups need to freeze?
Plan on at least one hour for the final layer to go fully solid, though two hours gets every cup firm all the way through. The two short ten-minute freezes between layers are separate from this final set.
- → Can I make these dairy-free?
Yes. Use dairy-free chocolate chips and a plant-based butter substitute in the filling in place of regular butter. Check your peanut butter brand too, since a few add milk solids.
- → Why did my chocolate shell crack instead of biting cleanly?
This usually means the shell went in too thick or without enough coconut oil to keep it flexible when frozen. Spread the chocolate in a thin, even layer and let the finished cups sit at room temperature for a couple of minutes before eating.
- → How long do these keep in the freezer?
Stored in an airtight container at 0°F or below, they stay safe to eat for a long stretch, though texture and flavor are best within the first couple of months. A tight seal that keeps air out matters more than the exact date on the calendar.
- → What if I see a pale, dusty film on the chocolate?
That's bloom, a harmless cosmetic change in the chocolate's fat structure that can happen with temperature swings in the freezer. It doesn't affect safety or flavor, and keeping the container at one steady temperature helps prevent it.
- → Is there a peanut-free version of this recipe?
Sunflower seed butter swaps in at the same amount and sets up with a similar texture, which makes this workable for a peanut-free kitchen. Still double check that your chocolate chips were made in a peanut-free facility if you're serving someone with a serious allergy.